Elmer’s Wood Glue Ingredients and Properties
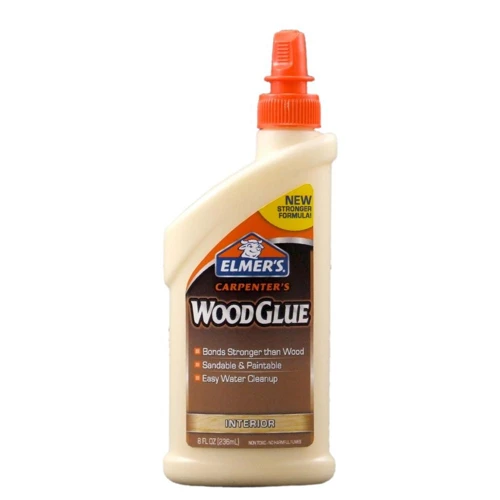
Elmer’s Wood Glue is synonymous with quality and reliability in the realm of adhesives. Its formulation consists mainly of polyvinyl acetate (PVA), a synthetic polymer that is emulsified in water. This composition gives it incredible strength and ease of use. The glue is designed to penetrate wood fibers deeply, creating a bond that is stronger than the wood itself. The water-based nature also means easy cleanup with water, making it user-friendly for both seasoned woodworkers and DIY enthusiasts.
Assessing Elmer Glue Bond Strength
The bond strength of Elmer’s Wood Glue is remarkable, allowing it to withstand significant stress once fully cured. This strength is crucial in woodworking, where joints and connections must endure constant use and weight. The glue’s tenacity is a result of its chemical makeup, which ensures it adheres firmly to wood surfaces, creating a lasting bond that is vital for the integrity of any woodworking project.
Elmer’s Wood Glue Drying Time Explained

Factors Influencing Wood Glue Drying Conditions
The Elmer’s wood glue drying time can vary based on several factors. These include the humidity and temperature of the environment, the types of wood being joined, and the thickness of the glue application. Higher humidity and lower temperatures generally slow down the drying process, while low humidity and higher temperatures can speed it up.
Wood Adhesive Cure Time vs. Drying Time
It’s important to distinguish between wood adhesive cure time and drying time. Drying refers to the evaporation of the glue’s water content, leaving behind the adhesive material that bonds the pieces of wood. Curing, on the other hand, is the chemical process that takes place once the water has evaporated, solidifying the bond. The full curing time for Elmer’s Wood Glue can take up to 24 hours, although the initial drying time is much shorter.
Optimal Conditions for Faster Drying
For optimal drying, maintaining room temperature around 70°F with a humidity level of 50% is ideal. Ensuring good airflow can also facilitate faster drying. It helps to read the label for specific drying conditions recommended by the manufacturer.
Wood Glue Clamping Duration for Effective Bonding
Importance of Clamping in Woodworking Projects
Clamping plays a pivotal role in ensuring a strong bond when using wood glues. It keeps the wood pieces in contact and under pressure while the glue sets, which is critical for a durable bond. Without proper clamping, the joint may be weak or fail under stress.
Recommended Clamping Times for Different Projects
The wood glue clamping duration can vary based on the project’s complexity and size. For most projects, a minimum of 30 minutes of clamping is recommended. Larger or more intricate projects may require several hours. Always follow the specific instructions provided on the glue packaging for the best results.
DIY Wood Glue Projects and Application Techniques
Simple DIY Projects Using Elmer’s Wood Glue
- Picture Frames: A perfect beginner project, requiring precise gluing and gentle clamping.
- Wooden Planters: An intermediate project that can introduce you to edge gluing and clamping techniques.
- Bookshelves: More advanced, requiring strong joints and potentially multiple clamping stages.
Elmer’s Glue Usage Guide for Home Repairs
For home repairs, Elmer’s Wood Glue can be a lifesaver. When fixing loose furniture joints or broken wooden items, ensure surfaces are clean and dry before application. Apply a thin layer of glue, clamp if possible, and wait for it to dry completely before resuming use.
Woodworking Glue Drying Tips and Tricks
How to Speed Up the Drying Process
To hasten the drying process, you can increase airflow or gently warm the environment. However, avoid direct heat sources, as they can cause the glue to dry unevenly or weaken the bond.
Common Mistakes to Avoid When Using Wood Glue
Avoid using too much glue, which can extend drying times and create a weaker joint. Also, ensure that you do not disturb the joint while the glue is drying, as movement can compromise the bond’s integrity.
Carpentry Adhesive Setting: The Key to Durable Furniture Repair
Tips for Using Furniture Repair Glue Drying for Best Results
For furniture repairs, the setting of the adhesive is as important as the initial application. Ensure that the glued pieces are properly aligned and clamped, and refrain from stress-testing the joint until the glue has fully cured.
Maintaining the Integrity of Repaired Items During the Drying Phase
During the drying phase, handle the repaired items with care. Avoid subjecting them to weight or stress, and keep them in a stable, temperate environment to allow the glue to set properly.
FAQ: Elmer’s Wood Glue Drying Time
How Long to Wait Before Sanding or Painting Over Glued Wood
Before sanding or painting over glued wood, it’s best to wait at least 24 hours to ensure the glue has fully cured. This waiting period ensures the bond has reached maximum strength, and the surface is stable for finishing.
If you’re working on a project and using different types of adhesives, knowing the drying times is crucial for a successful outcome. For those using Elmer’s glue on wood projects, understanding the specific drying time is key. Our detailed guide on how long Elmer’s glue should dry can help you plan your project timeline effectively. And if you’re dealing with other materials, we also have resources on the drying times for carpet and leather glues. Check out our articles on how long carpet glue takes to dry and how long leather glue takes to dry for more specific guidance tailored to those materials.
Can You Accelerate Elmer’s Wood Glue Drying Time Safely?
While mildly increasing the temperature and improving airflow can accelerate drying safely, it’s important not to rush the process. Using forced methods like hot air guns can weaken the bond and damage the wood.
In conclusion, understanding the nuances of Elmer’s wood glue drying time and how to handle it can elevate your woodworking projects to a professional level. Whether you’re engaging in DIY wood glue projects or intricate furniture repair, following guidance for carpentry adhesive setting and utilizing woodworking glue drying tips will ensure a bond that holds steadfastly. Always refer to Elmer’s glue usage guide for specific advice tailored to their formula, and remember that patience is a key ingredient in achieving the strongest, most durable wood joints.