Puzzle enthusiasts often seek ways to immortalize their completed masterpieces. By sealing a puzzle, you transform a temporary joy into a lasting work of art. It’s a satisfying endeavor that safeguards the effort and time invested into piecing together those intricate designs. Among the myriad of options available for puzzle preservation, Mod Podge stands out as a versatile and reliable choice for crafters looking to protect and showcase their puzzles.
Benefits of Sealing a Puzzle
Sealing a puzzle can elevate it from a tabletop game to a decorative piece. It prevents the loss of pieces, makes it easier to move and display, and protects the vibrant colors from fading. Furthermore, it adds a layer of protection from dust, spills, and other potential damage, ensuring the puzzle can be enjoyed for years to come.
Why Choose Mod Podge for Your Puzzle Project?
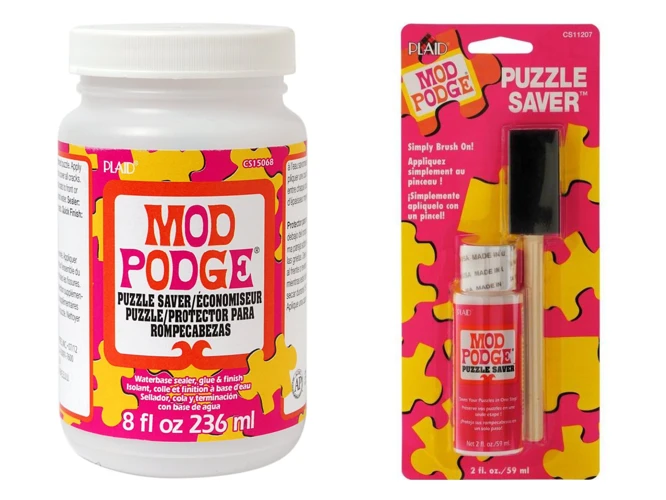
Using Mod Podge on puzzles is a popular choice due to its ease of use, accessibility, and excellent finish. It acts as a glue, sealer, and finish, all in one product. This non-toxic medium dries clear and can give puzzles either a glossy or matte finish, depending on the product line chosen, making it the ideal Mod Podge puzzle saver.
Preparation for Your DIY Puzzle Project
Before diving into the gluing process, proper preparation will ensure a smooth and enjoyable crafting experience. Selecting an appropriate puzzle and setting up your workspace are as crucial as the gluing itself.
Selecting the Right Puzzle to Preserve
Consider the puzzle’s size, complexity, and sentimental value. Choose one that you are proud of and would like to display. The image should be one that resonates with you or complements your decor.
Setting Up Your Crafting Area
Designate a flat, clean, and well-lit space to work on your puzzle gluing techniques. Cover the area with wax paper or plastic to protect the surface from glue spills.
Gathering Essential Supplies
- Mod Podge (Matte or Gloss depending on preference)
- Foam brush or applicator
- Rolling pin or brayer
- Wax paper or plastic to cover the workspace
Step-by-Step Guide to Glue a Puzzle Together
With your workspace ready and supplies at hand, it’s time to get into the heart of the DIY puzzle project: the gluing process.
Completing Your Puzzle
Ensure that all pieces are properly fitted and that the puzzle lies flat. Slide the protective wax paper underneath without disturbing the arrangement.
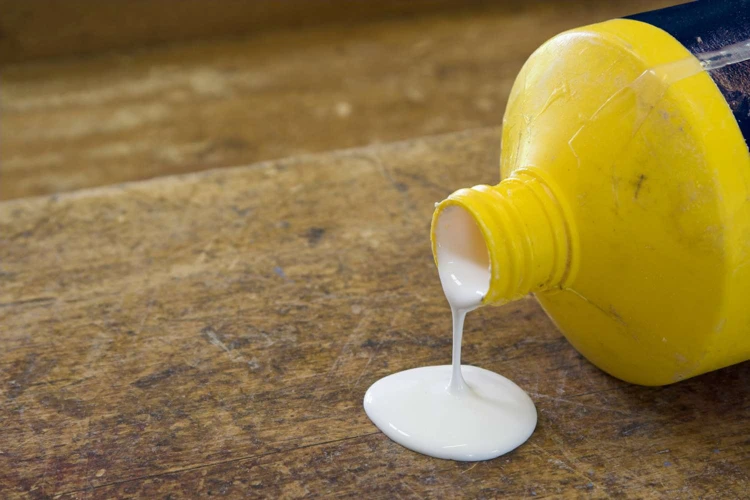
Applying the First Layer of Mod Podge
Starting from the center, use a foam brush to apply Mod Podge evenly across the puzzle’s surface. Ensure you cover all the pieces, paying special attention to the cracks.
Techniques for Even Application
Spread the Mod Podge in long, smooth strokes to avoid bubbles and pooling. A brayer or rolling pin can help press down any pieces that pop up.
When to Apply Additional Coats
After the first layer has dried clear, assess the puzzle’s texture. If you desire a smoother finish, apply a second coat. Allow each layer to dry thoroughly before adding another.
Homemade Puzzle Glue Alternatives
If Mod Podge is unavailable, a mixture of white glue and water can serve as a homemade puzzle glue. Mix one part water with two parts glue to create a similar sealing solution.
Puzzle Mounting Tips and Display Ideas

Once your puzzle is sealed and dry, the next step is to display your achievement. How you showcase your puzzle can be as creative as the puzzle itself.
Options for Displaying Your Finished Puzzle
- Frame it behind glass for a traditional look.
- Mount it on a backing board for a more casual presentation.
- Attach it to a canvas for an artistic effect.
Mounting Your Puzzle for Longevity
Adhere the puzzle to a sturdy backing board using a strong adhesive. This will prevent warping and make it easy to hang or frame.
Sealing and Protecting Your Puzzle
After the puzzle is mounted, consider adding another protective coat of Mod Podge over the top for extra durability.
Drying Times and Best Practices
Allow ample time for the final coat to dry completely, which can take several hours to overnight. Keep the puzzle flat and away from dust during this time.
Preservation Tips for Crafted Puzzles
Keep your crafted puzzles out of direct sunlight to prevent colors from fading. Also, consider using a UV-protective spray for added color preservation.
Advanced Puzzle Gluing Techniques
For those looking to expand their puzzle crafting skills, there are more sophisticated techniques to explore.
Crafting with Puzzles: More Creative Ideas
Consider crafting with puzzles by using pieces in mixed media art or creating a three-dimensional display by layering sections of different puzzles.
Using Mod Podge on Puzzles with Unique Textures
Textured puzzles, like those with glitter or a linen finish, may require a different approach. Test a small area first to ensure compatibility and desired results.
Conclusion: Your Completed Mod Podge Puzzle Saver Project
With the right materials and a bit of patience, you’ve turned your jigsaw puzzle into a preserved piece of art.
Reflecting on the Puzzle Gluing Experience
Gluing and sealing a puzzle is a rewarding process that adds a layer of accomplishment to the joy of puzzling. It’s a creative way to cherish the memories associated with the assembly of the puzzle.
Are you a puzzle enthusiast looking to preserve your masterpiece for display? Discover the best techniques for securing your puzzle work of art with our detailed guides. Learn how to apply Mod Podge seamlessly in our article on How To Glue A Puzzle With Mod Podge. If you’re exploring other methods or materials, you might also be interested in our tutorials on how to glue a puzzle to a canvas, the general steps for how to glue a puzzle, or even something more specific like our guide on how to glue a Jiggy puzzle. Each guide provides step-by-step instructions to help you turn your puzzle into a lasting piece of art.
Sharing and Caring for Your Puzzle Art
Finally, share your completed project with friends and family or give it as a personalized gift. With the puzzle mounting tips and best practices you’ve learned, your artwork will be admired and preserved for many years to come.