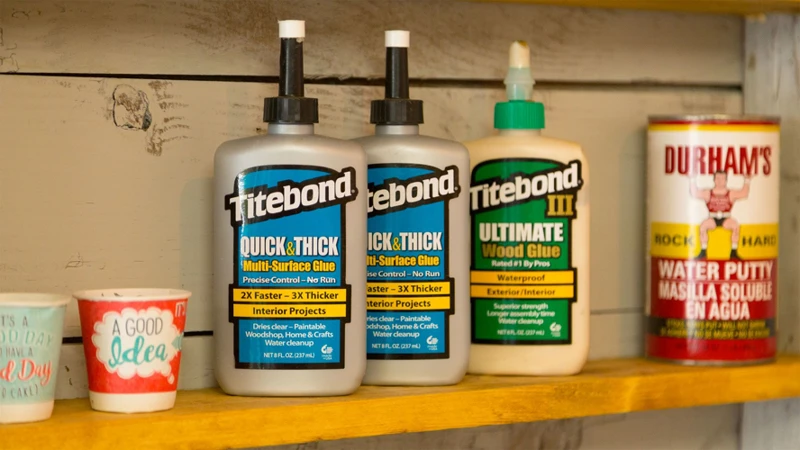
Are you frustrated with the consistency of your glue? Does it seem too thin to hold your projects together? Luckily, there are several simple ways to thicken your glue so it can perform its function effectively. In this article, we will explore five different methods for thickening glue that are easy to try at home. From mixing in flour to using borax, we will cover everything you need to know to make your glue thicker and more reliable. So, let’s dive in and learn how to take your crafting game to the next level with these helpful tips and tricks!
Why You Might Want to Thicken Your Glue
Have you ever been in the middle of a DIY project and realized that your glue consistency is just not working for you? Perhaps it’s too runny, making it difficult to hold items in place, or maybe it’s not spreading evenly. Whatever the reason may be, it can be frustrating when your glue is not performing as it should. That’s where thickening your glue comes in. By making your glue thicker, you can improve its performance and achieve better results on your project. Whether you’re working on a school project, making a craft, or creating a DIY repair, thickening your glue can make all the difference. And don’t worry, it’s actually quite simple!
How Does the Consistency of Glue Affect Its Performance?
How Does the Consistency of Glue Affect Its Performance?
The consistency of glue is a critical factor in its performance. It affects the adhesion, drying time, and overall strength of the bond. A too-thin glue may not hold well, while a too-thick glue can be difficult to apply and may take a long time to dry.
| Consistency | Effect on Adhesion | Effect on Drying Time | Effect on Strength |
|---|---|---|---|
| Thin | Weaker bond | Quick drying | Lower strength |
| Thick | Stronger bond | Slower drying | Higher strength |
To achieve the desired consistency for your project, it’s essential to thicken your glue properly. The right thickness can vary depending on the material you’re bonding and the type of bond you’re trying to create.
For example, if you’re making a DIY cutting board, you’ll want a thicker glue that can fill gaps and bond the pieces together firmly. On the other hand, if you’re attaching paper to cardboard, a thinner glue may work better to avoid wrinkles and create a smooth finish.
Learn more: How to Harden Paper with Glue.
What Are Some Common Reasons for Wanting to Thicken Glue?
There are various reasons why someone might want to thicken their glue. Here are some common reasons:
- Better grip: A thicker glue can provide a better grip or hold on surfaces. This is especially useful for DIY projects where you need to glue items together and want to ensure they stay in place.
- Desired consistency: Certain crafts or projects require a thicker consistency of glue to achieve the desired end result. For example, if you’re making putty, you may need a thick glue mixture to achieve the right texture.
- Cost-effective: Buying a thicker glue may be more expensive than buying a regular one, so thickening the glue you currently have is a cost-effective option.
- Extend the life of the glue: Thicker glue has a slower drying time, which can prolong the life of the glue and make it usable for a longer period of time.
No matter what the reason, there are several methods to thicken your glue that we will discuss in the next section. If you want to learn more about how to make putty without glue, we have a helpful article you can check out here.
How to Make Your Glue Thickener
When it comes to gluing, sometimes you may find yourself needing a thicker consistency than what your glue can offer. This can be for a variety of reasons, such as filling gaps or creating a more durable hold. Luckily, there are several simple methods to make your glue thicker that you can easily do at home with items you may already have in your pantry. Let’s take a look at some of these methods and how you can implement them to achieve the desired consistency for your glue. But before we dive into the process, it’s worth mentioning that if you’re not quite sure how to properly glue something, you may want to check out our guide on how to glue up a cutting board for some useful tips and tricks.
Method 1: Mixing in Flour or Cornstarch
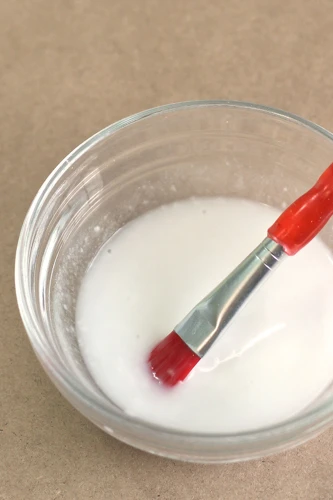
There are several methods you can use to make your glue thicker, and one of the easiest is by mixing in flour or cornstarch. This method works especially well for making homemade glue. Here’s how to do it:
Step 1: Gather your supplies. You’ll need flour or cornstarch, water, and your glue.
Step 2: Mix equal parts flour or cornstarch and water in a separate bowl until you get a smooth mixture.
Step 3: Add the flour or cornstarch mixture to your glue slowly, stirring constantly.
Step 4: Continue adding the flour or cornstarch mixture until your glue reaches the desired consistency.
Step 5: Test your glue to make sure it’s the right consistency by dipping a craft stick into the glue and lifting it up slowly. If the glue runs off the stick too quickly, add more flour or cornstarch mixture. If the glue is too thick, add more water.
| Pros | Cons |
|---|---|
| Easy to find ingredients in your kitchen | May dry with a slightly yellow tint |
| Non-toxic | May have a shorter shelf life |
| Good for making homemade glue | May not be as strong as other thickening methods |
This method is budget-friendly and great for crafts projects where you don’t need an industrial-strength adhesive. However, be aware that using flour or cornstarch as a thickener may make your glue more susceptible to mold growth. If you’re looking for a stronger adhesive or need your glue to last longer, you may want to try a different thickening method, such as using Epsom salt or borax.
If you want to learn more about the power of glue, check out our article on what keeps an organization together or if you’re looking for other fun crafts projects to do without glue, read about making yarn balls without glue or making crunchy slime without glue.
Method 2: Adding Salt
Adding salt is another simple method for thickening glue. This method creates a more rubbery and stretchy texture and is perfect for crafts that require some flexibility, such as creating slime. One of the great things about this method is that it is easy to find salt in your kitchen.
To properly use salt as a thickener, follow the steps in the table below:
| Materials Needed | Steps to Follow |
|---|---|
| – Salt | Measure out 1 tablespoon of salt and pour it into a bowl. |
| – Glue | Squeeze out the amount of glue that you will need for your project, according to the instructions on the bottle. |
| – Water | Add 1-2 teaspoons of water to dilute the glue if it is too thick for your project. |
| – Mixing tool | Use a mixing tool, such as a spoon or popsicle stick, to mix the salt evenly into the glue until the mixture thickens to your desired consistency. |
It is important to add a small amount of water to the glue before adding the salt. This helps to activate the glue and allows the salt to mix more easily. It is also important to mix the salt thoroughly into the glue to create a consistent texture.
One of the drawbacks of using salt as a thickener is that it can affect the color of the glue, especially if you are using white glue. Nevertheless, this is an easy and affordable method that can be used for a variety of craft projects.
Note: If you are working with Styrofoam or other delicate materials, salt may not be the best thickener to use as it can dissolve or wear away at the material over time. Instead, consider using a glue stick or a specialized adhesive designed for those materials.
If you are looking for more innovative & interesting ways to use glue in your craft projects, check out this article on how to make dish soap slime without glue for some new ideas to try!
Method 3: Using Epsom Salt
One common household item that can be used as a thickening agent for glue is Epsom salt. Epsom salt, chemically known as magnesium sulfate, can be found in most drug stores and grocery stores, and it is relatively inexpensive. Here is how to use Epsom salt to thicken your glue:
Materials Needed:
- Glue
- Epsom salt
- Bowl
- Spoon
1. Start by pouring your glue into a bowl.
2. Gradually add Epsom salt to the glue while stirring continuously.
3. Keep adding Epsom salt until you reach your desired consistency.
4. Allow the mixture to sit for a few minutes.
5. The glue should now be thicker and ready to use.
One of the benefits of using Epsom salt to thicken glue is that it can also improve the adhesive quality of the glue. This is because Epsom salt contains magnesium, which can help to strengthen the bond between the two surfaces being glued together.
It is important to note that while Epsom salt is generally safe to use, it can cause skin irritation in some individuals. Always wear gloves when handling Epsom salt and avoid getting it on your skin. Additionally, be sure to use only a small amount of Epsom salt at a time, as adding too much can cause the glue to become clumpy and difficult to work with.
Tip: If you are looking for a stronger adhesive, you can add a small amount of white vinegar to the Epsom salt and glue mixture. This will create a chemical reaction that will result in a stronger bond.
Using Epsom salt as a thickening agent for glue is a simple and cost-effective method. It can help to improve the bond strength of the glue, and it is easy to adjust the consistency to suit your needs. Just remember to use caution when handling Epsom salt and to add it gradually to avoid clumping.
Method 4: Making a Cornstarch and Vinegar Glue
For a more natural and eco-friendly option, you can make a cornstarch and vinegar glue to thicken your adhesive. This method uses common household items that can easily be found in your kitchen.
To make this glue, start by mixing half a cup of cornstarch and one-fourth cup of cold water in a saucepan. Stir the mixture until it becomes smooth.
Next, add one and a half cups of boiling water to the mixture and whisk it until it thickens. If you want a thicker consistency, you can add a bit more cornstarch.
Once your mixture has thickened, remove it from the heat and stir in 1 tablespoon of vinegar. The vinegar helps to preserve the glue and extends its shelf life.
Finally, pour your glue into a clean container and let it cool completely. You should now have a thick and durable glue that can be used for a variety of projects.
Note: This glue works best for paper, cardboard, and other porous materials. It may not work as well for non-porous materials like plastic or glass.
| Ingredients | Amount |
|---|---|
| Cornstarch | 1/2 cup |
| Cold water | 1/4 cup |
| Boiling water | 1 and 1/2 cups |
| Vinegar | 1 tablespoon |
If you are looking to glue styrofoam to cardboard, check out our article on How to Glue Styrofoam to Cardboard. If you are interested in learning more about glue sticks, check out our article on What Is a Glue Stick?. Lastly, if you’re looking for a way to reseal envelopes without using glue, check out our article on How to Reseal an Envelope Without Glue.
Method 5: Using Borax as a Thickener
One effective method for thickening glue is by using borax. Borax is a common household cleaner that can also be used as a versatile and non-toxic thickening agent for glue.
Materials you will need:
| Borax | Water | Measuring cup | Stirring tool | Glue |
|---|---|---|---|---|
| 1 teaspoon | 1/2 cup | 1 | Spoon or stick | Amount needed |
Steps to follow:
- Dissolve 1 teaspoon of borax powder into 1/2 cup of warm water, and stir until all the borax has dissolved.
- In a separate container, dilute the glue to the desired consistency with some water, if needed.
- Slowly add the dissolved borax solution into the glue while stirring continuously.
- Continue to stir the mixture until it thickens to the desired consistency and all the borax solution has been incorporated fully.
- Your thickened glue is now ready to be used for your project.
It is important to note that while borax can be an effective thickener for glue, it should be used with caution as it can cause skin irritation in some people. It’s also not recommended for use with children, as ingestion or inhalation of borax can be harmful.
Using borax as a thickener for glue is a cost-effective way to achieve the desired consistency while being mindful of using non-toxic materials.
Tips for Working with Thicker Glue
Once you have successfully thickened your glue, you may find that working with it requires a bit of adjustment. A thicker glue can be more difficult to spread and may take longer to dry. But don’t worry, with some simple tips and tricks, you can make sure that your newly thickened glue is ready to tackle any project you have in mind. Here are some helpful suggestions for working with thicker glue.
How to Properly Mix Your Glue Thickener
When it comes to thickening glue, properly mixing in the thickening agent is crucial for achieving the desired consistency. Here are some tips for properly mixing your glue thickener:
- Start with small amounts: Whether you’re using flour, cornstarch, salt, Epsom salt, or borax, start by mixing in a small amount first. This will allow you to gauge the effect the thickener has on your glue, and add more gradually if needed.
- Use warm water: If you’re using a thickening method that involves dissolving the thickener in water before adding it to the glue, using warm water can help dissolve the thickener more quickly and evenly.
- Stir well: Once you’ve added your thickening agent to the glue, stir it thoroughly until it’s well mixed. Pay extra attention to the bottom and sides of the container to ensure that all the glue is evenly mixed.
- Adjust consistency as needed: Depending on the project you’re working on, you may need to adjust the consistency of your glue. If it’s too thick, you can add more water or a small amount of glue. If it’s too thin, you can add more thickener or let it sit out for a few hours to thicken.
By following these tips, you’ll be able to properly mix your glue thickener and achieve the perfect consistency for your project. Remember to start with small amounts, use warm water, stir well, and adjust as needed.
Choosing the Right Thickening Method for Your Glue
When it comes to thickening your glue, there are a variety of methods to choose from. Depending on the type of glue you’re working with, some methods may work better than others. Here are some factors to consider when choosing the right thickening method for your glue:
- Type of glue: Not all glue can be thickened using the same methods. For example, flour or cornstarch may work well for a white glue, but not for a super glue. Make sure to research which thickening methods are appropriate for your specific type of glue.
- Intended use: Consider the purpose of your glue and how it will be used. If you need a thicker glue for a craft project, flour or cornstarch may be a good option. But if you’re looking to repair a broken object, a more heavy-duty thickener like borax may be necessary.
- Desired consistency: Think about how thick you want your glue to be. If you only need a slightly thicker consistency, adding a small amount of flour or cornstarch may do the trick. But if you need a very thick glue, you may need to use multiple methods or a stronger thickener like Epsom salt.
- Allergies: If you or anyone you’re working with has allergies, make sure to choose a thickening method that is safe and won’t cause any reactions. For example, cornstarch is a common allergen, so it may not be the best choice if someone in your household has a corn allergy.
By considering these factors and choosing the right thickening method for your glue, you can ensure that you achieve the desired consistency without compromising the quality or safety of your project.
Conclusion
In conclusion, thickening your glue is a simple and easy process that anyone can do. Depending on your needs and preferences, there are several methods to choose from, including mixing in flour or cornstarch, adding salt, using Epsom salt, making a cornstarch and vinegar glue, and using Borax as a thickener.
When working with thicker glue, it is important to properly mix your glue thickener to avoid any clumps or inconsistencies. It is also important to choose the right thickening method for your particular glue and project.
By following the tips and techniques outlined in this article, you can create a thicker glue that will be better suited for your needs. Whether you need a thicker glue for a DIY project, arts and crafts, or professional use, these methods are sure to come in handy.
So next time you find yourself in need of a thicker glue, don’t worry! With a little bit of patience and experimentation, you can easily create the perfect consistency to suit your needs. Happy crafting!
Frequently Asked Questions
What is the best glue for thickening?
It depends on the project you are working on, but some popular options for thickening glue include flour, cornstarch, salt, Epsom salt, vinegar, and borax.
Can I use any type of flour to thicken my glue?
Yes, any type of flour can be used to thicken glue, but keep in mind that the color and odor of the glue may be affected depending on the flour used.
Can I use sea salt instead of table salt to thicken my glue?
Yes, sea salt can be used to thicken glue, but it may be more expensive than table salt.
How much salt should I add to my glue to thicken it?
The amount of salt needed to thicken glue depends on how much glue you are working with. Start with a small amount of salt and gradually add more until you reach the desired consistency.
Can vinegar be used as a thickening agent for glue?
Yes, vinegar can be used with cornstarch to make a glue that dries with a clear finish and has a thicker consistency.
Will using a thickening agent affect the drying time of my glue?
Yes, using a thickening agent can affect the drying time of your glue. The glue may take longer to dry or may not dry as well if too much thickener is used.
Can I use borax to make my glue more durable?
Yes, borax can be used as a thickening agent and can also make the glue more durable. However, use caution when working with borax as it can be toxic if ingested.
How can I prevent lumps from forming when adding a thickener to my glue?
To prevent lumps, add the thickener slowly to the glue while stirring continuously. This will help the thickener disperse evenly and prevent clumps from forming.
Can I add food coloring or glitter to my thickened glue?
Yes, food coloring or glitter can be added to thickened glue to add some extra color or sparkle to your projects.
How long will thickened glue last?
Thickened glue will last for as long as the base glue would last, so be sure to store it properly and use it within its expiration date.