Are you tired of making slime with glue? Do you want to try a new recipe that doesn’t involve glue? Look no further because we have the perfect solution for you! Dish soap slime is an easy and fun alternative that you can make in just a few minutes. It requires only a few simple ingredients that you probably already have at home. This complete guide will take you through the steps of making dish soap slime without glue and provide you with tips and troubleshooting solutions along the way. Get ready for some slimy fun!
Ingredients You Need
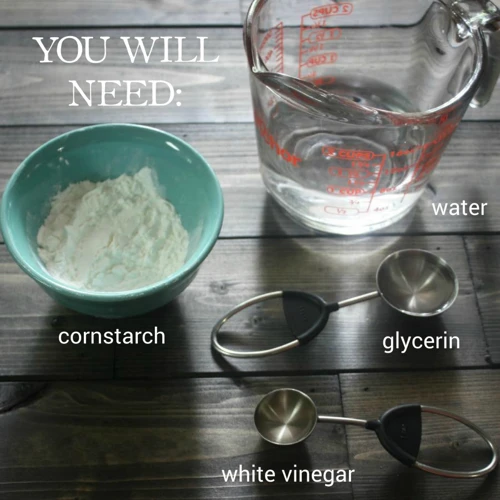
Looking to make dish soap slime without glue? The good news is that you won’t need many ingredients to get started! In fact, with just a few key items, you can make your very own slime at home. All you need is some dish soap, baking soda, and contact solution. Of course, you can also add your own personal touch with some fun colors. We’ll discuss each ingredient in more detail below and provide some helpful links to related topics if you’re interested in learning more about adhesives.
Dish Soap
Dish soap is a crucial ingredient for making dish soap slime. It has surfactants that break down and remove grease and oil, giving the slime its unique texture. When buying dish soap, make sure to get one that is clear and unscented. Avoid using dish soap with added moisturizers or scents as they can interfere with the slime-making process.
Here is a list of some of the best dish soaps for making slime:
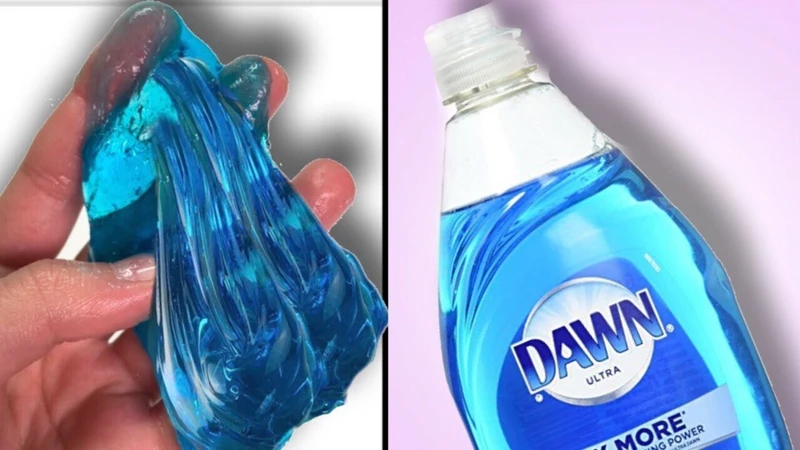
- Dawn Ultra Dishwashing Liquid: Dawn Ultra is a great choice for making dish soap slime. It has excellent grease-fighting abilities and creates a clear slime.
- Palmolive Dish Soap: This dish soap is also ideal for making slime. It produces a clear slime and has a nice consistency. It has a fresh scent that is not overpowering.
- Seventh Generation Dish Soap: This eco-friendly dish soap is perfect for those who want to make slime without using harsh chemicals. It produces a clear slime and has a pleasant scent.
Remember, the amount of dish soap you use in the slime-making process can affect the consistency of the slime. If you want a runnier slime, use less dish soap. If you want a firmer slime, use more dish soap. For best results, experiment with different amounts until you find the perfect consistency.
If you want to learn more about different types of glue, including what glue to use for pool table bumpers or how to make icing glue, check out our other articles.
Baking Soda
Baking soda is a key ingredient in this dish soap slime recipe that plays a vital role in creating the perfect consistency. It is a common household ingredient that is used in various cleaning and DIY projects. When combined with dish soap, it helps to create the necessary chemical reaction to make the slime stretchy and pliable.
Here are some tips for using baking soda:
- Make sure to use fresh baking soda for the best results. Expired baking soda will not work as well.
- Add small amounts of baking soda at a time to achieve the desired consistency. Adding too much baking soda can cause the slime to become too hard and difficult to work with.
- If you are having trouble getting the slime to form, try adding a bit more baking soda to the mixture. This will help to create the right chemical reaction and form the slime.
While baking soda is an essential ingredient in this slime recipe, it is not the only option. You can also experiment with other ingredients like cornstarch or salt to achieve the desired consistency. However, for this recipe, baking soda is the best option.
If you’re interested in other glue-related articles, you might want to check out what glue to use in snow globes.
Contact Solution
Contact solution is a crucial ingredient in making dish soap slime without glue. It helps to bind the mixture together and give it the stretchy texture that is characteristic of slime. When choosing a contact solution, it is essential to pick one that contains both boric acid and sodium borate in the ingredient list. These components act as the activators that create the slime’s viscosity.
There are many different brands of contact solution available on the market, but not all of them are suitable for making slime. It is essential to choose one that contains the right ingredients, as many contact solutions do not include these crucial components.
Below is a table of some of the most common contact solutions that contain boric acid and sodium borate and are suitable for making slime.
| Contact Solution Brand | Ingredients |
|---|---|
| Clear Care | Boric acid, sodium chloride, and hydrogen peroxide |
| Opti-Free | Boric acid, sodium chloride, and potassium chloride |
| Equate | Boric acid, sodium borate, and sodium chloride |
It is important to note that some individuals may be sensitive to the boron content in contact solution, so it is always advisable to wash hands thoroughly after handling it. Additionally, contact solution should not be ingested.
When making dish soap slime without glue, it is essential to choose the right contact solution to ensure a successful outcome. Choosing a contact solution that contains the correct ingredients, such as boric acid and sodium borate, is crucial. By following the steps outlined in this article and choosing the right ingredients, anyone can create a fun and stretchy batch of slime! For more information about glue and its uses visit /what-glue-to-use-for-pool-table-bumpers/.
How to Make Dish Soap Slime Without Glue
Creating slime is a fascinating and exciting activity that can keep you entertained for hours. However, you might not always have glue on hand, and that’s where dish soap comes in handy. With just a few ingredients, you can create slime without using glue. Follow these simple steps to learn how to make dish soap slime without glue, and get ready for some gooey fun! If you’re interested in other no-glue DIY projects, you can check out this tutorial on how to tie an elastic bracelet without glue.
Step 1: Pour Dish Soap into a Bowl
For the first step of making dish soap slime without glue, introduce your mixing bowl and dish soap. Choosing the right mixing bowl is important, as it will need to be a sizeable bowl that can hold all of the ingredients and give you enough room to stir without making a mess. For the dish soap, you will want to use a clear dish soap to achieve a transparent slime. However, you can use any dish soap you have on hand if you aren’t looking for transparency.
To make one batch of slime, you will need to pour about 1/2 cup of dish soap into your mixing bowl. You can measure this out using a measuring cup or simply estimate the amount. If you are making multiple batches or want to adjust the recipe, you can use the same ratio of ingredients (1:1:1 of dish soap, baking soda, and contact solution).
Once you have added the dish soap to the mixing bowl, use a spoon or spatula to stir it around a bit to loosen it up. It’s best to use a spoon or spatula that you are comfortable with getting a bit messy, as the slime mixture will stick to it. After stirring, the dish soap should be loosened and prepared for the next step.
Overall, Step 1 is straightforward: add dish soap to a mixing bowl and stir it around. However, it is important to choose the right mixing bowl and pay attention to the amount of dish soap used. Now that the dish soap is prepared, move on to the next step of adding baking soda to the mixture.
Step 2: Add Baking Soda to the Mixture and Stir
For the second step, we recommend adding baking soda to the dish soap mixture. Baking soda will add texture and create a more solid consistency to the slime. To do this, simply pour one tablespoon of baking soda into the bowl with your dish soap. Use a spoon or spatula to stir the mixture until the baking soda is fully incorporated.
This step is crucial for making the slime without glue because baking soda acts as a binding agent, allowing the slime to become more solid without the use of traditional glue. If you don’t have baking soda on hand, you can also try using icing glue or rubber cement glue as a substitute. However, these glues may affect the texture and appearance of your slime.
It’s important to note that adding too much baking soda can cause the slime to become dry and brittle, while adding too little can result in a sticky and runny consistency. If you run into either of these issues, check out our troubleshooting section for tips on how to fix them.
Once the baking soda is fully incorporated, you can move on to the next step of the process – adding contact solution.
Step 3: Mix Contact Solution with the Mixture
Step 3: Now it’s time to add contact solution to the mixture. Add a small amount at a time, approximately 1 teaspoon, and stir. The slime will begin to come together and pull away from the bowl. Continue adding the contact solution until you’ve reached the desired consistency. Be careful not to overdo it as too much contact solution can make the slime too tough.
Contact solution contains boric acid which reacts with the other ingredients to form the slime. If you don’t have contact solution, you can create a substitute by mixing 1 tablespoon of baking soda with 1 teaspoon of rubber cement glue and 1 tablespoon of water. However, the consistency and texture of the slime may vary using this substitute.
Make sure to keep stirring the mixture. At this point, it may seem like the slime is forming, but keep stirring until all the contact solution is fully combined. The slime should start to pull away from the bowl and clump together. If there are still areas that are too sticky, add a little more contact solution until it is fully combined.
Congratulations, you have made your dish soap slime without glue! If you want to personalize your slime, you can add food coloring or glitter. Just be careful not to add too much as it can change the consistency of the slime.
Pro Tip: If you are having trouble getting the desired consistency of your slime, you can add a teaspoon of starch and glue mixture to reach the perfect texture.
Step 4: Keep Stirring Until the Slime Forms
After mixing the contact solution with the dish soap and baking soda mixture, the next step is to keep stirring the slime until it forms. This can take a few minutes, depending on the consistency of the slime you’re going for.
It’s important to note that the slime will still be quite sticky at this point, but don’t worry! Adding more contact solution will help to reduce the stickiness and create a smoother texture. Keep stirring until the slime starts to pull away from the sides of the bowl and forms into a cohesive ball.
Pro tip: If you find that your slime is still too sticky even after adding additional contact solution, try kneading it with your hands for a few minutes. The heat from your hands can help to activate the ingredients and create a better consistency.
Once you’ve achieved the desired consistency, you can add any additional decorative elements. For example, adding food coloring or glitter can create a fun and unique look for your slime.
Remember: always store your slime in a sealed container to prevent it from drying out. This will also help to keep it fresh and ready to play with every time.
If you’re having trouble with your slime, don’t worry! Troubleshooting common slime issues is easy. And if you just can’t get enough of the sticky fun, try checking out some other helpful guides like how to seal diamond painting with PVA glue, or how to make paper hard with glue.
Step 5: Add Your Favorite Color (Optional)
Adding color to your homemade dish soap slime is completely optional, but it can make the experience more exciting and personalized. Here are some tips for achieving the perfect color:
- Start with a small amount: Adding too much food coloring at once can make your slime runny and difficult to fix. Start with a few drops and mix it well before adding more.
- Use gel food coloring: Gel food coloring is thicker and more concentrated than liquid food coloring, which means you’ll need less to achieve a desired shade. It also won’t water down your slime.
- Mix with water: If you only have liquid food coloring, mix it with a few drops of water before adding it to the slime. This will help prevent the color from being too intense and will make it easier to distribute evenly throughout the slime.
- Experiment with different colors: You can make your slime any color of the rainbow, or even mix colors together to create unique shades. Use your imagination and have fun!
Remember, adding color is completely optional and the dish soap slime will still be fun to play with even without it. However, if you do decide to add color, follow these tips to achieve a vibrant and successful slime.
Tips and Troubleshooting
As with any DIY project, making dish soap slime without glue can sometimes be a bit tricky. While the process is relatively straightforward, it’s important to keep a few key tips in mind to ensure your slime comes out just right. In this section, we’ll explore some helpful tips and tricks for making and storing your slime, as well as troubleshooting common issues that may arise. So, let’s dive in and discover how to make the perfect dish soap slime!
Tip 1: Use Clear Dish Soap for Transparent Slime
If you want to achieve a transparent slime, then you must use clear dish soap. Clear dish soap is the ingredient that primarily determines the transparency of your slime. Clear dish soap is a great alternative to traditional glue in making slime. Besides providing transparency, it also improves the texture and stretchiness of the slime.
Here are some tips to maximize the transparency:
- Use clear dish soap in place of traditional white dish soap or other liquid soaps.
- Choose a clear dish soap with minimum added colors or fragrances. This will ensure that the slime is as clear as possible.
- Be cautious while adding food coloring or other slime colorants. Use very little, as even a small amount can cloud the transparency.
- Mix the clear dish soap well. Any separation of the soap can create a cloudiness in the slime. So, make sure that the dish soap is mixed thoroughly with other ingredients.
Using clear dish soap can give your slime a unique and impressive look that will surely capture the attention of your friends and family. Experiment with different clear dish soaps to see which brands produce the clearest slime. With a little creativity and a few tips, you can make beautiful and delightful slime that stands out from the traditional slime varieties.
Tip 2: Adjust Amounts of Ingredients for Consistency
To achieve the perfect slime consistency, you may need to adjust the amounts of the ingredients used. It’s important to note that different brands of dish soap or contact solution may have varying consistencies and may require slightly different ratios. Here’s a table with suggested amounts:
| Ingredient | Amount |
|---|---|
| Dish Soap | 1/2 cup |
| Baking Soda | 1 tablespoon |
| Contact Solution | 1-2 tablespoons |
If your slime is too runny, try adding more baking soda in small increments. If it’s too sticky, add more contact solution. It’s important to add the contact solution gradually and in small amounts so that you don’t over activate the slime. Keep in mind that humidity and temperature can also affect the consistency of the slime, so don’t be afraid to experiment until you find the perfect balance of ingredients for your desired consistency.
Tip 3: Keep the Slime in a Sealed Container
One important tip to keep in mind when making dish soap slime without glue is to store it in a sealed container. This is crucial to maintaining the consistency of the slime and preventing it from drying out too quickly. Slime that is left out in the open air will start to harden and lose its stretchy, gooey texture, which defeats the purpose of making slime in the first place.
To prevent this from happening, it is recommended to store your dish soap slime in an airtight container. This will help to keep the air out and preserve the moisture in the slime for longer periods of time. One great option for a storage container is a plastic bag with a zip-lock seal, as it will prevent any air from getting in and keep the slime fresh.
Another reason why you should store your dish soap slime in a sealed container is to prevent any unwanted bacteria or dirt from getting into the mixture. Slime that is exposed to the elements can attract dust, hair, or other unwanted particles, which can lead to contamination. By keeping your slime in a sealed container, you can ensure that it stays clean and safe for use.
Additionally, if you want your slime to last for several weeks or even months, storing it in the refrigerator is a great idea. The cooler temperature will slow down the chemical reaction that causes the slime to dry out, which will help it maintain its consistency and texture for an extended period of time.
Keeping your dish soap slime in a sealed container is essential to maintaining its texture and preventing contamination. By following this simple tip, you can enjoy your homemade slime for longer and keep it in great condition for future use.
| Tip | Explanation |
|---|---|
| Tip 1 | Store your dish soap slime in an airtight container to prevent it from drying out too quickly |
| Tip 2 | Use a plastic bag with a zip-lock seal as a storage container to keep the air out and the slime fresh |
| Tip 3 | Refrigerate your slime to keep it in great condition for future use |
Troubleshooting: Too Runny
If you find that your dish soap slime is too runny, don’t worry! This is a common problem that has a few simple solutions. Here are some troubleshooting tips to help you fix your runny slime:
- 1. Add more baking soda: If your slime is too runny, adding more baking soda can help thicken it up. Start by adding about ¼ teaspoon of baking soda at a time and mixing well before adding more.
- 2. Reduce the amount of dish soap: Adding too much dish soap can make your slime runny, so try reducing the amount you use and see if that helps.
- 3. Increase the amount of contact solution: Adding more contact solution can help thicken your slime as well. Start by adding small amounts at a time and mixing well before adding more.
- 4. Use less water: If you used water to help dissolve the baking soda, try using less next time. Too much water can contribute to a runny consistency.
- 5. Let it sit: Sometimes giving your slime time to rest can help it thicken up. Once you’ve mixed all the ingredients together, let it sit for a few minutes before playing with it.
Try these tips until you get the desired consistency for your dish soap slime. Remember to add the ingredients slowly and mix well before adding more. With a little bit of tweaking, you’ll have perfect slime in no time!
Troubleshooting: Too Sticky
Is your dish soap slime too sticky? Don’t worry, there are some quick and easy solutions to fix this common problem. The stickiness usually happens when you add too much contact solution or when you don’t mix the ingredients properly.
Here are some troubleshooting steps to help you fix the sticky slime:
| Steps | Instructions |
|---|---|
| Step 1 | Add a small amount of baking soda to the mixture. This will help to absorb some of the moisture and reduce the stickiness. |
| Step 2 | Try adding a few drops of dish soap to the mixture. This will help to break down the stickiness and make the slime more pliable. |
| Step 3 | If the slime is still too sticky, add a small amount of contact solution to the mixture. Be sure to add only a little bit at a time until you reach the desired consistency. |
| Step 4 | If none of these steps work, start over with a new batch of slime. Sometimes the ingredients just don’t mix properly, and it’s better to start fresh than to try to salvage a batch that won’t work. |
Remember, slime making is all about trial and error. Don’t be discouraged if your first attempt doesn’t turn out perfectly. Just keep trying and adjusting the ingredients until you find the perfect consistency. It’s also important to note that some brands of dish soap and contact solution may not work as well as others, so don’t be afraid to experiment with different brands until you find the right combination for you.
Conclusion
After following the steps outlined in this guide, you should now have your very own dish soap slime without glue! This recipe is a great alternative for those who don’t have access to traditional slime ingredients or want to try something new.
Remember to experiment with the different ingredients and adjust the amounts to achieve the consistency you desire. You can also add food coloring or glitter to make your slime more colorful and interesting.
It’s important to keep your slime in a sealed container to prevent it from drying out, and to wash your hands after playing with it to avoid any potential irritation or allergic reactions.
Having said that, if you experience any discomfort or irritation while making or playing with the slime, stop immediately and seek medical attention if necessary.
Overall, making dish soap slime without glue can be a fun and creative activity for kids and adults alike. With just a few simple ingredients, you can create a unique, gooey substance that’s sure to provide hours of entertainment. Give it a try and see what kind of crazy creations you can come up with!
Frequently Asked Questions
Can I make dish soap slime without glue?
Yes, you can make dish soap slime without glue using basic household ingredients like dish soap, baking soda, and contact solution.
What kind of dish soap should I use?
You can use any kind of dish soap, but if you want transparent slime, use clear dish soap.
What is the role of baking soda in making dish soap slime?
Baking soda helps to thicken the dish soap and gives the slime a more putty-like texture.
Do I need to heat the mixture or put it in the fridge?
No, you don’t need to heat or cool the mixture. Simply mix the ingredients together at room temperature.
Can I add essential oils or other scents to the slime?
Yes, you can add essential oils or other scents to the slime to make it smell nice. However, be careful not to add too much liquid or the slime may become too runny.
How long does the slime last?
The slime can last for several weeks if kept in a sealed container and stored in a cool place. However, it may start to dry out and lose its texture over time.
Do I need to wear gloves when making slime?
You don’t need to wear gloves, but be sure to wash your hands thoroughly after making the slime, as some people may develop skin reactions to the ingredients.
What should I do if the slime is too runny?
If the slime is too runny, add more baking soda to thicken it up. Alternatively, you can add more dish soap if it’s too sticky.
Can I store the slime in the fridge?
You can store the slime in the fridge, but be sure to let it warm up to room temperature before playing with it, as cold slime can become stiff and hard to stretch.
Can I reuse the slime?
Yes, you can reuse the slime multiple times, but be sure to store it in a sealed container and knead it before playing with it again to restore its texture.