Introduction
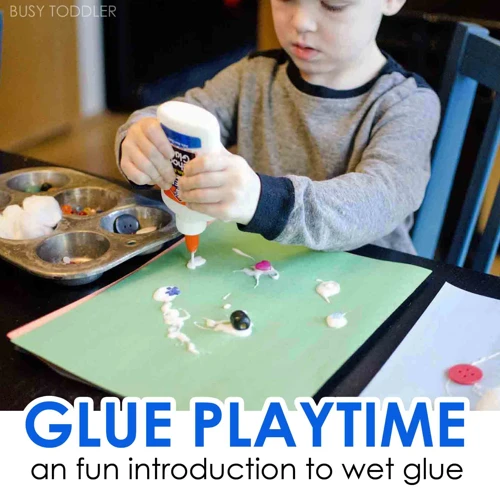
When it comes to paper projects, sturdiness is essential. Whether you’re creating a homemade notebook, a DIY cardboard house, or a paper mache sculpture, the finished product needs to hold up to wear and tear. Thankfully, there are techniques you can use to make your paper projects hard and durable. One such technique is using glue to stiffen the paper. In this comprehensive guide, we’ll walk you through the steps for making paper hard with glue, including the different types of glue you can use, how to prepare your paper, and troubleshooting tips. So, grab your glue and let’s get started!
The Importance of Sturdy Paper Projects
Creating sturdy paper projects requires the right techniques and materials. Using a strong adhesive to harden the paper is crucial, as flimsy paper can tear easily and compromise the overall structure of your project. Whether you’re creating a paper mache sculpture, a homemade card, or a decorative banner, having a solid foundation is key.
To achieve this, it’s important to choose the right type of glue for the job. Not all adhesives are created equal, and some may not provide the necessary durability. Here are some of the types of glue commonly used for hardening paper, and their strengths:
| Glue Type | Strengths |
|---|---|
| White Glue | Cost-effective, dries clear |
| Mod Podge | Lends a glossy finish, can be used as a sealer |
| Glue Sticks | Easy to apply, dries quickly |
| Double-Sided Tape | No drying time needed, can be removed easily |
No matter which type of glue you choose, taking the time to prepare your paper is also important. This includes cutting it to the correct size and shape, and decorating it as desired. Once you’re ready to begin the hardening process, follow these steps carefully for the best results. For more information on the drying time of different types of glue, check out this resource.
By creating a sturdy base for your project, you’ll ensure that it lasts long and looks great. Plus, using paper that has been hardened with glue opens up a world of possibilities for crafting and decorating. Keep experimenting and don’t be afraid to try new techniques – the possibilities are endless!
Types of Glue for Hardening Paper
When it comes to hardening paper, not all glues are created equal. Different types of glue provide different levels of strength and durability, so it’s important to choose the right one for your project. Here are some of the most commonly used glues for hardening paper.
White Glue: Also known as school glue or PVA glue, white glue is a popular choice for hardening paper due to its strong binding properties and easy availability. It can be diluted with water for a more even distribution and is suitable for most paper projects.
Mod Podge: This popular craft glue is specially formulated for decoupage and paper projects. Made from a combination of water, glue, and sealer, mod podge provides a strong hold while also protecting the paper from moisture and wear and tear.
Glue Sticks: While not as strong as white glue or mod podge, glue sticks are a convenient option for small, lightweight paper projects. They’re easy to apply and dry quickly, making them a great choice for children’s crafts.
Double-Sided Tape: While not technically a glue, double-sided tape can be used to harden paper by providing a strong hold without any mess or drips. It’s a good option for projects that require precise placement and a clean finish.
No matter which type of glue you choose, be sure to read the instructions carefully and test it on a small area before using it on your entire project. And if you’re not sure which glue to use, don’t hesitate to ask for advice or do some research online. For example, you can read about what is glue code if you’re interested in coding, or find out what to use for wallpaper glue if you’re planning a home renovation project.
White Glue
White glue is a popular option for hardening paper due to its wide availability and affordability. It’s also known as school glue, PVA glue, or Elmer’s glue, and it’s a water-based adhesive that dries clear and creates a strong bond. Here is a step-by-step guide on how to use white glue to make paper hard.
Materials Needed:
- White glue
- Water
- Bowl or container
- Brush
- Newspaper or protective surface
- Paper to be hardened
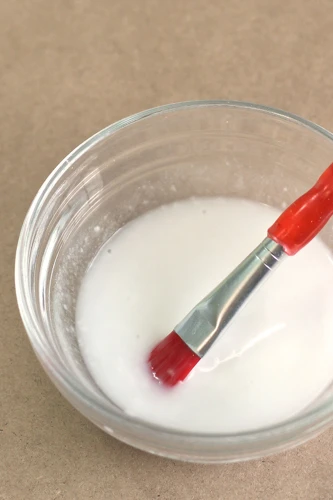
Step 1: Dilute the white glue with water. Mix equal parts water and white glue in a bowl or container. Stir until the mixture is well-combined and has a consistent texture. Diluting the glue will make it easier to spread and avoid clumps.
Step 2: Apply the diluted glue to the paper. Using a brush, apply a thin layer of the diluted white glue all over the paper. Be sure to cover the entire surface evenly, without excess glue or missed areas.
Step 3: Dry the paper. Once the paper is evenly coated with glue, place it on a protective surface like newspaper and wait for it to dry completely. This may take several hours, depending on the thickness of the paper and the humidity of the environment.
Step 4: Repeat the process. After the first layer of glue is dry, inspect the paper to see if it has hardened enough. If it still feels flimsy or weak, repeat the process by applying another layer of diluted white glue and waiting for it to dry completely.
It’s always a good idea to test the technique on a small piece of paper before committing to a larger project. If you’re looking for alternate paper-hardening methods, check out these related articles:
how to make a cardboard box without glue, what to use instead of super glue, and how to thin CA glue.
Mod Podge
Mod Podge is a popular glue option for papercrafts and is known for its versatile properties. This glue is a combination of adhesive and sealant, making it useful for both adhering materials and providing a protective coat. It also comes in different finishes such as matte, glossy, and satin.
Advantages of Using Mod Podge for Hardening Paper:
| Advantages | Details |
| Easy to use | Mod Podge has a smooth consistency, making it easy to apply without clumping or dripping. |
| Dries clear | Unlike some other glues, Mod Podge dries completely transparent, which is essential for certain paper projects. |
| Protects the paper | The sealant properties of Mod Podge protect the paper from damage and add durability while giving it a smooth, even texture. |
| Works with different paper types | Mod Podge can be used with various types of paper, including tissue paper and scrapbook paper, without causing wrinkles or bubbles during the hardening process. |
Tips for Using Mod Podge:
– Shake the Mod Podge bottle well before use to ensure a consistent texture.
– Apply it in thin, even coats to avoid clumping or unevenness.
– To prevent bubbles, use a foam brush or squeegee to apply the glue.
– You can add water to dilute Mod Podge if necessary, especially if you are working with delicate paper.
– To create a waterproof seal, apply multiple coats of Mod Podge.
If you don’t have Mod Podge on hand, you can also try other types of sealant glue like white glue or double-sided tape. You can even make your own glue using household items like flour and water or wallpaper paste (see the recipe here).
In any case, the most important thing to remember when hardening paper with glue is to approach the process with patience and care. By following the steps and tips provided in this guide, your paper projects will be sturdy and long-lasting.
Glue Sticks
Glue sticks are another common choice for hardening paper. They are convenient to use, as they don’t require diluting and are easy to control. However, it’s important to choose the right type of glue stick for your project.
What types of glue sticks should you use for hardening paper?
| Type of Glue Stick | Description |
|---|---|
| Acid-free glue sticks | These are a great choice for archival projects, as they won’t yellow or deteriorate over time. However, they can be more expensive than other types of glue sticks. |
| Washable glue sticks | These are ideal for projects that may get wet or need to be washed, such as scrapbook pages or paper mache projects. They can be easily washed out with water and won’t leave any residue. |
| Regular glue sticks | These are the most common type of glue stick and can be used for a variety of paper projects. However, they may not be as strong as other types of glue sticks. |
How do you use glue sticks to harden paper?
Using glue sticks to harden paper is a simple process. First, apply a thin layer of glue stick to one side of the paper. Then, press the paper onto a flat surface and smooth out any bubbles or wrinkles. Repeat the process on the other side of the paper. Allow the paper to dry completely before handling or manipulating it.
Can you use glue sticks for other paper projects?
Glue sticks can be used for many paper projects beyond just hardening paper. They are a great choice for attaching paper to paper, as they won’t cause the paper to warp or wrinkle like liquid glue can. Glue sticks are also great for attaching paper to other materials, such as foam or cardboard.
If you’re interested in learning more about different types of glue, check out What Glue Does Sondra Celli Use? for information on the specific glue used in a popular TV show. Or, if you’re curious about the weight of a glue stick, check out What is the Mass of a Glue Stick? Lastly, if you’re wondering how long to clamp Gorilla Wood Glue, check out How Long to Clamp Gorilla Wood Glue.
Double-Sided Tape
Double-sided tape is a great alternative to liquid glues and can be used to harden paper. It is especially useful when working with small or intricate paper projects.
Advantages
One of the main advantages of using double-sided tape is that it is mess-free. Unlike liquid glues, it does not require any preparation before use and does not leave any residue. This makes it a great option for those who want a quick and easy fix.
Disadvantages
However, double-sided tape does have its downsides. One of them is that it can be difficult to reposition or remove once it has been applied. Additionally, it may not provide as strong of a hold as liquid glue.
How to Use Double-Sided Tape for Hardening Paper
To use double-sided tape for hardening paper, simply follow these steps:
| Step | Description |
|---|---|
| 1 | Cut your paper to the desired size and shape |
| 2 | Cut a piece of double-sided tape to fit the size of your paper |
| 3 | Carefully apply the double-sided tape to the back of your paper, making sure to evenly distribute it |
| 4 | Place the paper onto a flat surface and apply pressure to the tape to ensure a strong bond |
| 5 | Repeat steps 2-4 as needed to fully harden the paper |
Troubleshooting Tips
If you find that the double-sided tape is not creating a strong enough bond, you may need to reapply it or try using a different type of tape. Additionally, be careful not to apply too much tape, as this can cause the paper to wrinkle or warp.
Double-sided tape can be a convenient and mess-free option for hardening paper, especially for smaller projects. However, be aware of its limitations and potential downsides before deciding to use it.
Preparing Your Paper
Before you can begin hardening your paper, it’s important to properly prepare it. This step is crucial for creating a sturdy and durable final product. In this section, we will cover the necessary steps you need to take to prepare your paper, including cutting it to size and optional painting or decorating. Ensuring that your paper is properly prepared will help ensure that it will harden evenly and remain strong for a long time to come.
Cutting to Size
Before starting to work on hardening your paper with glue, you need to make sure that it is cut to the appropriate size for your project. To do this, gather a ruler, pencil, and a sharp pair of scissors.
Step 1: Measure out the size you need for your paper using the ruler. Use the pencil to mark where you need to cut.
Step 2: Use the sharp scissors to cut along the pencil markings. Be sure to cut in a straight line to ensure a professional finish.
Step 3: Repeat the first two steps until you have all pieces of paper cut to the correct size.
Tip: If you plan on using different colors or designs on your paper project, you may want to use a paper cutter. This will help to ensure that all of your pieces are the same size and have clean edges.
By taking the time to cut your paper to the correct size, you will make the next steps of hardening your paper with glue much easier. It is essential to have straight, uniform pieces of paper for the best results.
Painting or Decorating (Optional)
Before hardening your paper with glue, you might want to consider painting or decorating it to add a special touch to your project. This step is completely optional but can really elevate the final product. Here are some tips for painting or decorating your paper:
| Tip | Description |
|---|---|
| Choose the Right Paint | There are a variety of paints you can use for paper, such as watercolors, acrylics, or even spray paint. Consider the type of paper you’re using and the look you want to achieve when choosing your paint. |
| Test the Paint | Before painting your entire piece of paper, test the paint on a small section to make sure it doesn’t bleed or warp the paper. |
| Use a Light Hand | When painting, start with light layers and build up color gradually. This will prevent the paper from becoming too saturated with paint and potentially warping or losing its texture. |
| Let it Dry Completely | Make sure your paint is completely dry before proceed to apply glue. Wet paint can mix with glue and create an uneven coating or color. |
| Consider Other Decorations | You could also decorate your paper with stamps, stickers, or stencils. Experiment with different techniques to create a unique and personal touch. |
By taking the time to paint or decorate your paper, you will be able to create a one-of-a-kind project that is both sturdy and beautiful. Just remember to let the paint dry completely before hardening your paper with glue.
How to Harden Paper with Glue
So, you want to learn the art of hardening paper with glue? Well, you’re in luck! This skill is not only practical for creating durable paper projects but can also be a fun and creative way to enhance various DIY projects. By using some simple materials and following a few easy steps, you can transform flimsy paper into sturdy sheets that are perfect for crafting, scrapbooking, and even bookbinding. Let’s dive into the process of hardening paper with glue and watch as your projects become more robust and long-lasting.
Step 1: Dilute the Glue
Before we jump into hardening the paper, it is important to dilute the glue. Diluting the glue will ensure that the paper does not become too stiff or warp during the drying process.
Here are the steps to dilute the glue:
- Step 1: Prepare a mixture of glue and water. The ratio of glue to water will depend on the type of glue you are using. For white glue, a 1:1 ratio of glue to water should work well. For Mod Podge, a 2:1 ratio of glue to water is recommended.
- Step 2: Mix the glue and water thoroughly. It is important to make sure the mixture is well combined so that the paper will evenly absorb the glue.
- Step 3: Test the mixture. Dip a scrap piece of paper into the glue mixture and see how it feels. If it feels too thick or gloopy, add a little more water. If it feels too thin, add a little more glue.
By diluting the glue, you will avoid applying too much glue to the paper, which can cause warping and wrinkling. It will also make the paper more pliable and easier to work with when shaping or folding.
Pro Tip: If you want extra durability, add a small amount of white vinegar to the glue mixture. Vinegar helps strengthen the glue and can make the paper even sturdier. However, be sure to add only a small amount as too much vinegar can damage the paper.
Once you have diluted the glue, you are ready to move on to applying it to the paper.
Step 2: Apply the Glue
Once you’ve diluted your glue to the desired consistency, it’s time to apply it to your paper. This step is crucial, as the way you apply the glue will greatly affect the end result of your project. Here are some tips for applying glue to your paper effectively:
| Tip: | Description: |
|---|---|
| Use a Brush: | Applying glue with a brush will give you the most even coverage. Use a small to medium-sized brush and make sure it’s clean before you start. |
| Apply in Thin Layers: | To avoid clumps and bubbles, apply the glue in thin, even layers. If you notice any bubbles or bumps in the glue, use your brush to smooth them out before moving on. |
| Cover the Entire Surface: | Make sure to cover the entire surface of your paper with glue. If you miss any spots, those areas may not harden properly and your project could end up flimsy or uneven. |
| Don’t Over-Saturate: | While it’s important to cover the entire surface, you also don’t want to oversaturate the paper with glue. This can cause the paper to warp or wrinkle and may also affect the overall hardness of the finished product. |
Remember to work quickly during this step to avoid the glue drying before you have a chance to smooth it out or adjust any mistakes. It’s also a good idea to have a damp cloth on hand to clean up any excess glue that may get on your hands or work surface. Once you’ve applied the glue, move on to the next step to dry the paper.
Step 3: Dry the Paper
After thoroughly applying the glue to your paper, it’s time to dry it out. Here are the steps:
- Let it Air Dry: This is the most natural way to dry your paper. Find a flat surface and lay your paper on top of it. Avoid using a hairdryer or any direct heat source, as it may cause your paper to warp or wrinkle.
- Use a Fan: If you’re in a hurry, a fan is a great option. Set a fan on low or medium speed and let it blow air onto your paper. This will help the glue to dry more quickly and evenly.
- Place it in a Warm Place: If you live in a humid or cold area, finding a warm place to dry your paper will be beneficial. Set your paper on a flat surface in a warm spot, like near a window with direct sunlight or a heating vent. This will help prevent any warping or wrinkles from forming.
Note: No matter which option you choose, make sure your paper is completely dry before moving on to the next step. If the glue is still wet, it won’t harden properly and may cause your paper to feel flimsy.
Step 4: Repeat the Process
Once you have allowed the glue to dry completely, the paper will have hardened slightly. However, to achieve maximum sturdiness, you’ll need to repeat the process of applying and drying glue a few more times.
Table:
| Step | Action |
|---|---|
| 1 | Dilute glue as before |
| 2 | Apply another layer of glue to the paper, using a brush or sponge |
| 3 | Allow the paper to dry completely, again |
| 4 | Repeat steps 1-3 for a total of 3-4 coats of glue |
Be patient during this process, as it may take several hours or even a whole day to complete all the layers of glue. You may also want to experiment with different types of glue to see which works best for your project. Remember, the more layers of glue you apply, the sturdier your paper will become, so take your time and don’t rush the process.
If you notice any areas that still feel flimsy or weak after the final coat of glue has dried, simply repeat the process in those specific areas until you are satisfied with the overall stiffness and durability of the paper.
Troubleshooting Tips
As with any DIY project, there may be some hiccups along the way when hardening paper with glue. Don’t panic! There are some common issues that may arise, and we’re here to help you troubleshoot them. In this section, we’ll go over some possible roadblocks you may encounter and what you can do to remedy the situation. So, don’t fret if something goes awry – we’ve got your back. Let’s dive in and tackle these troubleshooting tips!
The Paper Warps or Wrinkles
When hardening paper with glue, it is possible that the paper may warp or wrinkle. This can be a frustrating situation, but there are a few troubleshooting tips to try in order to salvage the project.
1. Use Less Glue
One reason for warping or wrinkling paper is an excess of glue. Try diluting the glue mixture even further, using a higher ratio of water to glue. This will allow for a thinner layer of glue to be applied to the paper.
2. Smooth Out Bubbles
If there are any air bubbles trapped under the glue, they can cause the paper to warp or wrinkle. Use a flat tool, such as a credit card, to smooth out the paper and remove any bubbles before allowing the glue to dry.
3. Iron the Paper
If the paper has already dried and become warped or wrinkled, it may be possible to salvage it by using an iron. Place a piece of wax paper over the paper and use a warm iron to press down and flatten out any bumps or wrinkles. Be sure to keep the iron moving to prevent scorching the paper.
4. Allow for More Drying Time
If the warping or wrinkling only occurs in certain spots, it may be due to uneven drying. Allow the paper to dry completely before applying additional layers of glue. This will prevent the glue from being absorbed unevenly and causing warping.
5. Use Heavier Paper
If warping or wrinkling is a consistent issue, try using a heavier weight paper. This will be less likely to manipulate and warp when it comes into contact with the glue.
By utilizing these troubleshooting tips, it is possible to salvage a paper project that has warped or wrinkled during the hardening process. Remember to take your time and remain patient throughout the process for the best results.
The Paper Still Feels Flimsy
If you find that your paper still feels flimsy after hardening it with glue, don’t worry! There are a couple of possible solutions to this problem.
1. Increase the Concentration of Glue Solution: If you are using a diluted glue solution, try increasing the concentration of glue to water. Test the paper after applying a single layer of the concentrated glue mixture and let it dry. If the paper still feels flimsy, add another layer and let it dry completely. Keep adding more layers until the paper feels sturdy and strong.
2. Use a Different Type of Glue: Some types of glue may work better than others for hardening paper. Try using a different type of glue, such as a stronger adhesive or a glue specifically designed for paper crafts. Experiment with different glues until you find the one that works best for your project.
3. Add a Backing Material: Adding a backing material to your paper can provide additional support and make it sturdier. Try adding a layer of cardboard or a thick paper to the back of your project using glue or double-sided tape.
4. Change the Paper: The type of paper you use can also affect its sturdiness. Try using a thicker or heavier weight paper for your project. Alternatively, you can try using a different type of material altogether, such as cardstock or chipboard, which are known for being durable and strong.
Keep in mind that hardening paper with glue can be trial and error. Don’t be discouraged if it takes a few tries to get the desired results. With a little experimentation, you’ll be able to create sturdy and impressive paper projects in no time.
Other Uses for Hardened Paper
After hardening paper with glue, there are numerous creative ways to use it beyond just traditional paper crafts. Here are some unique and unexpected applications of hardened paper:
Jewelry: Use small pieces of hardened paper to create unique and lightweight earrings, necklaces, and bracelets. Cut the paper into different shapes, add paint or glitter, and string them together to create beautiful statement pieces.
Home decor: Hardened paper is a versatile material for creating unique home decor. With the right tools and techniques, you can create vases, bowls, coasters, and even lampshades. The possibilities are endless, and you can customize the colors and patterns to match your decor.
Greeting cards: Use hardened paper to create one-of-a-kind greeting cards that will wow your friends and family. Cut out shapes, patterns, or words and glue them onto cardstock for a handmade touch that’s sure to impress.
Wall art: Cut larger pieces of hardened paper into geometric shapes or other designs and attach them to a canvas or wooden board for instant wall art. You can also use the paper as a background for artwork, collaging, or calligraphy.
Gift wrapping: Instead of traditional wrapping paper, use hardened paper to wrap gifts for a unique and sustainable touch. Add ribbon or twine to create a homemade look that will stand out under the tree.
These are just a few examples of the many creative ways to use hardened paper. With a little imagination and experimentation, you can come up with your own unique applications for this versatile material.
Conclusion
In conclusion, creating sturdy paper projects is essential for ensuring their longevity and durability. Hardening paper with glue is a simple and cost-effective way to achieve this, and there are several types of glue that can be used depending on the desired outcome. White glue, Mod Podge, glue sticks, and double-sided tape are all viable options for hardening paper.
Before applying any glue to your paper, it’s important to prepare it properly by cutting it to size and potentially decorating it with paint or other materials. Diluting the glue and applying it in multiple layers will also result in a stronger final product.
Troubleshooting tips, such as addressing issues with warping or flimsiness, can help to ensure a successful project. Additionally, hardened paper can have a variety of other uses, such as creating sculptures or decorations.
Overall, hardening paper with glue is a fun and accessible DIY project with numerous practical applications. By following the steps outlined in this guide and experimenting with different types of glue, anyone can create sturdy and long-lasting paper projects.
Frequently Asked Questions
What Type of Paper Should I Use?
Regular printer paper or cardstock works well for this technique. However, the thicker the paper, the sturdier it will be.
Can I Use Any Type of Glue?
No, not all glues work for hardening paper. The best types of glue to use for this technique are white glue, Mod Podge, glue sticks, or double-sided tape.
Do I Need to Dilute the Glue?
Yes, you will need to dilute the glue with a bit of water in order to make it easier to apply and to prevent it from drying too thickly on the paper.
How Many Layers of Glue Should I Apply?
It is recommended to apply at least two layers of glue to the paper, allowing each layer to dry completely before applying the next.
How Long Should I Wait for the Paper to Dry?
It will depend on the thickness of your paper and how much glue you have applied, but typically, the paper should dry within a few hours to overnight.
Can I Use Paint to Decorate the Paper Before Applying Glue?
Yes, you can use paint, markers, or other mediums to decorate your paper before applying the glue. Just be sure the paint is completely dry before adding the glue.
Can Hardened Paper Be Cut or Folded?
Yes, once the paper has hardened, it will be much sturdier and easier to handle. You can cut it, fold it, and manipulate it in various ways without it tearing or becoming flimsy.
What Other Projects Can I Make with Hardened Paper?
Hardened paper can be used to make a variety of projects, including homemade bookmarks, paper sculptures, and even decorative bowls or vases. The possibilities are endless!
How Long Will the Hardened Paper Last?
If stored properly, hardened paper can last for several months or even years without losing its sturdiness. Be sure to keep it in a dry, cool place away from direct sunlight.
Can I Harden Paper that Has Already Been Decorated?
Yes, you can harden paper that has already been decorated. Just be sure the decorations are completely dry before applying the glue.