Introduction
Crafting can be a fun, relaxing activity that allows you to create unique decorations for your home or gifts for loved ones. Making yarn balls is a simple yet delightful craft that can add a personal touch to any space. But have you ever tried making them without glue? It might seem like a daunting task, but with the right materials and our step-by-step guide, you’ll be able to make stunning and environmentally-friendly yarn balls that don’t require glue. Let’s dive in and start creating!
What Are Yarn Balls?
Yarn balls are a popular crafting item that can be used to create decorative objects such as garlands, ornaments, and even stuffed toys. They are made by wrapping yarn around a ball-shaped object until it is completely covered. Once the yarn is dry, the ball-shaped object is removed, leaving behind a sturdy and colorful craft item. Yarn balls are popular because of their versatility and ease of customization. Using different colors and textures of yarn, you can create yarn balls that match your home decor or the theme of your party decorations. They are also popular as a children’s craft activity. Yarn balls can be made using a variety of materials, including foam balls or balloons. In this article, we will focus on how to make yarn balls without glue, which is a more eco-friendly and cost-effective option.
Why Make Yarn Balls Without Glue?
Making yarn balls without glue is a fun and creative activity that can be enjoyed by people of all ages. Unlike traditional methods that use glue, this technique is more eco-friendly and doesn’t require any harsh chemicals. Yarn balls made without glue are a great DIY project for those who have sensitivity to chemicals or want to avoid using glue due to personal preferences. Additionally, making yarn balls without glue is straightforward and doesn’t involve any complicated procedures.
Here are some reasons why making yarn balls without glue is a great craft activity:
- It is an affordable activity that requires only a few basic materials such as balloons and yarn.
- Making yarn balls without glue is an eco-friendly alternative that doesn’t produce any toxic waste.
- Yarn balls made without glue are less likely to break apart and are sturdier than those made with glue.
- This technique allows you to experiment with different yarn textures and colors.
- Making yarn balls without glue can be a fun bonding activity with family and friends.
Making yarn balls without glue is a simple and enjoyable DIY project with numerous benefits. Not only is it an eco-friendly alternative to traditional methods, but it also allows for a wide range of creative possibilities. So, grab some yarn and balloons and let’s get started on this fun project!
Materials Needed
Materials Needed for Making Yarn Balls Without Glue
Before beginning the process of making yarn balls, it is essential to gather all the necessary materials. You won’t need any glue for this project, making it a mess-free and straightforward activity. All you need is some yarn, balloons, and scissors. If you don’t have any of these materials, you can easily find them at a craft store or order them online. Once you are ready with the required materials, you can quickly get started on making yarn balls. There are no special tools or equipment needed, making this a fun and accessible project for people of all ages.
Yarn
Yarn is the most important material needed to make yarn balls without glue. Choosing the right type of yarn can make a big difference in the final product. It’s important to choose a yarn that is durable and easy to work with. Cotton yarn is a popular choice for making yarn balls as it is easy to manipulate and comes in many different colors.
Another important consideration is the weight of the yarn. A thinner yarn will result in a smaller yarn ball, while a thicker yarn will result in a larger yarn ball. It’s important to choose a yarn weight that aligns with the desired size of the finished product.
When choosing a color, consider the overall aesthetic that you’re going for. If you want a more subtle look, consider neutral colors like beige, gray, or white. If you want something more bold and vibrant, consider bright colors like pink, blue, or green.
Below is a table showcasing some popular yarn options for making yarn balls without glue:
| Yarn Type | Material | Weight | Color Options |
|---|---|---|---|
| Re-Up | 100% recycled fabric (cotton, polyester, and nylon) | 4 – Medium | Assorted colors |
| Sugar’n Cream | 100% cotton | 4 – Medium | Assorted colors |
| Lionbrand Homespun | 98% acrylic, 2% polyester | 5 – Bulky | Assorted colors |
It’s important to remember that this table is just a starting point. There are many different types and brands of yarn out there, so it’s important to choose the one that suits your needs best. If you’re unsure, consider asking a sales associate at your local craft store for recommendations.
Rice starch glue can be used as an alternative to glue when making yarn balls, but it is not necessary for this particular project.
Balloons
To make yarn balls without glue, you’ll need to start by gathering your materials, including balloons. Balloons will be used as the base for your yarn balls, giving them their shape and structure. When choosing balloons for this project, it’s important to select balloons that are strong and durable. You don’t want your balloons to burst or deflate before the yarn is dry.
To ensure that your balloons have the necessary sturdiness, opt for “quality” balloons from a party supply store. Avoid using discount balloons or very thin balloons, as these are more likely to burst or deflate. Additionally, if you have any concern that your balloons may be too fragile, you can consider using multiple layers of yarn for added strength.
It’s important to note that while traditional methods of making yarn balls may involve using glue to help hold the yarn in place and dry into the desired shape, this method does not require any glue. Instead, the yarn will be wrapped tightly around a damp balloon and left to dry. This process may take longer than traditional methods, but it can be a great glue-free option for those with sensitivities or allergies to glue.
When you have chosen your balloons, be sure to inflate them to the desired size before beginning the wrapping process. You can use different sizes of balloons to make different sized yarn balls, depending on the look you’re going for. Remember to tie off the end of the balloon tightly to prevent any air from leaking out.
Choosing high-quality, sturdy balloons is an important step in making yarn balls without glue. With the right balloons, you’ll be on your way to creating beautiful, unique yarn decorations that are perfect for any occasion.
Scissors
Having a good pair of scissors is essential for making yarn balls without glue. You will need them to cut the yarn to the desired length. It’s recommended to use sharp scissors to avoid frayed edges that can make the wrapping process difficult. Any pair of scissors will do the job, but if you use fabric scissors, it’ll be easier to cut the yarn smoothly.
You’ll also need scissors to cut the yarn tails after wrapping the balloon. It’s crucial to have a clean cut, so the yarn doesn’t unravel after it’s dry. You can use any scissors for this, but precision scissors will give you more control.
One thing to keep in mind is that you shouldn’t cut the yarn too short; it’s always better to cut it longer than you think you’ll need. You can always trim it after wrapping the balloon if it’s too long. If you cut it too short, you’ll have to start over as a short yarn length may not be enough to create the yarn ball.
Remember to be careful when using scissors, especially when cutting the yarn, as it can be challenging to handle a slippery material like yarn.
As an Amazon Associate, we earn from qualifying purchases. Here are some recommended scissors you can check out through the following link: https://www.amazon.com/Scissors/b?ie=UTF8&node=3737781
Step-by-Step Guide
Now that you have all the materials needed to make yarn balls without glue, it’s time for the step-by-step guide. Grab your balloons, yarn, and scissors and let’s get started! Before we begin, if you’re looking for other adhesive options for your crafting projects, check out this helpful article on how to glue a puzzle with Mod Podge. But for now, let’s dive into the process of creating beautiful yarn balls without any glue.
Step 1: Blow Up Balloons
When making yarn balls without glue, the first step is to blow up the balloons that will serve as the base for the yarn. You’ll need a few balloons, depending on how many yarn balls you plan to make. Standard round balloons work well, but you can experiment with different shapes and sizes for a more varied finished product.
To blow up the balloons, simply take a balloon and place its opening onto the nozzle of an air pump. Pump air into the balloon until it reaches the desired size. Alternatively, you can also blow up the balloons manually using your mouth.
Make sure to not overinflate the balloons, as it can cause them to burst while wrapping the yarn. It’s also important to keep the size consistent across all balloons to ensure that the resulting yarn balls are of similar size.
Click here for more information on clamps for glue-ups.
Step 2: Cut Yarn
To begin making your yarn ball without glue, the second step is to cut the yarn into pieces. It is best to measure the yarn in lengths of around two to three feet long for ease of use. Plan on having enough yarn to wrap around the balloon multiple times, allowing for visually pleasing coverage and stability.
When selecting your yarn, choose high-quality materials in the color of your choice. The texture of the yarn can also play a significant role in the finished product. For example, a fluffy yarn can create a unique texture to your yarn ball, while a smoother or thinner yarn can result in a more polished finish.
With your yarn ready, it’s time to move on to the next step!
Note: If you have trouble cutting the yarn evenly, consider using scissors with serrated blades. These types of scissors are specifically designed to cut through textiles with ease and precision.
Pro-tip: If you don’t have any yarn at home, consider reusing old t-shirts or fabric scraps, cutting or tearing them into thin strips, and use them in place of yarn.
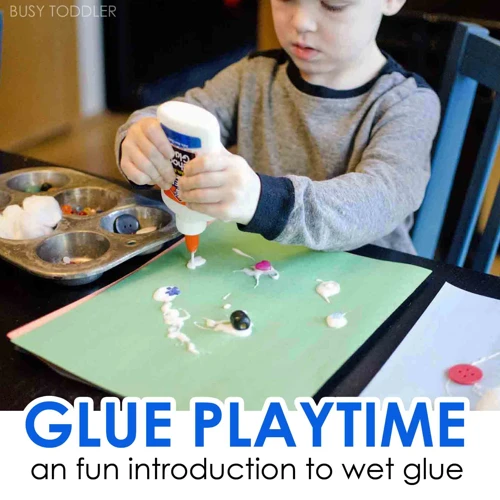
Remember, for this project, there is no need for glue, so be sure to avoid using it. Using glue on your yarn could damage the structure of the ball or prevent it from holding its shape. Instead, opt for using water to help the yarn adhere to the balloon.
Continue to the next step to find out how water can help form the perfect yarn ball without the use of glue.
Learn more about the types of glue to use for your other crafting needs.
Step 3: Dip Yarn in Water
Before wrapping the yarn around the balloon, it is essential to dip it in water. This will help the yarn adhere to the balloon and facilitate the shaping process. So, fill up a bowl with lukewarm water and add a little bit of mild soap to it. Then, submerge the yarn into the water and allow it to soak for few seconds. This step is crucial to making sure the yarn balls come out smooth and tight.
It’s important to use lukewarm water so that the yarn doesn’t shrink or expand too much. Additionally, adding mild soap to the water can help remove any excess oils or dirt from the yarn, ensuring a clean finished product.
When dipping the yarn in water, gently squeeze out any excess water to avoid making the yarn too wet. Additionally, when wrapping the yarn around the balloon, be sure to do it in a spiral motion, working from one end to the other. This will help ensure the yarn ball has an even shape and doesn’t come out lumpy.
It’s crucial to be gentle when squeezing out excess water from the yarn, to avoid damaging the fibers.
Once the yarn is fully wrapped around the balloon and has dried, you can pop the balloon and remove it from the inside of the yarn ball.
Keep in mind that if the yarn is not completely dry, it may not hold its shape. You can speed up the drying process by placing the yarn ball near a fan or in a well-ventilated area.
By following this simple step-by-step guide, you can create beautiful yarn balls to decorate your home, events, and parties. And the best part? You can do it all without using any glue!
Next up: let’s move on to Step 4: Wrapping Yarn Around Balloon.
Step 4: Wrap Yarn Around Balloon
Once you have prepared your balloons and cut your yarn, it’s time to start wrapping the yarn around the balloon. This is a crucial step in the process, as the way you wrap the yarn will affect the final look of your yarn balls. Here are the steps to follow:
- Take your yarn and tie it to the end of the balloon’s knot. Make sure that the knot is securely tied, so that the yarn will not slip off the balloon while you’re wrapping it.
- Start wrapping the yarn tightly around the balloon. Make sure that each wrap is snug against the previous one. You can wrap the yarn horizontally, vertically, or diagonally, depending on the look you’re going for.
- Occasionally, push the wrapped yarn down towards the bottom of the balloon to keep it tight and compact.
- Continue wrapping the yarn around the balloon until it is covered to your liking. Remember to leave a little bit of empty space at the top of the balloon, so that it will be easier to remove later.
Note: Be careful not to wrap the yarn too tightly, as this can cause the balloon to deform or even burst. Also, make sure you cover the entire balloon with yarn, as any gaps or holes will cause the yarn ball to be weaker and more likely to fall apart.
As a reminder, it’s important to do this step without using glue, as the glue can affect the final texture and consistency of your yarn ball. However, if you need help with glue for a different craft project, you can check out our article on how to get repair glue, how to make methyl cellulose glue, or how to use embossing powder with glue. However, if you’re wondering what glue to use on blinds or what glue to use for twine on glass, we also have articles on those topics as well.
Step 5: Allow to Dry
After wrapping the yarn around the balloon to your desired thickness, it’s time for Step 5: allowing your yarn ball to dry. This can take anywhere from a few hours to a full day depending on the thickness of your yarn and how much water you used. It’s best to let them dry overnight to ensure it’s fully dry.
During this time, the yarn will harden as it dries, creating a sturdy and strong yarn ball that will hold its shape. It’s important to ensure the yarn ball is completely dry before moving onto the next step to avoid the yarn unraveling.
To speed up the drying process, you can place the yarn balls outside in the sun or in a well-ventilated area to help with air circulation. Alternatively, you can use a fan to blow air onto the yarn balls to help them dry faster.
Note: if you applied too much water, the yarn may take longer to dry and may also be prone to sagging or losing its shape. So, be careful not to use too much water while dipping the yarn in water.
Once your yarn balls are completely dry, carefully cut a small hole in the balloon and gently pull out the balloon through the hole. This will leave you with a perfectly shaped yarn ball.
Tip: If you notice any sagging or deformities while the yarn is drying, you can reshape the ball by gently molding it with your hands while it is still slightly damp.
With these easy steps, making yarn balls without glue is simple and fun. It’s a great DIY project that anyone can do. Plus, these decorative balls can be used for a variety of purposes such as home decor or DIY projects.
Link: For other DIY projects that involve glue, check out our guide on what glue to use for twine on glass. Or, if you need to know what kind of glue to use on blinds, we’ve got you covered with our guide on what glue to use on blinds.
Tips and Tricks
After following the step-by-step guide to make beautiful and colorful yarn balls without glue, there are still a few things to consider to make the process smoother and the final result even better. These tips and tricks will ensure that you’re getting the most out of this fun and creative DIY project. From trying different yarn textures to perfecting your wrapping technique, these tips will help you produce stunning yarn balls that are sure to impress. Let’s dive in!
Try Different Yarn Textures
When you’re making yarn balls without glue, you can experiment with different yarn textures to add variety and depth to your finished product. There are so many different types of yarn available, from fuzzy and fluffy to smooth and shiny, so you can really get creative with your choices. To help you get started, I’ve compiled a table of some popular yarn textures and their unique qualities:
| Yarn Texture | Texture Description |
|---|---|
| Wool | Wool yarn is known for being soft, warm, and cozy. It has a slightly fuzzy texture and can be great for adding a rustic, natural feel to your yarn balls. |
| Mohair | Mohair yarn is known for its long, fluffy fibers that give it a soft and fluffy texture. It can add a playful, whimsical touch to your yarn balls. |
| Cotton | Cotton yarn is smooth and shiny, with a crisp feel. It’s great for creating a more modern or minimalist look with your yarn balls. |
| Silk | Silk yarn has a luxurious, silky texture that adds elegance and sophistication to your yarn balls. It’s perfect for special occasions or more formal gatherings. |
| Acrylic | Acrylic yarn is soft and lightweight, with a smooth texture. It’s a popular choice for yarn balls because it’s affordable and comes in a wide variety of colors. |
| Linen | Linen yarn has a slightly rough texture and can add a natural, organic feel to your yarn balls. It’s perfect for outdoor events or beachy themes. |
When choosing your yarn textures, consider the overall aesthetic you want to achieve with your yarn balls. Do you want them to look modern and sleek, or rustic and full of charm? Don’t be afraid to mix and match textures for a more dynamic finished product. You’ll be surprised at what a difference the right yarn texture can make!
Don’t Overwrap
When wrapping your yarn around the balloon, it’s important to be mindful not to overwrap. While it may be tempting to add more and more layers, doing so can result in lumpy and uneven yarn balls. Not to mention, overwrapping can cause the yarn to become too tight around the balloon, making it difficult to remove the balloon once the yarn has dried.
To avoid overwrapping, keep a close eye on the amount of yarn you’re using as you wrap. It’s important to keep the wraps evenly spaced and not overlapping too much. This will allow for a smooth and uniform surface once the yarn has dried.
Tip: As you’re wrapping the yarn, periodically step back and take a look at the balloon from all angles. This will help you identify any areas that may be overlapped too much or unevenly wrapped.
Here’s an example table showing the difference between properly wrapped yarn balls and overwrapped yarn balls:
| Properly Wrapped Yarn Ball | Overwrapped Yarn Ball |
 |
 |
As you can see, the properly wrapped yarn ball has a smooth and uniform surface, while the overwrapped yarn ball is lumpy and uneven. So, remember to take your time and wrap with care to avoid overwrapping your yarn balls.
Display Your Yarn Balls Creatively
Once you have made your beautiful yarn balls without glue, it’s time to showcase them in a creative way. You can place them in a bowl or basket, hang them from the ceiling, or even create a garland with them.
Here are some creative ways to display your yarn balls without glue:
| Display Idea | Description |
|---|---|
| Nature-Inspired Display | Arrange your yarn balls on a bed of moss or twigs for a natural and rustic feel. |
| Color-Coded Display | Group yarn balls of similar colors together to create a visually stunning display. |
| Floating Display | Hang your yarn balls from the ceiling using fishing line or ribbon for a unique and whimsical display. |
| Mini Display | Create mini yarn balls and place them in small glass jars for an adorable display that can be placed on shelves or in windowsills. |
Remember, the possibilities for displaying your yarn balls without glue are endless. Get creative and have fun with it. Displaying your DIY creations is a great way to add a personal touch to your home decor.
Conclusion
After following these steps, you should have a beautiful set of yarn balls that can be used as decorative pieces in your home or given as a thoughtful gift. The beauty of making yarn balls without glue is that this craft is accessible to anyone. With minimal materials and effort, you can create a stunning, one-of-a-kind decoration that will add character and charm to any space.
In addition to being an enjoyable activity, making yarn balls without glue is also a budget-friendly option for DIY enthusiasts. Yarn is an inexpensive material that can be found at most crafting stores. Balloons are also easy to come by and affordable.
One of the great things about this craft is the versatility. You can choose from a variety of yarn textures and colors to create customized yarn balls that match your décor. Whether you’re looking for something bold and vibrant or soft and neutral, there is a yarn out there that will fit your vision.
In conclusion, making yarn balls without glue is a fun and simple craft that is perfect for DIY enthusiasts of all skill levels. By following these steps and experimenting with different yarn textures, you can create unique decorative pieces that will add character and charm to any space. So, go ahead and give it a try – you’ll be surprised at how easy and enjoyable this activity can be!
Frequently Asked Questions
Can I use any type of yarn for making yarn balls?
Yes, you can use any type of yarn, including wool, acrylic, and cotton yarn.
How many balloons should I use for making yarn balls?
It depends on how many yarn balls you want to make. One balloon will make one yarn ball.
What size should the balloons be?
The size of the balloon will determine the size of the final yarn ball. You can use any size, but a medium-sized balloon is a good size to start with.
Do I need to use glue for making yarn balls?
No, you do not need to use glue. You can make yarn balls without using any glue at all.
How long should I soak the yarn in water?
You only need to dip the yarn in water for a few seconds. Do not soak the yarn for too long, as it will become too wet and difficult to wrap around the balloon.
How long do I need to allow the yarn ball to dry?
The drying time will depend on the temperature and humidity of your environment. On average, it will take 24-48 hours for the yarn ball to dry completely.
What can I do with yarn balls?
Yarn balls can be used as home decorations, as part of a centrepiece, or as a handmade gift. They can also be used as stress balls or as a toy for cats.
What if my yarn ball is misshapen after it dries?
You can reshape the yarn ball by gently squeezing and molding it with your hands while it is still slightly damp.
Can I add colour to my yarn balls?
Yes, you can add colour to your yarn balls by using coloured yarn or by dyeing the yarn before wrapping it around the balloon.
Are there any alternative methods for making yarn balls without glue?
Yes, besides dipping the yarn in water, you can also make yarn balls using cornstarch or sugar as a stiffener.