As a craft enthusiast or a DIY-er, have you ever wondered how you could make paper objects and crafts last longer or be more durable? Well, look no further! Hardening paper with glue is a technique that can improve a paper’s longevity and durability, making it perfect for various crafting possibilities. In this article, we will explore the different types of glue one can use for hardening paper, the techniques to achieve the desired result, and some tips and tricks to make the process easier and efficient. So, get your paper and glue ready, and let’s start exploring the wonderful world of hardened paper!
Why Harden Paper with Glue?
When it comes to preserving or enhancing the quality of paper, hardening it with glue becomes a practical solution. This technique can elevate the durability and longevity of paper, whether within crafting projects or for preserving important documents or old objects. But aside from these, there are other reasons why hardening paper with glue can be useful. Let’s delve into the benefits of this method.
Improves Durability
Improving durability is one of the main advantages of hardening paper with glue. By coating paper with a layer of glue, you can make it more robust and long-lasting. Whether you’re creating a paper craft project or preserving an old document that’s fragile, hardening paper with glue can significantly extend its lifespan.
Table of Glue and Their Drying Time
| Type of Glue | Drying Time |
|---|---|
| White Glue | 1-2 hours |
| Mod Podge | 15-20 minutes per coat; 24 hours for complete cure |
| Clear Glue | 1-2 hours |
| Paper Glue | 1-2 hours |
| Double-Sided Tape | N/A |
Using a strong adhesive like glue can help reinforce the paper’s fibers, preventing it from tearing, wrinkling, or creasing easily. By doing so, you can enjoy your paper creations for a longer time without worrying that they will crumple at the slightest touch. For instance, coating paper with a layer of glue before turning it into a paper mache sculpture can make it more durable and resistant to wear and tear.
Hardening paper with glue can make it resistant to moisture and humidity. Papers that are not treated with a sealant or protective glue can easily get damaged by water or humidity, causing them to become discolored or soft. Applying glue to the paper can act as a barrier, and make it less susceptible to water damage.
If you’re working on a project that involves gluing different paper layers together, like that of a collage, glue can help bind them together and create a robust surface.
Tip: To make your glue stronger, you can mix Elmer’s glue with water or other household ingredients like cornstarch or vinegar. Read our article on How to Make Elmer’s Glue Stronger for more tips.
All in all, hardening paper with glue can help improve its durability, longevity, and resistance to the elements. However, it’s essential to choose the right adhesive and technique for your project and consider factors like paper texture and drying time to achieve optimal results.
Enhances Longevity
Using glue to harden paper can significantly enhance its longevity. Whether you are preserving a beloved old book, creating a decorative piece of wall art, or making a unique ornament, hardening paper with glue can help ensure that it lasts for years to come.
Glue creates a protective barrier that can help shield the paper from dust, moisture, and other damaging elements. This is especially important for delicate or antique paper items that may be prone to damage over time.
Hardened paper is less likely to tear, crumple, or fade than untreated paper. It can help prevent yellowing and discoloration that can occur with age, and it can also help maintain the paper’s original shape and structure.
To enhance the longevity of paper using glue, it is important to choose the right type of glue and technique for your project. Not all glues are created equal, and some may be better suited for certain types of paper or projects than others.
For example, clear glue is a great option for hardening paper because it dries transparent and does not leave any residue or color behind. It is perfect for delicate or intricate pieces, such as papercrafts or delicate origami.
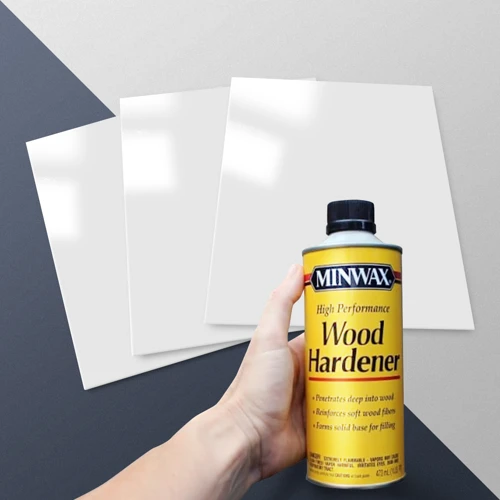
Alternatively, wood glue is another great option for hardening paper, particularly for larger projects. It dries clear and creates a strong bond that can help ensure that the paper retains its shape and structure.
Ultimately, using glue to harden paper is an effective way to extend the life of paper projects and items. With careful attention to choosing the right glue and technique, you can create long-lasting and durable paper crafts that you can enjoy for years to come.
Preserves Neglected Objects
Using glue to harden paper is not only useful for crafting purposes but also for preserving neglected objects. Old paper objects, such as books, maps, and documents, may become brittle and fragile over time. Preserving them can be a challenging task, but using glue can help.
Gluing paper objects back together can prevent them from deteriorating further, preserving them for future use and enjoyment. It can also help to protect them from further damage and prevent them from falling apart. For instance, a map can be glued back together and framed to hang on a wall, or old books can be repaired and placed on bookshelves to be admired.
To further protect paper objects, a sealant can be applied after hardening with glue. This will help to protect them from moisture, humidity, and other environmental factors that can damage paper.
In addition to preserving neglected objects, using glue to harden paper can also be a fun and creative way to repurpose old items. For example, old newspapers can be hardened and turned into a paper mache bowl or vase. It is a great way to recycle and give new life to old objects.
Preserving neglected paper objects with the help of glue can add longevity and durability to items that may have once been considered disposable. It offers endless opportunities to repurpose and refresh old items, giving them new and useful life.
If you want to learn more about using glue for crafting and repairing purposes, check out our article on How to Make a Paper Car Without Glue.
Allows for Crafting Possibilities
Gluing paper with the right technique and adhesive opens up numerous creative crafting possibilities. Paper hardening with glue is an affordable and straightforward way to add rigidity and crispness to your crafts, as well as protect them from moisture and wear and tear. Here are some of the crafts that you can make with hardened paper:
| Craft | Description |
|---|---|
| Origami | Ancient Japanese art of transforming a flat sheet of paper into a finished sculpture only using folding techniques. Hardening the origami paper makes it durable and less prone to ripping or wrinkling. |
| Decoupage | The art of decorating objects and surfaces with cut-outs of paper, fabric, or pictures glued in place. Hardening the edges of the cutouts gives a neater finish and lets you adjust them without tearing. |
| Scrapbooking | A craft of preserving, presenting, and arranging personal and family photos, memories, and memorabilia in a book. Hardened paper makes durable background pages that can withstand the test of time and the pressure of embellishments. |
| Papier-mache | A nostalgic craft of creating three-dimensional objects using a paste of paper strips or pulp. Hardened paper gives a sturdy base that can be combined with other materials, such as wire, gauze, or fabric, for more elaborate sculptures. |
| Journaling | A form of expressive writing that uses a notebook or diary to record thoughts, feelings, experiences, or goals. Hardened notebook pages make excellent backgrounds for writing, drawing, or painting, without bleeding or tearing. |
Knowing how to harden paper with glue is a valuable skill that can be used in a variety of projects, from gift making to home decor. The possibilities are endless, so experiment and explore your creativity! If you’re looking for more information on gluing paper, check out our article on how to glue paper to glass.
Types of Glue for Hardening Paper
When it comes to hardening paper, not all glues are created equal. Different types of glue can produce varying levels of hardness, flexibility, and finish on paper. It is important to understand the characteristics of each type of glue in order to choose the one that best suits your project needs. From the popular White Glue to the versatile Mod Podge, here are some of the best glues to use for hardening paper. Don’t forget to check out our article on what glue to use for sink if you’re looking for gluing tips beyond paper!
White Glue
When it comes to hardening paper, white glue is one of the most commonly used options for the task. Also known as school glue, craft glue, or PVA glue, this type of glue can be easily found at any craft or hardware store.
White glue is an adhesive made from polyvinyl acetate, a synthetic polymer that becomes clear when it dries. It is water-based, easy to use, and dries relatively quickly. It works well for hardening paper due to its ability to seep into the fibers of the paper and bind them together when it dries.
Another advantage of white glue is that it dries to be relatively stiff, which is ideal for hardening the paper. It also doesn’t yellow over time, which is important if you want to preserve the appearance of the paper.
There are only a few downsides to using white glue for hardening paper. First, it can be difficult to get a smooth finish with white glue because it tends to leave a slightly bumpy texture as it dries. Second, it can sometimes leave a visible residue on the paper, especially if you apply too much of it.
White glue is a reliable choice for hardening paper, and it is suitable for most paper-crafting projects that require extra durability or stiffness.
| Pros | Cons |
|---|---|
| Easy to find in stores | Can be difficult to get a smooth finish |
| Relatively low-cost | Can leave a visible residue on the paper |
| Dries to be relatively stiff | |
| Does not yellow over time |
If you want to learn more about how to glue different materials, check out our article on how to glue mix together.
Mod Podge
Mod Podge is a popular glue option for hardening paper due to its versatility and ease of use. It is a water-based sealer, glue, and finish that can be used on a variety of surfaces, including paper. Mod Podge also comes in various formulas, including matte, gloss, and satin finishes, giving you options for the final look of your project.
When hardening paper with Mod Podge, start by gathering the necessary supplies, including Mod Podge, a brush or sponge, and the paper you want to harden. Cut the paper to the desired size and shape before beginning the hardening process.
Here are the steps for hardening paper with Mod Podge:
- Step 1: Apply an even layer of Mod Podge to one side of the paper using a brush or sponge.
- Step 2: Allow the Mod Podge to dry completely. This may take a few hours, depending on how thickly the Mod Podge was applied.
- Step 3: Once the first side is completely dry, flip the paper over and apply Mod Podge to the other side.
- Step 4: Allow the Mod Podge to dry completely again.
- Step 5: Repeat steps 1-4 as necessary until the desired level of hardness is achieved.
When using Mod Podge to harden paper, keep in mind that multiple layers will likely be necessary to achieve the desired level of hardness. Also, be careful not to apply too much Mod Podge at once, as this can cause the paper to become too wet and fragile.
Mod Podge can be an excellent option for hardening paper due to its versatility and availability. Plus, with a little bit of patience and practice, you can achieve great results with this popular glue.
If you want to learn more about gluing techniques, check out our article on “How to Glue German Shepherd Ears Up“.
Clear Glue
Clear glue is often a popular choice for hardening paper due to its transparency, allowing for the preservation of details and colors on the paper. This type of glue can come in liquid or solid form, and can be found in most craft stores. Here are some tips and tricks for using clear glue to harden paper:
| Pros | Cons |
|---|---|
| Transparent finish | May create bubbles if not applied carefully |
| Allows for details to show through | May take longer to dry than other glues |
| Fairly easy to find in stores | May not be as strong as other types of glue |
When using clear glue, it is important to apply thin and even layers to avoid potential bubbles or clumps. It is also recommended to use a fine-tip brush to apply the glue, especially when working with delicate or small pieces of paper.
Crafters looking to preserve paper items such as old letters or photographs may find clear glue to be a particularly helpful tool. Applying a thin layer of clear glue to delicate and fragile paper items can help to prevent tears and damage from occurring over time.
For those who enjoy working on paper crafts, hardening paper with clear glue can allow for a sturdy base that can be used for a variety of projects including origami, paper maché, or even creating paper jewelry pieces.
Clear glue can be an effective option for hardening paper, as long as it is applied carefully and in thin, even layers. Crafters should take care to consider the specific needs of their project, and choose the best type of glue for their particular task.
Note: When cleaning tools after using clear glue, warm water and soap can be used. For more stubborn residue, a mixture of hot water and vinegar may do the trick.
If you want to glue motorcycle grips, please check our guide, or if you are looking for a way how to open Citadel Glue bottle, check our tutorial here.
Paper Glue
Paper glue, also known as scrapbooking glue, is a type of adhesive that is often used by crafters to harden paper. It is a strong and flexible glue that dries clear, making it perfect for use in paper crafts. Here are some of the key features and benefits of using paper glue for hardening paper:
| Feature/Benefit | Description |
|---|---|
| Acid-free | Prevents discoloration, yellowing, and deterioration of paper over time |
| Non-toxic | Safe for use in home and school projects |
| Water-based | Easy to clean up with soap and water |
| Dries clear | Does not leave behind a visible residue or color |
| Flexible | Bends and molds to the shape of the paper without cracking or breaking |
| Strong | Creates a solid bond between layers of paper, enhancing durability and longevity |
One of the best things about paper glue is that it is designed specifically for use with paper. This means that it is perfectly suited for hardening paper by creating a strong and durable bond between layers. Additionally, paper glue is easy to find in craft stores and online retailers, making it a convenient choice for most DIY projects.
When using paper glue to harden paper, it is important to follow the manufacturer’s instructions carefully. Generally, a thin layer of glue is applied to one side of the paper, which is then layered with another piece of paper. The process can be repeated multiple times, depending on the desired level of hardness.
Paper glue is an excellent choice for those who are looking for a versatile and effective adhesive for hardening paper. With its acid-free, non-toxic, and water-based formula, it is a safe and reliable option that provides great results for a variety of projects.
Double-Sided Tape
One of the lesser-known methods for hardening paper with glue is by using double-sided tape. This technique is popular for those who prefer a mess-free and easy approach to things. Double-sided tape is relatively inexpensive and can be found in most craft stores or office supply stores.
Steps for using Double-Sided Tape:
- Step 1: Cut the paper to the desired shape and size
- Step 2: Apply double-sided tape to one side of the paper
- Step 3: Carefully place the other side of the paper on top of the tape
- Step 4: Smooth out any air bubbles or creases with a bone folder or credit card
Advantages of using Double-Sided Tape:
- It is fast and easy to use, saving time and effort
- Most double-sided tapes have a strong adhesive, ensuring the paper stays well-secured
- It is mess-free and does not require any additional tools or supplies
Disadvantages of using Double-Sided Tape:
- It may not be suitable for large or heavy pieces of paper
- The tape may not hold up well in humid or wet environments
- It may not provide the same level of durability as other hardening techniques
While using double-sided tape may not be the most popular method for hardening paper with glue, it can be a useful technique for various projects. This approach is best suited for small and lightweight pieces of paper where durability is not a significant concern. It is also an excellent option for those who prefer a less messy and more straightforward approach to their crafts.
Techniques for Hardening Paper with Glue
When it comes to hardening paper with glue, there are several techniques that you can use to achieve the desired result. By applying glue to the paper in different ways, you can create different textures and levels of hardness. Here are some of the most popular techniques that you can try out to achieve the results you want.
Paper Mache
One popular technique for hardening paper with glue is paper mache. This technique uses a mixture of glue and water to create a paste, which is then applied to strips of paper and formed into a variety of shapes. Paper mache is often used in crafting, such as making piñatas or decorative figurines.
To create a paper mache mixture, you will need to mix glue with water in a bowl. The ratio of glue to water will depend on the thickness of the glue and the desired consistency of the paste. Generally, a ratio of two parts glue to one part water is a good starting point. Mix the glue and water together until they are thoroughly combined, and then dip strips of paper into the mixture.
Tips:
- Use a strong glue, such as white glue.
- Cut the paper into long strips with a width of about one inch.
- Choose thin, lightweight paper to make it easier to mold.
- Apply several layers of paper mache to create a strong shell.
- Allow each layer to dry completely before adding the next one.
To create a form using paper mache, you can use a variety of materials to serve as the base. Balloons, foam balls, and wire frames are all popular options. Simply apply the paper mache mixture to the base, smoothing out the strips of paper with your fingers as you work to create a uniform layer. Make sure to overlap the edges of each strip to create a strong bond between layers.
Once you have added several layers of paper mache, allow the structure to dry completely. This can take several hours or overnight, depending on the thickness of the layers and the humidity of your workspace. Once the structure is dry, you can add additional layers or decorations using paint or other embellishments.
Summary:
Paper mache is a fun and creative way to harden paper using glue. By mixing glue and water to create a paste, you can apply strips of paper to a base material to create a sturdy structure for crafting. Choosing the right type of glue and paper, applying multiple layers, and allowing ample drying time are key to the success of this technique.
Layering
Layering is a technique used to harden paper with glue that involves creating thin, overlapping layers of paper and glue. This creates a stronger and more durable surface for the paper.
To use this technique, start by tearing the paper into small pieces or cutting it into strips. Then, mix the glue with water in a bowl. The amount of water to add depends on the type of glue you are using, so be sure to check the manufacturer’s instructions.
Next, dip a brush into the glue mixture and brush it onto the surface of the item you want to harden. You can also dip the paper pieces directly into the glue mixture. Once the surface is covered in glue, place a layer of paper on top and smooth it out with your fingers or a brush.
Then, apply another layer of glue on top of the paper and repeat the process until the entire surface is covered. Be careful not to overlap the paper pieces too much, as this can create bumps and uneven surfaces.
After each layer of paper and glue, allow it to dry completely before adding another layer. This can take several hours or even overnight depending on the thickness of the paper and the type of glue used.
Finally, once the desired number of layers has been applied and the surface has dried completely, a sealant can be added for additional protection and durability.
Using the layering technique can result in a sturdy and durable paper surface that can resist bending, tearing, and water damage. It is particularly useful for creating decorative objects, such as papier-mâché sculptures, as well as repairing and preserving paper-based items.
| Pros | Cons/th> |
|---|---|
| Results in a strong and durable surface | May take several layers to achieve desired hardness |
| Creates a smooth and even surface | Can be time-consuming |
| Great for creating decorative objects | Requires patience and attention to detail |
Dipping
Dipping is another technique to harden paper with glue. In this method, the paper is dipped into a mixture of glue and water. It’s essential to use the correct ratio of glue and water to ensure that the paper hardens correctly. The ideal ratio is one part glue and one part water. However, the mixture may vary depending on the thickness and texture of the paper.
To get started with this method, you’ll need a container filled with the glue mixture. Make sure the container is large enough to fit the paper entirely. Once the mixture is ready, hold the paper from one corner and dip it into the glue solution. Take care not to submerge the paper completely as it may result in over-saturation of the paper.
After dipping the paper, gently remove any excess glue mixture by sliding your fingers over the paper from top to bottom. You can also use a squeegee or a spatula to remove excess glue. Take care not to tear the paper while removing the excess glue.
Once you’ve removed the excess glue, place the paper on a flat surface and let it dry. It’s essential to ensure that the paper is evenly placed on the surface to avoid any wrinkles or folds. The drying process may take a while depending on the thickness of the paper. It’s vital to be patient and let the paper dry thoroughly before handling it.
Dipping is an effective method for hardening paper as it allows the glue mixture to penetrate the fiber of the paper evenly. This technique is popularly used for creating paper crafts and decorations. However, it’s crucial to experiment with different types of paper and glue mixtures to see what works best for your project.
Brushing
Brushing is a popular technique for hardening paper with glue. It is easy to do and requires only a few materials. To use this technique, you will need a paintbrush, white glue, and a bowl or dish to hold the glue.
The Steps for Brushing
Here are the steps to follow when using the brushing technique to harden paper with glue:
| Step | Description |
|---|---|
| Step 1: | Cut the paper to the desired shape and size. |
| Step 2: | Add some white glue to the bowl or dish. |
| Step 3: | Dip the paintbrush into the glue and start brushing it onto the paper. |
| Step 4: | Make sure to apply the glue evenly over the entire surface of the paper. |
| Step 5: | Allow the glue to dry completely before handling the paper. This can take several hours, depending on the thickness of the glue and the temperature and humidity of the environment. |
Tips for Brushing
To ensure the best results when using the brushing technique to harden paper with glue, consider the following tips:
- Use a paintbrush with soft bristles to prevent damage to the paper.
- Apply a thin layer of glue to avoid wrinkles and bubbles.
- Work in a well-ventilated area to avoid inhaling fumes from the glue.
- Be patient and let the glue dry completely before handling the paper.
By following these steps and tips for brushing paper with glue, you can create sturdy and durable objects that will stand the test of time. Experiment with different types of glue and paper and see where your creativity takes you!
Tips and Tricks for Hardening Paper with Glue
As with any craft or project, hardening paper with glue requires a bit of strategy and know-how beyond the basics. To ensure your project is a success, here are some helpful tips and tricks to keep in mind. From selecting the right type of glue to properly preparing your work area, these pointers will make the process of hardening paper with glue more efficient and effective. Keep reading to discover how to take your paper hardening skills to the next level.
Use the Right Type of Glue
Choosing the right type of glue is essential for successful paper hardening. Not all types of glue are suitable for all types of paper or techniques. To make things easier, we have briefly outlined the different types of glue and their characteristics in the table below:
| Type of Glue | Characteristics | Best for |
|---|---|---|
| White Glue | Dries clear, water-soluble | General paper hardening, paper mache |
| Mod Podge | Dries clear, water-resistant, glossy or matte finish options | Crafting projects, decoupage |
| Clear Glue | Dries clear, stronger hold than white glue | Thin or delicate papers |
| Paper Glue | Specifically designed for paper, dries clear | Bonding paper to paper, scrapbooking |
| Double-Sided Tape | Peels off backing to reveal strips of adhesive | Quick fix or temporary hold of paper objects |
Using the wrong type of glue can result in the paper not hardening properly or the glue damaging the paper. It is important to carefully consider which glue to use for each project. For example, if you are working with thin or delicate papers, clear glue may be a better option than white glue as it provides a stronger hold. Similarly, if you are working on a crafting project that requires a glossy or matte finish, Mod Podge may be the best choice.
By using the right type of glue, you can ensure that your paper hardening project is successful and achieves the desired results.
Choose the Correct Technique for the Project
When hardening paper with glue, it’s important to choose the correct technique for your project to ensure the best results. Different techniques work better for different types of paper and project goals. Below is a table highlighting the best techniques for certain project types:
| Project Type | Best Technique |
|---|---|
| Crafting ornaments or small objects | Paper mache technique is ideal for crafting small objects like ornaments. This technique involves creating small paper strips or balls using glue and paper, and layering them over a mold to create a sturdy object. |
| Creating a paper sculpture | Layering technique is ideal for creating a paper sculpture. This technique involves layering paper strips over a wireframe or sculpting tools, adding glue between each layer to create a strong, durable structure. |
| Strengthening paper for a bookbinding project | Dipping technique is perfect for this project type as it hardens the paper and stiffens it, creating a durable binding. To use this technique, simply dip the paper in glue or a glue mixture, and then lay it flat to dry. |
| Creating a paper collage | Brushing technique is ideal for creating a paper collage as it allows for precise control of the glue application. Simply brush a thin layer of glue onto the paper and then adhere it to the collage surface. |
By choosing the correct technique for your project, you can ensure that your hardened paper is durable and long-lasting. Be sure to also consider the type of glue you are using, the paper’s thickness and texture, and any other tips and tricks that make the hardening process easier and more effective.
Consider the Paper’s Thickness and Texture
When hardening paper with glue, it is important to consider the thickness and texture of the paper. Thicker paper requires a stronger adhesive to properly harden, while thinner paper may become too brittle or warp when too much adhesive is used.
The texture of the paper can also impact how it reacts to the hardening process. Smoother paper will generally harden more evenly, while paper with a rougher texture may require extra layers or a different technique altogether.
Another factor to consider is whether the paper is porous or non-porous. Porous paper will absorb more adhesive, requiring more layers to achieve the desired level of hardness, while non-porous paper may require less adhesive overall.
When selecting a glue for the project, be sure to read the label and consider the recommended usage. Some glues may work better with certain types of paper, depending on their chemical composition or drying time. Experimenting with a small sample can help determine whether the chosen glue is well-suited for the task.
Ultimately, taking the time to consider the paper’s thickness and texture will go a long way in achieving a successful result when hardening paper with glue. By understanding how the paper will react to the adhesive and adjusting the technique accordingly, the final product will be strong, durable, and ready for use in a variety of applications.
Be Patient
When hardening paper with glue, it’s important to understand that the process takes time. While it may be tempting to rush the project and move on to the next step, patience is key in achieving a successful outcome. Here are some things to keep in mind to help you stay patient during the hardening process:
- Give the glue time to dry: Depending on the type of glue you’re using and the thickness of the paper, it may take several hours or even overnight for the glue to fully dry and harden the paper. Avoid touching or moving the paper until it is completely dry to prevent smudging or tearing.
- Avoid rushing the layers: Adding too many layers of glue onto the paper at once can cause it to warp or become too stiff. Instead, apply a thin layer of glue and let it dry completely before adding another layer.
- Patience is essential for intricate projects: For projects that require a lot of detail work, such as paper mache sculptures or models, it may take several days to complete the project. Resist the urge to rush through the steps to prevent mistakes and ensure a high-quality end result.
- Take breaks: If you find yourself getting frustrated or anxious during the hardening process, take a break and come back to the project later. This can help clear your mind and reduce the risk of making mistakes due to impatience.
By staying patient and taking the time to let the glue thoroughly dry between layers, you’ll be able to achieve a durable and long-lasting hardened paper project. Remember, good things come to those who wait!
Use a Sealant
Using a sealant is a crucial step in the process of hardening paper with glue. A sealant helps protect the paper from moisture and other external factors that could damage it over time. It also gives the paper a glossy and smooth finish, enhancing its appearance. Here are some tips for using a sealant effectively:
- Choose the right sealant: There are different types of sealants available, including spray-on sealants, brush-on sealants, and dip sealants. Choose the one that is most suitable for your project and the type of glue you are using.
- Apply in thin layers: Apply the sealant in thin layers to avoid creating bumps or drips. Allow each layer to dry completely before applying another layer. This will ensure that the sealant dries evenly and provides a smooth finish.
- Avoid over-brushing: Over-brushing the sealant can cause the paper to become soggy and weak. Avoid this by using a soft-bristled brush and applying the sealant gently and lightly.
- Use a well-ventilated area: Sealants can emit fumes that can be harmful if inhaled. Always use sealants in a well-ventilated area to ensure that you are not exposed to harmful chemicals.
- Protect your work surface: When applying the sealant, make sure to protect your work surface with a drop cloth or newspaper. This will prevent the sealant from getting on your work area and damaging it.
- Allow to dry completely: After applying the sealant, allow it to dry completely before handling the paper. This will ensure that the sealant has fully cured and will not smear or rub off.
By following these tips, you can effectively use a sealant to protect and enhance your hardened paper creations.
Experiment with Different Techniques
One of the keys to successfully hardening paper with glue is to experiment with different techniques. Each project will have its own unique challenges and requirements, which means that different methods may work better for different projects. Here are a few techniques to consider trying:
- Papier-mâché: This is a popular technique that involves soaking strips of paper in glue and water, layering them over a mold or form, and then allowing them to dry. This method is great for creating 3D objects, such as masks or sculptures.
- Layering: Another popular technique involves applying glue to the surface of the paper and then layering additional pieces of paper on top. This can be repeated multiple times until the desired level of hardness is achieved.
- Dipping: This technique involves dipping the paper into a solution of glue and water. This is a quick and effective technique, but it is important to make sure that the paper is coated evenly and any excess glue is removed.
- Brushing: With this technique, the glue is brushed directly onto the surface of the paper. This is a good option for projects that require precision or for hardening smaller pieces of paper.
It is important to remember that different techniques may work better for different types of paper or projects, so it is worth testing out a few different methods to see what works best. Don’t be afraid to get creative and try new things!
Avoid Overlapping Layers
When hardening paper with glue, one common mistake is overlapping layers. While it may seem like adding more layers can improve the durability of the paper, overlapping layers can actually weaken the structure. Overlapping can cause trapped air bubbles, preventing the glue from properly adhering to the paper. As a result, the paper can become bumpy, uneven, and more prone to tearing.
To avoid overlapping layers, it’s important to plan out each layer and ensure that it covers the entire surface without any overlaps. A helpful way to do this is by creating a template or stencil to use as a guide. By using a template, you can ensure that each layer is applied in the correct position and that each area is covered equally.
It is also important to apply the glue evenly and thinly. Using too much glue can also cause overlapping layers or create bumps in the paper. Make sure to use a brush or sponge to apply the glue in a smooth, even layer.
It’s important to wait for each layer to dry completely before adding another layer. Rushing the process and adding layers before the previous layer has dried can also cause overlapping layers and weakening of the paper structure.
Avoiding overlapping layers is crucial for creating a sturdy and durable paper project. Take the time to plan out each layer, apply the glue evenly and thinly, and wait for each layer to dry fully before adding the next one.
Below is a table summarizing the key points for avoiding overlapping layers:
| Key Point | Description |
| Plan out each layer | Create a template or stencil to use as a guide for each layer and ensure that each area is covered without overlaps. |
| Apply glue evenly and thinly | Using too much glue can cause bumps and overlapping layers. Use a brush or sponge to apply the glue in a smooth, even layer. |
| Wait for each layer to dry before adding the next one | Rushing the process can cause overlapping layers and weaken the paper structure. Wait for each layer to dry completely before adding another layer. |
Practice on Scrap Paper
One helpful tip for those looking to harden paper with glue is to practice on scrap paper before starting on a project. This allows for experimentation with different glues, techniques, and textures without the pressure of ruining the final project.
Here are some benefits of practicing on scrap paper:
- Reduces Waste: By using scrap paper, you can avoid wasting good paper or materials that you could have used for a future project.
- Helps You Improve: Practice makes perfect! The more you practice, the more comfortable you become with the process, leading to better results in your final project.
- Allows You to Test Different Techniques: The scrap paper serves as a testing ground. You can try out different techniques such as dipping, brushing, or layering, and see how each one affects the paper before implementing them in your final project.
- Helps You Choose the Right Glue: Different glues may work better on different types of paper. By testing various glues on scrap paper, you can determine which one works best for the type of paper you are working with and the technique you want to use.
By taking the time to practice on scrap paper, you can avoid costly mistakes and ensure that your final project turns out the way you envision it. Remember to take note of what works and what doesn’t, and use that knowledge to inform your technique and glue choices in future projects.
Clean Tools and Work Area Frequently
Keeping your tools and work area clean is crucial when hardening paper with glue. This not only ensures quality results but also extends the life of your tools. You wouldn’t want to find your craft knife or paintbrush ruined because it wasn’t cleaned properly after using glue. Below is a table of cleaning tips to keep in mind:
| Tool/Item | Cleaning Method | Frequency |
|---|---|---|
| Paintbrushes | Wash with warm soapy water and rinse thoroughly. Use a brush cleaner for stubborn glue residue. | After every use |
| Craft knife/Scalpel | Wipe blade with a damp cloth and dry thoroughly. Disinfect with rubbing alcohol or bleach solution. | After every use or as needed |
| Work surface | Wipe with a damp cloth to remove glue residue. Use a scraper or sponge for tough spots. | After every use or as needed |
| Glue container/ bottle | Wipe with a damp cloth and dry thoroughly. Store with the lid tightly closed to avoid clumping or drying out. | After every use or as needed |
Not only do these cleaning habits help with the longevity of your tools and work surface, but they also ensure that you will not mix different types of glue residue, which could lead to an undesired outcome. By keeping your tools and work area clean, you can guarantee that your hardening paper with glue projects will always turn out beautifully.
Conclusion
In conclusion, hardening paper with glue is a fantastic way to improve its durability, extend its longevity, preserve neglected objects, and even expand crafting possibilities. With the right type of glue and technique, you can create unique works of art or simply give new life to everyday objects.
Remember to choose the correct type of glue, consider paper thickness and texture, and be patient in the process. Experiment with different techniques and practice on scrap paper before diving into a big project. It is also important to clean tools and work area frequently to prevent glue buildup and maintain a clean workspace.
By following these tips and tricks, you can successfully harden paper with glue and create a variety of impressive projects. Whether you’re a seasoned crafter or just starting, the possibilities are endless. So go ahead, get creative, and enjoy the process of hardening paper with glue!
Frequently Asked Questions
What type of paper can be hardened with glue?
Most types of paper can be hardened with glue, including newspaper, printer paper, tissue paper, and even cardboard.
Will hardening paper with glue change its color?
It depends on the type of glue used. Some glues, like white glue, may dry clear and not change the paper’s color. Other glues, like Mod Podge, may leave a visible coating on the paper.
How long does it take for glued paper to dry and harden?
This varies depending on the type and amount of glue used, as well as the drying conditions. Generally, it can take anywhere from a few hours to overnight for the paper to fully dry and harden.
Can hardening paper with glue make it waterproof?
While the paper may become more durable and water-resistant, it is unlikely to become completely waterproof. Sealing the paper with a waterproof sealant after hardening with glue may increase its water resistance.
What can I make with hardened paper?
Hardened paper can be used for a variety of crafting projects, such as creating sculptures, masks, or even jewelry. It can also be used to preserve and strengthen old documents or artwork.
Can I harden paper with glue without it wrinkling?
While some wrinkling may occur during the hardening process, choosing the right technique and using a minimal amount of glue can help minimize this issue.
Is it safe to eat or drink from paper that has been hardened with glue?
No. Hardening paper with glue is not food-safe and may contain chemicals that are unsafe for consumption.
What sealant should I use after hardening paper with glue?
There are various types of sealants that can be used, such as spray sealant, acrylic sealant, or even clear nail polish. Choose a sealant that will not react with the glue used and provides the desired level of protection or finish.
Can I harden paper with homemade glue?
Yes, homemade glue can be used to harden paper. However, the outcome may vary depending on the type of glue used and its adhesive properties.
Can I use double-sided tape instead of glue to harden paper?
Yes, double-sided tape can be used to harden paper. However, it may not provide the same level of durability and longevity as glue.