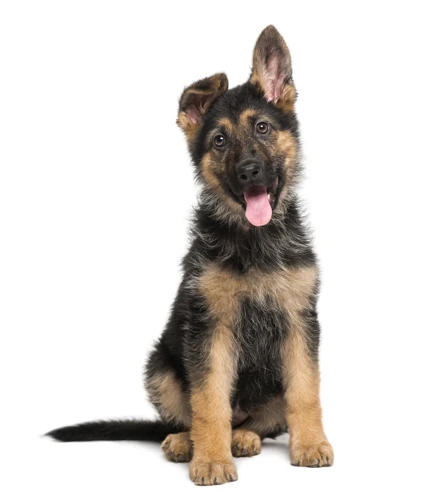
You love your German Shepherd and want to make sure they look their best, but their ears just won’t stand up. It can be perplexing and frustrating, but don’t worry, we’ve got you covered. In this comprehensive guide, we will explain how to glue German Shepherd ears up step-by-step, so your furry friend can show off their signature perky ears with pride. From cleaning and shaving the ear to choosing the right glue and taping technique, we’ll cover everything you need to know to achieve the perfect ear posture. So, let’s jump right into it!
Why Glue German Shepherd Ears Up?
As a pet owner, you may wonder why someone would need to glue their German Shepherd’s ears up. While it may seem like an unusual practice, it is actually a common technique used to achieve a specific look and prevent ear infections in certain breeds. Many dog owners find this process intimidating, which is why we created this step-by-step guide to help you achieve the desired look you’re after. But before we dive in, let’s take a closer look at why some owners choose to glue their German Shepherd’s ears up. There’s no link related to this topic in the text, but if you want to learn how to install a lace closure without glue, click here.
Is It Safe?
When it comes to gluing German Shepherd ears up, the question of safety naturally arises. Many people worry that this process will cause harm to their furry friend, and it’s important to take the necessary precautions to ensure it’s done in a safe and healthy way.
The truth is that ear glueing can be safe if done properly and with the right materials. Using the wrong kind of glue or failing to properly care for the ears during the healing process can lead to infection or other health issues.
Here are some important safety tips to keep in mind when glueing your German Shepherd’s ears:
| Safety Tip | Explanation |
|---|---|
| Use surgical glue | It’s important to use a glue that’s safe for use on skin and won’t cause irritation or other adverse reactions. Surgical glue is a good option because it’s specifically designed for use on the body. |
| Don’t use household glue | Household glue, such as superglue or Elmer’s glue, is not safe for use on skin and can cause irritation or even chemical burns. |
| Clean the ears thoroughly | Before applying any glue, make sure to clean the ear thoroughly to reduce the risk of infection. |
| Monitor the ears closely | After the ears are glued, it’s important to monitor them closely for signs of infection or other health issues. If you notice any redness, swelling, or discharge, contact your veterinarian immediately. |
As long as you use the right kind of glue, properly care for your German Shepherd’s ears, and closely monitor them during the healing process, gluing their ears up can be done safely and effectively. With that being said, if you’re not comfortable doing this procedure on your own, it’s always best to seek the help of a professional.
When to Start Glueing Your German Shepherd’s Ears
When to start glueing your German Shepherd’s ears:
Glueing a German Shepherd’s ears can be done at any age, but the best time to start is when the puppy is around 10-12 weeks old. At this stage, the cartilage in the ears is still soft and pliable, making it easier to shape into an erect position.
It’s important to remember that every dog is different, and some dogs’ ears will naturally stand up without any assistance, while others may require glueing. So, it’s recommended to wait until 10-12 weeks to make a decision regarding glueing the ears.
If you observe the puppy’s ears constantly drooping, then you can start gluing them up. However, if the ears are still floppy after 4-5 months, you might want to consult a veterinarian to determine if gluing is necessary.
It’s crucial to keep in mind that gluing a dog’s ears at an inappropriate time may lead to health issues, so it’s best to wait until the most appropriate time to start glueing the ears up.
What You’ll Need
When it comes to glueing German Shepherd ears, having the right supplies can make a significant difference in the process and outcome. Before starting, it’s important to understand what you’ll need to avoid any unnecessary complications. In this section, we’ll cover the essential items required for glueing a German Shepherd’s ears and highlight some of the options available for certain supplies. From a suitable adhesive to necessary tools and supplies, we’ll provide a comprehensive guide to ensure you have everything you need to perform the task effectively.
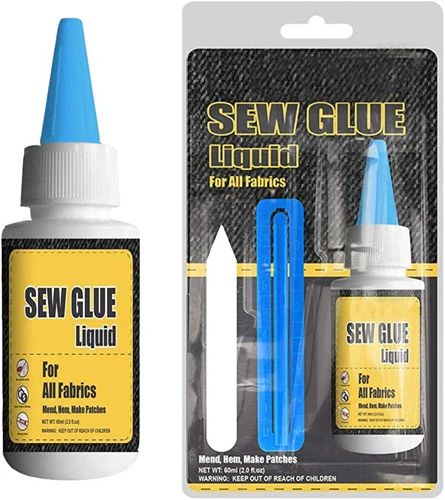
Glue Options
When it comes to gluing German Shepherd ears up, it’s essential to use the right type of glue. Here are the top glue options that are commonly used:
| Type of Glue | Pros | Cons |
|---|---|---|
| Surgical Adhesive | Strong and safe for use on skin | Can be expensive and may require a prescription from a veterinarian |
| Gorilla Glue | Provides a strong hold | Can be difficult to remove and may cause skin irritation if not used carefully |
| Epoxy | Dries quickly and provides a strong hold | Can be toxic if swallowed and may require extra care when applying |
| Protein-Based Glue | Non-toxic and safe for use on skin | May not provide as strong of a hold as other options |
Surgical adhesive is a popular option because it’s safe for use on skin. However, it can be expensive and may require a prescription from a veterinarian. Gorilla Glue is also commonly used because of its strong hold, but it can be difficult to remove and may cause skin irritation if not used carefully. Epoxy is another strong option but can be toxic if swallowed and requires extra care when applying. Finally, protein-based glue is safe for use on skin and non-toxic, but it may not provide as strong of a hold as other options.
It’s essential to choose the right glue for your German Shepherd’s ears and consulting with a veterinarian can also be helpful.
Other Supplies
Other supplies needed for gluing German Shepherd ears up include:
- Scissors: To cut the tape to the appropriate size for your dog’s ears.
- Cotton balls: To clean your dog’s ears before applying the glue and tape.
- Rubbing alcohol: To disinfect and dry your dog’s ears before applying glue.
- Q-tips: To apply glue to the ear and to help clean excess glue.
- Nonstick gauze: To protect the inside of your dog’s ear from the glue and tape.
- Tape: To hold the ear in place, you will need special adhesive tape that is safe for animals and won’t stick to their fur. Do not use duct or masking tape.
- In case your dog has sensitive skin, consider using a barrier cream to protect the skin around the ear from the glue and tape.
If you are unsure about any of these supplies, it is recommended to consult with a veterinarian or a professional dog groomer. Also, make sure to prepare these supplies in a clean and organized area before starting the gluing process.
Step-by-Step Guide to Glueing German Shepherd Ears Up
If you’re considering gluing your German Shepherd’s ears up to achieve the iconic pointy look, it’s important to approach the process with caution and detailed attention. With the right supplies and knowledge of each step, you can successfully glue your dog’s ears up at home. Here’s our comprehensive step-by-step guide to safely and effectively glueing your German Shepherd’s ears up, so you can achieve the breed’s characteristic look.
Step 1: Clean the Ear
Cleaning the ear is an essential step before applying glue. To ensure proper adhesion, the ear must be free of dirt, wax, and any other debris. Start by using cotton balls or gauze, moistened with warm water, to cleanse the ear from the base to the tip, making sure to remove any dirt or wax present. It’s important to be gentle to avoid irritating the sensitive tissue inside the ear and causing discomfort to your German Shepherd. Once the ear is clean, use a dry cotton ball to pat it gently and remove any excess moisture.
Remember: Unclean ears can lead to an infection, which can cause pain to your pet. It’s crucial to clean your dog’s ear properly before starting ear glueing.
To avoid any kind of contamination from bacteria or fungus, use a veterinarian-recommended ear cleaner. Needless to say, make sure to avoid using alcohol, hydrogen peroxide or any other solutions, as they may cause irritation and burn to your dog’s ears.
Internal Link: If you want to know how to stick fondant to fondant without glue, check out our article.
Step 2: Shave the Ear
Step 2: Shave the Ear
Before applying glue, you need to shave your German Shepherd’s ear. This step is important to ensure that the glue sticks well to the ear and holds it in place. To do this, you will need a pair of clippers and a steady hand.
You can use either electric clippers or handheld clippers, depending on your preference. Electric clippers may be quicker and more efficient, but handheld clippers give you more control and precision. Make sure to use a clean blade to prevent infections.
Begin by gently holding the ear away from the head and clipping the hair on the ear flap, starting from the base of the ear and working your way up. Use a low setting and be careful not to nick the skin or clip too closely to the edge of the ear. Then, shave the hair on the inside of the ear, following the natural curve of the ear canal.
Make sure to shave both ears even if you plan to only glue up one ear. This is because the weight distribution of the ears will be unequal if one ear is glued up and the other is not, causing the glue to loosen or wear off over time.
After shaving, wipe your German Shepherd’s ear with a clean cotton ball or cloth to remove any loose hairs or debris. This prepares the ear for the next step in the glueing process.
Table 1: Supplies for Shaving the Ear
| Supplies | Description |
|---|---|
| Clippers | Electric or handheld |
| Clean blade | To prevent infections |
| Cotton ball or cloth | To wipe away loose hairs or debris |
Glue books are a fun and creative way to use different types of adhesives. But when it comes to glueing your German Shepherd’s ears up, it’s important to use the right type of glue.
Step 3: Apply the Glue
After completely cleaning and shaving the ear, it’s time to apply the glue. Make sure the glue is at room temperature before use. Cold glue may cause discomfort, and hot glue can burn your dog’s ear. You will need to use a dog ear glue specifically designed for this purpose. Do not use super glue or any other type of glue not intended for use on dogs.
Here are the steps to apply the glue:
| Step | Action |
|---|---|
| 1 | Apply a thin layer of glue to the inside of the ear from the base to the tip. |
| 2 | Position the ear in the correct position and hold it there for a few seconds to make sure the glue sets. Be sure to avoid pressing on the ear flap too hard or too often as this will cause irritation and discomfort for your dog. |
| 3 | Ensure that the ear is not folded or creased and that the glue is not clumping up in any one area. Excess glue can cause infection and affect the ear’s weight-bearing abilities. |
| 4 | Repeat the process for the other ear. |
Remember to be gentle when applying the glue, and avoid getting it on your dog’s fur as it can stick and cause discomfort. In case of any mishaps, have some tissues or cotton swabs ready to clean the excess glue.
If you are having difficulties finding the right glue for your German Shepherd’s ears, consult your veterinarian for recommendations. Additionally, check out our article on what glue to use in snow globes for more information on different types of glue and their specific applications.
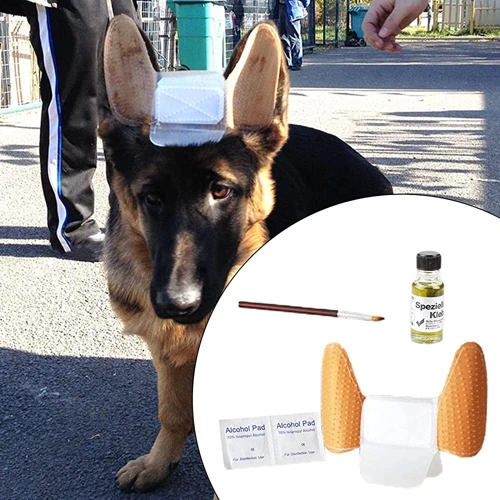
Step 4: Tape the Ear
Once you have applied the glue to your German Shepherd’s ear, it’s time to tape the ear into position. Use a high-quality adhesive tape that will hold the ear in place without causing skin irritation or damage. Cut a length of tape that is long enough to wrap around the ear at least once and then cut it in half lengthwise so that you have two thinner strips.
Starting at the base of the ear, wrap one of the tape strips around the ear, gently pulling the ear up into position as you go. Make sure the tape is snug but not too tight, as you don’t want to cut off circulation to the ear. Continue wrapping the tape strip around the ear until you reach the top.
Now take the second tape strip and wrap it around the base of the ear, where it meets the head. This will help keep the ear in the upright position and prevent it from flopping over. Make sure the tape is secure and doesn’t slip down the ear.
If your German Shepherd has floppy ears, you may need to use a foam ear brace to help support the ear during the healing process. In this case, insert the brace into the ear before applying the tape.
And that’s it! Your German Shepherd’s ear is now glued and taped into the upright position. Remember to keep an eye on the ear and reapply the tape and glue as needed until the ear cartilage sets. If you notice any signs of infection or discomfort, take your dog to the vet immediately.
Internal link: If you’re interested in learning how to seal an envelope without glue, check out our article on this topic.
Step 5: Monitor the Ear
After completing the previous steps, it’s important to monitor the ear to ensure that the glue is not causing any harm. Check the ear every day to make sure the glue is still holding and the ear is not developing any redness, irritation, or infection.
Here are some signs to watch out for:
- Redness or swelling around the ear
- Bleeding or discharge from the ear
- Foul odor coming from the ear
- Ear flopping down or leaning to one side
- The dog scratching or rubbing at the ear excessively
If you notice any of these symptoms, it’s important to seek veterinary attention immediately. In some cases, the glue may need to be removed, and antibiotics or other treatments may be necessary to prevent further damage or infection.
Remember that each dog is different, and while some may respond well to ear gluing, it may not be suitable for all dogs. It’s important to give your dog plenty of attention and care throughout the process to ensure their health and well-being.
Tips for Successful Ear Glueing
As with any pet care task, gluing your German Shepherd’s ears up requires patience, practice, and proper technique. In addition to the steps outlined in the previous section, there are tips and tricks that can help ensure a successful outcome. By heeding the following advice, you can help your dog achieve the desired upright ear position and avoid unnecessary discomfort or setbacks. Here are some tips for successful ear gluing. Remember, practice makes perfect and you may need to try a few different methods before you find what works best for both you and your furry friend.
Choose the Right Time to Glue
Choosing the Right Time to Glue your German Shepherd’s Ears is pivotal for the success and safety of the process. Not only can improper timing be ineffective, but it can also result in serious health issues for your dog. It is generally recommended to start gluing your German Shepherd’s ears between the ages of 7 and 14 weeks, as their ears are still malleable, but not too fragile.
Glueing your dog’s ears when they are too young can lead to cartilage damage and permanent disfiguration. On the other hand, waiting too long can result in the cartilage hardening, making it much harder to mold the ear and keep it in an upright position. Therefore, it’s important to find the right window of time to start gluing your dog’s ears and monitor their progress closely.
It’s also important to consider your dog’s health and activity level before starting the gluing process. If your dog is sick, injured, or very active, it may be better to wait until they are feeling better or have calmed down before attempting to glue their ears. The best time to glue your dog’s ears is when they are calm and relaxed, as this will help ensure that the glue sets properly and keeps their ears in place.
In addition to timing, it’s important to have all the necessary supplies on hand before starting the gluing process. This includes the glue, tape, and other materials needed to properly clean and prepare the ear. Make sure that you have everything you need before starting to help ensure that the process goes smoothly and to reduce the risk of any complications.
Choosing the right time to glue your German Shepherd’s ears is crucial for their health and safety, as well as the success of the process. By following the recommended timeline and making sure that your dog is in good health and relaxed, you can help ensure that their ears stay upright and healthy. For more creative and fun projects, be sure to check out our tutorial on making a paper kunai without tape or glue.
Watch for Signs of Infection
When you decide to glue up your German Shepherd’s ears, it is important to keep an eye on any potential signs of infection. Infection can occur if the ears are not properly cleaned or if the glue/tape is too tight. Some common signs of infection include redness, discharge, swelling, foul odor, and your dog continuously scratching at their ears. It is important to act quickly if you notice any of these signs.
To prevent infection, make sure to regularly clean your dog’s ears before and during the gluing process. You can use a gentle ear cleaner to remove any bacteria or debris that may be present. Additionally, ensure that the glue is not causing any discomfort or irritation for your dog.
If you do notice any signs of infection, it is important to seek veterinary care immediately. Your vet may prescribe antibiotics or recommend a different course of action to address the issue. Ignoring an infection can lead to more serious health problems for your dog.
Proper care and attention are essential to ensure that your German Shepherd’s glued ears stay healthy and intact. Paying attention to any signs of infection is just one part of the process. With the right approach, you can keep your dog’s ears standing tall and healthy.
As a reminder, if you have any doubts about the safety or effectiveness of the gluing process, it is always best to consult with your veterinarian. They can offer guidance on the best approach for your dog’s individual circumstances.
Internal link: If you’re interested in learning how to make glue from styrofoam, check out our article on how to make glue from styrofoam.
Be Patient
Glueing German Shepherd ears requires patience to be successful. It can be a long and tedious process and requires a lot of attention. First, it’s important to note that you may not see results right away. It could take weeks or even months for your dog’s ears to stand up fully. So, it’s crucial to be patient and not get discouraged if you don’t see immediate progress.
Additionally, you’ll need to be patient throughout the entire process. Applying glue and taping your dog’s ears can take a significant amount of time and effort. It’s important to do it correctly to prevent any problems, such as discomfort or even infections.
Being gentle with your dog throughout the process is also key to success. Remember that your furry friend is likely not going to understand what is happening to their ears, so they may feel uncomfortable or even scared. Try to comfort them as much as possible by talking to them in a soothing voice and giving them treats.
One way to make the process more enjoyable for both you and your dog is to turn it into a bonding experience. You can play with them, pet them, and give plenty of love and attention while you work on their ears. This will help them associate the process with positive experiences rather than discomfort.
Being patient is crucial when it comes to glueing German Shepherd ears. It takes time, effort, and attention to get it right. By being patient with the process, gentle with your furry friend, and turning it into a bonding experience, you can ensure your dog has the best and safest experience possible.
Be Gentle
To glue your German Shepherd’s ears up, you need to be very gentle with your dog throughout the process. German Shepherds are sensitive and incredibly loyal dogs, so it’s crucial to treat them with kindness, patience, and love. Remember, your dog is relying on you to take care of them and make sure they’re comfortable during this process.
One way to be gentle is to avoid tugging or pulling on your dog’s ears. When applying the glue and tape, make sure not to stretch the ear or pull it in any direction. Instead, use gentle pressure to guide the ear into the correct position. You may also want to give your dog treats or praise during the process to keep them calm and happy.
It’s also essential to use gentle, safe products on your dog. Make sure the glue you use is specifically designed for dogs and is safe for their skin. Avoid using harsh chemicals or household glues, as these can cause irritation, burns, or other issues. If you’re unsure what type of glue to use, ask your veterinarian or a professional dog breeder for recommendations.
Handling your dog with care during the ear glueing process will help build trust and strengthen your bond. You’ll also be helping to prevent long-term issues like ear infections or discomfort. So take your time, stay calm, and always be gentle with your furry friend. They’ll thank you for it with plenty of tail wags and cuddles!
Conclusion
In conclusion, gluing a German Shepherd’s ears up is a process that requires careful attention and patience. It is important to choose the right time to start glueing and to monitor the ears regularly. When done correctly, the process can assist in giving the breed their characteristic alert and regal appearance. However, it is also crucial to understand the potential risks involved and to take steps to prevent infection or injury to the dog. If you are interested in similar DIY projects involving glue, you may want to explore how to make rice starch glue. Alternatively, you can also learn more about slime-making without glue by following this tutorial on how to make fluffy slime without glue. Lastly, it is important to note that exposing glue to extreme temperatures can impact its effectiveness and stability. To learn more about what happens if glue freezes, follow this link for further information.
Frequently Asked Questions
What is the best age to start glueing German Shepherd ears?
The ideal age to begin gluing your German Shepherd’s ears is around 8-12 weeks.
Can you glue German Shepherd ears without shaving them?
It is not recommended to attempt gluing German Shepherd ears without shaving them first as the glue will not adhere properly to the fur.
How long do I need to leave the glue on my German Shepherd’s ears?
It is recommended to leave the glue on your German Shepherd’s ears for a minimum of two weeks to allow it enough time to set and harden.
What kind of glue should I use to glue my German Shepherd’s ears?
There are specially formulated ear glues available on the market that are designed specifically for gluing German Shepherd ears. Some popular options include Hirschkleber and Epi-Otic.
Can I use regular tape to tape my German Shepherd’s ears?
No, it is recommended to use specific ear tape that is designed for gluing German Shepherd ears. Some popular options include TufFlex and 3M Vetrap.
How often should I clean my German Shepherd’s ears during the gluing process?
It is recommended to clean your German Shepherd’s ears every other day during the gluing process to prevent infection and promote healing.
Is it normal for my German Shepherd’s ears to be red and inflamed during the gluing process?
Mild redness and inflammation is normal during the gluing process, but if you notice excessive swelling or discharge, it could be a sign of infection and you should consult a veterinarian.
Can I take my German Shepherd for walks during the gluing process?
Yes, you can take your German Shepherd for walks during the gluing process, but be sure to avoid activities that could damage the ears such as playing with other dogs or roughhousing.
What happens if the glue comes off before two weeks?
If the glue comes off before two weeks, you should reapply the glue and tape immediately to ensure proper healing.
How long can I leave the glue and tape on my German Shepherd’s ears?
The glue and tape should be removed after two weeks to avoid damaging the ear or causing discomfort to your German Shepherd.