Have you ever tried to create a project with Elmer’s glue, only to discover that it wasn’t quite strong enough? Whether you’re a crafter, DIY enthusiast or parent helping a child with a school project, there are times when you need your Elmer’s glue to hold up against wear and tear. Fortunately, there are ways to make your Elmer’s glue stronger. In this article, we will explore the science behind Elmer’s glue, common uses for it, and most importantly, tips and tricks on how to make your Elmer’s glue stronger. With a little bit of know-how, you can make sure that your next project stays together and lasts for a long time.
Understanding Elmer’s Glue
Elmer’s glue is a well-known adhesive that has been used in classrooms, homes, and offices for decades. This versatile and affordable glue is a popular choice for various DIY projects, arts and crafts, and household repairs. However, to make the best use of Elmer’s glue, it’s essential to understand how it works and its common applications. In this section, we’ll explore the properties of Elmer’s glue, how it works, and where it’s typically used. So, whether you’re a novice DIY enthusiast or an experienced crafter, read on to learn more about Elmer’s glue properties and characteristics. And if you want to learn how to make your homemade glue, check out our guide on how to make glue at home.
How Elmer’s Glue Works
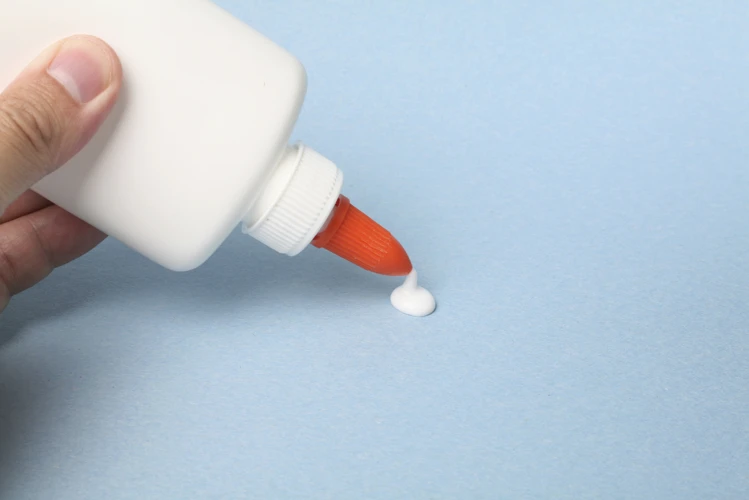
Elmer’s glue (also known as school glue or PVA glue) is a water-based adhesive that contains polyvinyl acetate, a synthetic polymer. When the glue is exposed to air, the water evaporates, causing the polymer particles to come closer and bond together, creating a strong adhesive bond. This process is known as “curing”, and it usually takes around 24 hours for the glue to fully cure.
It’s important to note that Elmer’s glue is not an instant adhesive and may take some time to dry completely. It is best used for non-porous materials and surfaces such as paper, cardboard, and some types of plastic. The glue can also be thinned down with water to make it easier to spread and make fine adjustments.
Elmer’s glue is also non-toxic, making it ideal for school projects and children’s crafts. However, it’s important to avoid ingesting or inhaling the glue as it can cause stomach discomfort and respiratory irritation.
Elmer’s glue is a versatile and useful adhesive that can be used for a variety of household, crafting, and school projects. Understanding how Elmer’s glue works can help you use it more effectively and achieve stronger bonds in your projects. To learn more about using Elmer’s glue in fun and creative ways, check out these slime recipes without glue or activator!
Common Uses for Elmer’s Glue
Elmer’s Glue is a versatile adhesive that can be used for a wide range of applications. Whether you’re working on an art project, fixing a broken item, or doing a DIY project, there’s likely a use for Elmer’s Glue. Below are some common uses for Elmer’s Glue:
| Application | How Elmer’s Glue is Used |
| Arts and Crafts | Elmer’s Glue is often used in a variety of art and craft projects, such as paper mache, collage, and painting. It’s also a popular adhesive for making slime. |
| Woodworking | Elmer’s Glue can be used to bond wood together. It’s a popular choice for furniture repair and cabinet making. |
| Household Repairs | Elmer’s Glue can be used to fix a variety of household items, such as ceramics, plastic, and paper products. |
| DIY Projects | Elmer’s Glue is a common adhesive used in DIY projects such as building models, creating decorations, and repairing household items. |
No relevant anchors were found in this section.
How to Make Elmer’s Glue Stronger
When you need to bond your craft or DIY project, Elmer’s glue is a reliable choice. However, you may want to make it stronger to ensure that it holds up over time. Luckily, there are ways to enhance the strength of Elmer’s glue beyond its basic formula. In this section, we will explore different methods and techniques for making your Elmer’s glue stronger. Whether you need it for woodworking, pool table bumpers, or slime, these tips and tricks will help you achieve the desired results. Also, if you are wondering what type of glue to use for a specific project, check out our guide on what glue to use for gold leaf.
Additives and Mix-Ins
Adding certain additives and mix-ins to your Elmer’s glue can make it stronger and more durable. One of the most popular mix-ins is borax, which can reinforce the glue and make it less likely to crack or break. To use borax, simply mix a small amount into your glue until it is fully blended. Another effective mix-in is baking soda, which can help to thicken the glue and give it a stronger hold. Try mixing a small amount of baking soda into your glue and testing it out to see if you notice a difference in its strength.
Another option is to add plaster of Paris to your Elmer’s glue. This substance can help to harden the glue and make it less prone to bending or breaking. Like the other mix-ins, you’ll want to experiment with the amount of plaster of Paris you use until you find the right balance. Remember to stir your mixture thoroughly in order to ensure that the plaster of Paris is evenly distributed throughout the glue.
If you’re working with an especially delicate or heavy project, you may want to add some super glue to your Elmer’s glue mixture. The super glue can help to add an additional layer of adhesion and make your project more stable. However, be sure to use the super glue sparingly, as it can cause the mixture to become brittle if too much is added.
Table salt is yet another mix-in you can try. This can help to increase the tackiness of the glue, making it more effective at bonding surfaces together. You may also want to experiment with adding white vinegar to your Elmer’s glue mixture, as this can help to increase its strength and flexibility.
Whatever mix-ins you choose, be sure to stir the mixture thoroughly and test it on a small piece of your project before applying it more widely. This will help you to ensure that it is effective and safe to use.
If you want to learn about more types of glue, check out our article on what glue to use on finished wood, what glue to use for pool table bumpers, how to make satisfying slime without glue or what is ca glue activator.
Reducing Water Content
When it comes to making Elmer’s glue stronger, reducing the water content in the mixture can be an effective method. A higher concentration of the glue itself within the mixture will result in a stronger bond. Here are a few ways to reduce the water content:
- Boiling Method: In this method, you’ll need to pour the amount of Elmer’s glue you need into a pan. Place the pan on your stove-top, and add a tiny amount of hot water. Continuously stir until the glue reaches the desired thickness. Make sure the mixture doesn’t boil, as this can cause the glue to curdle and lose its effectiveness. This method can be particularly useful if you want to use glue for crafts or DIY projects.
- Microwave Method: A quick and easy fix, this method involves microwaving Elmer’s glue for a few seconds. Start with a small amount of glue and microwave it for approximately 5-10 seconds. If it’s not thick enough, microwave it again for a few more seconds. Be careful not to overheat the glue, as it will result in a less effective bond.
- Salt Method: Add a small amount of table salt to the glue. Stir thoroughly, and allow the mixture to sit for a few minutes. The salt will absorb the excess water in the glue, resulting in a more concentrated mixture. After the salt has had enough time to absorb the water, strain any excess salt that did not dissolve in the glue. This method is ideal for a particularly strong bond and is useful when attaching heavier items such as laptop rubber feet.
Reducing the water content in Elmer’s glue can make a significant difference when it comes to the strength of the adhesive bond. By choosing one of the above methods and adjusting the ratio of glue to water, you can achieve a more concentrated mix that will bond more strongly. It’s important to note that some mix-ins, such as food coloring or glitter, can add excess moisture, so be mindful of what you include in the mixture.
Lace Closure Tip: If you’re using glue to install a lace closure without damaging your natural hair, reducing the water content can come in useful. A more concentrated mixture will result in a stronger bond that will last longer.
Remember that the drying time will be longer when the water content is reduced. If you’re using Elmer’s glue for carpet installation, then visit our article on how long does carpet glue take to dry.
Applying More Layers
When it comes to making Elmer’s Glue stronger, one simple technique is to apply more layers of glue. This works particularly well for craft projects, where the finished product needs to be sturdy and long-lasting. By applying several layers of glue, each layer reinforces the previous one, creating a stronger bond overall.
It’s important to note that this technique requires patience and drying time between each layer. Rushing the process may lead to a weaker bond, rather than a stronger one. To properly apply more layers of glue, follow these steps:
| Step | Description |
| Step 1 | Clean and dry the surfaces you want to glue together. Dirt, dust, and moisture can weaken the bond. |
| Step 2 | Apply a thin layer of Elmer’s Glue to one of the surfaces using a brush or applicator. |
| Step 3 | Let the first layer dry completely, which can take anywhere from 30 minutes to an hour, depending on the humidity and temperature. |
| Step 4 | Apply a second layer of Elmer’s Glue over the first layer, using the same brush or applicator. Ensure that the entire area is covered with glue. |
| Step 5 | Let the second layer dry completely. This may take several hours, so be patient. |
| Step 6 | If necessary, apply additional layers of glue following the same method until you have the desired strength. |
By applying more layers of glue, you can create a stronger bond that will endure the test of time. However, it is important to note that this technique may not work as well for larger or heavy-duty projects, where a more durable adhesive may be required. In such cases, you may want to consider alternative glues, such as those mentioned in the “Alternative Glues to Consider” section.
Tip: If you want to know how to glue laptop rubber feet, you can use this technique by applying several layers of glue to ensure a stronger bond. Be sure to clean and dry the surfaces beforehand to ensure the best results. For more information, check out our article on how to glue laptop rubber feet.
Other Tips and Tricks
When it comes to working with Elmer’s Glue, there are many tips and tricks that can help you achieve the results you desire. Some of these tips involve working directly with the glue itself, while others involve aspects such as storage and handling. By implementing these strategies, you can make your projects stronger and more successful. In this section, we will explore some of the additional tips and tricks that can help you to maximize your use of Elmer’s Glue. From selecting the right type of glue to exploring alternative options, let’s dive into the world of Elmer’s Glue! And if you’re interested in learning more about alternative methods for installing a lace closure or how long carpet glue takes to dry, be sure to check out our other articles on installing a lace closure without glue and the drying time of carpet glue.
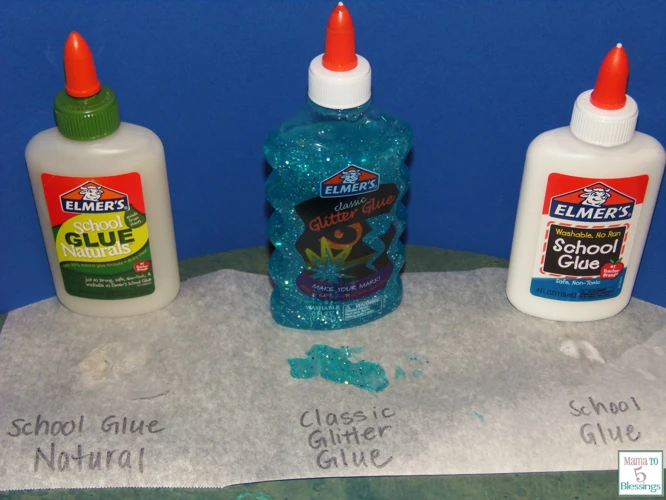
Choosing the Right Type of Elmer’s Glue
When it comes to making Elmer’s glue stronger, starting with the right type of glue can make a big difference. Here are some tips for choosing the best Elmer’s glue for your needs:
- White glue: This classic glue is perfect for paper-based projects, but it may not be the best choice for more heavy-duty applications. If you’re working with non-paper materials, opt for a different type of glue.
- Gel glue: Gel glue is a great option when you need a stronger bond, as it is thicker than white glue and can hold up under pressure. This type of glue is ideal for vertical surfaces and can be used on a variety of materials.
- Carpenter’s glue: If you’re working with wood, carpenter’s glue is a must-have. This type of glue is formulated to create a strong bond on wood surfaces and can help make your woodworking projects even more durable.
- Clear glue: Similar to white glue, clear glue is perfect for paper projects, but it has the added benefit of drying clear, which can be great for certain crafts. However, it may not be the best choice if you need a really strong bond.
- Max Bond glue: Elmer’s Max Bond glue is designed to provide an extra-strong bond for heavy-duty applications. If you need to bond materials like metal or plastic, Max Bond may be your best option.
When choosing the right type of Elmer’s glue, think about the materials you’ll be working with and the strength of bond you need. It’s also a good idea to consider the drying time and any other unique features of the glue you’re considering. With the right type of glue, you’ll be well on your way to making projects that are stronger and more durable.
Storage and Handling
Proper storage and handling of Elmer’s glue can help maintain its strength and consistency over time. Here are some tips to keep in mind:
| Tip | Description |
| 1 | Store in a cool, dry place away from sunlight and heat sources to avoid evaporating or thickening the glue. |
| 2 | Keep the cap tightly sealed to prevent air exposure that can cause the glue to dry out or become lumpy. |
| 3 | Avoid freezing the glue as it can degrade the adhesive properties. |
| 4 | Before using, mix the glue thoroughly with a stirring tool or shake the bottle to ensure an even consistency. |
| 5 | Use the glue within the expiration date to ensure the best adhesive strength. |
| 6 | Keep the glue away from children and pets and follow the instructions and warning labels on the bottle to avoid any accidents. |
By following these storage and handling tips, you can extend the life and performance of your Elmer’s glue, and help make your DIY or crafting projects more successful.
Alternative Glues to Consider
When Elmer’s glue isn’t the best option for your project, there are plenty of alternative glues to consider. Here are a few options to keep in mind:
| Glue Type | Description |
|---|---|
| PVA Glue | A popular choice for general purpose projects, PVA glue also dries clear and is water soluble. |
| Cyanoacrylate (Super Glue) | Known for its quick-drying properties, cyanoacrylate is ideal for small, precise projects like jewelry-making or model-building. |
| Epoxy Glue | A highly durable option, epoxy glue can be used on a range of surfaces, including metal, wood, and plastic. |
| Hot Glue | Perfect for heavier projects, hot glue is a quick-drying adhesive that can bond surfaces including fabric, wood, and foam. |
Keep in mind that each type of glue has its own strengths and weaknesses, so it’s important to consider the specific needs of your project before selecting an alternative to Elmer’s glue. Experiment with different types and combinations of glue until you find the one that works best for you.
Conclusion
In conclusion, making Elmer’s glue stronger may take some experimentation and trial and error, but with the right techniques and tips, it is definitely achievable. Remember to always consider the intended use of the glue before trying to make it stronger, as well as the materials being bonded together. Using additives and mix-ins can be an effective way to strengthen Elmer’s glue, as well as reducing the water content and applying multiple layers.
Additionally, it’s important to choose the right type of Elmer’s glue for the task at hand and store it properly to maintain its effectiveness. In some cases, alternative glues may be a better option depending on the specific requirements of the project.
By following these tips and tricks, you can increase the strength and durability of Elmer’s glue, making it a reliable adhesive for all your projects. So get creative, experiment, and don’t be afraid to try new techniques to make your Elmer’s glue stronger. With a little practice, you’ll be bonding materials together with confidence in no time.
Frequently Asked Questions
What is the difference between white and clear Elmer’s glue?
White Elmer’s glue dries clear and is ideal for paper, while clear Elmer’s glue retains its transparency and is best for glass, plastics, and other non-paper materials.
Can you mix two types of Elmer’s glue together?
Yes, you can mix two types of Elmer’s glue together, but it’s important to keep in mind that the resulting mixture may have different properties than either glue type on its own.
Can Elmer’s glue be painted over?
Yes, Elmer’s glue can be painted over once it’s dry. However, keep in mind that the painted surface may be slightly less durable than one created with a traditional paint medium.
Is Elmer’s glue safe for children to use?
Yes, Elmer’s glue is generally considered safe for children to use, but adult supervision is always recommended, especially during cleanup.
Can you use Elmer’s glue as a sealant?
Yes, Elmer’s glue can be used as a sealant, but its effectiveness will depend on the materials being sealed and the amount of stress the seal must endure.
What is Elmer’s glue made of?
Elmer’s glue is made primarily of polyvinyl acetate (PVA), a synthetic polymer used in many types of adhesives.
Can Elmer’s glue bond metal?
Elmer’s glue is not designed to bond metal, as metal surfaces tend to be too smooth and non-porous for the glue to create a strong bond.
Is Elmer’s glue waterproof?
No, Elmer’s glue is not completely waterproof, although it can resist small amounts of water for a short time.
Can Elmer’s glue be used for decoupage?
Yes, Elmer’s glue can be used for decoupage, particularly the white variety, which dries clear and can be used as both an adhesive and a sealant.
Can Elmer’s glue be used for book-binding?
Yes, Elmer’s glue can be used for book-binding, particularly in conjunction with specialized book-binding tapes and stitches.