Are you an archery enthusiast looking to enhance your skills? One important factor to keep in mind is the arrow inserts. While often overlooked, arrow inserts play a crucial role in arrow performance. To ensure optimal arrow performance, it’s essential to know how to glue arrow inserts securely in place. But, where do you even begin? This comprehensive guide will take you step-by-step through the process of gluing arrow inserts, from choosing the right type of insert to troubleshooting tips. So, grab your bow and arrow, let’s get started!
Understanding Arrow Inserts
![]()
Assembling your own arrows can be a rewarding and satisfying experience as you can customize each aspect to create the ideal arrow for your preferences and needs. However, not all arrows are created equal, and understanding the role and function of arrow inserts is crucial for proper arrow assembly. Arrow inserts are small metal or plastic pieces that fit inside the tip of the arrow shaft, providing a threaded surface for screwing in arrowheads. In this guide, we will explore the different types of arrow inserts, how to choose the right one for your arrow, and how to properly apply them to your arrow shaft to ensure a secure and quality fit. So, let’s dive into the world of arrow inserts and discover tips and tricks to improve your archery game.
1.1 What are Arrow Inserts?
Arrow inserts are an essential component of an arrow that can make a significant difference in how the arrow behaves. They are small, cylindrical pieces of metal or carbon that are inserted into the front end of the arrow shaft. The primary purpose of arrow inserts is to provide a threaded surface for screwing in various arrow points and broadheads.
Arrow Insert Components:
Arrow inserts typically consist of three main components: the insert body, the thread, and the shoulder. The insert body is the main piece, which is inserted into the arrow shaft. The thread is a metal coil around the insert that provides the threads to screw in the arrow points. The shoulder is the end of the insert that rests against the inside of the arrow shaft, providing additional support and stability.
Table 1. Types of Arrow Inserts:
| Type | Material | Pros | Cons |
|---|---|---|---|
| Bolt-On | Aluminum, Stainless Steel | Easy to install and remove, reusable | May add weight to the arrow, may come loose during impact |
| Glue-In | Aluminum, Brass, Carbon, Stainless Steel, Titanium | Provide better accuracy, better penetration, and flight, lightweight | Difficult to remove, may damage arrow shaft during removal |
| Push-In | Aluminum, Brass, Stainless Steel | Easy to install and remove, reusable, provide a tight fit | May come loose during impact, require special tool for installation |
There are mainly three types of arrow inserts: bolt-on, glue-in, and push-in. Each type of arrow insert has its own set of pros and cons, and the choice mainly depends on the type of arrow, its intended use, and the archer’s personal preference. For instance, if you need a reusable and removable insert, bolt-on or push-in types may be your preferred choice. On the other hand, if you are looking for better accuracy and flight, the glue-in type may be a better option.
It is essential to choose the right arrow insert to ensure that your arrow performs well and stays intact. Choosing the wrong type can lead to damage to your arrow, or it may not perform as expected. Now that you understand what arrow inserts are let us move on to the next section- gathering supplies.
1.2 Types of Arrow Inserts
When it comes to arrow inserts, there are various types available in the market. Each one has its own unique features and benefits which can impact the performance of your arrow. Here are some of the most common types of arrow inserts:
- Screw-In Inserts: These inserts feature a threaded design that makes them easy to screw into your arrow shaft. They are popular among archers who frequently change their arrowheads as it is quick and easy to swap them out.
- Glue-In Inserts: As the name suggests, these inserts require glue to fix them in place in the arrow shaft. They provide a more secure fit than screw-in inserts and are typically used for arrows that experience a lot of force.
- Push-In Inserts: These inserts are designed to be pushed into the arrow shaft, and they typically fit snugly without requiring glue or screws. They come in a variety of sizes to accommodate different arrow diameters.
- Pin Inserts: Pin inserts use a combination of pins and glue to hold them in place. They are popular among hunters and competitive archers as they provide a secure fit while also allowing for easy removal when needed.
It’s important to choose the right type of insert based on your specific needs and preferences. Keep in mind that different types of inserts may require different glues or installation methods. For instance, push-in inserts may not require glue, but some glue-in inserts may require a specific type of glue to work properly. Make sure to choose the appropriate type of glue and installation method for your particular type of arrow insert.
Click here to learn more about gluing arrow inserts.
1.3 Choosing the Right Arrow Insert
When it comes to choosing the right arrow insert, there are a few things to consider before making a decision. Firstly, consider the type of arrow you are using – heavier arrows will require inserts that can handle the weight and force being applied to them. Alternatively, if you are looking to improve the accuracy of your arrow shots, opt for inserts that have a tighter fit to reduce any movement of the arrow tip.
Another important factor to take into consideration is the type of glue you plan to use. Different materials of arrow inserts may require different types of glue. For example, carbon arrows may require special glue that is designed specifically for carbon materials.
It is also important to check the compatibility of the insert with the arrow shaft. The insert should fit snugly into the arrow shaft and have an appropriate length. Be sure to measure the arrow shaft carefully and choose the insert accordingly.
Lastly, consider the purpose of your arrow. Are you using it for hunting or target shooting? The intended use will help determine the type of insert you need. For instance, screw-in inserts are preferable for hunters as they allow easy replacement of the arrow tip, whereas glue-in inserts provide a more secure fit for target shooting.
Remember, choosing the right arrow insert is crucial for a successful and safe arrow shooting experience. Take your time to research and make an informed decision based on your individual needs and preferences.
Gathering Supplies
Now that you have a good understanding of arrow inserts, it’s time to gather all the supplies you’ll need to complete the gluing process. It’s important to have all the necessary materials on hand before beginning, as it will streamline the process and ensure greater accuracy. In this section, we will discuss the required materials and optional tools you can use to make the gluing process even easier. Before we delve into the specifics, be sure to check out our article on how to glue without glue to discover some fun DIY alternatives to traditional adhesive products.
2.1 Required Materials
Before starting the process of gluing the arrow inserts, it is essential to gather all the required materials in advance. This will ensure that the process goes smoothly without any hindrances. The following is a list of all the materials that are required for the gluing process:
- Arrow Inserts: The first and foremost requirement is, of course, the arrow inserts themselves. Make sure that you have the right type of arrow inserts for your arrow shaft.
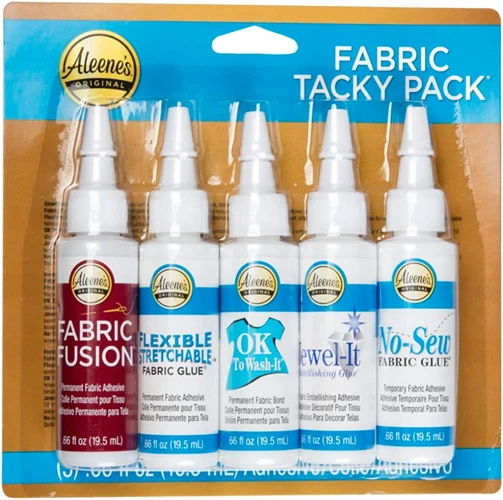
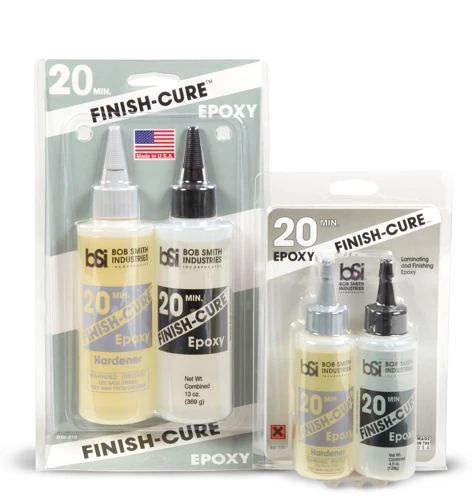
- Glue: Next comes the obvious requirement, which is the glue. Generally, a two-part epoxy glue is used for gluing arrow inserts. Ensure that the glue you are using is fresh and unexpired. Refer to the how to do glue guide to make your own glue.
- Arrow Shaft: The arrow shaft is the other important component that should be present. Make sure that it is clean and free of any dirt or debris.
- Measuring Tape: A measuring tape is required to measure the length of the arrow inserts and the shaft.
- Utility Knife: A sharp utility knife is used to cut the inserts to the required length.
- Sandpaper: Sandpaper is required to sand the ends of the arrow inserts and the shaft for better adhesion.
- Alcohol: Alcohol is used to clean the shaft before applying glue. Ensure that you have at least 90% isopropyl alcohol.
- Disposable Gloves: It is recommended to use disposable gloves to avoid any skin contact with the glue and other chemicals.
By gathering all these materials, you can ensure that the process flows smoothly without any interruptions. Now that you have all the required materials, it’s time to move to the next step in the process, which is understanding the arrow inserts.
2.2 Optional Tools
While you can glue arrow inserts without any extra tools, there are optional items that may make the process easier and more precise. Using a bench vise can help secure the arrow shaft and keep it from moving around while you work. A small saw or a pair of heavy-duty snips can be used to cut the inserts to the correct length. If you need to remove excess glue, you may find a razor blade or a fine grit sandpaper helpful. You can also use a heat gun or lighter to warm up the glue to remove the insert more easily if it was accidentally placed in the incorrect spot. However, using heat can be dangerous and may damage the arrow shaft if not done carefully, so proceed with caution.
Preparing the Arrow Shaft
![]()
When it comes to preparing the arrow shaft for gluing, there are some important steps you need to take to ensure that the insert adheres properly to the shaft. These steps will help to create a clean, rough surface that allows the glue to bond more effectively. By properly preparing the arrow shaft, you can ensure that your arrow inserts stay put and don’t move around or come loose during use. Let’s dive into the details and learn how to properly prepare the arrow shaft. If you’re interested in learning about other glues and adhesive projects, check out how to glue paper for DIY crafts and decorations.
3.1 Cleaning the Shaft
Cleaning the Shaft
Before gluing the arrow insert, it’s essential to clean the shaft properly. A dirty shaft can result in insufficient bonding between the insert and the arrow, leading to unsafe shooting and poorly functional arrows. It’s crucial to make sure that the shaft is free of debris, oils, and any other contaminants that may hinder the bonding process.
To clean the shaft, begin by wiping it down with a dry cloth or paper towel. This will remove any dust or loose debris that may have accumulated on the shaft surface. Next, take a small amount of rubbing alcohol or acetone and apply it to a second cloth. The alcohol will help to remove any oils or grease from the shaft, creating a clean surface for the glue to adhere to.
Make sure to apply the alcohol or acetone in a well-ventilated area that is free from any potential fire sources, as these materials are highly flammable. Gently rub the cloth along the entire length of the shaft to ensure that all contaminants are removed, then set it aside to dry completely.
By taking the time to properly clean the arrow shaft, you’ll ensure that the insert bond is strong and secure. If you’re looking for other helpful guides on glueing and bonding, check out our article on what glue to use on wax candles or learn how to dilute PVA glue by checking out our step-by-step guide on diluting PVA glue.
3.2 Roughing Up the Insert End
The next step in gluing arrow inserts is roughing up the insert end, this allows the glue to bond better with both the insert and the arrow shaft. The roughing process is essential because the inserts usually come with a smooth end that would not adhere well to the glue.
To rough up the insert end, you can use sandpaper or a file. Start by wrapping the sandpaper around the insert end tightly, then rub it gently on the smooth surface. This will create an uneven surface on the insert, allowing the adhesive to adhere to the insert surface better. Ensure that you don’t sand too much on the surface, as this can affect the fit of the insert in the arrow.
Another option is using a file, which is excellent for inserts with harder materials. Hold the insert securely and gently stroke the file across the surface in different directions. This process creates scratch marks on the insert, improving its bonding ability with the glue.
Pro Tip: Use a fine-grit sandpaper when roughing up the insert end, it will create just the right amount of roughness for bonding. Also, when using a file, keep checking the insert surface, so you don’t remove too much material.
In case you are having a challenging time gluing arrow inserts, some articles provide alternatives to glue, for example, how to make putty without glue or how to make slime without glue or liquid starch. Although they may not be the best for arrow inserts, these alternatives can work depending on the material you’re working with.
Now that you’ve roughened up the insert end, the next step is measuring and cutting the insert to the correct length, which we’ll cover in the next section.
3.3 Measuring and Cutting the Insert
Measuring and Cutting the Insert
The next step is to measure and cut the arrow insert to fit your arrow shaft. To do this accurately, start by measuring the length of the arrow shaft you’ll be using. With this measurement in mind, take the arrow insert and place it alongside the shaft. Mark the point where the insert meets the shaft, then use a sharp cutting tool to cut it to size.
It’s essential to make a clean cut to ensure that the arrow insert fits tightly into the shaft. One of the most effective tools for cutting arrow inserts is a tubing cutter, which provides a clean, precise cut to the insert material without causing any damage. Make sure to select the right size tubing cutter, which corresponds to the diameter of the arrow shaft that you’re using.
If you don’t have a tubing cutter available, you can also use a fine-toothed saw blade or a sharp pair of scissors. However, make sure that the cut is even to avoid any issues later on when applying the glue.
Measuring and cutting arrow inserts is an important process that will determine the success of your arrow-making project, and should not be rushed. Take your time and ensure that the cut is precise. You can always trim more, but you can never add length to the insert once it’s been cut.
When you have cut the insert, double-check that it fits snugly into the arrow shaft. If the insert is too long, trim it slightly until it fits just right. Conversely, if it’s too short, you may need to start the process again with a new insert.
Now that you have the properly sized arrow insert, you’re ready to move on to the next step: applying glue.
Applying Glue
Once you have cleaned and measured your arrow shaft and roughed up the insert end, it’s time to move on to the next crucial step in the process: applying the glue. This step will determine how well the insert sticks to the shaft, so it’s vital to take your time and follow the correct procedure. In this section, we will discuss what type of glue to use, how to apply it correctly, how to insert the arrow insert, and how to remove any excess glue. By the end of this section, you will have a secure and sturdy arrow that is ready to be cured and finished.
4.1 Choosing the Right Glue
Choosing the Right Glue
Choosing the right glue for your arrow insert is crucial for ensuring its long-lasting strength. Here are some factors to consider when selecting the right glue:
| Factor | Glue Type | Drying Time | Waterproof |
|---|---|---|---|
| Standard Insert and Shaft Material | Super Glue (cyanoacrylate) | Fast, typically less than 60 seconds | Yes |
| Carbon Shafts or Inserts | Epoxy | Slower than super glue, typically 15-30 minutes | Yes |
| Aluminum Shafts or Inserts | Hot Melt Glue or Epoxy | Hot Melt Glue is quick, but weaker. Epoxy takes longer to dry. | Yes |
It’s important to note that using the wrong type of glue can result in a weak bond and make your arrow insert prone to dislodging. Super Glue (cyanoacrylate) is a good general-purpose glue and is well-suited for standard inserts and shafts. Epoxy is perfect for bonding carbon shafts or inserts due to its strength and waterproof properties. Hot Melt Glue can be used on aluminum shafts or inserts although it is not as strong as epoxy.
Once you have selected the appropriate glue, make sure it is fresh and has not expired. An expired or stale glue may not provide the required strength to hold the arrow insert securely in place.
Before applying the glue, make sure that both the insert and the arrow shaft are clean and dry. Any dirt or debris will weaken the bond of the glue and cause the insert to have a loose fit or fall off.
4.2 Applying Glue to Insert and Shaft
To properly glue an arrow insert, you need to apply glue to both the insert and the inside of the arrow shaft. This will ensure a secure fit for your insert. Here are the detailed steps on how to apply glue to the insert and the shaft:
- Step 1: Squeeze a small amount of glue onto a piece of cardboard or other disposable surface.
- Step 2: Using a toothpick or other small tool, apply glue to the inside of the arrow shaft. Be sure to cover the full length of the insert area.
- Step 3: Apply glue to the insert using the same small tool. Be careful not to get glue on the threads of the insert, as this could affect how it screws into the shaft.
- Step 4: Spread the glue evenly around the insert, making sure that all surfaces to be glued are covered.
Remember to work quickly to ensure that the glue doesn’t dry before you are ready to insert the arrow insert. Some people prefer to apply the glue to the insert before screwing it into the arrow shaft, while others prefer to apply the glue after inserting the insert. Choose the method that works best for you.
It is important to use the right type of glue for arrow inserts to ensure a secure bond. Cyanoacrylate adhesive, also known as super glue, is a popular choice among archers. If you’re using a different type of adhesive, be sure to follow the manufacturer’s instructions.
Internal Link:
If you’re wondering how long you need to let the glue dry before using your arrow, check out our article on how long Elmer’s wood glue should dry.
4.3 Inserting the Arrow Insert
Once you have applied the glue to both the insert and the shaft, you are ready to insert the arrow insert. The most important thing to remember when inserting the arrow insert is to ensure that it is straight and aligned properly with the arrow shaft.
To do this, you may find it helpful to use an arrow insert tool. This is a simple tool that is designed to help you insert arrow inserts smoothly and accurately. If you don’t have an arrow insert tool, you can use pliers or a similar tool to hold the insert and push it into the shaft.
It’s important to insert the arrow insert to the correct depth as well. This can vary depending on the type of insert you are using, so be sure to consult the manufacturer’s instructions for the recommended depth. You can also use a measuring tool to ensure that the insert is inserted to the correct depth.
To make sure the insert is secure in the shaft, give it a gentle twist. This will help the glue spread evenly and create a strong bond. Finally, hold the insert in place for a few seconds while the glue sets.
It’s important to work carefully and slowly during this step, as a misaligned or unevenly inserted arrow insert can affect the accuracy and stability of the arrow. By taking your time and following the steps carefully, you can ensure a strong and secure arrow insert that will perform well in the field or on the range.
| Tools for Inserting Arrow Inserts | Steps for Inserting Arrow Inserts |
|---|---|
| Arrow insert tool | 1. Apply glue to insert and shaft 2. Hold insert with tool 3. Insert straight and aligned with shaft 4. Twist gently 5. Hold in place for a few seconds |
| Pliers or similar tool | 1. Apply glue to insert and shaft 2. Hold insert with tool 3. Insert straight and aligned with shaft 4. Twist gently 5. Hold in place for a few seconds |
If you want to know more about how glue is used in different situations, you can check out our guide on how to glue a book. However, keep in mind that the techniques and types of glue used for bookbinding may be different from those used for arrow inserts. Whatever you do, never use fake braces without super glue, as this can be dangerous and harmful to your health.
4.4 Removing Excess Glue
After inserting the arrow insert, it’s time to clean up any excess glue. Leaving excess glue on your arrow can create an uneven distribution of weight, which leads to a decline in accuracy. Here’s how to remove excess glue:
| Action | Method |
|---|---|
| Step 1: | Wait for the glue to cure properly before attempting to remove it. Depending on the type of glue used, curing times can vary and be anywhere from 6 to 12 hours. |
| Step 2: | Use sandpaper or a sharp razor blade to shave off the excess glue. Be extremely careful not to scratch the arrow shaft or cut yourself. |
| Step 3: | When using a razor blade, hold the blade at a 45-degree angle and gently scrape away the glue. Work slowly and carefully, making sure not to apply too much pressure. |
| Step 4: | After removing most of the glue, use a cotton swab soaked in rubbing alcohol to rub the remaining glue off. This will leave your arrow shaft looking clean and new. |
Bear in mind that removing excess glue requires patience and a steady hand. Rushing this step can result in damaging your arrow and losing accuracy. Taking your time and being extra careful should give you a clean and professional finish.
Curing and Finishing
After successfully inserting the arrow insert into the shaft, it’s crucial to ensure that the glue has cured properly before using the arrow. This is where curing and finishing come into play. In this section, we’ll discuss the necessary steps to make sure your arrow is properly cured and how to finish the arrow to ensure it’s ready for use. So, let’s dive in!
5.1 Curing Time
After inserting the arrow insert, it is important to allow enough time for the glue to cure properly. The curing time of the glue will depend on several factors, including the type of glue used and the temperature and humidity of the environment.
Table: Curing Time for Different Glue Types
| Glue Type | Approximate Curing Time |
|---|---|
| Cyanoacrylate Glue (Super Glue) | 1-2 hours |
| Epoxy | 4-6 hours |
| Polyurethane | 12-24 hours |
It is important to follow the manufacturer’s instructions for the specific glue being used. Additionally, it is important to allow the arrow to cure in a controlled environment, away from extreme temperatures or humidity.
During the curing process, it is important to avoid moving the arrow or applying any pressure, as this could cause the insert to shift or become loose. Once the glue has fully cured, the arrow will be ready to use.
Taking the time to properly cure the glue will ensure a secure hold of the arrow insert, improving accuracy and overall performance when using the arrow.
5.2 Finishing the Arrow
After the curing time has elapsed, it’s time to finish the arrow. This involves trimming the excess glue and making sure the arrow is smooth and ready to use. Here are the steps to follow for finishing the arrow:
| Step | Description |
|---|---|
| Step 1: | Cut off any excess glue that may have oozed out of the arrow shaft during the glue application. Use a sharp knife or razor blade to carefully trim away any dried glue that could interfere with the arrow’s performance. |
| Step 2: | Check the alignment of the insert with the arrow shaft. If it appears to be off-center or misaligned, you may need to remove the insert and reapply the glue. |
| Step 3: | Inspect the arrow for any rough spots or imperfections. Use sandpaper or a file to smooth out any rough edges and ensure a clean finish. A smooth arrow surface will reduce friction and provide better accuracy. |
| Step 4: | Apply a coat of clear varnish or sealant to the arrow to protect it from moisture and other outdoor elements. This will help prevent the arrow from warping or rotting over time. |
By following these steps, your arrow will be finished and ready for use. Remember to always use caution when handling arrows and to inspect them regularly for wear and tear. Happy shooting!
Troubleshooting Tips
You may have followed each step of the arrow insert gluing process meticulously, but still faced unexpected issues. Don’t worry! We have got you covered. In this section, we will discuss some common troubleshooting tips that can help you troubleshoot issues that may arise during the arrow insert gluing process, and provide you with effective solutions to tackle them head-on. Let’s dive into the most common problems hunters and archers encounter during arrow insert gluing, and learn how to fix them.
6.1 Insert Not Gluing Properly
If you find that your arrow insert is not gluing properly, there could be a few reasons why. Check out these troubleshooting tips to help you fix the issue:
- Ensure the Shaft is Clean: If there is a layer of dirt, debris or oil on the arrow shaft, this can prevent the glue from adhering to the surface properly. Use a clean cloth to thoroughly wipe down the shaft and remove any residue.
- Make Sure the Insert is Roughed Up: Roughing up the end of the arrow insert with sandpaper or a file creates a better surface for the glue to adhere to. Make sure to thoroughly rough up the insert before applying glue.
- Check the Temperature: If the temperature in the room is too cold, it can slow down the curing process of the glue. Make sure the room is at a moderate temperature and avoid working in very humid or damp conditions.
- Use the Right Amount of Glue: Using too much or too little glue can both cause issues with the gluing process. Make sure to follow the instructions on your glue bottle and apply the appropriate amount to both the shaft and insert.
- Ensure Proper Contact: Make sure you are pressing the insert firmly into the shaft and holding it in place for the recommended amount of time. This will help ensure that the insert and shaft are making proper contact and allow the glue to bond properly.
- Try a Different Glue: If you’ve tried everything and your insert still isn’t gluing properly, it could be time to try a different type of glue. Some glues work better with certain materials or in specific conditions, so do your research before selecting a different glue.
By following these troubleshooting tips, you should be well on your way to successfully gluing your arrow insert in place. Remember, patience and attention to detail are key when it comes to archery and arrow-building.
6.2 Glue Mess on the Shaft
One common issue that archers may face when gluing arrow inserts is accidentally getting glue on the shaft of the arrow. This can cause a mess and potentially affect the accuracy and performance of the arrow. To avoid this issue, here are some tips:
| Step | Tips |
|---|---|
| 1 | Use a small amount of glue: When applying glue to the insert, make sure to only use a small amount. Using too much glue increases the risk of it spilling onto the shaft. |
| 2 | Use masking tape: Cover the area around the insert with masking tape to protect the shaft and prevent any glue from making contact with it. |
| 3 | Wipe off excess glue immediately: If any glue does get on the shaft, use a clean cloth to wipe it off as soon as possible. The longer it sits, the harder it will be to remove. |
| 4 | Take your time: Rushing through the gluing process can increase the risk of making mistakes and causing glue messes. Take your time and be careful with each step. |
| 5 | Be patient: Allow the glue to fully cure before handling the arrow. This prevents any accidental contact with the arrow while the glue is still wet and increases the chances of a successful gluing process. |
By following these tips, you can avoid making a glue mess on the shaft of your arrow and ensure that it performs at its best capacity. Remember to take your time and be patient, as rushing through the process can cause more harm than good.
6.3 Insert Too Loose or Tight
Inserts that are too loose or too tight in the arrow shaft can cause accuracy and consistency issues. If the insert is too loose, it can cause the arrowhead to wobble or even fall off during flight, which can be dangerous. If the insert is too tight, it can damage the arrow shaft or even prevent the insert from entering.
Here are some troubleshooting tips for inserts that are too loose or too tight:
– Loose Insert: If the insert is too loose, it is important to remove it and start over with a new insert. Before inserting the new insert, make sure to clean the inside of the arrow shaft thoroughly to remove any debris or residue that may be causing the loose fit. Also, be sure to use enough glue to create a strong bond between the insert and the arrow shaft.
– Tight Insert: If the insert is too tight, there are several steps you can take to loosen it. First, try sanding the outside of the insert with fine-grit sandpaper to remove any excess glue or material. If this doesn’t work, you can also try heating the insert with a heat gun or boiling it in water for a few minutes to expand the metal slightly. However, be careful not to heat or boil the insert for too long, as this can damage the arrow shaft.
– Choosing the Right Insert: Another important factor to consider is choosing the right insert for your arrow shaft. Make sure to choose an insert that is designed to fit the inner diameter of your arrow shaft. You can also consider using an insert with a taper design, which can help create a more secure fit.
By following these troubleshooting tips and choosing the right insert, you can ensure a secure and accurate fit for your arrow inserts.
Conclusion
In conclusion, gluing arrow inserts can seem like a daunting task, but with the right tools and techniques, it can be a straightforward process. It is essential to understand the purpose and types of arrow inserts before selecting the right one for your needs.
Proper preparation of the arrow shaft is crucial to ensure a successful glue bond, including cleaning and roughing up the insert end. When it comes to applying glue, selecting the right adhesive and applying it correctly is essential to prevent issues like mess on the shaft.
Once the insert is in place, it’s important to follow the curing time guidelines to avoid any accidents later on. Finishing touches can include fletching the arrow or possibly painting it. If any troubleshooting is necessary, reviewing the tips listed above can help overcome any potential problems.
Overall, gluing arrow inserts is a fundamental skill for archery enthusiasts and hunters alike. By following these step-by-step guidelines, you can ensure your inserts are securely in place and ready for action. Happy shooting!
Frequently Asked Questions
What is the purpose of arrow inserts?
Arrow inserts help to reinforce the arrow’s threaded end, increase accuracy, and protect the arrow shaft from wear and tear.
What types of arrow inserts are available?
There are different types of arrow inserts, including aluminum, brass, and steel. Each material has its own set of pros and cons, so choose one that fits your needs.
How do I choose the right arrow insert for my bow?
Choose arrow inserts based on the type of bow you have, arrow material, desired arrow weight, and intended use. Consult with a professional if you’re not sure which insert to choose.
Can I reuse arrow inserts?
Arrow inserts can be reused if they’re still in good condition. However, it’s recommended that you replace them after a certain number of uses to maintain accuracy and consistency.
What materials do I need to glue arrow inserts?
You’ll need glue, rubbing alcohol, a q-tip or cotton ball, sandpaper, a measuring device, and your arrow inserts and shafts.
What kind of glue should I use for arrow inserts?
Choose a high-strength epoxy glue that’s designed specifically for arrow inserts.
How can I prevent glue mess on the shaft?
Use a clean and dry cotton swab to apply the glue to the insert end. Be careful not to spill any glue on the edges of the insert or the shaft.
What should I do if the insert doesn’t glue properly?
If the insert doesn’t glue properly, try roughing up the end of the arrow shaft with sandpaper and cleaning it with rubbing alcohol. Additionally, make sure that you’re using the appropriate glue type and allowing enough curing time.
What should I do if the insert is too loose or too tight?
If the insert is too loose, add more glue or choose a different size insert. If it’s too tight, sand the end of the arrow shaft until it fits properly.
How should I finish my arrow after gluing the insert?
You can finish your arrow by painting or wrapping it with thread, adding fletching, or attaching a nock. Make sure that these additions are aligned properly for maximum accuracy.