Introduction
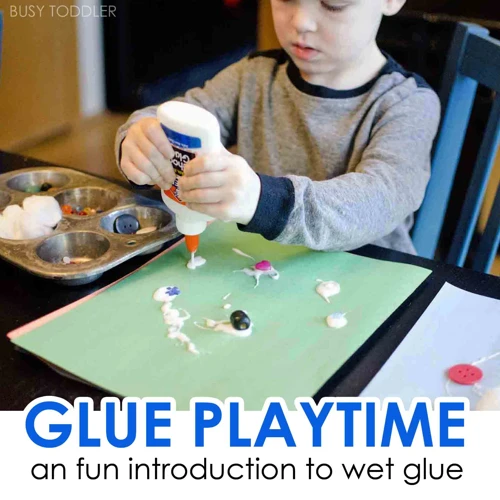
When it comes to crafting, woodworking, or even repairs around the house, PVA glue is often a material of choice thanks to its strong bond and versatility. However, sometimes the consistency of PVA glue straight out of the bottle might not be what you need for your project. That’s where dilution comes in. In this step-by-step guide, we’ll walk you through the process of diluting PVA glue to the perfect consistency for your specific task, as well as provide some tips and tricks to make it even better. So, let’s get started!
What is PVA Glue?
PVA glue stands for Polyvinyl Acetate Glue. It is a widely used adhesive due to its strong bonding capabilities, water resistance, and versatility. PVA glue is known for its ability to bond porous and non-porous materials such as wood, paper, fabric, and ceramics. It is also easy to clean with water, making it a popular choice for arts and crafts projects. Fun fact: PVA glue is non-toxic but not edible. Do not attempt to consume PVA glue or any other type of glue under any circumstances. If you are curious about what glue tastes like, click here to learn more.
| Pros of PVA Glue | Cons of PVA Glue |
|---|---|
| Strong bonding capabilities for both porous and non-porous materials | May not hold up well in extreme temperatures and humidity |
| Water-resistant | May take longer to dry than other types of glue |
| Easy to clean with water | May not be suitable for use on oily or greasy surfaces |
| Versatile | May not be suitable for use on plastics or metal |
PVA glue can be used in various applications including woodworking, bookbinding, and general household repairs. It is also the primary adhesive used in wallpaper pastes due to its bonding strength and water resistance.
While PVA glue has many advantages, it is not suitable for all types of projects. For example, it may not be the best option for bonding plastic or metal materials. In such cases, you may need to consider using other types of adhesives such as epoxy or cyanoacrylate glue. You can also use specific glue like special bed bug glue which you can learn here.
In the next section, we will discuss why it is necessary to dilute PVA glue for specific applications.
Why Dilute PVA Glue?
Diluting PVA glue is an important step in many crafting and DIY projects. PVA glue is a popular adhesive due to its strong bonding properties and clear drying finish. However, in some cases, the glue can be too thick and difficult to use or spread. This is when diluting the PVA glue becomes essential. Diluted PVA glue has a smoother consistency and becomes easier to work with, making it ideal for use in projects such as paper mache and decoupage. By thinning out the glue, it can be absorbed into surfaces more easily, resulting in a stronger bond with fewer air pockets or gaps. The dilute PVA glue is less likely to crack or create air bubbles, making it perfect for 3D projects or crafts. However, it is critical to follow the right steps and mix the glue with the correct amounts of water to ensure that the bond is strong and durable.
Materials Needed
When it comes to diluting PVA glue, having the right materials can make all the difference. You want to ensure that you have everything necessary to create the perfect consistency for your project. In this section, we’ll outline the materials you need to successfully dilute your PVA glue. Make sure you have all the items listed below before getting started. If you have any questions about the materials mentioned here, check out our article on spirit glue, glue for wax candles, how to open Elmer’s Glue-All, glue sticks, making your own glue, white school glue, or keeping E6000 glue from drying out.
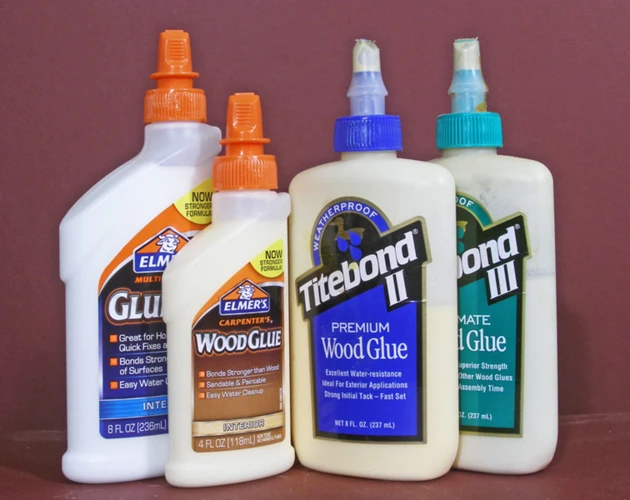
PVA Glue
When it comes to diluting PVA glue, the type of glue you use is crucial. There are many brands of PVA glue available, but not all of them are suitable for dilution. It is important to use a high-quality PVA glue that is designed for dilution. Here are some options to consider:
- Elmer’s Glue-All: This is a popular brand of PVA glue that is great for dilution. It is commonly used in schools and is versatile for use in a variety of crafts and projects.
- Titebond II: Another great option for diluting PVA glue is Titebond II. This glue is designed for wood projects and is water-resistant when dry.
- Sobo: Sobo is a specialty PVA glue that is great for fabric and paper projects. It is perfect for dilution and has a flexible hold.
No matter which brand of PVA glue you choose, make sure it is fresh and has not expired. Using old or expired glue can result in a weak bond and may not work well for dilution. Additionally, make sure to follow the manufacturer’s instructions for diluting the glue, as the ratios may vary between different brands and types of PVA glue.
Water
Water is one of the two main ingredients you’ll need to dilute PVA glue. It is an essential element to this process as it helps to thin the glue and make it easier to work with. When choosing the water to use, it is recommended to use distilled water as opposed to tap water. Distilled water is free of impurities and minerals that can affect the chemical makeup of the glue.
Here are a few things to keep in mind when it comes to water:
- Use room temperature water. Cold water may cause the glue to clump, while hot water can make it too thin.
- Measure the water carefully. Adding too much or too little can affect the consistency of the glue.
- Gradually add water to the glue. It’s easier to thin the glue out slowly than to try to thicken it back up.
- If you’re using tap water, let it sit out for a few minutes before using it. This will allow any chlorine or other chemicals in the water to evaporate.
By using the right amount and type of water, along with the PVA glue, you’ll be able to create a perfect mix that’s easy to use for your project. Just remember to follow the steps and be patient as you dilute the glue, and you’ll have a high-quality adhesive that can be used for a variety of crafts and DIY projects.
Measuring Cup
Having a measuring cup is essential when diluting PVA glue. You don’t want to guess the amount of glue and water you need, or you might end up with a mixture that is too thick or too runny for your project.
When choosing a measuring cup, look for one that has clear markings on the side that show measurements in milliliters (ml) and ounces (oz). This will help you accurately measure out the correct amount of glue and water.
It’s important to note that some measuring cups are made specifically for either liquid or dry ingredients. When diluting PVA glue, you should use a measuring cup specifically made for liquids. These cups usually have a spout and a handle, making pouring and measuring easy and accurate.
Pro tip: Use a separate measuring cup for your glue and water. This will prevent any residue from the glue sticking to the cup and contaminating your measurements.
If you don’t have a measuring cup, you can use a measuring spoon or a kitchen scale to measure out the correct amount of glue and water. However, using a measuring cup is the most convenient and accurate method.
To summarize, a clear and accurate measuring cup is an essential tool for diluting PVA glue. It will help you achieve the proper consistency for your project and reduce the risk of making mistakes.
Mixing Container
When it comes to mixing PVA glue with water, the container you use plays a vital role in achieving a consistent and smooth mixture. That’s why it’s essential to choose the right mixing container for diluting PVA glue. Here are the things you need to consider when selecting a mixing container:
| Factor | Considerations |
|---|---|
| Capacity | Choose a mixing container that can hold the amount of diluted PVA glue you need. Keep in mind the glue-to-water ratio and the volume needed for your project. It’s better to have a larger container than a smaller one to avoid spills and overflow. |
| Material | The mixing container should be made of a material that can withstand the glue’s adhesive properties. Options include plastic, glass, or metal. Avoid porous materials like paper cups or cardboard containers as they can absorb the glue and alter the mixture’s consistency. |
| Shape | The mixing container’s shape doesn’t matter much, but a wider base can make it easier to mix the glue and water together. Choose a container with straight sides, so you can scrape the sides and corners easily with a stirring tool. |
| Cleanliness | Ensure that the container is clean and free from any contaminants that may affect the quality of the glue mixture. Wash the container with soap and water, then rinse it thoroughly before use. |
By considering these factors, you can choose a mixing container that is suitable for diluting PVA glue and achieve a consistent and effective glue mixture for your project.
Stirring Tool
When it comes to stirring PVA glue and water, having the right tool is crucial. A proper stirring tool will ensure that the glue and water are mixed together evenly and thoroughly. So, what makes a good stirring tool?
Material: The stirring tool should be made from a material that is non-reactive to PVA glue. A wooden or plastic stirring tool is a good choice.
Shape: The stirring tool should have a long handle and a flat bottom. This will allow you to reach the bottom of the mixing container and ensure that all the glue is mixed in.
Size: The size of the stirring tool should be appropriate for the amount of glue being diluted. If you’re diluting a small amount of glue, a smaller stirring tool should be used.
To make things easier, we’ve created a table of suggested stirring tools based on the amount of glue being diluted.
| Amount of PVA Glue | Suggested Stirring Tool |
|---|---|
| Less than 1 cup | A plastic spoon |
| 1-2 cups | A wooden or plastic paint stirrer |
| 2-3 cups | A wooden mixing stick |
| More than 3 cups | A large wooden or plastic mixing paddle |
It’s important to note that whatever stirring tool you choose, it should be clean and dry before you use it. This will prevent any contaminants from getting into the glue mixture.
Step-by-Step Guide
Are you ready to start diluting your PVA glue? This step-by-step guide will walk you through the process, ensuring that your glue is properly diluted and ready for use in your next project. Follow these instructions carefully and you’ll have a perfectly diluted PVA glue mixture in no time. So let’s get started!
Step 1: Measure Out Your Ingredients
Before diluting PVA glue, it’s important to have all the necessary materials on hand and to measure them out accurately. Here’s a list of the materials you’ll need:
- PVA Glue: You’ll need PVA glue in the amount required for your project.
- Water: Distilled water is recommended as it has fewer impurities that could affect the glue’s performance. Measure out the amount of water needed to dilute the glue.
- Measuring Cup: A measuring cup is essential for accuracy. Measure the water accurately using this tool.
- Mixing Container: You’ll need a container to mix the glue and water together. A plastic or glass container with a wide mouth is ideal for easy mixing.
- Stirring Tool: A stirring tool, such as a wooden stick or plastic spoon, will help you mix the glue and water together evenly.
Once you have all the materials on hand, it’s time to accurately measure them out. Use your measuring cup to measure out the correct amount of water needed for your project. Take note of how much glue you’ll be using, then mix it with the water in the mixing container according to the right ratio.
It’s important to measure out your ingredients accurately so that you’ll be able to achieve the desired consistency and viscosity of the glue. Using the wrong amount of water can make the glue too watery and weak, while using too much glue can result in a very thick mixture that’s difficult to work with. By measuring your ingredients correctly, you’ll avoid wasting glue and maintain control over the quality of the final product.
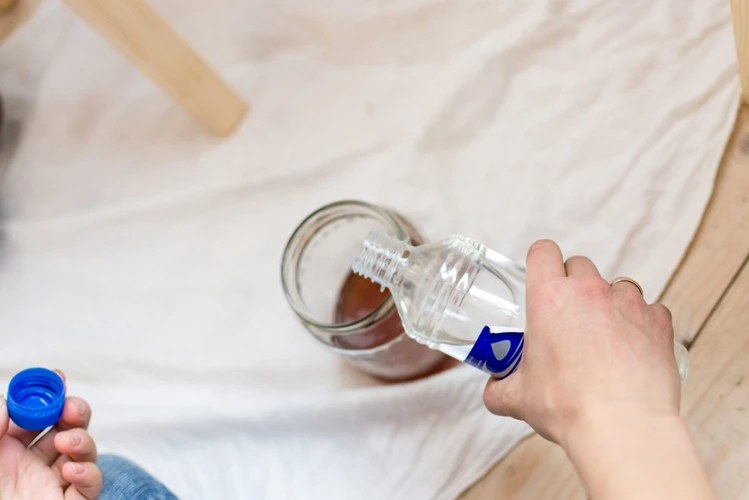
Step 2: Mix the Glue and Water Together
Before we start mixing the glue and water together, it’s important to note that the ratio of glue to water will depend on the task at hand. Typically, a 1:1 ratio is a good starting point for general crafting purposes. However, for more specific tasks, such as paper mache, you may need to adjust the ratio accordingly.
Here’s how to mix the glue and water together:
Step 1: Pour your measured amount of PVA glue into your mixing container.
Step 2: Slowly pour the measured amount of water into the mixing container with the glue. It’s important to pour the water slowly to avoid creating foam or bubbles in the mixture.
Step 3: Use your stirring tool to combine the glue and water until they are fully mixed together. Keep stirring until the mixture becomes smooth and consistent.
It’s important to note that if you are diluting a large amount of PVA glue, you may want to use a power mixer or stirrer to ensure proper mixing.
Also, remember that diluting the PVA glue will increase its drying time. So, keep that in mind when planning your project.
Step 3: Stir the Mixture Thoroughly
To ensure a proper mixture, it is crucial to stir the diluted PVA glue thoroughly. Follow these guidelines for best results:
| Step | Instructions |
|---|---|
| 1 | Hold the mixing container with one hand and the stirring tool with the other hand. |
| 2 | Dip the stirring tool into the mixture, making sure to scrape the bottom of the container to get any settled glue. |
| 3 | Slowly swirl the stirring tool around the mixture, making sure to cover the entire surface area of the liquid. |
| 4 | Continue stirring for at least 1-2 minutes or until the glue and water are completely combined. |
| 5 | Check for any remaining chunks or clumps of undissolved glue and continue stirring until everything is fully dissolved. |
It is important to remember that the more thorough the stirring process, the better the adhesive properties of the glue will be. A clumpy or uneven mixture may not bond as effectively and could lead to weaker results. So take the time to thoroughly mix your diluted PVA glue for the best outcome.
Testing the Diluted PVA Glue
As you finish diluting your PVA glue, it’s important to test its new properties to ensure it will work for your intended purpose. By testing the glue, you’ll be able to determine if the consistency and strength are suitable for your project. In this section, we’ll explore a few simple tests you can perform to evaluate the viscosity and shear strength of your diluted glue. Let’s dive in!
Viscosity Check
After diluting your PVA glue, it’s important to test the viscosity of the mixture to ensure it’s at the desired consistency. Viscosity is essentially the thickness or flow of a liquid, and it can vary based on the ratio of glue to water.
To test the viscosity of your diluted PVA glue, you’ll need a measuring tool, such as a viscosity cup, which can be purchased at most hardware or craft stores.
Step 1: Fill the viscosity cup with the diluted PVA glue mixture.
Step 2: Hold the cup over a clean, flat surface and start a timer.
Step 3: As the time passes, watch as the mixture drips out of the cup. When the flow slows to a stop, stop the timer.
Step 4: Record the time it took for the mixture to fully drip out of the cup.
Once you have the viscosity measurement, you can compare it to the desired viscosity for your project. If it’s too thin, you may need to add more glue to the mixture. If it’s too thick, add more water to the mixture. It’s important to make adjustments incrementally and re-test the viscosity until you achieve the desired consistency.
Below is an example table to record your viscosity measurements:
| Test Number | Glue (ml) | Water (ml) | Time to Empty (seconds) | Viscosity |
|---|---|---|---|---|
| 1 | 10 | 20 | 45 | TBD |
| 2 | 15 | 25 | 60 | TBD |
| 3 | 20 | 30 | 75 | TBD |
By recording your viscosity measurements, you can easily track your progress and make adjustments as needed for each test until you achieve the perfect consistency for your project.
Shear Test
After diluting your PVA glue, it’s important to run a shear test to ensure that the glue has the appropriate bonding strength for your particular project. Follow these steps to perform a successful shear test:
- Prepare your test materials: You’ll need two pieces of the same material that you plan to bond together. Cut them to the same size and shape, and ensure they are both clean and dry.
- Apply the diluted PVA glue: Use a brush or applicator to apply a thin, even layer of the diluted glue to one of the pieces of material. Be sure to cover the entire surface area.
- Place the pieces together: Carefully place the second piece of material on top of the first, aligning it precisely. Press firmly to ensure a thorough bond.
- Allow the glue to dry: Follow the recommended drying time for your particular PVA glue. It’s important to resist the temptation to test the bond too soon, as this can compromise the strength of the bond.
- Perform the shear test: Once the glue has fully cured, apply a force to separate the two pieces of material, pulling them apart at a 90-degree angle. Use a force gauge or other measuring tool to determine the amount of force required to separate the pieces.
It’s important to note that the amount of force required to separate the pieces will vary depending on the particular materials you’re working with and the strength of the bond required. If the bond fails during the shear test, you may need to adjust the ratio of PVA glue to water, or consider using a different adhesive for your project.
Tips and Tricks
As with any craft or DIY project, there are always ways to make the process easier and more enjoyable. Diluting PVA glue is no exception. Here are some useful tips and tricks that will help you get the most out of your diluted PVA glue mixture and take your projects to the next level. From using distilled water to adding a little sparkle to your mix, these tips are sure to make your crafting experience more fun and productive.
Use Distilled Water
It is highly recommended to use distilled water when diluting PVA glue. Distilled water is water that has gone through a process of distillation to remove any impurities and minerals. Using distilled water ensures that the glue will not be affected by any minerals or impurities that can alter its chemical properties.
Benefits of using distilled water:
- Minimizes any chance of chemical reactions caused by impurities in regular tap water
- Removes any impurities that can cause the glue to break down over time
- Leaves a clear and clean finish on your project
It is important to note that tap water may vary in quality depending on the region and its treatment process. Using distilled water is the safest option to ensure the glue’s quality and longevity.
Tip: If distilled water is not available, you can also use filtered water that is free of impurities and minerals. However, avoid using water directly from the tap, as it may contain chlorine that can negatively affect the glue.
Using distilled water is essential for achieving the best results when diluting PVA glue. It guarantees the adhesive properties and maximizes its bonding strength while protecting your project from any chemical reactions or impurities. So, don’t forget to stock up on distilled water for your next PVA glue project.
Add Glitter or Dye to the Mix
Adding glitter or dye to your diluted PVA glue mixture can make it more visually appealing and can add a touch of uniqueness to your projects. Here are a few tips on how to do it:
- Use glitter sparingly: Adding too much glitter can affect the consistency of your glue and make it more difficult to work with. Don’t use more than 5-10% of the total volume of the glue.
- Mix the glitter before diluting: To ensure an even distribution of glitter, mix it in with the glue BEFORE you add water.
- Mix well: After you’ve added your glitter or dye, stir the mixture thoroughly to ensure that it’s evenly distributed.
- Experiment with colors: Adding a few drops of food coloring or acrylic paint can give your projects a pop of color. Just like with glitter, be sure to mix well before diluting.
Keep in mind that adding glitter or dye may affect the properties of your diluted PVA glue. It may change the viscosity or drying time of the glue, so be sure to test it on a small piece of scrap material before using it on a larger project. Adding glitter or dye can be a fun way to add a personal touch to your projects while still using the same reliable PVA glue you know and trust.
Conclusion
In conclusion, diluting PVA glue can be a useful process when working on various projects. It allows for better control over the viscosity of the glue, making it easier to apply and work with on different surfaces.
By following the step-by-step guide provided in this article, you can dilute PVA glue with ease and achieve the desired consistency for your project. Remember to always test the diluted glue before using it on your project to ensure that it has the desired characteristics.
Furthermore, it is essential to use distilled water to dilute your glue to prevent any impurities from affecting the adhesive properties of the glue. Adding glitter or dye to the mixture can also enhance the appearance of your project and give it a unique touch.
In summary, diluting PVA glue is a simple and effective process that can be done with just a few basic materials. By understanding the benefits and following the detailed guide provided in this article, you can create a strong and versatile adhesive that works for a variety of different projects.
Frequently Asked Questions
How much water should I mix with PVA glue?
The amount of water you mix with PVA glue depends on the viscosity you want to achieve. Generally, a good ratio is one part glue to one part water.
Can I use tap water to dilute PVA glue?
Tap water is fine to use, but using distilled water can ensure that no impurities affect the performance of your diluted PVA glue.
What is the best stirring tool to use?
A wooden mixing stick or a plastic spatula works well to stir the PVA glue and water mixture thoroughly.
Can I dilute PVA glue with other liquids besides water?
Yes, you can dilute PVA glue with other liquids like acrylic paint or fabric dye to achieve different effects.
What can I use diluted PVA glue for?
Using diluted PVA glue can be great for paper mache, decoupage, or as a sealant for wood or other materials.
How long does it take for diluted PVA glue to dry?
The drying time of diluted PVA glue depends on the thickness of the layer applied and the humidity in the air. Usually, it takes around 24 hours for the glue to fully dry.
Can I store my diluted PVA glue for future use?
Yes, you can store your diluted PVA glue for future use. Make sure to keep it in a well-sealed container and shake or stir it before using it again.
Can I apply diluted PVA glue with a brush?
Yes, applying diluted PVA glue with a brush is a great method to ensure even coverage on your project.
Does diluted PVA glue have a strong odor?
No, diluted PVA glue should not have a strong odor. If you notice a strong odor, there may be some impurities in the mixture or the glue may have gone bad.
What should I do if I spill diluted PVA glue?
If you accidentally spill diluted PVA glue, clean it up immediately with warm soapy water. If it has dried, use a scraper or sandpaper to remove it.