Introduction
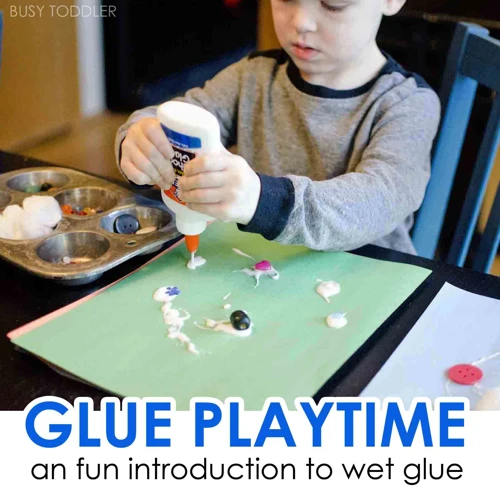
Making your own white school glue may seem like a perplexing task, but it can be a rewarding and cost-effective activity to try out. If you’re someone who enjoys DIY projects or have children who love to do arts and crafts, then learning how to make your own white school glue could save you a few trips to the store. In this article, we’ll guide you through the step-by-step process of making white school glue that is inexpensive, easy-to-make, and safe for children to use. So why not give it a try?
What is White School Glue?
White school glue is a type of adhesive that is commonly used in schools and arts and crafts projects. It is a water-based adhesive that dries clear and is easy to use. White school glue is also known as white glue, PVA glue, or Elmer’s glue (named after the popular brand). This type of glue is non-toxic, making it safe to use for classroom projects or for children’s crafts. White school glue is also versatile and can be used to glue a variety of materials including paper, cardboard, fabric, and wood.
The Benefits of Using White School Glue
- Non-toxic: White school glue is a safe alternative to other types of adhesives that may be toxic or flammable.
- Dries clear: Unlike other adhesives that may leave behind a visible residue, white school glue dries clear, making it ideal for use in projects where appearance is important.
- Easy cleanup: Because white school glue is water-based, it can be easily cleaned up with soap and water, even when it has dried. This makes it a great choice for messy projects or for use with children.
- Bonding strength: White school glue provides a strong bond between materials, making it ideal for use in a variety of projects.
- Multipurpose: White school glue can be used to bond a variety of materials, making it a versatile adhesive to have on hand.
White school glue is commonly used in classrooms, but it can also be used for a variety of other projects, including arts and crafts, woodworking, and even home repairs. If you need glue that dries quickly and bonds strongly, white school glue may be the perfect choice.
If you want to know how to make your own white school glue at home, check out the following sections where you can find step-by-step instructions.
Materials You Will Need
Get ready to make your own white school glue! Before we dive into the step-by-step instructions, it’s important to gather all the necessary materials. Don’t worry, you won’t need anything fancy or hard to find. In fact, you probably have most of the tools and ingredients already in your kitchen. Here is what you’ll need:
Ingredients
When making white school glue, there are only a few ingredients that you need. The ingredients are easily accessible and can be found in most grocery stores. Here is a list of the items that you need to make white school glue:
- Water: You will need around 250ml of water to make the glue mixture.
- All-Purpose Flour: You will need around 250g of all-purpose flour to bind the glue mixture together.
- Vinegar: You will need 30 ml of vinegar as a preservative in the glue mixture.
These ingredients are affordable and can be found in most households. Making your own white school glue at home is an easy and cost-effective alternative to purchasing glue from the store. Plus, you can be sure that no harmful chemicals are present in the glue mixture.
Note: For other types of glue or adhesives, such as glue for wall stickers or rubber cement glue, different ingredients may be required. If you are interested in making other types of glue, check out some of our other articles on how to make different types of glue including what glue dries clear on glass and how to use rubber cement glue.
Tools
To make white school glue, you will need the following tools:
- Saucepan: You will require a small saucepan to heat and cook the ingredients.
- Stirring utensil: Use a wooden spoon or spatula to stir the mixture while cooking it.
- Measuring cups and spoons: Use measuring cups and spoons to get the correct measurements of the ingredients.
- Container: Use a clean container to store the glue after making it.
It is essential to use clean equipment and tools to prevent any contamination in the glue. Any contamination can affect the glue’s quality and shelf-life, making it unusable and potentially dangerous.
If you want to know more about the drying time of different types of glue, you can check out our article on ‘How Long Does Citadel Glue Take to Dry?‘ or ‘How Long for Windshield Glue to Dry?‘. These articles provide information about the drying time of different types of glue and factors that affect their drying time.
Instructions
Now that you have gathered all of the materials and tools needed to make white school glue, it’s time to start with the process. Follow these simple steps to create your homemade glue that can easily replace the store-bought version. If you’re wondering why you should bother making your own glue, check out our article on what is BIM 360 Glue, which explains the benefits of using homemade glue.
Step 1: Mix the Ingredients
For making white school glue, the mixing of the ingredients is the first step of the process. This step is crucial as it sets the foundation of the glue. Proper mixing of the ingredients makes sure that the glue has the desired texture and consistency.
To begin with, the ingredients needed for making white school glue are, water, cornstarch, and vinegar. Water is used as the base for the glue, while cornstarch acts as a thickener. Vinegar is used to preserve the glue.
Here is a table that displays the quantity for each ingredient:
| Materials | Quantity |
|---|---|
| Water | 1 cup |
| Cornstarch | 1/2 cup |
| Vinegar | 1 tablespoon |
Once you have all the ingredients ready, take a saucepan and pour 1 cup of water in it. Add 1/2 cup of cornstarch to the water and whisk the mixture until it dissolves completely. Make sure that there are no lumps in the mixture.
After whisking, place the saucepan on medium heat and stir continuously. Stir until the mixture starts to thicken. Keep stirring the mixture until it forms a glue-like consistency. This will take around 5-7 minutes.
Once the mixture has thickened, turn off the heat and let it cool down. Make sure that you stir the mixture occasionally while it cools down. This will prevent the formation of a skin on top of the mixture.
In the next step, add 1 tablespoon of vinegar to the mixture. Vinegar is a preservative, and it prevents the formation of bacteria in the glue. Stir the mixture again to make sure that all the ingredients are evenly mixed.
Now your white school glue is ready to use! You can use it for arts and crafts or fix broken household objects. If you need any tips on how to use glue for activities like gluing sheltie ears, making homemade puzzle glue, or applying wall stickers, you can browse our other articles.
Step 2: Heat the Mixture
After combining the ingredients for making white school glue, it’s time to move onto the next step – heating the mixture. This is an important step as heat will help to dissolve the ingredients and create a smooth consistency. Follow these simple steps for heating the mixture:
- Step 1: Place the mixing bowl containing the combined ingredients on a stove top.
- Step 2: Turn on the stove to medium heat and stir the mixture constantly.
- Step 3: Keep stirring the mixture until it starts to boil.
- Step 4: Once it boils, reduce the heat to low and let it simmer for another 5-10 minutes. Continue stirring the mixture to ensure a homogeneous mix.
Heating the mixture will help to evaporate any excess water and bring out the desired consistency. If you want to add a bit of color to your glue, you can also do so at this point while the mixture is hot. You could use food coloring or even glitter to make your white school glue stand out and look unique.
Once you have completed heating the mixture, it’s time to move on to the next step- cooling it down. Use the anchor how-do-you-make-fluffy-slime-without-glue or how-to-make-super-glue-at-home-without-petrol if the reader needs more information on how to make different glues.
Step 3: Cool the Mixture
After heating the mixture in the previous step, the next step in making white school glue is to cool the mixture to room temperature. Here are the detailed instructions:
- Step 1: Turn off the heat source and carefully remove the mixing bowl from the stove.
- Step 2: Let the mixture cool for about 10 to 15 minutes.
- Step 3: Once the mixture has cooled, stir it well again to ensure that all the ingredients are well combined.
- Step 4: At this point, the glue mixture should have a thick and creamy consistency.
- Step 5: Set the mixture aside and allow it to cool completely at room temperature for several hours or overnight.
It’s important to let the mixture cool completely before moving onto the next step, as this will give the glue time to thicken and set. Once the mixture has cooled down completely, it should have a gel-like consistency and be ready for the final step.
Step 4: Add Preservative
One important step in making white school glue is to add a preservative. This step helps to extend the shelf life of the glue and prevent the growth of harmful bacteria that could lead to spoilage. There are several preservatives that can be used for this purpose, but one of the most popular options is borax.
Here are the steps to add preservative:
- Dissolve 1/4 teaspoon of borax powder into 1/4 cup of warm water. Stir until the borax powder is completely dissolved.
- Add the borax mixture to the glue mixture. Stir well to combine.
- The glue should now have a longer shelf life and be less susceptible to spoilage.
It’s important to note that borax can be harmful if ingested or inhaled, so it’s important to handle it with care. It’s also important to keep the glue out of reach of children and pets. If you prefer not to use borax, there are other preservatives that can be used instead, such as vinegar or citric acid. Be sure to do your research and choose a preservative that is safe and effective for your specific needs.
By adding a preservative to your white school glue, you can ensure that it stays fresh and ready to use for longer periods of time. This can be especially useful for teachers, students, and anyone who goes through a lot of glue on a regular basis. With just a few simple steps, you can create a high-quality, long-lasting glue that will serve all your adhesive needs.
Storage and Use
Now that you’ve successfully made your own white school glue, it’s important to know how to properly store and use it. Proper storage will ensure that your glue stays fresh and ready to use whenever you need it, while correct usage will help you achieve the best results for your projects. Here are some tips on how to store and use your DIY white school glue.
Storage Tips
Proper storage of white school glue can extend its shelf life and ensure its effectiveness. Here are some tips on how to best store your homemade white school glue:
- Store in an airtight container: To prevent air from drying out your glue and making it less effective, store it in an airtight container such as a glass jar with a lid.
- Keep away from extreme temperatures: Extreme temperatures can cause the glue to lose its effectiveness. Keep it in a cool, dry place away from direct sunlight.
- Stir before each use: It is important to stir the glue before each use to ensure the ingredients are thoroughly mixed together.
- Check for signs of spoilage: If your glue becomes discolored or starts to smell unpleasant, it may have spoiled and should not be used.
By following these storage tips, you can extend the shelf life of your homemade white school glue and ensure it maintains its effectiveness for all of your crafting and DIY needs.
Usage Tips
Now that you have successfully made your own white school glue, it’s time to put it to use! Here are some usage tips to help you get the most out of your homemade glue:
- Avoid over-application: When applying the glue, less is often more. Apply a thin, even layer to avoid excess dripping or seeping.
- Use on porous surfaces: White school glue is best suited for porous surfaces such as paper, cardboard, or wood. It may not adhere as well to non-porous surfaces like plastic or metal.
- Allow for drying time: Depending on the amount of glue applied and the current humidity level, drying time may vary. Try to avoid touching or manipulating the glued area until it has fully dried.
- Store at room temperature: To keep your homemade white school glue from drying out or becoming too thick, store it in a cool, dry place at room temperature.
- Use a brush: If applying the glue to a small or detailed area, consider using a small brush to accurately apply the glue where needed.
- Dilute if needed: If your glue is too thick or difficult to apply, consider diluting it with a small amount of water. Just be sure not to dilute the glue too much, as this may affect its adhesive properties.
With these usage tips in mind, you’ll be able to make the most of your homemade white school glue. And if you happen to make a little too much glue, don’t worry – it can be stored for later use as long as it’s properly sealed and stored at room temperature.
Conclusion
After following the step-by-step instructions to make your own white school glue, you are now equipped with a fun and practical skill. Homemade glue is not only cost-effective but also customizable. Feel free to add glitter, food coloring, or even scents to make your glue stand out.
This DIY project is perfect for parents and teachers who want to involve their children or students in a fun and educational activity. Making their glue will not only engage them in the creative process but will also spark their curiosity in science and chemistry.
Homemade white school glue is also an excellent eco-friendly alternative to store-bought glue. By using natural and non-toxic materials, you are reducing your carbon footprint and making a positive impact on the environment. Furthermore, you are taking a small step towards reducing the need for single-use plastics such as glue bottles.
In conclusion, creating your white school glue is a fun and easy project that provides numerous benefits, including cost-effectiveness, customization, educational opportunities, and eco-friendliness. So go ahead, embrace your creativity, and start making your own white school glue today!
Frequently Asked Questions
What is the difference between white school glue and clear glue?
White school glue is opaque while clear glue is transparent. Clear glue is also generally stronger than white school glue, but white school glue is less expensive.
What can I use white school glue for besides arts and crafts?
White school glue can also be used for bookbinding, repairing household items such as ceramics and glass, and as as a temporary sealant for small leaks.
Can I make white school glue with substitutes for the traditional ingredients?
Yes, alternatives such as cornstarch or potato starch can be used instead of flour, and distilled white vinegar can be used instead of the traditional preservative. However, the consistency and shelf life of the glue may be affected.
How long can I store homemade white school glue?
If stored in an airtight container in the refrigerator, homemade white school glue can last up to six months.
Is it safe to use homemade white school glue?
Yes, as long as the ingredients are from a reputable source and the glue is made according to the instructions provided.
Can white school glue be used on fabrics?
Yes, but it may not hold up as well as other fabric glues specifically designed for that purpose.
Why should I make my own white school glue instead of buying it?
Making your own white school glue can be more cost-effective and allows you to control the ingredients and consistency of the glue. It is also a fun DIY activity.
Does homemade white school glue dry clear?
Yes, but it may take longer to dry compared to store-bought clear glues.
Can I add food coloring to homemade white school glue for a fun project?
Yes, just add a few drops of food coloring to the mixture before heating it.
Can I use homemade white school glue for slime?
Yes, homemade white school glue can be used as a base for slime recipes. Just be sure to follow a slime recipe specifically designed for white school glue.