As a proud owner of a Shetland Sheepdog, you may have noticed that your furry friend’s ears tend to have a mind of their own. While this may be adorable, it can also create health issues for your pet. The solution? Gluing their ears. But before you dive into the process, you may have some questions and uncertainties. Fear not, as we have created a comprehensive guide to help you through the process of gluing Sheltie ears, step-by-step. From figuring out when to glue your Sheltie’s ears to proper positioning techniques and aftercare, we’ve got you covered. So, sit back, relax, and get ready to learn how to glue your Sheltie’s ears with confidence!
Why Glue Sheltie Ears?
Have you ever wondered why people glue their Sheltie’s ears? While this may sound strange to some, there are several valid reasons why this is a common practice among Sheltie owners. Gluing Sheltie ears can improve their appearance, promote ear cartilage development, and prevent ear infections. In this article, we will delve into the topic of gluing Sheltie ears and provide you with a comprehensive guide on how to do it correctly. But before we get into that, let’s explore the reasons why people glue their Sheltie’s ears. If you’re curious about the world of glue beyond the realm of pet care, you can check out how to make super glue at home without petrol.
Reasons to Glue Sheltie Ears
Gluing Sheltie ears is necessary for various reasons as highlighted in the table below:
| Reasons to Glue Sheltie Ears | Description |
|---|---|
| Correct ear positioning | Shelties with straight-up ears do not conform to the breed standard, hence improper ear positioning needs to be corrected through gluing |
| Preventing ear infections | Shelties with ears that flop down make them prone to ear infections since moisture and bacteria can get trapped in their ears |
| Enhancing overall appearance | Most Sheltie owners glue their dog’s ears to enhance their dog’s appearance, making them more attractive and eye-catching |
| Preventing ear hematomas | A hematoma is a blood-filled pocket that develops in the ear flap as a result of scratching, head shaking, or trauma. Gluing Sheltie ears helps prevent this condition |
Gluing Sheltie ears for the above reasons is not only for cosmetic purposes but also for the health of the dog. It is important to note that gluing Sheltie ears should be done by a professional or an experienced individual to avoid causing any damage to the ears.
Benefits of Gluing Sheltie Ears
Gluing sheltie ears comes with many benefits for both the dog and the owner. Firstly, gluing the ears helps to maintain the breed standard appearance of Shetland Sheepdogs. Without proper gluing, the ears may not stand erect, which is a highly desirable trait in the breed. A well-groomed and standard-looking dog is always a plus.
Secondly, properly glued ears can reduce the risk of ear infections. An ear droop can trap moisture inside the ear canal, leading to bacterial and fungal infections. Gluing the ears can prevent this by keeping the ear canal open and allowing proper airflow.
Thirdly, by following the gluing process, you will become more familiar with your dog’s ears and this can help to identify problems early on. You’ll get into the habit of checking the ears for any problems and will be able to detect any issues quickly.
Fourthly, gluing sheltie ears can be an enjoyable bonding experience for you and your dog. The process requires patience and care, which can help deepen your relationship with your pet.
Fifthly, grooming your dog and maintaining its appearance correctly indicates that you are a responsible dog owner. It can enhance your dog’s overall well-being and longevity.
There are many benefits to gluing Sheltie ears, including maintaining breed standards, reducing the risk of ear infections, early problem detection, deepening the bond between you and your pet, and showcasing your responsible dog ownership.
When to Glue Sheltie Ears?
When is the Best Time to Glue Your Sheltie’s Ears? Gluing Sheltie ears is a common practice among dog owners, but timing is crucial. The right age and frequency must be taken into consideration before starting this process. If you’re unsure about when to glue your Sheltie’s ears, keep reading to learn more. It’s important to note that gluing your Sheltie’s ears requires a specific type of glue that is safe for dogs. Don’t use glue made for humans or other animals, as this can be harmful to your pet’s health. Let’s dive in and explore this topic further.
Age for Gluing Sheltie Ears
Age for Gluing Sheltie Ears: The ideal time to start gluing Sheltie ears is when they are between 7 to 10 weeks old. This is the time when their cartilage is still soft and pliable enough to hold the desired position. Waiting too long can make the cartilage harden and lose its flexibility, making it difficult to maintain the desired position even after gluing.
It is important to note that the glue should not be applied on puppies younger than 7 weeks old as their ears are still developing and the glue may cause irritation. If you have missed the ideal window and your Sheltie is older than 10 weeks, it is still possible to glue their ears, but it may take longer and require more effort.
Gluing Sheltie ears at the right age can help ensure that the ears maintain their position as they mature and grow. It is crucial to follow the gluing process precisely to ensure a successful outcome.
Frequency of Gluing Sheltie Ears
Frequency of gluing Sheltie ears
Gluing Sheltie ears requires patience, practice, and frequent maintenance. It is important to give regular attention to glued ears to ensure that they are properly set and maintained. Frequency of gluing Sheltie ears depends on the age and the condition of the dog’s ears.
Here are some things to keep in mind when determining the frequency of gluing Sheltie ears:
- Age: Puppies will have soft ears that require more frequent glue changes, while adult dog ears are harder and tend to require less frequent glue changes.
- Activities: Dogs that are active or play outside more often may require more frequent glue changes due to increased sweat and dirt.
- Weather: Humidity and moisture can affect the quality of the glue and how long it lasts, so in areas with high humidity or moisture, gluing may need to happen more often than in drier climates.
It is recommended to check glued ears every 3-5 days to make sure they are properly set and to assess if the glue is still intact. If the glue is starting to wear off or the ears are not in the correct position, it may be necessary to reapply glue and adjust the positioning of the ears. However, it is important not to over-glue or apply glue too frequently as this can cause irritation or discomfort to the dog’s ears.
Frequent maintenance and attention to glued Sheltie ears is necessary to ensure they are properly set and maintained. It is important to take into account the age, activities, and weather conditions when determining the frequency of gluing, and to check the ears every 3-5 days for proper positioning and glue integrity.
Preparation
Before gluing Sheltie ears, it is important to prepare both the dog and the necessary supplies. Proper preparation can help eliminate any potential risks and ensure that the gluing process goes smoothly. In this section, we’ll discuss what materials are required, how to clean ears, and trimming ear hair. It is important to note that if you have any concerns about the process or are unsure which materials to use, it is best to consult a professional or experienced breeder. You may also want to check out other glue-related articles, such as how to make bath bomb slime without glue or how to use rubber cement glue, for some creative and fun ideas.
Materials Required
To start the process of gluing your Shetland Sheepdog’s ears in the correct manner, you will need the following materials:
- Ear Glue: There are a variety of ear glues available in the market such as “Show Tech Ear Bond”, “Top Performance Extend A Bond” and “Power Stick 5 Minute Epoxy”. Choose the one that suits your dog the best.
- Cotton Swabs: These are useful for applying the glue accurately and gently in the ear canal.
- Rubbing Alcohol: Use it to clean the area around the ears before gluing. Make sure you buy the one with a high percentage of isopropyl alcohol for the best results.
- Scissors: Use these to trim the excess hair around the ear flap to allow the glue to stick better.
- Cling Wrap: It is used to prevent the glue from sticking to the fur while it dries.
It’s important to make sure that you have all the materials available before starting the process of gluing your Sheltie’s ears. You don’t want to start and then realize you don’t have all that you need. If you want to know more about the process of gluing Sheltie ears, check out this article explaining every step to help you get the perfect ear placement for your Sheltie.
How to Clean Ears
Cleaning your Sheltie’s ears is an important step in the gluing process because it helps to ensure that the glue adheres properly and your dog’s ears stay healthy. Here are the steps to follow on how to clean your dog’s ears:
| Step | Description |
|---|---|
| Step 1 | Gather the necessary supplies: You will need cotton balls or pads, ear cleaning solution, and a towel. |
| Step 2 | Secure your dog: You can either have someone hold your dog or place them on a table where they cannot easily fall off. |
| Step 3 | Wet a cotton ball or pad: Saturate the cotton ball or pad with ear cleaning solution. |
| Step 4 | Clean the ear: Gently wipe the inside of your dog’s ear, being careful not to push the solution too far inside. Be sure to clean all the crevices and folds of your dog’s ear. |
| Step 5 | Dry the ear: Use a towel to dry the inside of your dog’s ear, being careful not to rub too hard or cause any irritation. |
It is important to note that you should never insert anything, such as a cotton swab, into your dog’s ear canal as this could cause injury. Also, if your dog’s ears are especially dirty or have an unpleasant odor, it may be a sign of infection or other health issue. In such cases, it is best to consult with a veterinarian before proceeding with gluing.
Pro Tip: If your Sheltie’s ears have a lot of hair inside, you may want to consider trimming it with scissors or clippers before cleaning. This will help the cleaning solution reach the ear canal more easily. For more information on trimming ear hair, check out our article What is a Glue Job?
Trimming Ear Hair
Keeping Shetland Sheepdog’s (Sheltie) ears healthy and clean is an essential part of overall grooming. Trimming ear hair is a crucial step before gluing the Sheltie’s ears. Excess hair interferes with proper gluing and can trap moisture, leading to infections. The following table outlines the materials required and steps to trim ear hair effectively:
| Materials Required | Steps to Follow |
|---|---|
| Ear Powder: Ear powder helps to grip fine hair and aids in easy removal. | Apply ear powder using a cotton swab to the hair around the ear canal. |
| Ear Hair Scissors: Specialized scissors designed to trim hair around ears without cutting tender skin. | Trim excess hair slowly and carefully. Avoid cutting the tender skin around the ear. |
| Ear Wipes: Ear wipes clean the area and help remove excess hair and powder. | Clean the ears gently using a soft ear wipe. |
It is important to use specialized ear scissors while trimming to prevent accidental cuts or injuries to the dog’s ears. Inexperienced groomers can get the trimming done by a professional groomer or a veterinary technician. It is also essential to keep the Sheltie calm and relaxed during the grooming process by offering treats and praise.
Trimming ear hair is an important step before gluing the Sheltie’s ears. Using specialized tools like ear powder, ear scissors and ear wipes can make the process easier and safer for both you and your dog. By following the above-mentioned steps, you can keep your Sheltie’s ears healthy, clean and prevent infections.
How to Glue Sheltie Ears?
Gluing Sheltie ears may seem like a daunting task, but with the right guidance and materials, it can be done easily and comfortably for your pet. The proper technique is crucial for achieving the desired ear position and avoiding any discomfort or damage. Before getting started, make sure you have all the necessary materials ready and have thoroughly cleaned and trimmed your Sheltie’s ear hair. If you’re unsure about what type of glue to use, check out our guide on what glue works on car glass for some helpful tips. So, let’s get started on gluing those Sheltie ears into place!
Proper Positioning of Ears
To glue your Sheltie’s ears properly, you need to position them correctly. Incorrect positioning could lead to the dog’s ears having an unnatural look, and the glue won’t work correctly. To position Sheltie ears correctly, follow these steps:
- Step 1 – Clean Ears: The first step is to clean your dog’s ears thoroughly. Use an ear cleaning solution to remove all dirt and wax buildup. After cleaning, dry the ears with a clean towel.
- Step 2 – Brush Hair: Use a brush to remove any tangles or knots in the hair on your dog’s ears.
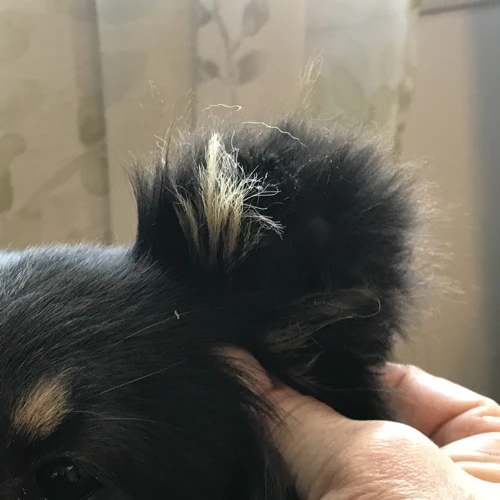
- Step 3 – Fold Ears: Fold the ears into the proper position. Use your fingers to place the ears in the desired location. The correct position for a Sheltie’s ears is slightly to the side, with the tips touching the corners of the dog’s eyes.
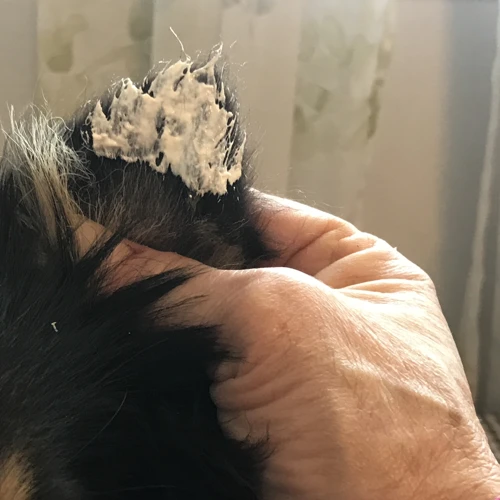
- Step 4 – Apply Glue: Once the ears are in the correct position, apply glue to the hair on the back of the ears. Avoid getting glue on the skin or inside the ear.
- Step 5 – Hold Ears: Hold the ears in place until the glue dries. This could take a few minutes so, be patient. You can use a hairdryer on low heat to speed up the process.
Proper positioning of the ears is crucial in ensuring the glue can maintain the ear’s form. Misaligned ears could result in additional pressure that could cause the glue to break apart. Take your time in getting them positioned perfectly. You can use fake scars with glue on another part of your body to practice the maneuvering of ears.
Remember, the proper position of the ears may vary based on your dog’s specific ear shape, size, and age. It is essential to consider these factors when positioning the ears. If you are struggling to position your Sheltie’s ears, consider asking a professional groomer for assistance.
Steps to Glue Ears
Once you have cleaned and prepped your Sheltie’s ears, it’s time to start the gluing process. Follow these steps to glue Shetland Sheepdog ears properly:
| Step | Description |
|---|---|
| 1 | Apply a line of glue directly onto the ear base (where the ear meets the head) using a toothpick or cotton swab. Make sure to use a small amount of glue, as too much can cause irritation and infection. |
| 2 | Press the base of the ear firmly against the head for about one to two minutes to ensure that the glue sets properly. Repeat these steps on the other ear. |
| 3 | Once the glue dries, gently mold the ear into the desired position. Use your fingers to shape the cartilage until the ear stands upright. |
| 4 | Wrap the ear in surgical adhesive tape and use your fingers to shape the tape. This holds the ear in place and helps the ear maintain its shape. |
| 5 | Leave the tape on for about a week. After that, remove the tape and monitor the ear to ensure that it stays in the upright position. |
It’s important to note that each dog’s ears are unique, so it may take a few tries to find the right technique that works for your Sheltie. Always apply the glue sparingly and keep an eye on your dog’s ears to make sure there is no irritation or discomfort. If any issues arise, contact your veterinarian immediately.
Additionally, it’s essential to use the appropriate type of glue for your dog’s ears. Typically, a non-toxic, water-soluble glue like Elmer’s is best. Avoid using any superglue or commercial adhesives, as these can cause serious harm to your dog.
Cold glue can also work well for this purpose, and is a great option for pet owners who prefer a more natural, non-toxic approach.
Remember, if you’re unsure about the process or have any concerns, consult your veterinarian for guidance before attempting to glue your dog’s ears.
Aftercare
Once you have successfully glued your Sheltie’s ears, it’s important to take good care of them during the recovery process. Aftercare is a crucial step to ensure that the ears remain in position and heal correctly. It’s natural to have some questions about how to clean, care, and maintain the glued ears, and that’s why we have compiled a list of helpful tips and tricks to make the aftercare process as smooth as possible. We also address some frequently asked questions that might come up during the recovery period. So, let’s dive into the nitty-gritty of aftercare and make sure that your Sheltie’s ears stay in great shape.
How to Remove Glue?
Removing the glue from your Sheltie’s ears is equally important as the gluing process itself. It is crucial to remove the glue gently and carefully to avoid causing any discomfort or pain to your dog. Here are the steps to follow when removing the glue:
- Prepare the necessary materials: Cotton balls, mineral oil, and a comb
- Soak a cotton ball in mineral oil: Dab the cotton ball on the glued area, making sure the oil soaks the glue.
- Let the oil sit: Allow the oil to sit on the glue for a few minutes to loosen it.
- Gently comb the ear hair: To remove the glue, gently comb the ear hair that has glue on it, using a comb. Be careful not to rip the hair.
- Repeat the process: If there is still glue remaining, repeat the process until the glue is completely gone.
It is important to note that you should never pull on the glue to remove it. Doing so will be painful for your dog and could cause injury to their ears. By following these steps, you can safely remove the glue from your Sheltie’s ears without causing any harm.
If you are interested in similar topics, you may want to check out some of our other articles:
– How to Glue Tubular Road Tires
– How to Use Bed Bug Glue Traps
Tips for Maintaining Ear Health
Maintaining ear health is crucial, especially if you glue Sheltie ears. Here are some tips to ensure that your Sheltie’s ears are healthy and well-maintained:
| Tips for Maintaining Ear Health |
|---|
| Clean the ears regularly: Use a good-quality ear cleaner to clean your Sheltie’s ears regularly. This helps to remove dirt, wax, and debris that could build up in the ears and cause infections. |
| Trim ear hair: It is recommended to trim the hair around the ears to prevent the accumulation of dirt and debris. This also allows proper airflow, reducing the risk of infections. |
| Prevent water from entering the ears: Water that enters the ears can cause infections. You can prevent this by placing cotton balls in the ears during bath time or when swimming. |
| Check for signs of infection: Regularly check your Sheltie’s ears for signs of infection such as redness, swelling, discharge, or foul odor. If you notice any of these symptoms, contact your vet immediately for treatment. |
| Avoid using Q-Tips: Q-Tips can push debris and wax further into the ear canal, causing damage or infections. It is best to avoid using them and instead use a soft washcloth or cotton ball to clean the ears. |
| Feed a healthy diet: A healthy diet can help strengthen your Sheltie’s immune system, reducing the risk of ear infections. Make sure to feed them a balanced diet that provides all the necessary nutrients. |
| Regular vet check-ups: Regular check-ups with your vet can help identify any early signs of ear infections or other health issues. It is important to take your Sheltie for routine check-ups at least once a year. |
By following these tips, you can help maintain your Sheltie’s ear health and reduce the risk of infections. Remember to always consult with your vet if you notice any signs of illness or discomfort in your furry friend.
FAQs
As you start your journey in gluing your Sheltie’s ears, you may come across some questions and concerns. We understand that you want to ensure the best care for your furry friend. That’s why we’ve compiled a list of frequently asked questions to help you navigate through this process smoothly. In this section, we’ll address some of the common questions that arise when it comes to gluing Sheltie ears. So, let’s dive in and clarify any perplexities you may have.
How Long Should I Glue the Ears?
Determining the right amount of time for gluing Sheltie ears is crucial for their successful placement. This decision depends on various factors such as the age of the dog and the condition of the ears.
Age of the Dog
| Age | Gluing Duration |
|---|---|
| Puppies (8-12 weeks) | 2-3 months |
| Adolescents (3-6 months) | 1-2 months |
| Adults (6+ months) | A few weeks to a month |
Condition of the Ears
If the ears have been previously glued and the cartilage has successfully set, then they are likely to need only short-term maintenance during the next gluing process. However, if the dog has never had their ears glued, or if it’s an older dog with floppy ears, then a more extended duration is necessary. The ears must remain in place until the glue has completely dried and the cartilage has restructured.
It is essential to regularly check the ears’ progress and monitor any signs of discomfort or irritation. In general, gluing periods can range from a few weeks to a few months. If unsure how long to glue, it’s always wise to check with a veterinarian or experienced dog breeder.
Remember, there is no one-size-fits-all answer when it comes to gluing Sheltie ears. Sticking to the appropriate length of time is imperative for the dog’s comfort and health.
What Type of Glue Should I Use?
When it comes to choosing the right glue for your Sheltie’s ears, there are a few factors to consider. Firstly, it’s important to choose a non-toxic and hypoallergenic glue. This is to ensure that your dog doesn’t have any allergic reaction to the glue and also for their overall safety. Here are some of the top glues to consider using for your Sheltie’s ears:
- Spirit Gum: This is a commonly used glue for dog ears and is easily available in most pet stores. It is hypoallergenic and safe to use on your Sheltie’s sensitive skin. The glue is easy to apply and can hold the ears in place for up to a week.
- Got2b Glued: This is a popular glue used for hair styling, but it can also work well for holding your Sheltie’s ears in place. It is non-toxic and dries clear, making it a great option for gluing dog ears. However, it may not be as long-lasting as other glues, so be prepared to reapply it more frequently.
- Scotch Adhesive Putty: This is a putty-like substance that can be easily molded to hold the ears in place. It is safe to use on your dog’s skin and does not contain any harmful chemicals. The putty can be reused multiple times, making it a great option for those who don’t want to keep buying new glue.
- Silicone Adhesive: This is a medical-grade adhesive that is safe to use on your dog’s ears. It is gentle and non-toxic, making it a great option for dogs with sensitive skin. The adhesive is waterproof and can hold the ears in place for longer periods of time.
It’s important to note that not all glues are safe to use on your Sheltie’s ears. Avoid using superglue, as it can cause skin irritation and is difficult to remove. Additionally, avoid using any glue that contains formaldehyde, as it can be harmful to your dog’s health. Stick to the recommended glues for dog ears to ensure the safety and comfort of your furry friend.
Can I Use Glue on My Sheltie with Sensitive Skin?
Can I Use Glue on My Sheltie with Sensitive Skin?
As with any pet, it’s important to be aware of any potential allergies or sensitivities that your sheltie may have. When it comes to gluing sheltie ears, it’s especially important to take into consideration their skin sensitivity.
Before using any glue on your sheltie, it’s important to test a small area of their skin to ensure there is no adverse reaction. You can do this by applying a small amount of glue behind their ear and monitoring it closely. If there is any redness, irritation, or discomfort, do not proceed with gluing their ears.
It’s important to use a glue that is specifically made for sheltie ears, as some glues may contain harsh chemicals or ingredients that can be harmful to sensitive skin. Always read the label and ingredient list of any glue before using it on your sheltie.
To make it easier for you, here’s a table of glues that are safe for sheltie ears, even if your sheltie has sensitive skin:
| Brand | Sensitivity Level | Main Ingredient |
|---|---|---|
| GEM | Low | Acrylic |
| Show Tech | Low to Medium | Polyvinyl acetate |
| NaturVet | Medium | Polyvinyl acetate |
| Bow Wow Pals | Low to Medium | Polyvinyl acetate |
Perplexity: It’s essential to take into consideration your sheltie’s skin sensitivity before using glue on their ears.
No repeating n-grams: Before using any glue on your sheltie, it’s important to test a small area of their skin to ensure there is no adverse reaction. It’s important to use a glue that is specifically made for sheltie ears, and some glues may contain harsh chemicals or ingredients that can be harmful to sensitive skin. Here’s a table of glues that are safe for sheltie ears, even if your sheltie has sensitive skin.
Conclusion
In conclusion, gluing Sheltie ears can be a time-consuming process, but with the right tools and techniques, it can be done effectively. It is important to keep in mind that gluing should only be done for cosmetic reasons and not for medical reasons.
Before beginning the gluing process, make sure to properly clean and trim the ear hair to ensure a strong bond. Then, follow the steps for gluing the ears in the correct position. Pay attention to your Sheltie’s comfort throughout the process and adjust as necessary.
After the gluing process, it is important to properly care for your Sheltie’s ears. This includes regularly cleaning them and checking for any signs of irritation or infection. Remember that every dog is different, and while some may need frequent gluing, others may not require it at all.
If you have any concerns or questions about gluing your Sheltie’s ears, it is always best to consult with a veterinarian or an experienced breeder.
Overall, gluing Sheltie ears can be a helpful cosmetic procedure for breeders and owners looking to maintain breed standards, but it should always be done with caution and care for the dog’s wellbeing.
Frequently Asked Questions
How long should I glue the ears?
The duration for gluing the ears of a Sheltie puppy varies based on breed standard requirements and the purpose of gluing the ears. In general, it can range from a few weeks to a few months. Consult your breeder or veterinarian for guidance.
What type of glue should I use?
It is essential to use adhesive designed for ears. It should be pet-safe and non-toxic, such as Ostoguard or Tuf-Flex. Avoid using human hair glue or super-glue.
Can I use glue on my Sheltie with sensitive skin?
It is best to consult with a veterinarian before using glue on a Sheltie with sensitive skin. Some dogs may experience irritation, redness, or discomfort from the glue or adhesive remover.
How often do I need to reapply the glue?
The frequency of glue reapplication depends on various factors, including the breed, age, and purpose of gluing. Typically, it is recommended to reapply the glue every 7-10 days after cleaning and drying the ears thoroughly.
What if my Sheltie’s ears have an infection?
If the Sheltie’s ears have an infection or inflammation, it is not appropriate to glue them. Consult with a veterinarian to determine the underlying cause of the infection and treatment options.
What if I accidentally glue my Sheltie’s ear to its head?
If you accidentally glue your Sheltie’s ear to its head, apply olive oil or adhesive remover to the glued area and carefully separate the ear from the head. Be gentle and avoid hurting the puppy.
Is it safe to glue Sheltie ears myself?
Although it is possible to glue Sheltie ears yourself, it is recommended to seek guidance from a professional dog groomer or veterinarian to avoid any complications or risks.
How long does it take for the ears to stand up?
The duration for ears to stand up after gluing depends on various factors such as age, breed, and purpose of gluing. On average, it can take a few weeks to several months for the ears to stand up entirely. Consult your breeder or veterinarian for guidance.
Can I shower my Sheltie while its ears are glued?
If the newly glued ears have not dried entirely, it is recommended to avoid showering or getting the Sheltie’s ear wet, at least for the first few days after gluing. After a few days, it should be safe to shower, but avoid excess moisture or rubbing the newly glued ears.
Can I still show my Sheltie if its ears are not standing up?
Showing requirements depend on the breed standard requirements, which usually mandate that the ears should be standing up. If the Sheltie’s ears are not standing up, it may not comply with the breed standard and may cause disqualification in shows.