Have you ever wanted to create a realistic fake scar for a costume or special effect? The idea may sound daunting, but fear not – with just a few supplies and techniques, you can easily create a convincing scar that will have everyone double-checking whether it’s real. In this article, we’ll take a closer look at how to make fake scars with glue using easy and realistic techniques. So grab your supplies and get ready to bring your creativity to life!
Supplies You’ll Need:
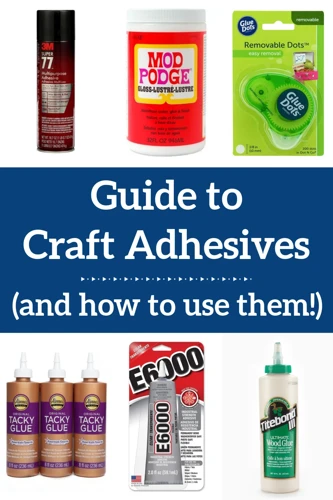
Once you’ve decided to create fake scars with glue, you’ll need to have the right supplies to achieve the most realistic effect. The supplies you’ll need are simple and easy to obtain. You may already have some of them in your home. To create fake scars that look as close to the real thing as possible, you’ll need glue, tissue paper and makeup. Depending on the technique you’ll choose, the additional materials will be needed. If you’re wondering what type of glue works best for this project, consider doing research to find the right glue for your needs.
1. Glue
When it comes to making fake scars, choosing the right glue is crucial. You want a glue that will create a strong and long-lasting bond, but also one that is safe to use on your skin. In this case, the preferred choice of glue is liquid latex. Liquid latex is a type of natural rubber and is commonly used in the special effects industry for creating realistic wounds and scars.
Liquid latex can easily be found at most craft stores or online, and it’s important to note that it dries quickly, so you’ll need to work fast. When using liquid latex, it’s also important to do a patch test on your skin to make sure you’re not allergic to it. Simply apply a small amount of liquid latex to your skin and wait 24 hours to see if there is any reaction.
Another option for glue is spirit gum, which is a type of adhesive commonly used for theatrical makeup and special effects. Spirit gum is also easily found at most costume or theatrical supply stores and is safe to use on the skin. However, it’s important to note that spirit gum can be a bit more difficult to remove compared to liquid latex.
When choosing a glue, it’s important to consider your skin type and any allergies you may have. Always read the label carefully and follow the instructions for use. If you’re unsure which type of glue is best for your project, consult with a professional or do some research online.
Table:
| Glue Type | Pros | Cons |
| Liquid Latex | Dries quickly, commonly used for special effects, safe on skin | Needs to be applied quickly, may not be suitable for those allergic to latex |
| Spirit Gum | Safe on skin, commonly used for theatrical makeup and special effects | Can be difficult to remove, may not be suitable for those sensitive to solvents |
If you want to learn more about the different types of glue you can use for other projects, check out our article on what glue to use on blinds.
2. Tissue Paper
Tissue paper is an essential supply for making fake scars with glue. Tissue paper is durable and allows you to shape and mold your fake scars in various ways. To use tissue paper in making fake scars, follow these steps:
- Tear the tissue paper into small pieces: Tear your tissue paper into small pieces to achieve a more natural effect. Ripped edges will look more realistic than cut edges when making your fake scars.
- Apply glue to the area: Apply glue to the area where you want to create your fake scars. You can use any glue, but we recommend a washable, non-toxic glue for safety reasons.
- Layer the tissue paper: Layer the small pieces of tissue paper onto the glue area. Use your fingers or a brush to press the tissue paper down onto the glue. Make sure the entire area is covered before continuing.
- Add more glue: Apply another layer of glue on top of the tissue paper layer. This helps to create a strong bond between the tissue paper and the skin.
- Let it dry: Let the tissue paper and glue dry completely before moving on to the next step in creating your fake scars.
Using tissue paper in making fake scars with glue is an easy and inexpensive method. Additionally, it allows you to create scars of different shapes and sizes. Despite its pliability, appropriate care should still be taken while using tissue paper, especially when adding additional layers.
3. Makeup
To make fake scars with glue, you will need to gather a few supplies, including tissue paper, glue, and makeup. Makeup is essential for making your fake scars look realistic and blending them into your skin. There are a few types of makeup that you can use for this purpose, each with its own benefits.
Concealer: A concealer that matches your skin tone can be used to cover the base of your fake scar and help it blend into your skin.
Foundation: Similar to concealer, using a foundation that matches your skin tone can help blend the scar into your skin and make it look more natural.
Red, blue, and purple eyeshadows: These eyeshadow colors can be used to create a bruised or irritated effect around the edges of your fake scar.
Black, brown, and red lipsticks: These can be used to create depth and shading within the fake scar.
| Makeup Supplies | Benefit |
|---|---|
| Concealer | Matches your skin tone and helps the scar blend into your skin |
| Foundation | Matches your skin tone and helps the scar blend into your skin |
| Red, blue, and purple eyeshadows | Creates a bruised or irritated effect around the edges of the scar |
| Black, brown, and red lipsticks | Creates depth and shading within the fake scar |
When using makeup for your fake scars, it’s important to remember to blend carefully and use a light hand. You can always add more makeup to create a more intense effect, but it can be difficult to remove too much. If you’re unsure about how to use makeup to create a specific effect, consider looking up tutorials online or practicing on a small area before attempting to create your fake scar.
Internal link: If you’re interested in learning about gluing binding on a guitar, check out our article on how to glue binding on a guitar.
Techniques to Make Realistic Fake Scars
Creating realistic fake scars with glue is easier than you think, and it’s a great way to add some excitement to your Halloween costume or movie makeup. To achieve an authentic look, you need to use different techniques during the process. In this section, we will walk you through the steps to create your “wounds” with common supplies like glue, tissue paper, and makeup. It’s crucial to note that the type of glue you use matters significantly. Make sure to use the appropriate adhesive that won’t harm your skin or cause an allergic reaction. If you’re wondering which glue to use as a base for the fake scars, we recommend checking out our article on what glue to use for basing miniatures.
1. Skin Preparation
Before creating your fake scars with glue, it’s essential to prepare your skin correctly. Proper skin preparation can make a significant difference in the final result and ensure that the fake scars look realistic and remain intact for an extended period.
Here are the critical steps to prepare your skin before creating fake scars:
| Step | Description |
|---|---|
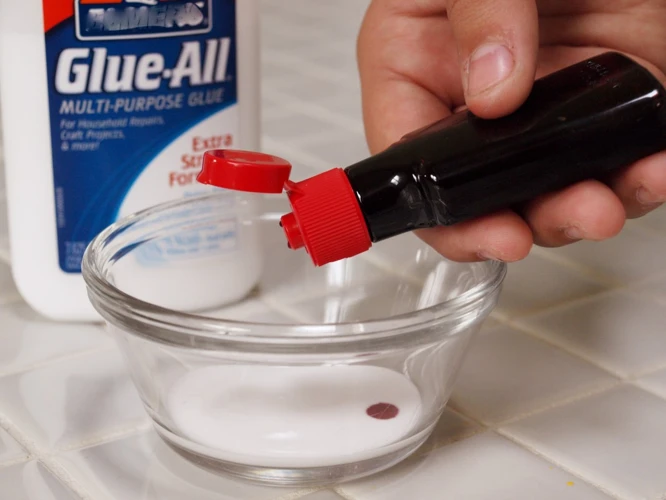
| 1 | Cleanse the Skin Start by cleansing the area of skin where you plan to create the fake scar. You can use soap and water or an alcohol wipe. Cleaning the area will remove any dirt, oil, or debris that could interfere with the glue’s ability to adhere to your skin. |
| 2 | Apply Decoupage Glue Apply a thin layer of decoupage glue, such as Mod Podge, to the skin where you plan to create the fake scar. Let the glue dry completely. Decoupage glue will help create a barrier between the glue and your skin, making it easier to remove the fake scar when you’re done. |
| 3 | Protect the Skin Before applying the glue and tissue paper, protect the surrounding skin with petroleum jelly or a similar product. This will prevent the glue from sticking to any skin other than the area where you plan to create the fake scar. |
Following these three steps will prepare your skin for the fake scar application process. By cleansing the skin, applying decoupage glue, and protectively applying petroleum jelly, you will ensure that the fake scar adheres correctly while protecting the surrounding skin.
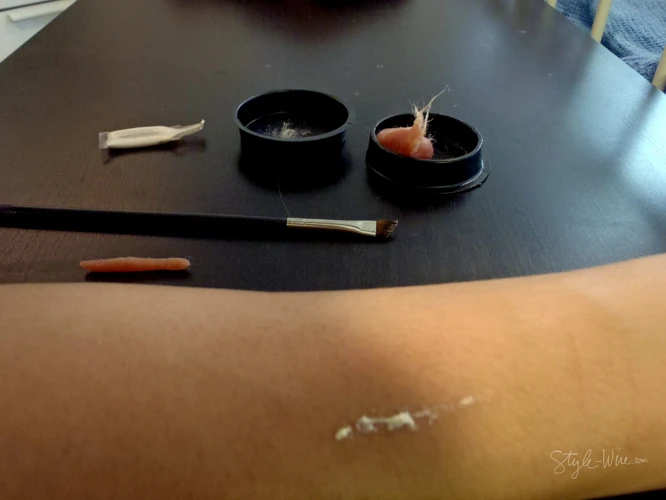
2. Creating the Base
After preparing the skin, the next step is to create the base for your fake scar. To create a base, take a small amount of glue and draw a thin line with it where you want your scar to be. Use a toothpick or a small brush to spread out the glue and create the shape that you want. The line should be slightly raised, but not too thick.
To make the base more realistic, use tissue paper to create the texture of the scar. Take a small piece of tissue paper and crumple it up, then flatten it out and apply it to the glue base. Use your fingers or a small brush to press the tissue paper into the glue and smooth out any wrinkles. Repeat this step until you have the desired amount of texture.
Tip: If you don’t have tissue paper, you can also use small pieces of toilet paper or paper towels for texture.
| Materials | Steps |
|---|---|
| Glue | Draw a thin line with glue where you want your scar to be |
| Tissue paper | Crumple a small piece of tissue paper, flatten it and apply it to the glue base. Repeat until you have the desired texture. |
| Toothpick or small brush | Use to spread glue and smooth out the texture. |
Remember to keep the base as close to the skin color as possible. If you want your scar to be more visible, use a darker shade of glue. Creating the base is the most important step in making a fake scar with glue, as it lays the foundation for the texture and color that will come later in the process.
Tip: For a more unique texture, you can experiment with different types of glue. Check out this article for more information on what decoupage glue is and how it can be used in your fake scar-making process.
3. Adding Texture
Once the base of your fake scar has dried, it’s time to add some texture to make it look more realistic. There are a few different ways to create texture, but one simple method involves using a toothpick or a pointed tool to create thin, raised lines in the glue.
To add texture to your fake scar, first dip a toothpick into some glue. Then, use the toothpick to carefully create thin lines and raised areas on the surface of the glue. Start with small lines and add more texture as needed, being careful not to overdo it and make the scar look too fake.
Another way to add texture is to crumple up small pieces of tissue paper and press them into the still-wet glue. This can create a more realistic, uneven surface for your fake scar. You can also use a brush to add some light texture by gently dabbing it across the surface of the glue.
No matter what method you choose, it’s important to add texture slowly and carefully. If you make a mistake, don’t worry – you can always remove the glue and start over.
Pro tip: If you want to add even more texture and detail to your fake scar, try adding some makeup or coloring. You can use eyeshadows, blushes, and other makeup products to create a realistic, multi-dimensional effect. For example, you could add some red and purple tones to mimic the look of a bruise, or you could add some brown and yellow tones to create the look of scabbing.
Remember, the key to adding texture is to take your time and experiment with different techniques. Don’t be afraid to try new things and see what works best for your fake scar.
If you need more glue for your project, check out our article on how to get repair glue.
4. Adding Color and Shading
When it comes to adding the color and shading to your fake scar, you can use makeup or paint to create a more realistic effect. First, use a color that matches your skin tone to blend the edges of the scar into your skin. Then, using a darker shade, add shading to the inside of the scar to create depth. You may also want to add some red or pink to make the scar look more realistic, as scars are often slightly discolored. Using a small brush or sponge applicator can help you achieve a more natural and precise look.
Pro tip: If you’re using makeup, try using a matte finish to make the scar look more natural and less shiny.
Remember, less is more when it comes to adding color and shading. Start with a small amount of product and build up as needed to avoid overdoing it. And always take breaks to step back and look at your progress from a distance. This can help you to see if you need to add more color or shading in certain areas for a more realistic look.
Also, avoid using too much water when mixing the colors as it can cause the glue to loosen and your scar to fall off.
Finally, if you want to add even more texture and dimension to your fake scar, consider using different shades of makeup or paint. You can also use a small brush to add small details such as veins or tiny cuts. With a little experimentation, you can create a fake scar that looks like it’s been there for years.
Pro tip: For more inspiration on creative uses for glue, check out our article on how to make bird seed blocks with glue.
Tips for Making Fake Scars with Glue
So, you’ve gathered all your supplies and you’re ready to make some fake scars. As you begin to work on your masterpiece, keep these tips in mind to help you create the most realistic looking scars possible. From using reference images to experimenting with different colors and textures, these tips will help take your fake scars to the next level. And when you’re finished scaring your friends and family, be sure to check out our other articles on creative uses for glue, such as how to glue notepads, what glue to use on wall, and even how to seal an envelope without glue.
1. Use a reference image
When creating fake scars with glue, it can be helpful to use a reference image to ensure that your results are as realistic as possible. This can be especially useful if you are not familiar with what real scars look like. Here are some tips for using reference images effectively:
- Find a high-quality image: Look for images that are clear and show the details of the scar. You can find images online, in medical texts, or even by taking your own pictures of scars.
- Study the shape and color: Pay attention to the shape and size of the scar, as well as the color and shading. This will help you create a more accurate depiction of the scar.
- Use the image as a guide: Keep the reference image nearby as you create your fake scar. Use it as a guide for placement, shape, and coloring.
- Don’t be afraid to deviate: While it’s important to use a reference image, you don’t have to create an exact replica of the scar. Use your creativity and experimentation to make it unique and fitting for your needs.
By using a reference image, you can create a more convincing fake scar that looks like a real scar. Don’t underestimate the value of taking the time to find and study a reference image before beginning your project.
2. Take it slow
When making fake scars with glue, it is important to take your time and go slowly. Rushing through the process can result in a less realistic and messy looking scar. To ensure you take it slow and get the best results possible, here are some tips to keep in mind:
| Tips for Taking it Slow |
|---|
| 1. Work in small sections: |
| When creating your fake scar, work in small sections at a time. This allows you to focus on each detail and make adjustments as needed before moving on to the next section. |
| 2. Allow glue to dry between layers: |
| Applying multiple layers of glue and tissue paper is essential for creating a realistic texture. However, it is important to let each layer dry completely before layering on top of it. This will prevent the glue from becoming too wet and causing the layers to slide off. |
| 3. Check your progress: |
| As you work, step back and examine your progress. This will allow you to identify any areas that need more detail or adjustment. It is easier to make changes early on in the process rather than trying to fix everything at the end. |
| 4. Don’t rush the makeup application: |
| After you have created the base for your fake scar, it is time to add color and shading to make it look more realistic. When applying makeup, use a light hand and build up the color slowly. This will prevent you from overdoing it and ruining the effect. |
By taking your time and following these tips, you can create fake scars with glue that look realistic and professional. Remember, practice makes perfect, so don’t be discouraged if it takes a few tries to get it right.
3. Use multiple layers
Creating a realistic fake scar with glue requires the use of multiple layers. You want to start with a thin layer of tissue paper and glue and then build it up with additional layers to add depth and texture. The number of layers you use will depend on how thick and elevated you want your scar to be.
Using multiple layers will also help ensure the durability of your fake scar. Each layer needs to fully dry before adding the next one. You can speed up the drying process with a hairdryer set to low, but it’s still important to be patient. Rushing the drying process can result in a weaker hold and a less realistic final product.
Here’s an example table that outlines the recommended number of layers for different types of scars:
| Type of Scar | Recommended Number of Layers |
|---|---|
| Small, flat scar | 2-3 layers |
| Large, raised scar | 5-6 layers |
| Indented scar | 4-5 layers |
Using too many layers or not allowing each layer to dry fully can result in a lumpy or uneven final product. However, the right number of layers can help create a realistic-looking scar that appears to be a natural part of your skin.
4. Experiment with different colors and textures
When it comes to creating fake scars with glue, experimenting with different colors and textures is an essential step to achieve a realistic effect. Using the same color or texture for every scar will make them look fake and unrealistic. To create a unique and authentic look, you should try different colors and textures that match the type of scar you’re trying to imitate.
Here’s a table that showcases some ideas for different colors and textures you can experiment with:
| Color/Texture | Scar Types |
|---|---|
| Reddish-purple | Recent cuts or wounds |
| Yellowish-green | Older wounds or bruises |
| Brown or black | Burn scars or puncture wounds |
| Bumpy or lumpy texture | Keloid or hypertrophic scars |
| Smooth or shiny texture | Scars caused by surgery or stitches |
By experimenting with different colors and textures, you can create scars that look more authentic and realistic. Keep in mind that the color and texture you choose will depend on the type of scar you’re creating. You may need to mix colors or use multiple layers to achieve the desired effect. Don’t be afraid to play around with different options until you find the best way to create the scar you need.
Removing Your Fake Scars
Once you’ve enjoyed your fake scars for as long as you want, it’s time to remove them. Removal is easy and painless, but it’s important to do it carefully to avoid any damage to your skin. In this section, we’ll walk through the best practices for removing your fake scars, step-by-step.
Step 1: Gently Peel Off the Tissue Paper
Start by gently peeling off the tissue paper layer by layer. Be sure to peel it slowly to avoid tearing your skin. If it’s sticking, moisten it with a cotton ball dipped in warm water or rubbing alcohol.
Step 2: Remove Any Residue
Once all the tissue paper has been removed, you may have some glue residue left behind. Don’t worry; this is easy to remove. Soak a cotton ball or washcloth in warm water and gently rub the area until the glue residue comes off.
Step 3: Cleanse the Area
After removing the glue residue, cleanse the area with soap and warm water. You can also use a gentle cleanser or baby oil to remove any remaining residue.
Step 4: Moisturize the Area
After cleansing, it’s essential to moisturize the area with a gentle lotion or cream. This will help to prevent any dryness or irritation that could occur after the application and removal of the fake scars.
Step 5: Wait Before Reapplying Scars
After removing the fake scars, it’s best to wait a day or two before reapplying them. This will give your skin time to recover and prevent any irritation or damage.
Now that you know how to remove your fake scars successfully, you can enjoy experimenting with different techniques and designs confidently. Just remember to remove them with care and follow these simple steps for healthy and beautiful skin.
Conclusion
In conclusion, making fake scars with glue is a great way to add some realism to your cosplay, Halloween costumes, or movie makeup. With just a few supplies, you can create convincing scars that will impress anyone. However, it’s important to remember that applying glue and makeup to your skin requires care and attention to avoid any adverse reactions or irritation.
Always prepare your skin properly and follow the techniques outlined in this article to create realistic scars. Take your time and experiment with different textures and colors to achieve the desired effect. Don’t forget to use reference images for inspiration and accuracy.
When it’s time to remove your fake scars, be sure to do so gently to avoid any damage or irritation to your skin. Use a mild cleanser and warm water to loosen the glue, and avoid peeling or pulling at the scar.
Overall, making fake scars with glue takes a bit of practice and patience, but the results are worth it. With these techniques and tips in mind, you can achieve some truly realistic and impressive scars for any occasion. So, grab your supplies and get creative with your scar-making skills!
Frequently Asked Questions
1. How long will the fake scars last?
With proper care and storage, fake scars made with glue and tissue paper can last up to a week.
2. Can I use regular school glue for creating fake scars?
Yes, regular school glue can be used to create fake scars. However, it may need more time to dry and may not provide as realistic of a texture compared to specialized fx glue.
3. Can I use the fake scars on sensitive skin?
If you have sensitive skin, it is best to patch test the materials first. Some people may react to the adhesive in the glue or the ingredients in the makeup used to color the scar.
4. Can I apply makeup over the fake scars?
Yes, makeup can be applied over the fake scars to help blend them into your skin and make them look more realistic.
5. How do I remove the fake scars?
The fake scars can be removed by gently peeling them off your skin. If there is any residue left over, it can be wiped away with olive oil or makeup remover.
6. Can I reuse the fake scars?
Fake scars made with glue and tissue paper are not designed for multiple uses. It is best to create new ones for each use.
7. Is it safe to apply glue on my skin?
Using small amounts of glue on your skin is generally safe, but it is important to avoid any irritation or allergic reactions. Be sure to patch test the materials first and avoid getting glue in your eyes or mouth.
8. Can I use other materials besides tissue paper to create the fake scars?
Yes, you can experiment with using other materials like cotton balls or latex to create different textures for your fake scars.
9. How can I make the fake scars look more realistic?
Adding multiple layers, using different colors and textures, and referencing images of real scars can all help make your fake scars look more realistic.
10. Can children make fake scars with glue?
Children should only attempt to make fake scars with glue under adult supervision. Make sure to use non-toxic materials and keep it away from eyes and mouth.