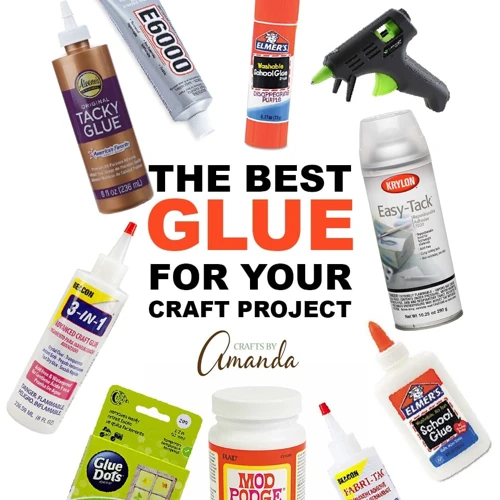
Crafting and art projects often require the use of glue. However, not everyone has access to store-bought glue or prefers to make their own. If you are one of those people, you might be wondering how to make your own cold glue. The good news is that it’s a simple process, and you can easily make it at home using everyday household items. In this guide, we will walk you through the steps of making cold glue and provide tips on how to store and use it effectively, as well as how to troubleshoot any potential issues that may arise. So, put on your crafting hat and let’s get started!
Gather Materials
As you prepare to make your own cold glue, you’ll need to gather all the necessary materials. With the right ingredients and tools, you’ll be well on your way to creating a powerful adhesive that can be used for a wide range of applications. Before you begin, make sure you have all the items on the following list.
Looking for more information on where to place glue traps? Check out this guide for some helpful tips.
Ingredients
Making cold glue requires just a few simple ingredients, many of which you likely already have in your kitchen. However, it’s important to have all the necessary ingredients on hand before beginning the process. Here are the ingredients you will need for making cold glue:
| Ingredient | Amount |
|---|---|
| Gelatin | 1 tablespoon |
| Cold water | 3 tablespoons |
| Vinegar | 1 tablespoon |
Gelatin is the primary ingredient in this cold glue recipe, as it provides the adhesive properties needed to make the glue sticky. You can typically find unflavored gelatin in the baking aisle of your local grocery store.
You’ll also need cold water to dissolve the gelatin in, as well as vinegar to mix with the gelatin and water mixture. The vinegar helps to extend the shelf life of the glue by preventing it from spoiling.
While the ingredients in this recipe are relatively simple, it’s important to have the correct amounts to ensure that the glue sets properly. Make sure to measure your ingredients precisely before beginning the mixing process.
If you’re interested in other types of glues for different purposes, you can check out these articles for more information:
- What Kind of Glue to Mount Air Plants?
- What Glue to Stick Wallpaper to Furniture?
- Is Tacky Glue Waterproof When Dry?
- How Long Does Carpet Glue Take to Dry?
- How to Make Slime with Shaving Cream (No Glue)
- How to Glue Styrofoam to Cardboard?
- How to Make a Fake Tongue Ring Without Glue?
- How Long for Windshield Glue to Dry?
Tools
To make cold glue, you will need certain tools to ensure that the glue is mixed properly and is the right consistency. Don’t worry, you don’t need anything fancy, just a few basic tools that you may already have in your kitchen. Here are the tools required to make cold glue:
- A saucepan: You will need a small saucepan to heat up the mixture of water, gelatin, and vinegar. Choose a medium-sized saucepan that can comfortably fit all of the ingredients.
- A whisk: Make sure to have a whisk on hand to thoroughly stir the mixture and prevent any clumping.
- A measuring cup: Use a measuring cup to carefully measure out the ingredients. This will ensure that your cold glue turns out perfectly.
- A container with a lid: After making cold glue, you’ll need to store it in an airtight container to avoid it from drying out or becoming too thick. Choose a container with a lid that securely fastens to prevent air from entering.
If you don’t have a whisk, you can also use a fork or a spoon to mix the ingredients. However, a whisk is recommended for the smoothest texture. Now that you have gathered all the necessary tools, you’re ready to make your cold glue!
If you happen to need a box for storing your newly made cold glue, check out our guide on how to make a cardboard box without glue for a fun DIY project.
Mixing the Glue
As you embark on the journey to make your very own cold glue, mixing the ingredients and achieving the perfect consistency may seem like a daunting task. But fear not, as this guide will take you through the process step-by-step, ensuring that your glue is perfect for all your crafting needs. Get ready to roll up your sleeves and dive into the mixing process with eager anticipation.
Step 1: Add Gelatin to Water
To start making your own cold glue, you need to begin with the first step: adding gelatin to water. This is a crucial step as the gelatin will serve as the main adhesive ingredient for your glue.
Materials Needed:
| Gelatin Powder | Water |
|---|---|
| 1 tablespoon | 3 tablespoons |
To add the gelatin to water, it is best to start with cold water. Pour the water into a heat-safe container. Then, slowly sprinkle the gelatin powder over the top of the water. It is important to sprinkle the powder slowly and evenly to avoid clumps.
Once the powder is evenly distributed on the surface of the water, allow it to sit for a few minutes. The gelatin will absorb the water and start to thicken.
Tip: You can also let the mixture sit in the refrigerator for a few minutes to help speed up the thickening process.
Now that you have added the gelatin powder to the water, it’s time to move on to the next step: heating the mixture.
Step 2: Heat the Mixture
To create cold glue, the mixture must be heated after adding gelatin to water. This step helps to dissolve the gelatin properly and ensure a smooth consistency. Here are the detailed steps for heating the mixture:
- Step 1: Place the gelatin-water mixture on low heat in a saucepan.
- Step 2: Gently heat the mixture while stirring constantly. Be sure to keep an eye on the mixture to avoid boiling it. Boiling can cause the glue to become too thick or clumpy.
- Step 3: Continue to heat and stir the mixture until the gelatin is completely dissolved. It should take about 5-10 minutes.
It’s important to note that heating the mixture too quickly or at too high of a temperature can lead to clumps or an uneven consistency. This means that you should be vigilant while heating the mixture and keep a close eye on its progress. In the next step, we’ll add the vinegar and stir to complete the cold glue recipe.
Step 3: Add Vinegar and Stir
After the mixture has been heated and the gelatin has dissolved, it’s time to add the vinegar. Adding vinegar to the gelatin mixture will cause the glue to gelatinize more quickly. Vinegar also helps to prevent the glue from becoming moldy.
Here are the steps to add vinegar to the glue mixture:
| Step 1: | Measure out 1 tablespoon of white vinegar. You can use apple cider vinegar, but white vinegar has a neutral smell and won’t affect the color of your glue. |
| Step 2: | Pour the vinegar into the gelatin mixture and stir well. Make sure the vinegar is evenly mixed throughout the glue. |
| Step 3: | Continue stirring the glue for a few more minutes until the mixture is completely smooth. If there are any clumps, make sure to break them up. |
Once the vinegar has been added and the glue has been mixed thoroughly, you’re ready to start using your cold glue. Keep in mind that the glue will start to gelatinize quickly, so it’s best to use it right away. If you’re not ready to use the glue yet, you can store it in an airtight container in the refrigerator for up to a week.
Storing and Using Your Cold Glue
After successfully making your own cold glue, you will want to know how to store and use it properly. Proper storage will ensure that your homemade glue lasts long enough for you to get the most out of it, while understanding how to handle it will enable you to use it effectively in your craft projects. In this section, we will guide you through the process of storing and using your cold glue, giving you tips and tricks to ensure that you always achieve the desired results.
Storing Your Glue
After making your homemade cold glue, you need to store it properly to ensure it lasts. Here’s a quick guide on how to store your glue:
| Keep it Sealed: | For storage, transfer the glue mixture from your mixing pot to an airtight container. A glass jar or a plastic container with a lid will work best. Keeping air away from your glue mixture will prevent it from drying out. Seal the container tightly to avoid air exposure and store in a cool, dry place like your pantry or craft room. |
|---|---|
| Don’t Store it for Too Long: | Unlike store-bought liquid glue with preservatives, homemade cold glue doesn’t last very long. It usually starts to spoil after a few weeks, even if it is well-sealed. So make sure to make only small batches of glue as per requirement and use it within a month. |
| Keep it Away from Heat: | Do not store your glue jar in direct sunlight or areas of high temperatures like near an oven or furnace. This could cause your glue to spoil faster by breaking down the protein structure faster due to excessive heat. |
By following these simple steps, you can easily store your homemade cold glue and ensure longevity.
Using Your Glue
Once you’ve made your cold glue, it’s time to use it! Here are some tips for getting the most out of your homemade adhesive:
- Apply a thin layer: Cold glue doesn’t require a lot of adhesive to create a strong bond. Applying too much glue can cause the paper to warp or wrinkle, so use a thin layer of glue to avoid this problem.
- Use a brush: To make sure you’re applying a thin layer, use a brush to spread the glue evenly. This will also help you avoid getting glue on your fingers or creating clumps in the glue.
- Wait for the glue to dry: Cold glue takes a little longer to dry than other types of glue. It can take anywhere from 10-30 minutes depending on the humidity and temperature of your workspace. Don’t try to apply pressure or move the project until the glue is completely dry.
- Press the paper: If you’re gluing paper, use a bone folder or the edge of a ruler to press the paper firmly onto the surface. This will help prevent air bubbles and ensure a tight bond.
- Store the glue upside-down: When you’re not using your cold glue, store it with the lid facing down. This will help prevent the glue from drying out and make it easier to use next time.
By following these tips, you’ll be able to use your homemade cold glue to create strong bonds without creating a mess or damaging your projects. Just remember to be patient and allow the glue time to dry completely before moving on to the next step.
Troubleshooting Your Glue
Crafting with cold glue can be a fun and easy activity, but sometimes things don’t go as planned. If you’ve run into issues with your cold glue, don’t worry! There are simple solutions to troubleshoot and fix any problems. Let’s dive into some common issues you may encounter when making and using cold glue and how to solve them.
Glue is Too Thick
One of the common problems that can occur when making cold glue is that the glue may become overly thick. This can be frustrating, as the thick consistency can make applying the glue difficult and messy. However, there are a few steps you can take to fix the problem.
1. Add More Water
If your glue is too thick, the first solution is to add more water. Slowly pour small amounts of water into the glue mixture while stirring constantly. Be careful not to add too much water at once, as this can result in the glue becoming too thin.
2. Reheat the Glue
Another solution is to reheat the glue mixture. Pour the thick glue into a pot or heat-resistant bowl. Place the container in a larger pot or pan filled with about 2 inches of water (creating a double boiler). Heat the water over medium-low heat, stirring the glue mixture constantly until it reaches a thinner consistency.
3. Strain the Glue
If the glue is too clumpy or lumpy, straining the mixture can help remove any solid pieces and result in a smoother consistency. Place a fine mesh sieve over a bowl or container and pour the thick glue through the sieve. The mesh will help filter out any solid pieces, resulting in a smoother glue mixture.
4. Add Vinegar
Vinegar can also help thin out thick glue. Add small amounts of vinegar to the mixture while stirring constantly. Be careful not to add too much vinegar at once, as this can affect the glue’s adhesive properties.
Remember, it’s important to stir the glue constantly while trying to fix its thickness to ensure the ingredients blend evenly. With a little bit of experimentation, you should be able to find a solution that results in the perfect consistency for your cold glue.
Glue is Too Thin
If your cold glue is too thin, it might not adhere to surfaces effectively. Here are some possible reasons why your glue might be too thin, and some tips on how to fix it:
- Too Much Water: If you added too much water to your glue mixture, it may be too thin. Try adding more gelatin to thicken it up. Start by adding a small amount and then stir until the glue reaches the desired consistency.
- Not Enough Gelatin: It’s possible that you didn’t add enough gelatin to your glue mixture. Try adding more gelatin and stir until you get the consistency you desire. Remember that a little goes a long way, so it’s important not to overdo it.
- Not Enough Heating: If you didn’t heat the glue mixture for the recommended amount of time, the gelatin may not have fully dissolved. This can result in a thin glue consistency. Try reheating the mixture and stirring until all the gelatin is dissolved.
Remember to always test your glue on a small, inconspicuous area before using it on your project. If your glue is still too thin, even after attempting to fix it, consider starting over with a new batch of cold glue.
Glue is Clumpy or Separated
If your cold glue turns out clumpy or separated, don’t panic! This is a common problem, but it can be fixed with a few simple steps. Here’s what you need to do:
Step 1: Heat up the Glue
First, heat up the glue on low heat until it becomes liquid. This will help dissolve any clumps that have formed and make the glue smooth again.
Step 2: Add a Little Water
If the glue is still clumpy, try adding a little water to it. Mix it well to distribute the water throughout the glue. Be careful not to add too much water, or your glue will become too thin. Only add a little at a time until you reach the desired consistency.
Step 3: Strain the Glue
If there are still clumps in the glue, you can strain it through a fine-mesh strainer or cheesecloth. This will remove any clumps or impurities, leaving you with smooth glue.
Step 4: Store the Glue Properly
Finally, make sure you store your glue properly. Keep it in an airtight container in a cool, dry place. Exposure to air, sunlight, or moisture can cause your glue to separate or spoil.
By following these simple steps, you can fix clumpy or separated glue and ensure that it stays fresh and usable for longer. Remember, proper storage is key to maintaining the quality of your cold glue.
Conclusion
After following this step-by-step guide, you should now have a good understanding of how to make cold glue at home. It’s a simple process that requires just a few ingredients and tools. By making your own glue, you can save money and have more control over the composition of your products.
Benefits of Making Cold Glue at Home
One of the biggest benefits of making your own cold glue is that it is cost-effective. The materials required to make it are relatively inexpensive and readily available, making it an affordable option for crafters and DIY enthusiasts. Additionally, you can make as much glue as you need, reducing waste and saving money in the long run.
Another benefit of making cold glue at home is that it allows you to have more control over the composition of the glue. You can choose the gelatin that you use, which will affect how strong or flexible your glue is. You can also add other ingredients to the glue to customize it for your specific project.
Tips for Making Cold Glue
When making cold glue, it’s important to follow the instructions carefully to ensure that you get the desired consistency and strength. If you find that your glue is too thick or too thin, you can adjust it by adding more or less water. Additionally, if your glue becomes clumpy or separated, you can try reheating it and stirring it until it is smooth once again.
Overall, making cold glue at home can be a fun and rewarding experience. Whether you’re creating a craft project or repairing a household item, having a reliable glue on hand can be incredibly helpful. By following this step-by-step guide, you’ll be able to make cold glue that is both effective and easy to work with.
Frequently Asked Questions
How long does it take for cold glue to dry?
The drying time for cold glue can vary depending on factors such as humidity and temperature, but typically it takes about 20-30 minutes to dry completely.
Can I use cold glue for woodworking projects?
Yes, cold glue is a great option for woodworking as it dries clear and can be sanded down to a smooth finish.
Does cold glue work on fabric?
While cold glue can work on some fabrics, it is not the best option for all types. It is always best to do a test patch before committing to using cold glue on a larger project.
Is cold glue waterproof?
Unfortunately, cold glue is not waterproof and should not be used for projects that will be exposed to moisture.
What is the best way to store cold glue?
Cold glue should be stored in an airtight container in a cool, dry place to prevent it from drying out or spoiling.
Can I make cold glue without gelatin?
No, gelatin is the key ingredient in cold glue and cannot be substituted. Without gelatin, the mixture will not have the adhesive properties needed to create glue.
Can I use cold glue on plastic?
Yes, cold glue can be used on certain types of plastic. Again, it is best to do a test patch before committing to using cold glue on a larger project.
Does cold glue have a shelf life?
Yes, cold glue has a limited shelf life and can spoil over time. It is best to use cold glue within a few months of making it.
Can I reheat cold glue after it has cooled down?
No, reheating cold glue after it has cooled down will change its properties and it may not work as intended. Only make the amount of glue that you need for each project.
What if my cold glue mixture is too thin?
If your cold glue mixture is too thin, you can try adding more gelatin and heating it up again. However, be careful not to add too much gelatin or the glue will become too thick to use.