For many cycling enthusiasts, the choice of tires is a critical one. Tubular tires, with their unique construction and installation requirements, offer a range of benefits for serious road cyclists. In this article, we delve into the nuances of gluing tubular tires, an essential skill for optimizing performance and safety on the road.
Benefits of Tubular Tires for Road Cycling
Tubular tires, also known as “sew-ups,” are revered for their superior ride quality and reduced rolling resistance. They are lighter than clincher tires and can be ridden at lower pressures, which makes them less susceptible to flats and provides a more comfortable ride. The bond between the tire and rim in a tubular tire setup also enhances the bike’s handling, especially during high-speed descents and sharp turns.
Preparing for Tubular Tire Installation
Preparing correctly for tubular tire installation is crucial. It ensures a secure bond between the tire and rim, which is vital for safety and performance. Let’s walk through the materials you’ll need and the adhesive choices available.
Materials Needed for Tubular Tire Gluing
A successful tubular tire setup begins with gathering the right materials:
- Tubular tires
- Clean rim without old glue or debris
- Tubular tire adhesive
- Acetone or alcohol for cleaning
- Brush or spatula for applying glue
- Air pump
- Cloth for cleaning and wiping
Understanding Tubular Tire Adhesive Options
Choosing the right tubular tire adhesive is pivotal. There are two primary types: solvent-based glues and tape. Solvent-based glues create a stronger bond, but require more skill and drying time. Tape is easier to apply and cleaner but may not provide as secure a bond under high-stress conditions.
Step-by-Step Guide to Gluing Tubular Tires
The actual process of gluing tubular tires is methodical and precision-oriented. Let’s break it down into manageable steps.
Step 1: Stretching and Pre-Shaping the Tubular Tire
Before applying any glue, the tubular tire must be stretched and pre-shaped. This is typically done by mounting the tire on a rim and inflating it for 24 hours. This pre-stretching makes the installation process smoother and helps the tire to fit the rim more easily.
Step 2: Cleaning the Rim for Tubular Tire Setup
Any residue or old glue on the rim can compromise the adhesion. The rim should be thoroughly cleaned using acetone or alcohol. This step ensures a clean surface for the road cycling tire glue to adhere to.
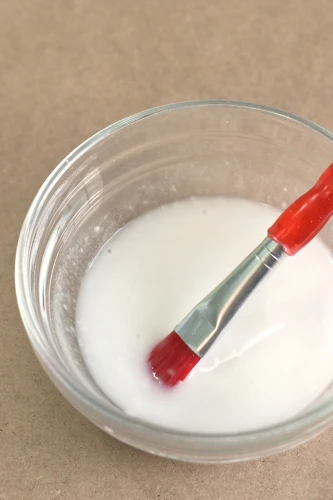
Step 3: Applying the First Layer of Glue
Apply a thin, even layer of tubular tire adhesive to the rim. This initial layer acts as a primer, setting the stage for additional layers. Allow it to dry completely, usually for at least an hour, depending on the glue used.
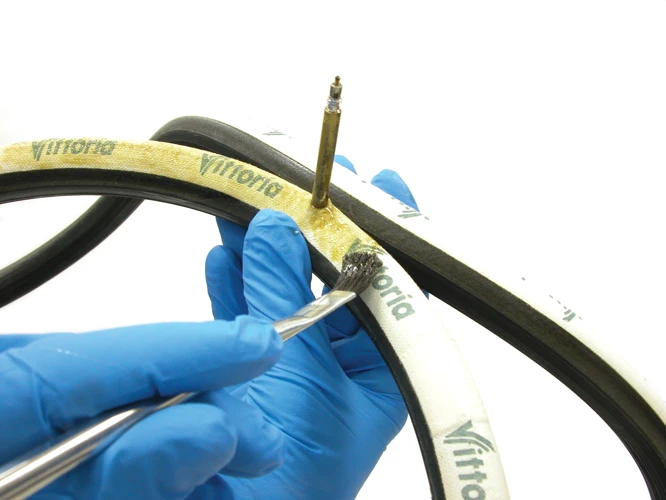
Step 4: Adding Additional Layers of Road Cycling Tire Glue
Once the first layer is dry, apply a second layer of adhesive to the rim. Also, apply a thin layer to the base tape of the tire. These layers increase the contact surface area between the tire and rim, creating a more secure bond.
Step 5: Aligning and Installing the Tubular Tire
After applying the second glue layer and allowing it to become tacky, carefully place the tire onto the rim. Start at the valve and work your way around, making sure the tire is centered and straight.
Step 6: Ensuring Proper Tire Alignment
Once the tire is on the rim, quickly adjust it to make sure it’s aligned correctly. Spin the wheel and look for any hops or wobbles, adjusting as necessary. This step must be done before the glue dries to ensure a true and straight tire installation.
Step 7: The Curing Process for Tubular Tire Adhesive
The final step is to let the adhesive cure. The curing time can vary depending on the glue, but it usually takes around 24 hours. Inflating the tire to a high pressure during this time helps to press the tire into the rim, solidifying the bond.
After Installation: Tubular Tire Maintenance and Repair

Post-installation, maintaining and repairing your tubular tires will help extend their lifespan and ensure continued performance.
Bicycle Tire Maintenance Tips
Regularly inspect your tires for signs of wear or damage. Keeping them clean and inflated to the recommended pressure is vital for prolonging their life. Also, rotating them periodically can even out the wear.
Tubular Tire Repair Techniques
For tubular tire repair, options are somewhat limited due to their construction. Small punctures can be fixed with sealant, but larger issues may require the tire to be unstitched and patched — an intricate task often best left to professionals.
Troubleshooting Common Issues with Tubular Tire Installation
Even with careful installation, issues can arise. Common problems include uneven application of adhesive, misalignment of the tire to the rim, or insufficient curing time. Reassessing each step of the installation process can help identify and rectify these issues.
For cycling enthusiasts looking to master the art of bike maintenance, our detailed guide on how to glue tubular road tires is a must-read. If you’re interested in other adhesive applications, you might also enjoy our tutorials on how to glue RC tires, perfect for remote control vehicle fans, or our step-by-step instructions for those with motorhomes, on how to glue down an RV rubber roof. And for the motorcycle riders, our article on how to glue motorcycle grips ensures a secure and comfortable grip on your next ride.
Conclusion: Enjoying the Ride with Properly Glued Tubular Tires
Gluing tubular tires is a skill that rewards patience and precision. When done correctly, it enhances the cycling experience, providing a smooth, fast ride. With your tires properly glued, you can hit the road with confidence, ready to enjoy every mile of your journey.