Have you ever found yourself struggling to create a strong bond when gluing materials together? Whether you’re a DIY enthusiast or a professional mechanic, selecting the right adhesive and applying it correctly can be a tricky task. Is there a one-size-fits-all solution to this problem? Not exactly. Gluing may seem like a simple task, but it involves an art and science that can determine whether your bond will hold or fail. This article will guide you step-by-step through the different types of adhesives, important factors to consider when choosing one, and the techniques for cleaning surfaces, applying glue, and troubleshooting common problems. Say goodbye to weak bonds and hello to strong adhesives with this comprehensive guide.
Chapter 1: Understanding Adhesives
When it comes to DIY projects or repairs in the home, having a good understanding of adhesives is incredibly important. Knowing which type of adhesive to use for a particular project can be the difference between a smooth success and a sticky failure. It’s not just a matter of picking up any old glue and sticking things together, as different types of adhesives can have drastically different results. In this chapter, we’ll explore the science behind how adhesives work, the different types available, and what factors to consider when choosing the right adhesive for your project.
1.1 The Science of Adhesives
Strong adhesives are used extensively in various industries to bond different materials, including wood, plastic, metal, glass, and ceramics. Adhesives work based on the principle of adhesion, which is the attraction between molecules of different substances. When a drop of adhesive is placed on a surface, it fills in all the rough and porous areas and creates a mechanical bond with the surface. Adhesive molecules then interact with surface molecules and form a chemical bond.
The science of adhesives is complex, and it involves the understanding of various factors that affect adhesion, such as surface energy, surface tension, viscosity, and the chemical structure of the adhesive and the substrate. The type of adhesive used depends on the properties of the materials being bonded and the application requirements. There are a wide variety of adhesives available in the market, including cyanoacrylates, epoxies, polyurethanes, hot melts, contact adhesives, and pressure-sensitive adhesives, among others.
Each adhesive type is designed to work under specific conditions, such as temperature, humidity, UV exposure, and chemical exposure. The chemical structure of the adhesive determines its curing mechanism and performance. For instance, some adhesive types cure by polymerization, which is the process of forming long chains of molecules, while others cure by evaporation, where the solvent evaporates, leaving behind a solid adhesive film.
Understanding the science of adhesives is crucial for selecting the right adhesive for a given application and achieving strong and durable bonds between different materials. It is also essential for troubleshooting problems that may arise during the bonding process, such as poor adhesion, voids, or excessive adhesive squeeze-out. For more information on adhesive use, read our guide on how to use adhesive glue.
1.2 The Different Types of Adhesives
There are several different types of adhesives available on the market today, and each of them has unique properties and characteristics. Some of the most common types of adhesives include:
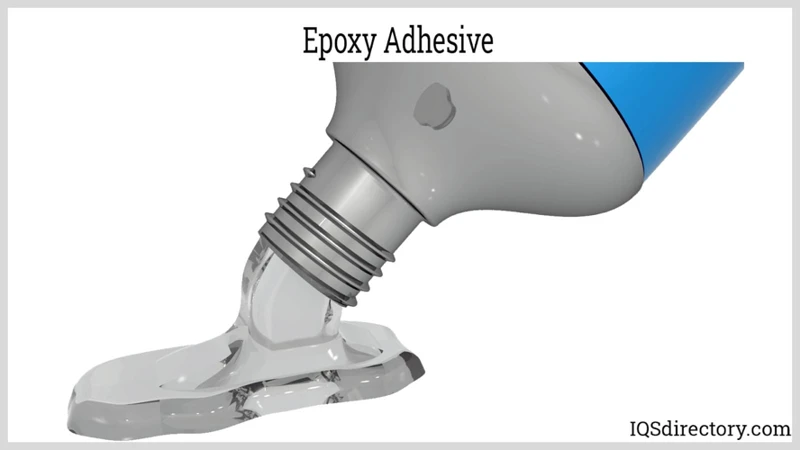
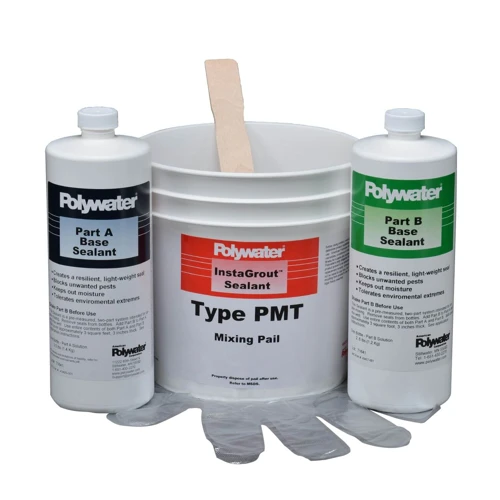
- Epoxy Resin: This two-part adhesive is designed to bond with a variety of surfaces and materials, including metal, wood, and plastic. It can also be used to fill gaps and cracks in the surface, making it a versatile adhesive for many different applications.
- Super Glue: Also known as cyanoacrylate adhesive, super glue is a fast-drying adhesive that forms a strong bond in seconds. It is ideal for small projects that require a quick fix, such as repairing a broken piece of jewelry or a small household item.
- Polyurethane: This adhesive is ideal for bonding wood and other porous materials. It forms a very strong bond and can be sanded, painted, or stained after it has dried.
- Hot Glue: Hot glue is a versatile adhesive that can be used on a variety of surfaces, including paper, wood, plastic, and fabric. It is easy to apply and dries quickly, making it ideal for many crafting projects.
- Tape: While not technically an adhesive, tape is often used as a quick and easy way to attach two surfaces together. There are many different types of tape available, including duct tape, masking tape, and electrical tape, each with their unique properties.
When choosing the right adhesive for your project, consider the materials you are bonding and the conditions in which the bond will be under. It’s also important to read the manufacturer’s instructions carefully and follow them closely to ensure that your adhesive is used correctly.
1.3 Factors to Consider When Choosing an Adhesive
When selecting the right adhesive for a project, it is important to consider several factors to ensure a strong and long-lasting bond. The following factors should be considered:
- Material compatibility: Different adhesives are compatible with different materials. It is important to choose an adhesive that is suitable for the materials being bonded. For example, some adhesives work better on porous materials than non-porous materials.
- Strength of the bond: Consider the strength of the bond that is required for the specific project. For example, for heavy-duty projects, a two-part epoxy may be needed.
- Application method: Consider the application method that works best for the project. Some adhesives require special tools or have a more complicated application process.
- Environmental conditions: Take into account the temperature and humidity conditions in which the adhesive will be applied and used. Some adhesives work better in certain environmental conditions than others.
- Curing time: The curing time required for the adhesive should also be taken into consideration. Some adhesives require more time to cure than others and may need to be left untouched for a specific amount of time.
By taking these factors into consideration, the right adhesive can be selected for the specific project, ensuring a strong bond that will last over time. For more information on how to thin glue, check out our helpful guide by clicking on this link.
Chapter 2: Preparing Surfaces for Gluing
When it comes to gluing, preparation is key. Properly preparing the surfaces that will be bonded together can greatly increase the strength and durability of the adhesive bond. Cleaning, sanding, and priming are all important steps to take before applying any glue. By taking the time to properly prepare the surfaces, you can ensure better adhesion and avoid common problems like glue failure or uneven bonding. So, let’s dive into the second chapter of our guide and learn more about preparing surfaces for gluing.
2.1 Cleaning the Surface
Cleaning the surface is an essential step in the gluing process. Any dirt, dust, or oil on the surface can prevent the glue from adhering properly, which may result in a weak bond. A dirty surface can cause the glue to cure improperly, leading to a brittle joint. It’s crucial to clean the surface thoroughly before applying glue.
Here are some tips for cleaning the surface:
- Use a clean rag or a towel to wipe off any loose dirt or debris from the surface.
- If the surface is oily, use a degreaser or a solvent to remove the oil.
- For non-porous surfaces such as glass or metal, use rubbing alcohol or acetone to clean the surface.
- For porous surfaces such as wood or fabric, use soap and warm water to clean the surface. Rinse the surface thoroughly and let it dry.
Note: Make sure to wear gloves when using a solvent or a degreaser to avoid skin irritation.
Once you’ve cleaned the surface, it’s essential to avoid touching it with your bare hands. The oils and moisture from your skin can transfer onto the surface, affecting the adhesion of the glue.
By taking the time to clean the surface properly, you can ensure that the glue bonds strongly and forms a lasting joint. To learn more about the importance of preparing surfaces for gluing, check out our article on how much does a hot glue stick weigh.
2.2 Sanding and Roughing Up the Surface
When it comes to gluing surfaces together, simply applying adhesive isn’t enough. Before gluing, the surface must be prepared by sanding or roughing it up. Sanding creates a surface with more “tooth” which gives the glue something to adhere to. However, it is important to not over-sand or rough up the surface too aggressively, as this could weaken the structure of the material or create a surface that is too porous to properly hold the glue.
To sand or rough up the surface, start with a coarse grit sandpaper and work your way to a finer grit. Make sure to sand in the same direction as the grain of the material for an even finish. For certain materials such as plastic or metal, a scratch awl or wire brush can be used to create a rougher surface.
It’s always a good idea to clean the surface after sanding to remove any dust or debris that may have accumulated. This can be done with a damp cloth or compressed air. It’s important to wait until the surface is completely dry before proceeding with the gluing process.
By properly sanding and roughing up the surface, you can ensure that the adhesive will have a strong hold and create a solid bond. In cases where the glue may not adhere properly, such as with certain plastics or metals, it may be necessary to use a different type of adhesive or a specialized tool like a glue-line rip blade.
2.3 Using Primer
Preparing the surface for gluing is an essential step in ensuring that the adhesive performs its desired function. One way to improve the bond between the surface and adhesive is by using a primer. Primer is a substance that acts as a preparatory coat for the surface and helps to improve the adhesion of the glue. Applying primer to the surface creates a better bonding surface for the adhesive.
Below are some steps to follow when using primer:
- Clean the surface to remove any dirt, dust, and debris that may prevent the primer from bonding to the surface.
- Dry the surface completely before applying the primer.
- Use a clean brush or roller to apply the primer evenly on the surface.
- Avoid applying too much primer as this may lead to a poor bonding surface.
- Allow the primer to dry based on the manufacturer’s instructions before gluing the surface together.
It is important to note that not every surface requires a primer. However, some surfaces like plastic, metal, and glass may benefit from it. Always check the manufacturer’s instructions and the adhesive label to determine whether a primer is needed.
Using a primer can help increase the adhesion of glue to the surface by creating a better bonding surface. Proper surface preparation ensures that the primer and adhesive work effectively together.
Chapter 3: Applying the Glue
When it comes to applying glue, it might seem like a straightforward process. However, there are certain techniques and considerations to keep in mind to ensure that your adhesive bond is as strong as possible. In this chapter, we will explore the different methods of applying glue, as well as how to use clamps and other tools to get the best results. We will also discuss how much glue to apply and provide tips for avoiding common mistakes. Whether you’re working on a DIY project or a professional construction job, mastering the art of glue application can make all the difference in the durability of your finished product.
3.1 Techniques for Applying Glue
When it comes to applying glue, there are a few different techniques that can help ensure you get the best bond possible for your project. Here are some tips for applying glue:
- Brushing: Brushing glue onto a surface is a common technique, particularly when working with larger surfaces or in hard-to-reach areas. Use a small brush to evenly spread a thin layer of glue onto the surface and make sure the glue covers the entire area.
- Rolling: Rolling is a technique that can be used for larger surfaces or on surfaces that are difficult to reach with a brush. You can use a paint roller or a foam roller to apply an even layer of glue. Make sure to roll in one direction to avoid creating air bubbles.
- Spraying: Spraying glue onto a surface is an efficient method that is especially useful for larger projects. However, it requires a special applicator that can evenly distribute the glue. A sprayer can also help to reach challenging areas, such as corners or tight spaces.
- Syringe: Using a syringe is a precise method for applying glue. This technique works for small projects and areas that require a specific amount of glue application. Utilizing a syringe gives you more control over how much glue you apply, and where it is distributed.
Keep in mind that different types of glue will require different techniques for applying. Be sure to follow the instructions on the label of the adhesive you are using for best results. Also, consider the size of your project and the type of surface you are applying the glue to – these factors can affect the application method you choose.
Remember that gluing is only one step in the process – the actual bond created by the glue will depend on the surface preparation, curing time, and other factors discussed in this article. Now that we know how to apply glue, let’s move on to discussing different tools we can use in the gluing process. If you want to learn how to make slime without glue or starch, check out our guide.
3.2 Using Clamps and Other Tools
When applying glue, using clamps and other tools can help create a stronger bond between surfaces. Clamping applies pressure to keep the surfaces in contact, allowing the adhesive to dry and cure effectively. However, not all projects require the use of clamps or tools, so it’s important to assess the situation before proceeding.
Clamps come in different shapes and sizes, and their use depends on the nature of the project. C-clamps are ideal for clamping wood projects, and screw clamps work well on metal surfaces. Spring clamps often come in handy when gluing small pieces.
Moreover, other helpful tools usually include masking tape, painter’s tape, or carpet tape to keep the surfaces in contact before applying clamps. Additionally, glue spreaders and rollers can be used to apply the glue more evenly on flat surfaces or in difficult-to-reach areas.
Before clamping, apply just the right amount of pressure to the surfaces, ensuring that the glue doesn’t get squeezed out. Applying too much pressure can cause the glue joint to fail, while insufficient pressure may result in a weak bond. It is important to find the right balance.
It’s crucial to read the adhesive manufacturer’s instructions on clamp time and the time it takes for the glue to cure before removing the clamps. Properly cured adhesive ensures long-lasting and strong bonds.
Proper use of clamps and other tools can improve the strength and quality of glue joints. However, it’s important to keep in mind that not all projects require clamping or tools. Choose the right type of clamp or tool and apply the appropriate pressure for a successful glue job.
3.3 How Much Glue to Apply
3.3 How Much Glue to Apply
The amount of glue you need to apply depends on several factors, including the size and type of material you are bonding, the type of adhesive you are using, and the surface area you need to cover. Applying too little glue will result in weak bonding, while applying too much can lead to overflow and messiness. Here’s a table that can help you estimate the amount of glue to apply:
| Material Type | Glue Amount |
|---|---|
| Wood | 1/8 inch bead per linear inch |
| Metal | Thin layer across the surface |
| Rubber/Plastic | Thin layer across the surface or dots every 1-2 inches |
| Glass/Ceramics | Thin layer across the surface |
It’s important to note that these are just general guidelines, and you may need to adjust the amount based on the specific project you are working on. Additionally, make sure to always follow the manufacturer’s recommendations for the specific adhesive you are using.
Anchor Text: Wondering how much glue to apply to a rubber bracelet? Check out our article on how to fix a rubber bracelet without glue.
Chapter 4: Drying and Curing
As you finish applying the glue, it’s time to move on to the next step – drying and curing. This stage is crucial to ensure that the bond is strong enough to withstand the intended usage. Drying is the process by which the solvent in the glue evaporates after application, while curing is the chemical reaction between the glue and the surface, which creates a more robust bond. In this chapter, we’ll explore strategies for understanding and controlling the drying and curing process so that you can achieve the right level of adhesion. We’ll also provide tips on creating the optimal environment for curing. But before we dive into the details, let’s discuss why understanding these concepts is critical to the bonding process.
4.1 Understanding Drying and Curing Times
Understanding Drying and Curing Times
One of the most important steps in using strong adhesives is understanding drying and curing times. These terms are often used interchangeably, but they refer to slightly different phases of the gluing process.
Drying time refers to the time it takes for the solvent or water in the adhesive to evaporate and for the glue to become tacky. During this stage, the glue may still be a bit wet and pliable, but it will stick to the surfaces.
Curing time, on the other hand, refers to the time it takes for the glue to reach its full strength and for the bond to become permanent. This typically takes longer than the drying time and can vary depending on the type of adhesive.
It’s important to follow the manufacturer’s guidelines for drying and curing times, which can usually be found on the adhesive packaging or in the instructions. Some adhesives, such as superglue, can dry in seconds but take several hours to cure fully. Others, such as epoxy, may take longer to dry but can reach full strength within a day or two.
To help you keep track of drying and curing times for different adhesives, we’ve compiled a table below:
| Type of Adhesive | Drying Time | Curing Time |
|---|---|---|
| Cyanoacrylate (Super Glue) | A few seconds | 24-48 hours |
| White Glue (PVA) | 15-30 minutes | 24 hours |
| Epoxy | 5-10 minutes | 24-72 hours |
| Contact Cement | 15-20 minutes | 24 hours |
Keep in mind that temperature and humidity can also affect drying and curing times. In general, warmer temperatures and lower humidity can speed up the process, while cooler temperatures and higher humidity can slow it down.
Pro tip: To ensure that the glue fully cures, leave the materials clamped together for the recommended curing time before removing the clamps. If you remove the clamps too soon, the bond may not be as strong as it could be.
Understanding drying and curing times is crucial for achieving a strong adhesive bond. By following the manufacturer’s guidelines and taking environmental factors into account, you can ensure that your glue projects are a success.
4.2 Creating the Right Environment for Curing
Creating the right environment for curing is crucial in ensuring the strength and durability of the bond. Different types of adhesives have different requirements when it comes to curing environment. However, there are some basic principles that apply to most types of adhesives.
Temperature: The temperature of the curing environment can greatly affect the strength of the bond. It is important to know the recommended temperature range for the adhesive you are using. Generally, a temperature of around 70°F (21°C) is ideal for most adhesives. However, some adhesives may require higher or lower temperatures for optimal curing. For example, cyanoacrylate adhesives (super glue) cure best at room temperature, while epoxy adhesives may require higher temperatures.
Humidity: Humidity can affect the curing time of some adhesives. For example, water-based adhesives cure through evaporation and require a certain level of humidity to properly cure. On the other hand, low humidity can cause other types of adhesives, like cyanoacrylate, to take longer to cure or not cure at all.
Pressure: Applying pressure during curing can help improve the strength of the bond. This is especially true for adhesives that require time to cure, like epoxy. Clamping the surfaces together during curing can also help ensure a uniform bond.
Ventilation: Adequate ventilation is important when curing certain types of adhesives, like super glue and contact cement. These types of adhesives release fumes that can be harmful if inhaled in large quantities. It’s important to work in a well-ventilated area and avoid inhaling the fumes.
By paying attention to these factors, you can create the optimal environment for curing that will ensure the strongest and most durable bond. Before curing, make sure to check the manufacturer’s recommendations for the specific adhesive you are using to ensure the best results.
If you’re interested in learning more about choosing the right blade for your saw when cutting wood, check out our guide on What Is a Glue Line Rip Blade?
Chapter 5: Troubleshooting Common Problems
As you work on your adhesive projects, it’s natural to run into challenges along the way. Sometimes the glue might not seem to be sticking as strongly as it should, or you may have applied it incorrectly and need to fix your mistake. Whatever your issue may be, this chapter is devoted to helping you troubleshoot common adhesive problems so that you can achieve the best possible results. From understanding why your glue isn’t sticking to dealing with overflow and squishing, we’ve got you covered. And if you’re looking for some fun glue alternatives, check out our guide on how to make gak without borax and glue and tide, or if you’re struggling to open your glue bottle, try our tips on how to open citadel glue. Let’s dive in!
5.1 Glue Not Sticking?
There’s nothing more frustrating than applying glue to a surface and finding out it just won’t stick. This can happen for several reasons including improper surface preparation, use of the wrong type of adhesive, lack of pressure during application, or even incorrect drying and curing conditions. Here are some steps to take if you find yourself dealing with glue that won’t stick:
- Double-check the adhesive type: Make sure you’ve chosen the correct type of adhesive for your specific project. Different adhesives are designed for different surfaces and materials. If you’ve used the wrong adhesive, the glue may not be able to form a bond with the surface and will not stick.
- Check surface cleanliness: Ensure that the surface is clean and free from any dirt, grime, or other substances. Any contaminants present on the surface can form a barrier that prevents the adhesive from bonding correctly.
- Try sanding the surface: If the surface is too smooth, it may not provide enough roughness for the adhesive to stick. Try sanding it with a fine grit sandpaper to help the adhesive form a stronger bond.
- Check drying and curing conditions: It’s important to follow the manufacturer’s instructions on drying and curing times for the adhesive. If the environment doesn’t have the right conditions for drying and curing, the adhesive may never fully dry or cure, which can result in a weak bond.
- Increase pressure during application: If you didn’t apply enough pressure during the application, the adhesive may not spread evenly on the surface or form a strong bond. Try applying more pressure to ensure that the glue is evenly distributed and forms a strong bond.
By following these steps, you’ll be able to troubleshoot why the glue is not sticking and take the necessary actions to ensure its success. In case you’re stuck with choosing between tape or glue, this article offers guidance on which is stronger, depending on the project. Alternatively, you can also learn how to make cleaning slime without glue in this article.
5.2 Over-Application of Glue?
When applying glue to a surface, it is important to use the right amount. If you over-apply the glue, it can lead to a messy and uneven application, which can compromise the strength of the adhesive bond. Here are some tips to help you avoid over-applying glue:
- Read the instructions: The instructions on the glue packaging will usually indicate how much glue to apply for optimal adhesion. Be sure to follow these guidelines to avoid over-application.
- Apply in thin layers: It’s better to apply glue in multiple thin layers than to use one thick, gloopy layer. This will help ensure an even application and improve the strength of the bond.
- Use a brush or roller: Applying glue with a brush or roller can help ensure a thin and even layer. If using a brush, make sure to use long, smooth strokes to avoid creating clumps and ridges of glue.
- Clean up excess glue: If you do accidentally over-apply glue, use a damp cloth or paper towel to clean up the excess before it dries. This will help prevent a messy and uneven bond.
Remember that over-applying glue not only looks messy, but it can also compromise the strength of the adhesive bond. By following the tips above, you can ensure a clean and strong bond every time.
5.3 Dealing with Overflow and Squishing
When dealing with overflow and squishing of adhesives, it’s important to act quickly to prevent any further damage. Here are some steps you can take to address this common problem:
| Step | Action |
|---|---|
| 1 | Use a scrap piece of material to wipe up any excess glue before it dries. Be sure to clean up both sides of the glued area. |
| 2 | If the glue has already started to dry, use a razor blade or scraper to carefully scrape away the excess. Be sure to not damage the surface you are gluing. |
| 3 | If the overflow or squishing has caused a gap in the glue line, apply more adhesive to fill in the gap. Make sure to follow the proper application techniques to avoid further issues. |
| 4 | Use clamps or weights to secure the glued area and allow it to dry according to the manufacturer’s instructions. |
It’s important to note that prevention is key when it comes to avoiding overflow and squishing. Be sure to use the appropriate amount of adhesive, and follow the manufacturer’s instructions for application. Using clamps and other tools can also help to prevent excess glue from spreading. By taking these precautions, you can avoid common issues like overflow and make the gluing process smoother overall.
Conclusion
In conclusion, we have explored the world of adhesives and learned about the art and science of strong bonding. From understanding the different types of adhesives and factors to consider when choosing one, to preparing surfaces for gluing and applying the glue with proper techniques, we have covered all the essential steps for successful bonding.
We have also discussed the importance of drying and curing, as well as troubleshooting common problems such as glue not sticking or over-application.
Overall, it is important to note that choosing the right adhesive for your project and following the proper steps for preparation and application are crucial for achieving a strong and long-lasting bond. Additionally, taking into consideration the environment and conditions for drying and curing can greatly impact the outcome.
Remember, even with the best techniques and materials, sometimes mistakes happen. Don’t be discouraged if a bond fails or if you encounter any problems. Learn from your mistakes and try again with a better understanding of what went wrong.
In the end, the art and science of strong adhesives requires patience, attention to detail, and a willingness to experiment and learn. With the right knowledge and approach, the possibilities for bonding are endless.
Frequently Asked Questions
1. What is the strongest type of adhesive?
There are several strong types of adhesives, including epoxy, polyurethane, cyanoacrylate, and silicone adhesives. The strength of an adhesive depends on the materials it is bonding and the application conditions.
2. Can I use any type of adhesive on metal surfaces?
No, not all adhesives are suitable for use on metal surfaces. Some adhesives work better on metal than others and factors such as surface preparation and the type of metal being bonded should also be considered. For example, epoxy, polyurethane, and cyanoacrylate adhesives are commonly used for metal bonding.
3. Can adhesives be used on plastic surfaces?
Yes, many adhesives can be used on plastic surfaces, but selecting the right type of adhesive for the specific plastic material is important. For example, cyanoacrylate and epoxy adhesives are often used for bonding plastics.
4. Can I use the same adhesive for different materials?
Not necessarily, different materials may require different types of adhesives and surface preparation techniques. It is important to choose the right adhesive for each material to achieve a strong and long-lasting bond.
5. How long does it take for glue to dry?
The drying time for glue can vary depending on the type of adhesive, the materials being bonded, and the environmental conditions. Some adhesives can dry in a few seconds while others may take several hours or even days to dry completely.
6. Can I speed up the drying time of glue?
Yes, some adhesives can be accelerated by increasing the temperature or reducing the humidity of the environment. However, it is important to follow the manufacturer’s instructions and not to use excessive heat, as this can damage the materials or weaken the bond.
7. How much glue should I use?
The amount of glue required depends on the type of adhesive and the surface area being bonded. Applying too much or too little glue can affect the strength and quality of the bond. It is best to follow the manufacturer’s instructions for recommended application amounts.
8. Can I remove adhesive residue from surfaces?
Yes, there are several methods for removing adhesive residue from surfaces, including using solvents, heat, or mechanical abrasion. It is important to choose a method that is safe for the materials being treated and to follow proper safety guidelines and precautions.
9. Can I reuse clamps and tools used for gluing?
Yes, clamps and tools can be reused, but they should be cleaned and stored properly to ensure their effectiveness and longevity. Always clean and inspect clamps and tools before and after each use.
10. Can I use adhesives for outdoor applications?
Yes, there are many types of adhesives that are suitable for outdoor applications, but factors such as weather conditions and the type of material being bonded should be considered when selecting the appropriate adhesive. For example, silicone, polyurethane, and epoxy adhesives are often used for outdoor bonding.