Have you ever been entranced by the delicate beauty of vellum paper and wanted to incorporate it into your next crafting project, but didn’t know how to attach it to regular paper or cardstock? Don’t worry, you’re not alone! Many people find themselves puzzled when it comes to gluing vellum to paper. That’s why we’ve put together this comprehensive guide to help you with the process. In this article, we’ll cover everything you need to know, from choosing the right materials to tips and tricks for a perfect finish. So, let’s dive in and learn how to glue vellum to paper like a pro!
Materials You’ll Need
When it comes to gluing vellum to paper, having the right materials on hand is key to achieving a successful outcome. While this may seem daunting at first, don’t worry! We have put together a comprehensive list of everything you will need to get started. From vellum and cardstock, to various types of glue and the necessary tools, we’ve got you covered. So whether you’re a seasoned crafter or just starting out, let’s take a look at everything you’ll need to make your vellum and paper project a success. And if you want to know more about glue, check out our article on how to draw glue.
Vellum
Vellum is a translucent paper material that’s commonly used in arts and crafts projects. It’s often used to add a touch of elegance or sophistication to paper crafts and other DIY projects. Vellum comes in various colors, textures, and finishes, which make it a versatile material. When using vellum for paper crafts, it’s important to keep in mind that it can be delicate and easily damaged. Thus, it’s crucial to handle it with care.
One common problem when working with vellum is that it can be difficult to adhere to other materials. Vellum’s transparency can make it challenging to use regular glue as it might show through the paper. That is why it’s important to select the right type of glue when working with vellum to avoid damaging the paper.
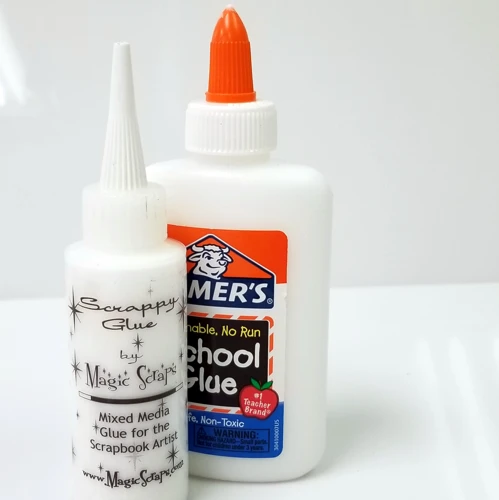
There are various types of glues that can be used when adhering vellum to paper or other surfaces. PVA glue is a popular choice because it dries clear and is less likely to wrinkle the vellum. Scotch double-sided tape can be used as well as it is also transparent and easy to use. Another option is using a glue stick as it won’t wrinkle or damage the vellum, but it’s not a permanent solution. Other types of glues, such as rubber cement or hot glue guns, are not recommended as they can be too harsh and damage the delicate material.
It’s important to note that vellum can be delicate, so it’s essential to take extra precautions when handling it. When cutting vellum, it’s best to use a pair of scissors or trimmer to avoid tearing or damaging the paper. Additionally, gently folding the vellum helps to create precise and clean edges.
Vellum is a unique and beautiful material to work with, but it requires extra care and attention when adhering it to other surfaces. When selecting a glue for vellum, it’s best to use a non-damaging, clear adhesive. The right combination of glue and technique will give your paper craft projects a professional and polished finish. If you want to know more about how to dilute PVA glue, you can check this tutorial on how to dilute PVA glue.
Cardstock or Paper
Cardstock or paper is what you’ll be gluing your vellum to. Both types of surfaces are great for crafts, card-making, scrapbooking and more. Cardstock is a thicker, more durable material, while paper is thinner and more pliable. Depending on the project you’re working on, either cardstock or paper may be the best choice for you. Here are some things to consider when choosing between the two:
| Cardstock | Paper |
|---|---|
| Thicker, more durable surface | Thinner, more pliable surface |
| Great for making cards and invitations | Great for making origami and other paper crafts |
| Available in a variety of weights and textures | Available in a variety of colors and patterns |
| Slightly more expensive than paper | More affordable than cardstock |
When choosing your cardstock or paper, consider the weight and texture of the paper. If you plan on printing on it, make sure it’s compatible with your printer. You can also mix and match different types of cardstock and paper to create visually interesting designs.
Remember to use a high-quality cardstock or paper to avoid any tears or wrinkles. If you need to trim your cardstock or paper to fit your project, make sure to do so before gluing the vellum.
Now that you know more about the differences between cardstock and paper, you can choose the best material for your vellum project. If you need some inspiration for your next paper craft project, check out this recipe for making cleaning slime without glue.
Glue
When it comes to choosing the right glue for a project involving vellum and paper, it is important to select a glue that will not bleed through the vellum or cause wrinkling and warping. Here are some recommendations for glues that work well with vellum and paper:
| Glue Type | Features | Where to find |
|---|---|---|
| Double-sided Tape | Easy to apply, prevents wrinkles and warping, won’t bleed through the vellum | online stores, craft stores |
| Acid-free Liquid Glue | Special formula for use with sensitive papers, dries clear, won’t wrinkle or warp the vellum | homemade, office supply stores, craft stores |
| Vellum Adhesive | Specifically designed for use with vellum, dries clear, prevents warping and wrinkling | online stores, office supply stores, craft stores |
Double-sided tape is a great option for those who want a quick and easy way to attach vellum to paper without any mess. Acid-free liquid glue, on the other hand, is a great option if you want to make sure that your project stays in pristine condition for years to come. Vellum adhesive is specifically designed for use with vellum, so it is a great option if you are looking for a foolproof way to attach vellum to paper.
It is important to note that using too much glue can cause the vellum to wrinkle, so it is best to apply thin and even layers of glue to ensure that the glue dries evenly and that the vellum stays smooth. Additionally, when using liquid glue, it is helpful to use a brush to spread the glue evenly across the surface of the vellum to prevent any clumps or bumps.
Using the right glue can make all the difference when it comes to creating a beautiful project involving vellum and paper. So be sure to choose wisely and apply with care!
Scissors or Trimmer
Scissors or Trimmer is a crucial tool in the process of gluing vellum to paper. Choosing the right type of cutting tool depends on the project’s complexity and the desired outcome. Scissors are the go-to cutting tool for most projects. They are commonly found in households, and they are designed to cut through most types of paper. Scissors come in different sizes, styles, and shapes to suit specific cutting needs. On the other hand, a trimmer provides straight, accurate cuts when working with a large number of sheets. Trimmers are mostly used in office and school settings. They are effective in cutting stacks of paper, which reduces the workload and saves time.
When selecting scissors, it is essential to check using a cutting mat to avoid damaging the workspace’s surface. Also, ensure that the blades are sharp and clean before cutting the vellum and paper. Scissors with dull blades may damage the edges of the paper and vellum, leading to an uneven edge. On the other hand, choosing the right trimmer requires checking the size of the sheets and the intended use. Some trimmers are portable, lightweight, and perfect for on-the-go projects, while others are suitable for large projects and require a more substantial workspace.
Finally, one must practice caution while using scissors or trimmers to avoid cuts or accidents. It is essential to store the cutting tools safely, especially when there are children around. Accidents can happen when scissors or trimmers are left open and lying around. Always keep them in a drawer or cupboard after use.
Tip: To get precise and even cuts, use a ruler to create guidelines on where to cut the vellum and paper.
In essence, having both scissors and trimmers can come in handy for any art or paper projects. They are easy to use, and by following the recommended safety guidelines, it is a reasonably safe process. With the right cutting tool, creating beautiful craft projects will be an easy breezy task.
Tape
Tape can be a great help when it comes to gluing vellum to paper. It can be used to hold the vellum and paper in place while the glue dries. However, it is important to choose the right kind of tape to avoid damaging the paper or vellum. The best tape to use is low-tack tape or drafting tape, which can be removed easily without causing any damage.
When using tape, it’s important to place it strategically so that it doesn’t interfere with the glue. One option is to place the tape on the corners of the vellum and paper, holding them in place while you apply the glue. Alternatively, you can place the tape on the backside of the paper, leaving the front side free for gluing.
Keep in mind that tape is not a replacement for glue and should only be used as an aid. The glue is what will create a strong and lasting bond between the vellum and paper. Additionally, make sure that the glue is completely dry before removing any tape to avoid tearing the paper or vellum.
TIP: Instead of using tape, you can also use clips or clothespins to hold the vellum and paper in place while the glue dries. Just make sure to place them gently to avoid causing any creases or wrinkles in the paper or vellum.
Tape can be a helpful tool when gluing vellum to paper, but it should be used with caution and only as an aid to the glue. With the right materials and techniques, you can create a beautiful finished product that will last for years to come.
Brush
Using a brush is an important part of the process when gluing vellum to paper. A brush allows you to spread the glue evenly over the vellum surface so that it does not create bumps or wrinkles when attached to the paper.
When choosing a brush, it is recommended to use a soft-bristled brush that is at least 1-inch wide. This will give you enough flexibility to move the glue around and won’t create any unwanted scratches on the vellum.
To use the brush, start by squeezing a small amount of glue onto the vellum. Then, using the brush, gently spread the glue in a thin layer all over the vellum, making sure to go all the way to the edges. If you do not have a brush, you can use a toothpick or a cotton swab.
It is important to apply the glue in thin layers to avoid any discoloration or displacement of the paper. Applying too much glue in one area can also cause the paper to wrinkle or warp, which is why a thin layer of glue is best for vellum.
In case you want to explore other types of gluing, you can check out our articles on how to glue clay to cardboard, how to glue boards together without warping, and what glue works on car glass to learn more about different techniques and materials to use.
Choosing the Right Glue for Vellum and Paper
When it comes to adhering vellum to paper, choosing the right type of glue is crucial for achieving a seamless, polished result. With so many different types of glue available on the market, it can be difficult to know which one is best suited for the job. In this section, we’ll explore some of the most effective glue options for vellum and paper, as well as provide recommendations based on your specific project needs and materials. So if you’re feeling perplexed about which glue to choose, don’t worry! We’ve got you covered.
Glue Recommendations for Vellum
When it comes to gluing vellum, not all glues work the same way. It’s essential to choose the right adhesive to ensure a secure and long-lasting bond for your project. Here are some recommended glues for vellum:
| Glue Type | Description |
|---|---|
| PVA Glue | This glue is a popular choice for vellum because it dries clear and doesn’t leave any residue. It also has a strong bond and doesn’t cause the vellum to wrinkle or curl. |
| Double-sided tape | This type of adhesive doesn’t require any drying time, making it a fast and easy option. However, it may not be as strong as other glues and could cause the vellum to wrinkle or bubble if not applied evenly. |
| Spray adhesive | This glue is a great option for larger projects that require a lot of gluing. It provides a strong, permanent bond and can be applied evenly over a large surface area. However, it can be messy and difficult to control. |
| Glue dots | These small, adhesive dots are a convenient option for attaching vellum to paper. They are mess-free and don’t require any drying time. However, they may not provide as strong of a bond as other glues. |
Ultimately, the type of glue you choose will depend on the specifics of your project. It’s always a good idea to test a small area first before applying the glue to the entire project. This will help ensure that the glue doesn’t cause any damage or discoloration to the vellum.
Glue Recommendations for Paper or Cardstock
When it comes to paper or cardstock, not all adhesives are created equal. Here are some glue recommendations for bonding vellum to paper or cardstock:
- Double-sided tape: This is a great option for a clean and easy adhesive application. Opt for a double-sided tape that is acid-free and photo-safe.
- Roller adhesive: Similar to double-sided tape, roller adhesive is a quick and mess-free option. Look for a roller adhesive that also dries clear for a seamless finish.
- Liquid glue: If you prefer a liquid glue, choose a clear and fast-drying formula. Avoid using a glue that is too wet as it can warp the paper and the vellum. One popular option is Aleene’s Tacky Glue.
- Glue dots: Glue dots are perfect for small pieces of vellum or paper as they are easily removable and won’t leave any residue. However, they may not be strong enough to hold larger pieces together, so use with caution.
Keep in mind that when using a liquid glue on paper or cardstock, it’s best to apply a thin layer to avoid warping and wrinkling. Test your adhesive on a small piece of paper and vellum before committing to the entire project. And always make sure the glue is dry before handling the completed project to avoid smudging or smearing.
Step-by-Step Guide to Gluing Vellum to Paper
Now that you have your materials ready and have chosen the right glue, it’s time to start gluing vellum to paper. Don’t worry, the process is not complicated if you follow a few simple steps. Grab your vellum, paper, glue, and a brush, and let’s get started! Follow these step-by-step instructions and soon you will have a perfectly glued project.
Step 1: Prepare Your Materials
The first step in gluing vellum to paper is to prepare your materials. This means gathering all the necessary items and making sure they are ready to use. Here is a list of the materials you will need and some tips on preparing them:
- Vellum: First, choose the vellum paper that you would like to use. Make sure that it is clean and free of dust, fingerprints, or any other debris. Use a clean, dry cloth to wipe down the surface of the vellum before starting the gluing process.
- Cardstock or Paper: Next, choose the cardstock or paper that you want to use as your base. The cardstock or paper should be cut to the size that you want your final project to be. Make sure that it is also clean and free of any debris or dust.
- Glue: Choose the right type of glue for both the vellum and paper. There are several different types of glue that you can use for this project, so make sure to choose the one that best fits your needs. If you are unsure which type of glue to use, see our recommendations below.
- Scissors or Trimmer: You’ll need a reliable cutting tool to cut your vellum and paper down to the desired size. Be sure to choose a sharp pair of scissors or a trimmer that can handle the thickness of your chosen paper.
- Tape: In addition to glue, you might want to use tape to hold your vellum and paper in place as you work. Make sure that the tape you choose is transparent and won’t damage your paper or vellum.
- Brush: Finally, you’ll need a brush to apply glue to your vellum and paper. Choose a soft, flat brush that is easy to control. Avoid using a brush with stiff bristles that might scratch your paper or vellum.
By carefully preparing your materials ahead of time, you can ensure that the gluing process will go smoothly and produce the best possible results.
Step 2: Apply the Glue to the Vellum
Now that you have your materials prepared, it’s time to apply the glue to the vellum. This step is crucial in ensuring that your vellum will adhere properly to your paper or cardstock.
Here’s how to apply glue to the vellum:
| Step 1: | Turn your vellum over so that the side you want to glue is face down. |
| Step 2: | Using a brush, apply a thin layer of glue to the vellum. Be sure to apply the glue evenly and avoid applying too much, as this can cause the vellum to warp or wrinkle. |
| Step 3: | If you are using a glue stick, rub it over the back of the vellum in a smooth, even motion. Be sure to cover all areas of the vellum that will be in contact with the paper. |
| Step 4: | When using liquid glue, make sure to use a non-clogging glue pen or brush applicator to prevent clogs. Alternatively, you can also use a foam brush to apply the glue. |
| Step 5: | Allow the glue to dry for a few seconds so that it becomes tacky. This will make it easier to position the vellum on the paper. |
Remember to apply the glue sparingly and evenly, as too much glue can cause your vellum to wrinkle or warp. Using the right amount of glue will also make it easier to remove any air bubbles in the next step.
Step 3: Place the Vellum onto the Paper
Now that you have applied glue to the vellum carefully, it’s time to place it onto the paper. Follow the steps below to ensure the vellum stays in place:
| Step | Instructions |
|---|---|
| Step 1 | Decide on the placement of the vellum on your paper. Once it’s in place, moving it can cause smudging or wrinkling. |
| Step 2 | Gently lay the vellum onto the paper. Make sure it lines up exactly how you want it. The first attempt should be your best one, as too much movement can create issues. |
| Step 3 | Using the brush, smooth out any bumps or bubbles from the center to the outer edge of the vellum sheet. This helps eliminate wrinkles and air pockets. Use light pressure while doing this, as you don’t want to rip the vellum. |
| Step 4 | Allow the glue to dry completely. Drying times can vary based on the type of glue you choose and amount used, but the glue should be fully dry in about 10-15 minutes under normal circumstances. Careful, quick work to this point will help limit the drying time. |
Remember not to apply excessive pressure or manipulate the vellum too much, as these can create unwanted wrinkles or smudges. If the vellum does wrinkle, use a clean brush or your fingertips to gently smooth it out. Now that your vellum is glued successfully onto your paper, you’re one step closer to completing your project!
Step 4: Remove Any Air Bubbles
Once you have placed the vellum onto the paper, it is important to remove any air bubbles to ensure a smooth finish. Here are the steps to remove air bubbles:
| Step | Action |
|---|---|
| Step 1 | Use a soft-bristled brush or your finger to gently press down on the vellum and push any air bubbles towards the edge. |
| Step 2 | If there are still air bubbles, use a pin to gently prick the vellum in the center of the bubble. |
| Step 3 | Press down on the area where the air bubble was with the soft-bristled brush or your finger to flatten it out. |
| Step 4 | If you accidentally tear the vellum, don’t worry! Simply cut a small piece of vellum and glue it over the tear, pressing down firmly to ensure it sticks. |
It’s important to be gentle when handling the vellum during this step to avoid tearing or damaging it. By following these steps, you can achieve a smooth and professional-looking finish.
Step 5: Let the Glue Dry
Allowing the glue to dry completely is an essential final step to ensure that your vellum stays securely attached to the paper. Here are a few things to keep in mind while waiting for the glue to dry:
- Be patient. Depending on the type of glue you used, it could take anywhere from a few minutes to an hour or more for it to dry completely. Avoid touching the vellum or pressing down on it while the glue is drying, as this could cause it to shift or wrinkle.
- Avoid direct sunlight or heat sources while the glue is drying. This can cause the glue to dry too quickly, or cause the vellum and paper to buckle or warp.
- Depending on your project, you may want to consider placing a heavy book or other flat weight on top of the vellum as the glue dries. This can help to ensure a smooth, wrinkle-free finish.
- Once the glue is dry, inspect your project for any loose edges or areas where the glue didn’t adhere as you intended. If you notice any spots that need attention, carefully apply a small amount of glue with a brush or applicator and press down firmly to secure.
By following these tips for letting the glue dry, you’ll be able to achieve a professional-looking finish that will last for years to come.
Tips and Tricks
Are you looking to take your vellum and paper crafting skills to the next level? Gluing vellum to paper can be a tricky process, but with the right tips and tricks, you can achieve a flawless finish. Below, we’ve gathered some helpful suggestions that will make your vellum and paper creations stand out. From using tape instead of clips to applying glue in thin layers, these tips will help ensure that your project turns out perfectly. Let’s dive in!
Tip 1: Use Tape Instead of Clips
When gluing vellum to paper, it is important to keep everything in place until the glue dries. While many people use clips to hold the vellum and paper together, these can leave indentations in the paper and create uneven surfaces.
Tip: A better alternative is to use tape. The tape won’t leave any marks on the paper and it doesn’t squeeze the vellum and paper together too tightly.
There are a few types of tape you can use for this purpose. Washi tape and drafting tape are both good options, but make sure to use a tape that is easily removable and won’t tear the vellum or paper.
To use tape instead of clips, simply lay a strip of tape on the back of the vellum, sticky side up. Then line up the vellum with the paper and press it down onto the tape. The tape will hold everything together while the glue dries.
Perplexity: Finding the right tool to hold vellum and paper together can be perplexing, but using tape instead of clips can make all the difference in preventing marks or uneven surfaces.
Table:
| Advantages of Tape | Disadvantages of Clips |
|---|---|
| Doesn’t leave marks on paper or vellum | Can create indentations in paper surface |
| Doesn’t squeeze materials together too tightly | Can create uneven surface between vellum and paper |
| Comes in easily removable options | May require more force to remove without damaging materials |
No Repeating N-gramms: By using tape instead of clips, you can avoid repeating the same mistakes that might result in indentations, uneven surfaces, and other imperfections. Using the table above, you can easily compare the benefits of tape and the disadvantages of clips, to make a more informed decision about the best option to use for your project.
Tip 2: Apply Glue in Thin Layers
When it comes to gluing vellum to paper, it’s important to spread the glue evenly and use just the right amount. Applying too much glue can cause the vellum to wrinkle or become translucent. That’s why it’s best to apply glue in thin layers. To help you achieve this, here are some tips:
- Start with a small amount of glue: Rather than applying a large amount of glue all at once, start with a small amount and add more as needed. You can always add more glue if necessary, but it’s much harder to remove excess glue once it’s been applied.
- Spread the glue evenly: Use a brush to spread the glue evenly across the surface of the vellum. If you don’t have a brush, you can also use a cotton swab or the tip of a toothpick.
- Work quickly: Glue can dry quickly, especially when working with vellum. That’s why it’s important to work quickly and apply the glue in thin, even layers.
- Allow each layer to dry: If you need to apply multiple layers of glue, make sure to allow each layer to dry completely before adding the next one. This will help prevent wrinkling and ensure a strong bond.
By following these tips and applying glue in thin layers, you’ll be able to easily glue vellum to paper without any issues. Remember to take your time and work carefully to achieve the best results.
Tip 3: Use a Brush to Spread the Glue Evenly
When it comes to gluing vellum to paper, using a brush to spread the glue evenly can make a big difference in the outcome of your project. Here are a few tips to keep in mind:
1. Choose the right brush: A small paintbrush or a foam brush will work well for applying glue to vellum. Make sure to choose one that is clean and dry before using.
2. Apply a thin layer of glue: Using too much glue can cause the vellum to warp or curl. Apply a thin layer of glue to the vellum, spreading it out evenly with the brush.
3. Work quickly: Once you’ve applied the glue, work quickly to place the vellum onto the paper before the glue dries. This will help reduce the risk of air bubbles forming.
4. Smooth out any air bubbles: If you do notice air bubbles forming, use the brush to gently press them out towards the edge of the paper. Be gentle, as pressing too hard can cause the vellum to tear.
5. Let it dry: Once you’ve placed the vellum onto the paper and smoothed out any air bubbles, let the glue dry completely before handling the project again.
By using a brush to spread the glue evenly, you can ensure that your vellum and paper adhere together smoothly and without any bumps or wrinkles. Remember to work quickly and apply a thin layer of glue to ensure the best results.
Conclusion
After following the steps outlined in this guide, you should have a beautiful and secure vellum and paper creation! Gluing vellum to paper can be a tricky process, but with the right materials and techniques, it can be a breeze.
Remember to take your time and be patient as you work through each step. Rushing the gluing process can lead to mistakes and a less-than-perfect finished product.
Additionally, be sure to choose the right glue for the job and keep in mind the tips and tricks mentioned in this article. Using tape instead of clips, applying glue in thin layers, and using a brush to spread the glue evenly are all simple but effective ways to ensure a successful vellum and paper project.
Overall, with a little practice and attention to detail, gluing vellum to paper can be a fun and rewarding craft project. So gather your materials, follow these steps, and let your creativity shine!
Frequently Asked Questions
Can you use any type of glue to adhere vellum to paper?
No, not all glues are suitable for vellum. It is recommended to use a glue made specifically for vellum, like a vellum adhesive tape or a glue pen.
Can you print on vellum and still glue it to paper?
Yes, you can print on vellum and still glue it to paper. Just make sure the ink is dry and the vellum is not too thin or it may tear.
Does the weight of the paper or cardstock matter?
Yes, heavier paper or cardstock may require a stronger adhesive like a double-sided tape, while lighter weight paper can be glued with a glue stick.
What is the best way to remove air bubbles when gluing vellum to paper?
Press down on the vellum from the center towards the edges. Use a straight edge or ruler to smooth out any bubbles and ensure the vellum is flush with the paper.
Can vellum be used as an overlay on pictures or photographs?
Yes, vellum is often used as an overlay on pictures or photographs to add a decorative or protective layer.
How do you prevent the glue from showing through the vellum?
Use a clear glue or adhere the vellum to areas on the paper where the glue won’t show, like behind other elements or on a patterned background.
Can you layer vellum over vellum?
Yes, you can layer vellum over vellum to create a more dimensional effect. Use a light adhesive and apply sparingly to prevent the layers from being too bulky.
Can you use a heat gun to speed up the glue drying process?
No, using a heat gun or hair dryer on vellum may cause it to warp or buckle. It’s best to let the glue dry naturally.
What are some alternative materials to glue when adhering vellum to paper?
Tape runners, washi tape, or even sewing with a needle and thread are alternative methods to adhere vellum to paper.
What is the best way to store vellum projects?
Store vellum projects in a cool, dry place away from direct sunlight to prevent yellowing or curling over time.