Picture this – you’ve just received a set of beautiful wall stickers that would be perfect for your living room decor. You’re excited to put them up, but there’s one problem: you don’t know what glue to use to make sure they stick on securely. With so many options available in the market, it’s easy to feel overwhelmed. That’s why we’ve put together this helpful guide on the best glue for wall stickers that will leave you feeling confident and ready to showcase your aesthetic style. We’ll cover the factors you need to consider, the top glues that are available, application tips, and useful tips for removing them in case you need to redecorate. So, let’s delve right into it!
Factors to Consider
When it comes to choosing the best glue for wall stickers, there are a few factors to consider. Each factor plays a critical role in determining which glue will work the best for your specific needs and circumstances. It’s important to think about the type of wall you have, the type of sticker you plan to use, and how long you want the sticker to stick. By taking these factors into account, you can ensure that you choose the right glue for your project.
Type of Wall
When it comes to selecting the right glue for your wall stickers, the type of wall you’ll be applying the adhesive to is a crucial factor to consider. Different wall surfaces require different adhesives to ensure that your wall stickers stay in place. Here are some of the common wall types and the recommended glues for each:
| Wall Type | Recommended Glue |
|---|---|
| Drywall | For painted drywall, use E6000 Craft Adhesive or Aleene’s Original Tacky Glue. If your drywall is unpainted, Loctite Power Grab Express All-Purpose Adhesive is recommended. |
| Plaster | Gorilla Super Glue Gel or XFasten Super Glue are excellent options for plaster walls. |
| Concrete | XFasten Super Glue is a strong adhesive that can easily handle concrete walls. |
| Tile | If you’re putting wall stickers on tile, try E6000 Craft Adhesive or Loctite Power Grab Express All-Purpose Adhesive for a secure hold. |
| Glass | Aleene’s Original Tacky Glue or Loctite Power Grab Express All-Purpose Adhesive are good choices for glass surfaces. |
No matter what type of wall you’re working with, it’s important to make sure that the surface is clean and free from debris before applying any glue. This can be done using a damp cloth or sponge. If you need to know how to open Elmer’s glue-all or how to make glue from scratch, check out our other articles on those topics.
Type of Sticker
When considering the type of sticker that you want to adhere to your wall, it is important to take into account the material the sticker is made from. Different adhesives work better with certain materials, so it’s important to select the right one to ensure the sticker will properly adhere. Here are some common types of stickers along with the recommended glue to use:
| Type of Sticker | Recommended Glue |
|---|---|
| Paper stickers | E6000 Craft Adhesive |
| Vinyl stickers | Aleene’s Original Tacky Glue |
| Fabric stickers | Loctite Power Grab Express All-Purpose Adhesive |
| Heavy-duty stickers | Gorilla Super Glue Gel or XFasten Super Glue |
Paper stickers are lightweight and fragile, so they need a strong adhesive. E6000 Craft Adhesive is a popular choice for paper stickers because it creates a strong bond and dries clear.
Vinyl stickers are heavier and tougher. Aleene’s Original Tacky Glue works well with vinyl because it is also a strong adhesive that dries clear.
If you are dealing with fabric stickers, Loctite Power Grab is a great adhesive to use. It dries clear and has a non-toxic formula, making it safe to use on a variety of materials.
For heavy-duty stickers, such as those made of metal or wood, Gorilla Super Glue Gel or XFasten Super Glue are good options. They are strong enough to hold up the weight of these types of stickers while still drying clear to blend in with the wall.
It’s important to note that some stickers may come with their own adhesive backing. If the sticker already has adhesive on the back, it may not be necessary to add additional glue. However, if the adhesive backing is not strong enough, you may need to use one of the above adhesives to ensure the sticker stays in place.
Remember, always test a small area before applying a large amount of adhesive to ensure it works with your specific sticker and wall material. If you’re not sure which adhesive to use or how to apply it properly, seek advice from a professional or refer to one of our application tips mentioned later in the article.
Duration of Use
Duration of use is an important factor to consider when choosing the appropriate glue for wall stickers. Some glues are ideal for long-term use, while others are suitable for temporary applications. The table below outlines the duration of use for the top 5 glues for wall stickers.
| Glue | Duration of Use |
|---|---|
| E6000 Craft Adhesive | Long-term |
| Aleene’s Original Tacky Glue | Short to medium-term |
| Loctite Power Grab Express All-Purpose Adhesive | Long-term |
| Gorilla Super Glue Gel | Short to medium-term |
| XFasten Super Glue | Short to medium-term |
The E6000 Craft Adhesive is suitable for long-term use as it is a strong adhesive that can withstand various weather conditions. It is ideal for permanent applications as it can provide a durable and secure hold that can last for several years. On the other hand, Aleene’s Original Tacky Glue, Gorilla Super Glue Gel, and XFasten Super Glue are more suitable for short to medium-term applications. These glues are perfect for temporary installations and can hold up well for several months. Meanwhile, the Loctite Power Grab Express All-Purpose Adhesive is also ideal for long-term use as it can provide a strong and permanent hold on various surfaces.
No relevant anchor found for this section.
The Top 5 Glues for Wall Stickers
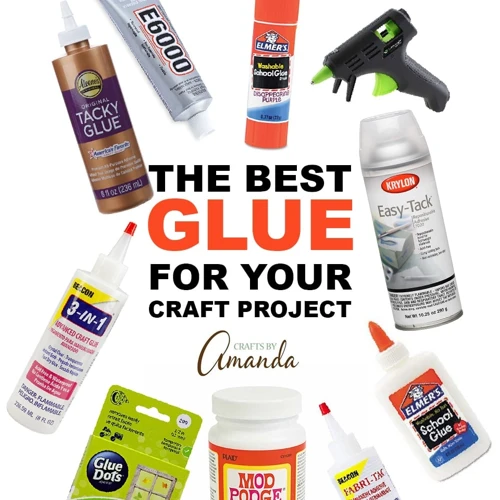
When it comes to getting your wall stickers to stick, having the right glue is essential. Whether you are decorating a nursery or updating your living room, using the right adhesive can make all the difference. To help you in your search, we’ve compiled a list of the top five glues for wall stickers. These adhesives were chosen based on their strength, versatility, ease of use, and compatibility with different types of surfaces and stickers. So, without further ado, let’s dive in and take a closer look at each of these top-performing adhesives.
1. E6000 Craft Adhesive
E6000 Craft Adhesive is a popular choice for wall stickers due to its strong and durable hold. This adhesive is suitable for various types of surfaces, including porous and non-porous materials. Here are some pros and cons of using E6000 Craft Adhesive:
Pros:
- It creates a strong hold that lasts for a long time, even on surfaces that are not perfectly smooth.
- It works well with most types of wall stickers, including vinyl and fabric stickers.
- The glue is waterproof and heat-resistant, making it ideal for use in areas that are exposed to moisture or heat.
- It dries clear, which is great for transparent or translucent stickers.
Cons:
- The glue can be difficult to remove once it has dried, which can be a downside if you want to change your wall stickers frequently.
- It has a strong odor, so you should use it in a well-ventilated area.
- The glue can be messy to work with, so you need to be careful when applying it.
If you decide to use E6000 Craft Adhesive for your wall stickers, be sure to follow the application tips below to ensure the best results. If you encounter any difficulty with opening the tube of adhesive, you can check out our article on how to open Elmer’s Glue All.
2. Aleene’s Original Tacky Glue
Aleene’s Original Tacky Glue is a popular choice for many DIY enthusiasts because it is versatile and dries clear. This glue is great for projects that require a strong and permanent bond, but it can also be used for temporary applications when diluted with water. The glue is non-toxic, making it safe for use around children and pets.
One of the key features of Aleene’s Original Tacky Glue is its ability to bond to a variety of surfaces, including paper, wood, fabric, and plastic. This glue is also water-resistant, which makes it ideal for use in humid environments and for outdoor projects.
| Type of glue | Drying time | Maximum strength | Water-resistant |
|---|---|---|---|
| Aleene’s Original Tacky Glue | 24 hours | Permanent | Yes |
When using Aleene’s Original Tacky Glue, it’s important to apply the glue evenly and to use the right amount to avoid any bubbling or wrinkling. The drying time for this glue is 24 hours, so it’s important to be patient and wait for the glue to dry completely before handling the project.
If you’re looking for a more immediate bond, you may want to consider other options, such as E6000 Craft Adhesive or Gorilla Super Glue Gel. However, it’s important to keep in mind that these glues may not be as versatile as Aleene’s Original Tacky Glue.
If you need to remove any excess glue or clean up any spills, warm soapy water can be used. It’s important to clean up any excess glue before it dries to avoid any long-term damage to the surface.
Aleene’s Original Tacky Glue is a great option for a variety of projects and surfaces. It’s versatile, non-toxic, and water-resistant, making it a popular choice for many DIY enthusiasts.
3. Loctite Power Grab Express All-Purpose Adhesive
Loctite Power Grab Express All-Purpose Adhesive is a premium quality glue for wall stickers that gives users a strong and durable hold. This adhesive is perfect for a variety of wall surfaces and can also bond to numerous materials, including plastics, wood, metal, ceramic, and more.
One of the impressive features of this adhesive is its quick bonding time. It can provide a strong and permanent bond within 30 seconds, which makes it an effective solution for those who don’t want to wait for long periods for their wall stickers to stick. The formula is designed to provide a high-tack and strong bond that can resist frequent impacts and daily strain.
This adhesive comes in a tube with a convenient applicator that facilitates quick and clean application. Users must confirm that they are using the right amount of glue for optimal results. Remember to apply enough pressure to the sticker for at least 30 seconds, allowing the adhesive to adhere tightly to the wall surface.
Loctite Power Grab Express All-Purpose Adhesive’s versatility can be attributed to its ability to resist temperature changes, humidity, and moisture. This property makes it ideal for use in high traffic areas like kitchens and bathrooms. It also gives users the flexibility to use it both indoors and outdoors. It leaves behind no mess or damage to the walls when removed.
If you’re looking for glue that can give you the best value for your money, Loctite Power Grab Express All-Purpose Adhesive is an excellent choice. It’s affordable, performs incredibly, and has an impressive bonding time, making it a top pick for homeowners and DIY enthusiasts alike.
Pro tip: Did you know that you can make your edible glue with corn syrup? Check out our article on “How to make edible glue with corn syrup,” and learn how to add a fun twist to your glue-making process.
4. Gorilla Super Glue Gel
Gorilla Super Glue Gel is one of the most versatile and strong adhesives available in the market. It’s perfect for bonding almost any surface, including plastic, metal, wood, and ceramic, making it an ideal option for wall stickers. This glue gel sets in just 10-30 seconds, ensuring a quick and easy application with a strong hold that lasts.
One of the key features of Gorilla Super Glue Gel is its ability to form a tight bond that is resistant to impact and shock. This means that your wall stickers will stay in place even if they are subjected to regular wear and tear. Additionally, the glue gel is waterproof, making it an ideal choice for use in bathrooms, kitchens, and other areas that are frequently exposed to moisture.
When using Gorilla Super Glue Gel, it’s important to remember to use it sparingly, as a little goes a long way. Too much glue can cause the sticker to lift or wrinkle, ruining the overall effect. A small drop in the center of the sticker is usually enough to ensure a strong bond. Once applied, pressing the sticker down firmly for a few seconds will help to ensure that the glue fully sets.
Like most super glues, Gorilla Super Glue Gel can be difficult to remove once it has set. Using an acetone-based solvent can help to loosen the bond, making the sticker easier to remove. However, it’s important to be careful when using solvents, as they can damage some surfaces. For this reason, testing the solvent on a small, inconspicuous area of the surface first is always recommended.
Gorilla Super Glue Gel is a top-rated option for bonding wall stickers. Its quick-drying formula, strong hold, and waterproof properties make it an ideal choice for almost any application. However, users should take caution while using it to ensure the surface is not affected in any way.
| Pros | Cons |
|---|---|
| Quick-drying | Can be difficult to remove once set |
| Strong, impact-resistant bond | Can damage some surfaces |
| Waterproof | Needs to be used sparingly |
If you want to know how to make dish soap slime without glue, check out our guide here.
5. XFasten Super Glue
XFasten Super Glue is a versatile adhesive that can be used for a variety of applications, including wall stickers. It is a fast-drying glue that creates a strong bond between the sticker and the wall. Here are some of the key features and benefits of this product:
- Fast Drying Time: This glue dries quickly which makes it easy to work with. It sets in just 10-20 seconds, which means that you don’t have to hold the sticker in place for too long.
- Strong Bond: XFasten Super Glue creates a strong bond that can withstand the test of time. It is ideal for use on different types of surfaces, including walls, wood, metal, and plastic.
- Easy to Apply: This glue comes with a precision nozzle that allows you to apply it exactly where you need it. The nozzle also helps to control the amount of glue that is dispensed, which reduces the risk of getting messy.
- Multi-Purpose: Apart from wall stickers, XFasten Super Glue can be used for a variety of applications such as jewelry making, woodwork, and DIY projects.
- Compact Size: This glue comes in a small tube that is easy to carry around. It is ideal for people who are always on the go and need an adhesive that is easy to use.
XFasten Super Glue is an affordable option for people who want a fast-drying and reliable adhesive. It is versatile, easy to apply, and compact which makes it convenient to use. Whether you are working on a home improvement project or a DIY craft, this glue is a great choice that you can rely on.
Note: If you want to learn more about how to make glue, we have a detailed guide on our website on “How to Make Glue“.
Application Tips
When it comes to applying wall stickers, using the right glue can make all the difference in how well they stick and how long they last. Here are some application tips to help you get the most out of your chosen glue and wall stickers. Whether you’re decorating a room or DIY-ing a project, mastering these techniques will lead to a professional-looking finish.
Clean the Surface
When applying wall stickers, it is extremely important to have a clean and smooth surface to work with. Any dust, dirt, or oil on the wall can prevent the glue from bonding properly, which can cause the stickers to fall off.
Before applying any glue, make sure to thoroughly clean the surface where the sticker will be placed. Use a damp cloth or sponge to wipe down the wall, and take care to remove any debris or dirt in the corners or around the edges of the area. Allow the surface to dry completely before proceeding with the glue application.
If the wall has a textured surface, it may be helpful to use a small brush or vacuum cleaner to remove any dust or debris from the crevices. Additionally, if the wall has been painted recently, it is important to wait at least 2-3 weeks before applying any glue to ensure that the paint has fully cured.
Note: Make sure to check the manufacturer’s recommendations for any specific cleaning instructions or restrictions.
By following these cleaning tips, you can ensure that the glue will properly adhere to the wall and keep your stickers securely in place without the risk of falling off.
For more information on glue for other projects, check out our article on how much a hot glue stick weighs or our guide on how to glue jewelry.
Use the Right Amount of Glue
When it comes to using the right amount of glue for wall stickers, it’s important to find a balance between too much and too little. Using too much glue can create a mess and make it difficult to position the sticker properly, while using too little can result in the sticker falling off. The exact amount of glue needed will depend on the size and shape of the sticker, as well as the type of glue being used.
Here are some general guidelines for using the right amount of glue:
| Type of Glue | Amount |
|---|---|
| E6000 Craft Adhesive | A small dot or thin line along the edges of the sticker |
| Aleene’s Original Tacky Glue | A thin, even layer across the back of the sticker |
| Loctite Power Grab Express All-Purpose Adhesive | A thick line along the edges of the sticker and a few dots in the middle |
| Gorilla Super Glue Gel | A small dot or thin line along the edges of the sticker |
| XFasten Super Glue | A small dot or thin line along the edges of the sticker |
Remember, it’s always better to start with a small amount of glue and add more if needed. You don’t want to end up with excess glue that can make the sticker slide around or seep out from underneath. If you’re not sure how much glue to use, test a small area first before applying it to the entire sticker.
If you need additional tips and tricks on how to glue other items, such as end-grain wood or elastic bracelets, you can check out our guide on/how-to-glue-a/ and /how-to-tie-elastic-bracelet-without-glue/. These articles will guide you on how to properly glue different materials, ensuring that your DIY projects will properly bond together.
Apply Pressure
When applying glue to wall stickers, it is important to use enough pressure to ensure that the sticker adheres properly to the wall. Here are some tips to make sure pressure is applied correctly:
- Use your fingers: After placing the sticker on the wall, use your fingers to firmly press it into place. Make sure to apply even pressure across the entire sticker surface to avoid any air bubbles or wrinkling.
- Smooth with a tool: For larger stickers or harder-to-reach areas, use a smooth tool such as a credit card, spatula, or roller to apply pressure. Gently glide the tool along the surface of the sticker, pressing it down as you go.
- Apply weight: For particularly stubborn stickers, you can place a heavy object on top of the sticker to apply pressure. Make sure to use something that won’t damage the sticker or wall, such as a book or a clean brick wrapped in a towel.
Remember, too much pressure can cause the glue to squeeze out and create a mess, so be careful not to overdo it. Applying the right amount of pressure will help the sticker stay in place for longer and prevent it from falling off or peeling.
Pro tip: For even greater adhesion, apply the glue to the back of the wall sticker and to the wall itself, creating a double bond that will help keep the sticker firmly in place.
If you want to take a break from gluing wall stickers and try something new, check out our tutorial on how to make a fake tongue ring without glue or learn how to glue end grain wood for your next DIY woodworking project.
Wait for the Glue to Dry Completely
Waiting for the glue to dry completely is one of the most essential steps for ensuring that your wall stickers stay in place for an extended period. Rushing the process could cause the glue to be ineffective and result in the stickers peeling off your wall. Below are some of the guidelines that you should follow during this crucial stage:
- Avoid rushing the drying process: Sometimes, when in a hurry, you may want to cut corners to save time. One of the areas you might be tempted to rush is the drying of the glue. However, this may cause more harm than good in the long run, and you should resist the urge to check if the sticker has dried every few minutes. Give it ample time to dry on its own.
- Ensure the room is well-ventilated: During the drying process, the room should have proper ventilation to allow moisture to escape. The stickers will dry faster if the air in the room is circulating. A fan or open windows can help to facilitate faster drying.
- Follow the glue’s instructions: Different types of glues have varying drying times. Some may dry faster than others. Read the instructions on the glue’s packaging to determine how long the drying process takes and follow them closely.
- Avoid contact with the sticker: After applying the glue, avoid touching or disturbing the sticker during the drying process. Doing so could cause the sticker to shift or peel off once the glue has dried.
- Be patient: Patience is key when waiting for glue to dry. The more time you give it to dry, the better the outcome. Once the glue has dried completely, gently test the edges of the sticker to ensure it has adhered well to the wall before leaving it alone.
By following the above guidelines, your wall stickers are more likely to stay in place for an extended period, minimizing any chances of peeling or falling off. Remember that taking your time is critical, and rushing the process can lead to unfavorable results.
Removal Tips
Removing wall stickers can be a challenging task, especially if you don’t know the right techniques to use. It’s equally important to ensure that the process doesn’t damage your walls. Luckily, there are several methods you can use to remove wall stickers without leaving any residue or causing damage. In this section, we’ll take a look at some effective removal tips that will make the job easier and stress-free.
Heat Method
When it comes to removing wall stickers, the heat method is one of the most effective ways to do so. The process involves using heat to weaken the adhesive, making it easier to remove.
Materials Needed:
To use the heat method, you will need a few materials:
| Materials | Description |
|---|---|
| Hair Dryer | A hair dryer is needed to apply heat to the wall sticker. |
| Plastic Scraper | A plastic scraper is needed to gently scrape away the sticker after it has been heated. |
| Isopropyl Alcohol | To remove any remaining adhesive after the sticker has been removed, use isopropyl alcohol. |
Steps:
Here are the steps to follow when using the heat method to remove wall stickers:
- Turn on the hairdryer to the highest setting and point it at the wall sticker. Hold the hairdryer a few inches away from the sticker and apply heat for about one minute.
- After a minute has passed, use a plastic scraper to gently scrape away the sticker. If the sticker does not easily come off, apply heat for another minute and then try again.
- Once the sticker has been fully removed, use a cloth or paper towel to apply a small amount of isopropyl alcohol to the area to remove any remaining adhesive.
- Allow the area to dry before applying a new sticker.
Precautions:
It is crucial to follow some precautions when using the heat method for removing wall stickers.
- Be careful not to hold the hairdryer too close to the wall, as this can cause damage to the paint or wall surface.
- Always use a plastic scraper instead of a metal one, as a metal scraper can cause damage to the wall surface.
- Avoid using the heat method on delicate or fragile walls, such as wallpaper or plaster walls, as it can damage them.
- Always be cautious and patient during the process, as rushing or using excessive force can cause damage to the wall surface.
Using the heat method is an effective and practical way to remove wall stickers. Just make sure to follow precautions and use the right materials to avoid causing damage to your walls.
Solvent Method
When it comes to removing wall stickers, the solvent method can be effective, but it does require caution and proper ventilation. Solvents are substances that are capable of dissolving adhesives, and they can range from alcohol to acetone. Here are the steps to remove wall stickers using the solvent method:
- Put on rubber gloves to protect your hands from the solvent.
- Choose a well-ventilated area and open windows or use a fan to increase airflow.
- Apply the solvent of your choice to a soft cloth and gently rub it onto the sticker using circular motions.
- Wait for the solvent to dissolve the adhesive, which may take several minutes or longer depending on the type of sticker and adhesive.
- Use a plastic scraper or credit card to carefully lift and remove the sticker. Be sure to avoid using sharp objects that could damage the wall surface.
- Wipe away any remaining solvent and adhesive residue with a clean cloth.
- Rinse the area with warm water and mild soap to remove any remaining solvent and residue.
- Dry the area completely with a towel or allow it to air dry.
It’s important to note that solvents can be dangerous if proper safety measures aren’t taken. Always wear protective gloves and use solvents in a well-ventilated area. Additionally, test the solvent on a small, inconspicuous area of the wall before applying it to the sticker to ensure that it doesn’t cause damage or discoloration.
Peeling Method
When it comes to removing wall stickers, the peeling method can be an option if the sticker is already loose or barely sticking on the surface. However, it is important to approach this method carefully to avoid damaging the wall surface.
Step 1: Start by locating a corner or edge of the sticker that is already peeling off.
Step 2: Use a plastic scraper or credit card to gently lift the sticker from the surface. Be careful not to press too hard, as this can create scratches or damage to the wall.
Step 3: Slowly peel the sticker off the wall, using your other hand to support and guide it. If the sticker feels resistant, stop peeling and apply heat or solvent as discussed in the previous sections.
Step 4: Once the sticker is completely removed, assess the wall surface for any remaining glue residue. If there are any remnants, use a clean cloth or sponge with warm soapy water to gently rub and remove them.
Step 5: Rinse the wall with clean water and allow it to dry. You may also consider using a wall cleaner or primer to prep the surface before applying a new sticker in the future.
The peeling method can be a quick and easy way to remove wall stickers, but caution must be taken to avoid causing damage to the wall. If the sticker is firmly attached or if there is residue left behind, it is recommended to use either the heat or solvent method for safe and effective removal.
Conclusion
In conclusion, finding the best glue for wall stickers may seem like a daunting task, but it can be made easier by considering the key factors such as the type of wall, type of sticker, and duration of use. It is also important to choose a high-quality glue, such as the E6000 Craft Adhesive, Aleene’s Original Tacky Glue, Loctite Power Grab Express All-Purpose Adhesive, Gorilla Super Glue Gel, or XFasten Super Glue.
Remember to clean the surface before application and apply the right amount of glue while also exerting pressure and allowing sufficient drying time. When it comes to removing the stickers, you can use the heat method, solvent method, or peeling method, depending on the type of glue used and the nature of your wall surface.
Overall, with the use of the right glue and proper application techniques, your wall stickers will stay in place for as long as you desire. Take the time to carefully study the instructions for each glue and test it on a small area before committing to a larger project to ensure the best results.
Frequently Asked Questions
What type of glue is best for wall stickers?
The best type of glue for wall stickers is a strong adhesive that can withstand the weight of the sticker and any external factors that may compromise it over time.
Can I use regular glue for wall stickers?
No, regular glue is not recommended for wall stickers. Wall stickers require a stronger adhesive that can withstand different types of surfaces and pressures.
Will glue damage my wall?
If you are careful and use the right type of glue, it should not damage your wall. However, it is important to follow the removal instructions carefully to avoid damaging the wall surface.
Do wall stickers lose their stickiness over time?
Yes, wall stickers can lose their stickiness over time due to exposure to external factors such as heat or moisture. That’s why it’s important to use a strong, long-lasting glue to maintain the stickiness for as long as possible.
What types of surfaces can be used for wall stickers?
Wall stickers can be used on a wide range of surfaces including painted walls, tiles, glass, metal, and plastic. It’s important to select the right type of glue based on the surface to ensure the sticker remains in place.
Can I reuse a wall sticker once it has been removed?
No, a wall sticker cannot be reused once it has been removed as the adhesive loses its stickiness after being removed.
How long does the glue take to dry?
The drying time for glue can vary based on the type and brand of glue. It’s important to follow the instructions carefully and wait until the glue is completely dry before applying any pressure or moving the sticker.
What type of cleaning solution should I use to clean the surface before applying glue?
You can use a mild detergent solution or rubbing alcohol to clean the surface before applying glue. It’s important to ensure the surface is completely dry before applying glue.
Can I remove the glue without damaging the wall surface?
Yes, it is possible to remove the glue without damaging the wall surface if you follow the removal instructions carefully. The heat method and solvent method are both effective in removing the glue without damaging the wall surface.
Is it safe to use glue for wall stickers around children and pets?
If you select a non-toxic and low VOC (volatile organic compound) glue, it should be safe to use around children and pets. However, it’s always best to keep children and pets away from the glue until it has completely dried.