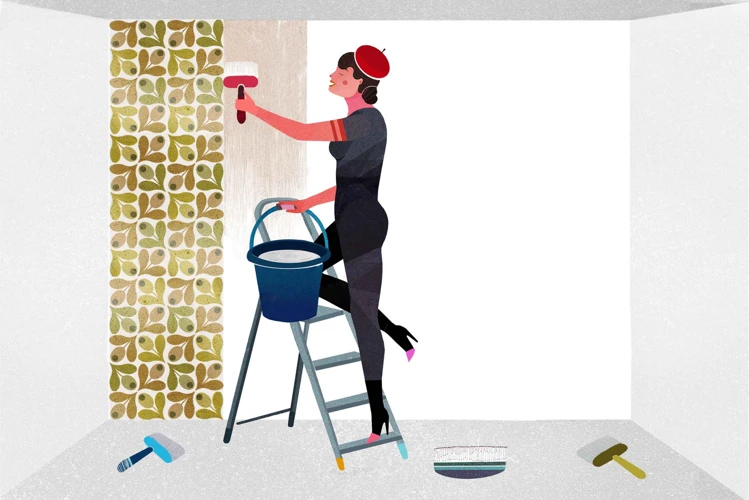
Embarking on any home improvement project can be an exciting challenge, and wallpapering is no exception. However, even a beginner can achieve professional-looking results with the right tools and techniques. With that said, if you’re new to this, you might be wondering where to begin. Fear not! After following the steps outlined in this guide, you’ll have a beautifully wallpapered room in no time. So, grab your supplies and get ready to transform your space with tips and tricks for gluing wallpaper.
Gather Your Supplies
As with any project, it is important to have all of the necessary supplies on hand before beginning. When it comes to wallpapering, having the right tools and materials can make a huge difference in the final result. In this section, we’ll go over some of the items you’ll need to gather before you begin your wallpapering project. Don’t worry if you’re not familiar with some of these items, we’ll explain what they are and how to use them. So let’s get started on creating a list of the things you’ll need to get this project off the ground!
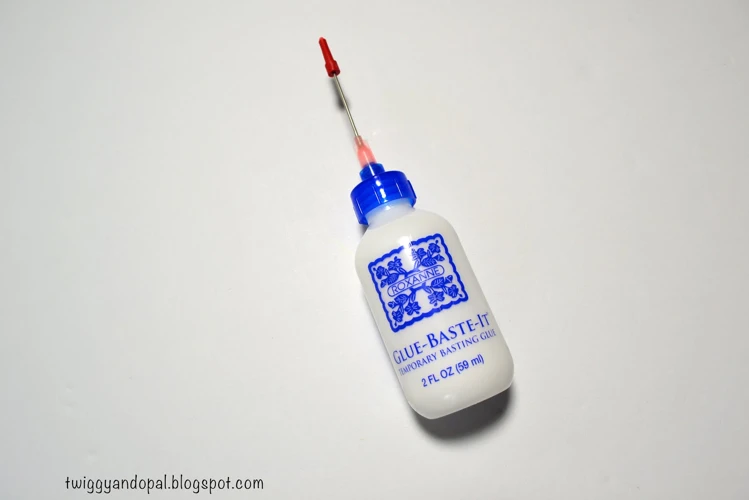
If you are unsure about what type of glue to use for your wallpapering project, check out our article on different types of glue.
Wallpaper and Tools
When it comes to gathering supplies for wallpapering, you will need wallpaper and a variety of tools to ensure a smooth and successful project. Here are the essential items you’ll want to get:
- Wallpaper rolls: make sure to calculate the amount of wallpaper you’ll need based on the square footage of your wall. It’s always better to round up the number of rolls to avoid running short mid-project.
- Wallpaper paste: there are different types of paste available depending on the type of wallpaper material you’re using – make sure to choose the right one.
- Wallpaper smoother: a straight-edged smoother is perfect for creating a seamless finish.
- Utility knife: a sharp blade will make the cutting process easier.
- Cutting mat: this will protect your work surface while you cut the wallpaper.
- Measuring tape: make sure to measure your walls accurately to avoid waste.
- Pencil: use a pencil to mark where you need to cut the wallpaper.
- Level: a level will help you ensure that your wallpaper is straight.
- Step stool: if you’re wallpapering a large wall, a stool will give you extra height to reach the top.
Note: If you’re using a pre-pasted wallpaper, you might not need a separate wallpaper paste. However, make sure to read the manufacturer’s instructions carefully to know how to activate the paste properly.
Internal link: If you’re unsure about which type of glue to use, you might find this guide on how to use tacky glue helpful.
Preparation Materials
Before you start hanging wallpaper, it is important to gather the necessary preparation materials. These supplies not only ensure that your wallpaper looks perfect once it’s on the wall, but they also help to make the application process go smoothly. Here are some preparation materials that you will need:
| Materials | Description |
|---|---|
| Stepladder | A sturdy ladder that allows you to reach high spots on your walls. |
| Drop cloth | A large piece of fabric or plastic that protects your floors from water, glue, and other messes. |
| Wallpaper smoother | A tool made of plastic or metal that helps to remove air bubbles from your wallpaper and smooth out any wrinkles |
| Razor knife or scissors | A sharp blade tool that allows you to cut the wallpaper to the correct size and shape. |
| Sponge | A soft sponge used to apply the glue, activate the adhesive, and clean up any excess glue or paste. |
| Level | A tool that helps you to ensure that the wallpaper hangs straight on the wall. |
| Tape Measure | A flexible tape used to measure the height and width of walls accurately |
| Wallpaper primer | A special primer that improves the adhesion of wallpaper paste and prevents the wallpaper from peeling off the wall. |
Using these materials will help you to prepare your walls for wallpapering and ensure that your wallpaper looks beautiful and smooth. Now that you have your preparation materials ready, it’s time to prepare your walls for wallpapering. But before that, do you know how to make Elmer’s glue dry faster? This trick can be useful in case you overapplied the paste.
Prepare Your Walls
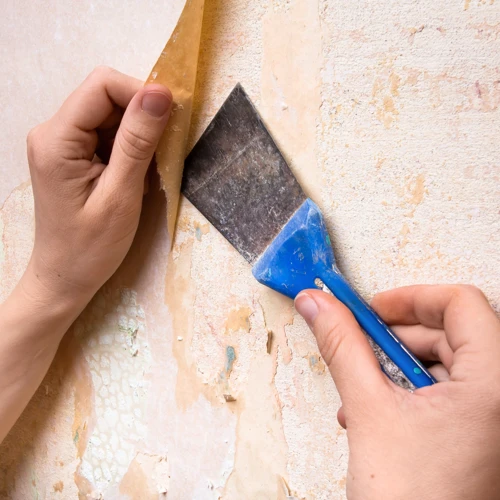
Before you start applying wallpaper, it is crucial to prepare your walls properly. The last thing you want is for your wallpaper to peel off or develop bubbles due to poorly prepared walls. This step may take some time, but it is well worth it in the long run. Understanding the preparation process ensures that your wallpaper will have a smooth finish and will last for many years. So, let’s get started on the most important steps to get your walls ready for wallpaper! If you encounter any problems during the wallpaper application process, such as peeling edges and bubbles, don’t forget to check out how to use edible glue or what is Elmer’s glue used for for alternative solutions.
Clean the Surface
Before you start applying the wallpaper, it is essential to prepare the surface you will be covering. Cleaning the wall is crucial, as any dirt or residue will prevent the glue from properly adhering. A clean surface will also ensure a smooth appearance. Here are some steps to follow for cleaning the surface:
Step 1: Begin by removing any loose paint chips or wallpaper. Use a scraper or sandpaper to smooth any rough spots on the wall.
Step 2: To remove any dirt or dust from the wall, use a soft-bristled brush or a vacuum with a brush attachment. Make sure to get into all the crevices and corners of the wall to properly clean it.
Step 3: Mix warm water and a mild soap or detergent, then use a sponge or cloth to wipe down the wall. Make sure not to oversaturate the wall with water, as this can cause damage to the underlying structure.
Step 4: Rinse the wall with warm water and allow ample time for it to dry completely. Drying times may vary, but allowing at least 24 hours is recommended before proceeding to the next step.
Cleaning the surface is an essential step in preparing the wall for wallpaper application. By removing any dust, dirt, or residue, the wallpaper glue can adhere to the surface more effectively. Not properly cleaning the wall can cause the wallpaper to bubble or peel, resulting in an uneven and unsightly appearance. Make sure to follow these steps closely to ensure that the surface is adequately prepped for wallpapering.
If you have accidentally applied glue to a wrong surface and need to undo it, check out /how-to-get-repair-glue/ for tips on removing glue from different materials.
Fill Holes and Sand Rough Spots
Before gluing wallpaper, it is crucial to fill any holes or cracks in the wall and sand down any rough spots. This will ensure that the wallpaper adheres evenly to the surface and looks smooth and polished once it’s up. Here are some steps to help you get the wall prepared for the wallpaper:
– First, use a putty knife to fill any holes or cracks in the wall with spackle. Allow the spackle to dry for the amount of time recommended on the label.
– Once the spackle has dried, use fine-grit sandpaper to sand down the areas where you filled the holes. This will level out the surface and make it even for better wallpaper application.
– Next, sand down any rough spots or bumps on the wall. This can be done by using a sanding sponge or sandpaper. Be sure to use a gentle touch, as sanding the wall too hard can cause damage to the surface.
– After sanding, wipe down the wall with a damp cloth to remove any dust or debris. Allow the wall to dry completely before proceeding with wallpaper application.
Pro tip: In case of large holes or cracks, consider applying a patch to the area to reinforce the wall strength. For further information about making dry glue wet again if it has been opened some time ago, read our step-by-step guide.
By taking the time to properly prepare your walls, you can ensure that your wallpaper will stick and stay in place for the long haul. Plus, with a smooth and level surface, your wallpaper will look flawless once it’s hung up.
Measure and Cut the Wallpaper
Measure and Cut the Wallpaper: Before hanging your wallpaper, you need to measure the wall to calculate how much wallpaper you need. Make sure to measure the height of the wall from the base to the ceiling, and the total distance around the wall. Add a few extra inches to the measurements to ensure you have enough wallpaper to work with.
Once you have the right measurements, it’s time to cut your wallpaper. Use a sharp utility knife or wallpaper scissors to cut the strips of wallpaper to the correct length. Be sure to use a straight edge or ruler to create a clean, straight line when cutting.
Pro tip: Cut strips of wallpaper several inches longer than the wall height to allow for trimming at the ceiling and floor. It’s better to have excess wallpaper and trim it away than to have too little and risk gaps or uneven seams.
When cutting the strips of wallpaper, be sure to take note of any patterns or designs on the paper. You’ll want to match the pattern on each strip to ensure a seamless look.
Internal link: If you’re looking for more crafty DIY ideas, check out our article on how to glue glass beads to a wine bottle for some inspiration.
After you’ve cut all of your wallpaper strips, be sure to label them in order of how they’ll be hung on the wall. This will make it easier to keep track of where each piece goes, especially if there are multiple strips with the same pattern.
Pro tip: If you’re using a wallpaper with a large pattern, lay out each strip on the floor in the correct order to make sure the pattern lines up before hanging.
By taking the time to measure and cut your wallpaper accurately, you’ll be able to achieve a professional-looking wallpaper job that will last for years to come. And if you want to try your hand at other DIY projects using glue, check out our article on how to make sprue glue or how to glue mosaic.
Apply the Wallpaper Paste
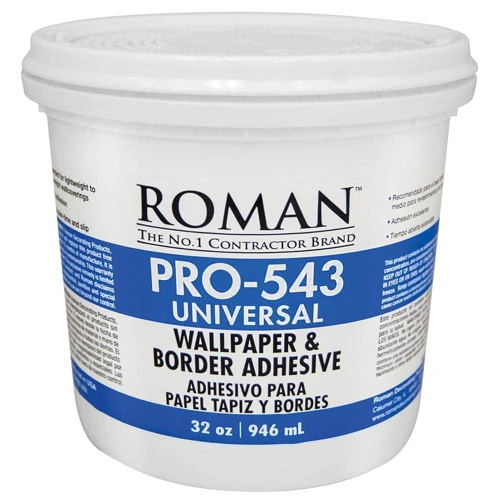
As you progress with your wallpapering project, the next step is to apply the wallpaper paste. This is an important step that can determine the longevity and overall look of your wallpaper. Applying the paste in the right way can ensure that your wallpaper adheres properly to the wall, without any bubbles or wrinkles. In this section, we’ll go over some useful tips and techniques to help you apply your wallpaper paste like a pro. So, grab your tools and let’s get started!
Read the Instructions on the Paste
When it comes to gluing wallpaper, the type of paste you use can make all the difference. It is essential to read the instructions on the paste before applying it to your wallpaper. Each type of wallpaper paste has its own specific set of instructions, and following them correctly will help ensure that your wallpaper adheres smoothly and lasts as long as possible.
To help you understand what to look for in a wallpaper paste’s instructions, we’ve created a table that highlights some common considerations:
| Instruction | Importance |
|---|---|
| Mixing ratio | Essential – Using the wrong ratio can lead to poor adhesion or damage to your wallpaper |
| Application method | Important – Certain pastes require specific application methods, such as soaking or rolling |
| Drying time | Crucial – Not allowing enough time for the paste to dry can result in bubbling or peeling |
| Cleanup instructions | Helpful – Knowing what solvents or techniques to use for cleanup can save time and effort |
| Compatibility with wallpaper type | Essential – Some pastes are specifically designed for certain types of wallpaper, such as vinyl versus paper |
By carefully reading and following these instructions, you’ll be on your way to a successful wallpapering project. Don’t be afraid to reach out to the manufacturer or a professional if you have any doubts or questions about your paste or its instructions.
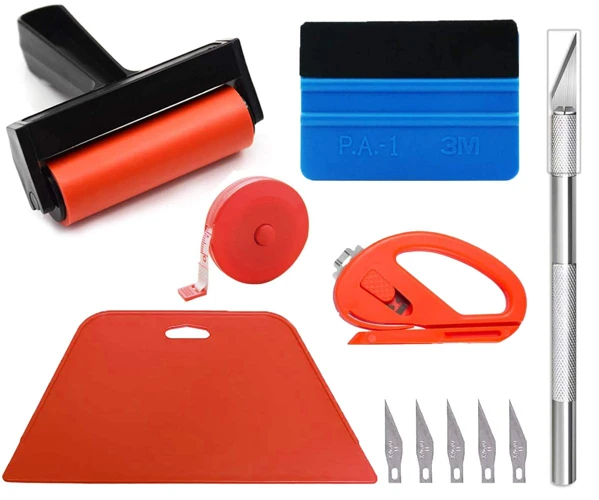
Use the Right Tools and Techniques
When it comes to gluing wallpaper, using the right tools and techniques can make a big difference in the final outcome. Here are some tips to ensure that you have everything you need to complete the job successfully:
- Use a high-quality wallpaper brush: A good wallpaper brush will help you apply the paste evenly and smoothly, without leaving lumps or air bubbles behind. Look for a brush with long, soft bristles that are designed specifically for wallpapering.
- Invest in a smoothing brush: A smoothing brush is a specialty tool that is designed to help you smooth out the wallpaper after you have applied it to the wall. This will help to eliminate any air bubbles or wrinkles, and ensure that the wallpaper is smooth and flat against the wall.
- Get a wallpaper roller: A wallpaper roller is a handy tool that will help you to secure the wallpaper tightly to the wall, and ensure that the glue is evenly distributed. You can find wallpaper rollers at most hardware stores, and they are relatively inexpensive.
- Keep a sharp utility knife on hand: A sharp utility knife is essential for cutting the wallpaper to the right length and trimming the edges. Be sure to use a new blade for each cut, to ensure a clean, smooth edge.
- Don’t forget a seam roller: A seam roller is a specialized tool that is used to smooth out the seams between pieces of wallpaper, and ensure that they are tightly secured to the wall. This will help to eliminate any gaps or bubbles between the panels.
Remember, using the right tools and techniques can make all the difference when it comes to gluing wallpaper. Invest in high-quality tools and take your time with each step of the process, and you’ll be rewarded with a beautiful and professional-looking result.
Hang the Wallpaper
Now that you have measured, cut, and applied the paste to your wallpaper, it is time to hang it up on your prepared walls. This can be a nerve-wracking process, but with the right tools and techniques, you can get it done perfectly. In this section, we will take you through each step of hanging your wallpaper, from starting in a corner to matching patterns and overlapping seams. Let’s dive in and begin to transform your space with your newly wallpapered walls!
Start in a Corner
When you’re ready to hang your wallpaper, it’s important to start in a corner. This will ensure that the wallpaper is straight and aligned properly. Here are some tips for starting in a corner:
| Step | Description |
|---|---|
| 1 | Measure the width of your wallpaper and subtract 1/2 inch from that measurement. This will be the width of your first strip. |
| 2 | Use a pencil and level to mark a straight line 1/2 inch in from the corner where you will be starting. This will be your vertical starting line. |
| 3 | Apply wallpaper paste to the back of the wallpaper strip and fold it in half with paste side facing paste side, making sure that the ends are even. This is called booking the strip and allows the paste to soak into the paper. |
| 4 | Align the folded wallpaper strip’s edge with the vertical starting line and press it to the wall, leaving the excess wallpaper to overlap the adjacent wall. |
| 5 | Unfold and smooth out the wallpaper along the wall, using a wallpaper brush or smoothing tool to remove any bubbles or wrinkles. Keep pressing the wallpaper strip against the wall, smoothing out any bumps or bubbles as you go. |
Starting in a corner and ensuring a straight vertical alignment is crucial for the success of your wallpaper job. Take your time and be patient throughout the process to achieve a smooth and professional-looking result.
Match Patterns and Overlap Seams
Matching patterns and overlapping seams is a crucial step to ensure that your wallpaper looks seamless and professional. Here are some tips to help you successfully match patterns and overlap seams.
- Start with a plumb line: Use a plumb line to ensure that your first strip is hung perfectly straight. This will make it easier to match patterns and overlap seams as you hang subsequent strips.
- Overlap or butt seams: Decide whether you want to overlap or butt the seams. Overlapping seams involves overlapping the edges of two pieces of wallpaper by about 2 inches. Butting seams involves placing the edges of two pieces of wallpaper side-by-side. Overlapping seams are more forgiving, while butting seams provide a cleaner appearance.
- Align the pattern: When matching patterns, make sure to align the pattern precisely. Hold up the wallpaper strip you will be hanging next to the already-hung strip and check the pattern with a level to ensure it lines up correctly.
- Smooth out bubbles: Use a wallpaper smoothing tool to smooth out any bubbles or wrinkles in the wallpaper. This will help the pattern align and overlap more seamlessly.
- Trim the excess: Once the wallpaper is overlapped or butted and the pattern is aligned, use a sharp razor knife to trim any excess. Be sure to follow the plumb line and avoid cutting into the wallpaper already hung.
Keep in mind that matching patterns and overlapping seams can be tricky, especially if you are new to hanging wallpaper. Don’t be discouraged if it takes a few tries to get it exactly right. With practice, you will be able to successfully match patterns and overlap seams to create a stunning wallpapered surface.
Smooth out and Trim the Edges
After hanging the wallpaper, the next step is to smooth out any bubbles or wrinkles. This is important to ensure that the wallpaper looks neat and professional. To do this, use a wallpaper smoother or squeegee and start from the center of the wallpaper and work outwards. Use moderate pressure to avoid damaging the wallpaper.
Once you have smoothed out the wallpaper, it is time to trim the edges. Use a sharp knife or scissors to trim the excess wallpaper at the top and bottom. Be careful not to cut into the wallpaper on the wall.
To cut the wallpaper around outlets or switches, use a ruler and a sharp blade. Place the wallpaper over the outlet or switch and use the blade to cut an X into the wallpaper. Fold the edges of the wallpaper inward and smooth them out. Finally, cut off any excess wallpaper.
When trimming the edges, make sure that the wallpaper is aligning smoothly with the ceiling, skirting boards, and corners. If you need to, use a straight edge to ensure that the edge is straight and even.
Remember to take your time when trimming the edges to avoid making any mistakes. It is better to cut off small amounts of wallpaper at a time rather than trying to cut large sections at once.
Once you have finished trimming the edges, you should step back and admire your work. If you notice any imperfections, use a damp sponge to gently push out any air bubbles and smooth out any wrinkles.
By following these tips, you can ensure that your wallpaper looks professional and is perfectly aligned. Don’t rush this step, take your time and be patient, the end result will be worth it.
Let It Dry and Enjoy
Now that you’ve finished hanging your wallpaper, it’s time to let it dry and admire your hard work. This is an important step in the process as rushing it can lead to bubbles or wrinkles in the wallpaper. First, ensure that the room is well-ventilated to help the wallpaper dry faster. Keep windows open or use a fan to increase airflow.
Avoid touching or moving the wallpaper while it is still wet, as this can dislodge it from the wall or cause wrinkles to form. Allow at least 24 hours for the wallpaper to dry completely. Check the manufacturer’s instructions for specific drying time recommendations, as drying times can vary based on the type of wallpaper and the specific adhesive used.
After the wallpaper has dried, check for any bubbles or wrinkles that may have formed during the drying process. If you notice any issues, use a sharp utility knife or a small needle to carefully release the trapped air or smooth out any wrinkles.
Now it’s time to sit back and enjoy your newly decorated space. Appreciate the new ambiance and take pride in your work. Properly applied wallpaper can last for many years, so savor the enjoyment it will bring to your home. Don’t forget to properly dispose of any leftover materials and to clean up the workspace for your next project.
Conclusion
In conclusion, gluing wallpaper may seem like a daunting task, but with the right tools and techniques, it can be a straightforward and rewarding experience. Remember to gather all the necessary supplies and prepare your walls before measuring and cutting the wallpaper. Applying the wallpaper paste may seem like a simple step, but it’s important to read the instructions carefully and use the right tools and techniques for a smooth and seamless finish.
When hanging the wallpaper, starting in a corner and matching patterns and overlapping seams can make all the difference. Once the wallpaper is up, be sure to smooth out any bubbles or wrinkles and trim the edges cleanly. Finally, allow the wallpaper to dry completely before enjoying your beautifully decorated space.
By following these tips and tricks, you can confidently glue wallpaper like a pro and transform any room in your home. Don’t be afraid to experiment with different patterns and styles, and have fun with the decorating process. With a little patience and attention to detail, you’ll have perfectly hung wallpaper that will enhance the look and feel of your space for years to come.
Frequently Asked Questions
1. Can I use regular glue to hang wallpaper?
No, regular glue is not suitable for wallpaper. You should use wallpaper paste which is specifically formulated to attach wallpaper to walls.
2. Do I need to remove old wallpaper before hanging new wallpaper?
Yes, it is recommended to remove old wallpaper before hanging new wallpaper to ensure a smooth and even surface.
3. Can I hang wallpaper on a textured wall?
It is possible to hang wallpaper on a textured wall, but the texture may show through the wallpaper. It is recommended to smooth out the texture beforehand for best results.
4. How do I know how much wallpaper to buy?
You will need to measure the height and width of the walls you wish to cover with wallpaper. Use these measurements to calculate the square footage, and then purchase enough wallpaper to cover that area with a little extra for mistakes.
5. What tools do I need to hang wallpaper?
You will need a wallpaper brush, a smoothing brush, a wallpaper knife, a tape measure, a pencil, a level, a ladder, and a wallpaper table or a flat and clean surface to prepare the wallpaper for hanging.
6. How long does wallpaper paste take to dry?
The time needed for wallpaper paste to dry will depend on the brand and type of paste used. Check the instructions on the package for specific drying times. In general, it can take anywhere from 24 to 48 hours for wallpaper paste to fully dry.
7. How can I avoid air bubbles under the wallpaper?
To avoid air bubbles, make sure to smooth out the wallpaper from the center to the edges, using a wallpaper brush or a smoothing brush. Work slowly and carefully, using the brush to gently push out any air bubbles as you go.
8. Can I hang wallpaper by myself or do I need help?
While it is possible to hang wallpaper by yourself, it can be a difficult and time-consuming task. It may be helpful to have another person assist you in measuring, cutting, and hanging the wallpaper.
9. How can I remove excess wallpaper paste from the wallpaper?
You can remove excess wallpaper paste from the wallpaper using a damp sponge or cloth. Make sure to wipe gently, so as not to damage the wallpaper.
10. How do I maintain my wallpaper after hanging it?
You can maintain your wallpaper by dusting it regularly with a soft brush or cloth. You can also spot clean any stains or marks with a damp cloth. Avoid using any abrasive or harsh cleaning products on the wallpaper.