Introduction: What is Elmer’s Glue?

Elmer’s Glue is a popular brand of white glue, known for its strong bonding power and user-friendly properties. This type of glue is made from a water-soluble polymer that can join together a wide range of surfaces, including paper, wood, fabric, and ceramics. Elmer’s Glue is a non-toxic adhesive that is safe for kids to use, making it a popular choice for arts and crafts projects and school assignments. One of the advantages of Elmer’s Glue is its easy availability, as it can be found in many stores and online. Additionally, it is relatively inexpensive, making it a practical choice for various needs.
While there are different variations of Elmer’s Glue available on the market, the most commonly used type is the classic white school glue. It dries clear and is easy to clean up with water, which is why it is ideal for many crafting and DIY projects. Some of the popular uses of Elmer’s Glue are in the areas of arts and crafts, school projects, woodworking, and DIY home repairs. In the following sections, we will explore each of these areas in more detail and give some examples of how Elmer’s Glue can be used for each one.
If you want to learn more about other types of glue and their uses, check out our article about what is the best glue or learn about what glue is best for bookbinding.
Elmer’s Glue for Arts and Crafts
Crafting is a wonderful way to unwind and engage in a creative process. If you’re a passionate crafter, you know that choosing the right glue is crucial to the success of your projects. Among the many glue options available, Elmer’s glue is a favored choice for many reasons. This versatile adhesive can be used for an array of arts and crafts, making it an essential tool in any crafter’s arsenal. In this section, we will explore the various ways Elmer’s Glue can be used in arts and crafts and how it emerges as a viable option for any of your crafting needs.
Craft Projects for Kids
When it comes to craft projects for kids, Elmer’s Glue is a versatile tool that can help bring ideas to life. It can be used for a wide range of activities from paper crafts to creating unique decorations.
1. Paper Crafts: Children can use Elmer’s Glue for paper crafts, such as making paper flowers, paper chains, and paper mache crafts. The glue is perfect for bonding paper together and keeping it in place until it dries.
2. DIY Slime: Slime is a popular trend among kids, and Elmer’s Glue is the key ingredient to make it. All you need is Elmer’s Glue, water, and some other ingredients to create a fun and stretchy slime that kids will love.
3. Decorating with Glitter: Kids can decorate their projects with glitter by using Elmer’s Glue as a base. Simply apply the glue to the project and sprinkle the glitter over it. The glue will dry clear, leaving a sparkly finish.
4. Collages: Creating collages with mixed materials is a fun way to use Elmer’s Glue. Children can use the glue to attach various materials such as paper, fabric, and buttons to create a unique piece of art.
5. Sticking Things Together: Elmer’s Glue is great for sticking together different materials like felt, cardboard, and foam. Kids can use it to make different art projects from recycled items.
All in all, Elmer’s Glue is a staple in any craft supply arsenal for kids. It can be used for an array of activities from creating paper crafts to unique decorations. It’s easy to use, has a fast dry time, and it’s water-soluble, making it easy to clean up after use. With Elmer’s glue, your kid’s imagination is the limit!
If you want to learn more about what glue dries the fastest, check out our article “What glue dries the fastest?”.
DIY Jewelry Making
DIY Jewelry Making: Elmer’s Glue is a perfect adhesive for creating beautiful and unique jewelry pieces. Whether you’re using beads, gemstones, or other materials, Elmer’s Glue can bond them securely to the jewelry findings to make a stunning piece.
When it comes to jewelry, it is essential to use the right type of Elmer’s Glue. Specifically, clear glue like Elmer’s Clear Glue, is perfect for jewelry making since it will not leave any marks or stains on the jewelry piece.
Check out the following chart for a helpful summary of Elmer’s Glue types for jewelry making:
| Type of Jewelry | Suggested Elmer’s Glue Type |
|---|---|
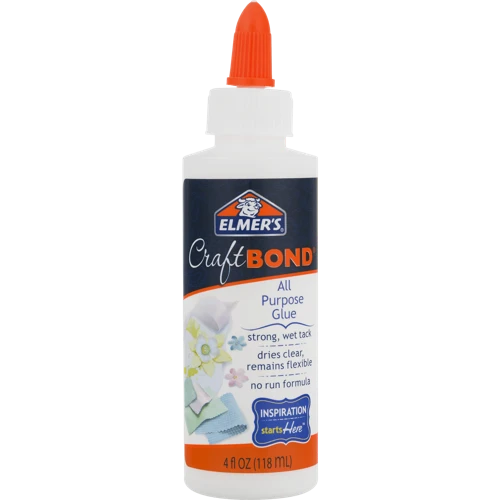
| General Jewelry Making | Elmer’s Clear Glue or Elmer’s CraftBond Tacky Glue |
| Metal and Plastic Jewelry | Elmer’s CraftBond Fabric & Paper Glue |
| Heavy-Duty Projects such as Leather or Stone | Elmer’s CraftBond Extreme Glue |
Using Elmer’s Glue is a great alternative to using a hot glue gun, which can be dangerous and inconvenient for jewelry making. Not only is Elmer’s Glue easier to use, but it also has a lower risk of burning your fingers. So, whether you are making earrings, necklaces, or bracelets, consider using Elmer’s Glue to secure your jewelry creations together.
If you’re looking for some inspiration for your next jewelry project, click here for a helpful tutorial on how to make a chocolate bouquet without a glue gun.
Decorative Art Projects
Elmer’s glue is a perfect option for creating stunning decorative art projects. This versatile adhesive can be used for a variety of projects, including creating decoupage items, designing custom picture frames, making dazzling window ornaments, and much more. Here are a few creative ideas for using Elmer’s glue in decorative art projects:
- Decoupage: Mix equal parts of Elmer’s glue and water to create a decoupage medium. This mixture can be used to decorate almost any surface, including wood, ceramic, metal, and glass. Simply apply the glue mixture to the surface using a brush, place your decorative paper or fabric on the surface, and then smooth out any wrinkles or bubbles with your fingers. Another layer of glue mixture can be applied on top of the paper or fabric to seal the decoration. This technique is ideal for creating unique decorative items such as vases, boxes, picture frames, and more.
- Custom Picture Frames: Using a plain wooden picture frame, paint a base coat with acrylic paint and let it dry. Then, use Elmer’s glue to glue on embellishments such as seashells, beads, or buttons. Once dry, paint a protective layer of Elmer’s glue on top to protect the decoration.
- Window Ornaments: Mix equal parts of Elmer’s glue and water to create a glue mixture. Cut out colored tissue paper or cellophane in different shapes and sizes and dip them into the glue mixture. Place the wet tissue paper on the windowpane and smooth with your fingers. Once it dries, it creates a beautiful stained glass effect.
Elmer’s glue can be a cost-effective way to create beautiful decorative art projects for any home or office. Whether working on a shoestring budget or looking for a new creative outlet, Elmer’s glue can help bring your artistic vision to life. For more creative ideas on using glue in different ways, consider checking out some of our related articles such as Where to Get Super Glue Near Me, How to Make Flubber Without Glue or Borax, What Glue to Use for Basing Miniatures, How to Make Glue Thicker, What is a Glue Trap?, How to Make Cold Glue.
Elmer’s Glue for School Projects
When it comes to completing school projects, Elmer’s Glue is a particularly handy tool to have on hand. This versatile adhesive can be used for a wide variety of school projects, whether you’re working on a poster board, constructing a science fair project, or creating a paper mache sculpture. With so many potential uses for Elmer’s Glue in a school setting, it’s worth exploring the various ways you can use this adhesive to create impressive and durable projects. Let’s take a closer look at some of the most popular school projects for which Elmer’s Glue is an essential tool.
Paper Mache
Paper mache is a popular technique for creating three-dimensional objects using Elmer’s glue. It is an ideal medium for making models, masks, and other craft projects. Using Elmer’s glue for paper mache allows for a strong, durable, and lightweight final product.
To start a paper mache project, first, create a base structure out of wire or cardboard. Then, mix equal parts of Elmer’s glue and water to create a paste. Soak strips of newspaper or other similar materials in the paste and use it to cover the base structure. Repeat this process until the desired thickness is achieved.
Benefits of Elmer’s glue for Paper Mache:
- Strong Bond: Elmer’s glue creates a strong bond that holds the paper mache together, even after it has dried, ensuring that the finished product is sturdy and long-lasting.
- Easy to Work With: The glue and water mixture has a smooth consistency that makes it easy to apply to the base structure and paper strips, ensuring a more even and consistent coverage.
- Safe and Non-Toxic: Unlike other adhesives, Elmer’s glue is safe for use by children and adults, making it an ideal choice for paper mache projects in schools and homes.
- Dries Clear: Elmer’s glue dries clear, which means that it won’t affect the final appearance of the paper mache project. This is especially helpful when using colored papers or paints.
In addition to being a fun and creative activity, paper mache projects made using Elmer’s glue are also cost-effective. The required materials are readily available at most craft stores, and using Elmer’s glue as the adhesive can save money compared to other specialized adhesives.
Elmer’s glue provides a reliable and effective option for creating paper mache objects that are strong, easy to work with, and safe for both children and adults. Its versatility and affordability make it a popular choice for crafters and artists of all ages and skill levels.
Science Fair Projects
Science fair projects can be both exciting and daunting for students, but Elmer’s glue can make the process a little easier. Here are some ways Elmer’s glue can be used in science fair projects:
- Creating a display board: Display boards are an important aspect of science fair projects, allowing students to showcase their research and findings. Elmer’s glue can be used to secure pictures, graphs, and text to the board. It also works well for adding 3D elements, such as small models or objects, to the board.
- Building models: Some science fair projects require the use of models, such as a model of the solar system or a model of the human body. Elmer’s glue can be used to assemble these models, whether they are made from paper, cardboard, or another material.
- Creating slime: Slime can be a fun and engaging way to explore science concepts like viscosity and chemical reactions. Elmer’s glue is a key ingredient in many slime recipes, helping to create a sticky base that can be combined with other ingredients like borax or baking soda.
- Constructing a volcano: Volcano projects are a classic science fair option, and Elmer’s glue can be used to create the volcano structure. Mix Elmer’s glue, water, and baking soda to create a paste that can be molded into a volcano shape around a plastic bottle or other base. When the paste dries, it will form a sturdy structure for the volcano.
By using Elmer’s glue in their science fair projects, students can create durable, professional-looking displays and models that accurately represent their research and findings.
Poster Boards
When it comes to school projects, poster boards are a classic assignment that require creativity and organization. Elmer’s glue can be an essential tool in helping to elevate the final product.
Here are some ways to use Elmer’s glue for poster boards:
- Attaching Materials: Whether it’s pictures, graphs or cutouts, Elmer’s glue can help you attach your materials securely to your poster board. Make sure to use a liberal amount of glue and spread it evenly to avoid any bubbling or wrinkling.
- Creating 3D Effects: If you want to add a sense of depth to your poster board, use Elmer’s glue to attach objects like foam letters or shapes. Apply glue to both the object and the board, press firmly and hold until dry.
- Adding Glitter: To make your poster board stand out, add some sparkle with glitter. Apply a thin layer of glue to the desired area and sprinkle on the glitter. Shake off any excess and let dry.
Remember to give yourself enough time for the glue to fully dry before transporting or presenting your poster board. It’s also important to use Elmer’s glue in a well-ventilated area and with caution, as it can be difficult to remove if it accidentally gets on clothing or other surfaces. With these tips, your poster board will be sure to make a statement.
Elmer’s Glue for Woodworking
When it comes to woodworking, the type of glue you use can make or break your project. It needs to be strong, durable, and able to withstand the elements. This is where Elmer’s Glue comes in handy. Not only is it reliable, but it also dries clear, making it a popular choice among woodworkers. Let’s take a closer look at how Elmer’s Glue can be utilized in woodworking projects.
Joining Wood
When you’re working on a woodworking project, the strength and durability of the joints you create can make all the difference. Elmer’s Glue is a versatile adhesive that can be used for a variety of tasks, including joining wood. Here are some tips for using Elmer’s Glue when joining wood:
Step 1: Choose the Right Type of Glue
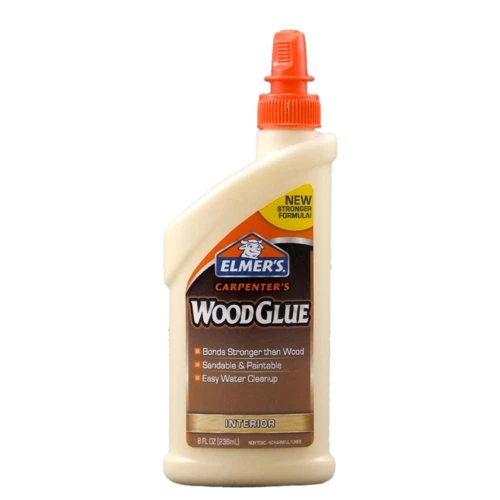
Not all types of Elmer’s Glue are suitable for joining wood. For this task, you’ll want to choose a wood glue that is specifically designed for this purpose. Elmer’s Carpenter’s Wood Glue Max is a popular choice for many woodworking enthusiasts.
Step 2: Prepare the Surfaces
Before you apply the glue, it’s important to prepare the surfaces that you’ll be joining. Make sure they are clean and free of any dust or debris. Sand the surfaces to create a rough texture that will help the glue bond more effectively.
Step 3: Apply the Glue
Using a brush, spread a thin, even layer of Elmer’s Carpenter’s Wood Glue Max onto one of the surfaces you’ll be joining. Make sure to cover the entire surface. Then, press the two surfaces together, applying firm pressure. Wipe off any excess glue that squeezes out of the joint.
Step 4: Clamp the Joint
To ensure a strong, secure joint, use clamps to hold the two surfaces together while the glue dries. Place the clamps across the joint and tighten them until the surfaces are firmly pressed together.
Step 5: Allow the Glue to Dry
Elmer’s Carpenter’s Wood Glue Max dries clear, making it easy to see when the joint is fully dry. Allow the glue to dry for at least 24 hours before removing the clamps. Once the joint is dry, you can sand, paint, or stain it as desired.
Using Elmer’s Glue for woodworking projects is an affordable and effective way to create strong joints that will stand the test of time. Whether you’re building a piece of furniture or repairing a wooden object, Elmer’s Carpenter’s Wood Glue Max can help you achieve professional-grade results.
| Steps | Details |
|---|---|
| Step 1 | Choose the Right Type of Glue |
| Step 2 | Prepare the Surfaces |
| Step 3 | Apply the Glue |
| Step 4 | Clamp the Joint |
| Step 5 | Allow the Glue to Dry |
Filling Cracks and Gaps
When it comes to woodworking projects, it’s not uncommon to encounter small gaps or cracks that need to be filled in order to achieve a smooth, polished finish. That’s where Elmer’s Glue comes in handy! Here are a few steps to follow when filling cracks and gaps with Elmer’s Glue:
Step 1: Clean the area around the gap or crack. Use a brush or vacuum to remove any debris or dust that may be present.
Step 2: Squeeze a small amount of Elmer’s Glue into the gap or crack. Use a putty knife or spatula to spread the glue evenly, making sure to fill the entire area.
Step 3: Allow the glue to dry completely. This may take several hours depending on the size of the gap or crack.
Step 4: Sand the area smooth using fine-grit sandpaper. This will help to level out the surface and create a seamless finish.
Step 5: Apply a coat of paint or stain to the area, if desired, to match the surrounding wood.
Using Elmer’s Glue to fill gaps and cracks is a simple and effective way to achieve a professional-looking finish on woodworking projects. Plus, because Elmer’s Glue is water-based, it won’t shrink or crack over time like some other types of filler. So, next time you encounter a small gap or crack while woodworking, reach for the Elmer’s Glue!
Applying Veneer
When it comes to woodworking, applying veneer can add a touch of elegance to any project. Elmer’s Glue is the perfect adhesive for this task. Here are the steps to apply veneer using Elmer’s Glue:
Step 1: Prepare the surface of the wood. Sand it down and make sure it’s clean and free of debris.
Step 2: Measure and cut the veneer to fit the surface of the wood. Leave some excess on all sides to trim later.
Step 3: Apply a thin layer of Elmer’s Glue to the surface of the wood. Use a paintbrush or roller to achieve an even layer.
Step 4: Carefully place the veneer onto the surface of the wood. Press down and smooth out any bubbles or wrinkles in the veneer.
Step 5: Use a veneer roller or a rolling pin to apply pressure evenly across the entire surface. This will ensure a strong bond and prevent any air bubbles from forming.
Step 6: Trim the excess veneer using a sharp knife or razor blade. Be careful not to cut into the wood or leave any rough edges.
Step 7: Sand the surface of the veneer to remove any rough edges or unevenness. Wipe the surface clean with a damp cloth.
Elmer’s Glue is known for its strong bonding capabilities, making it the perfect adhesive choice for applying veneer to wood. With proper surface preparation and application techniques, you can achieve a perfectly smooth and elegant finish for your woodworking project.
Elmer’s Glue for DIY Projects
When it comes to tackling DIY projects, having the right tools and supplies is crucial for success. One versatile and affordable item that should be in every DIY enthusiast’s arsenal is Elmer’s Glue. This adhesive can be applied to a variety of materials and surfaces, making it a go-to product for many projects around the house. Let’s explore some of the ways in which Elmer’s Glue can be used in DIY projects to achieve professional-looking results without breaking the bank.
Home Repairs
When it comes to DIY home repairs, Elmer’s Glue can come in handy for a variety of projects. Here are some ways to use this versatile adhesive:
| Project | Description |
|---|---|
| Fixing Loose or Damaged Wood | Elmer’s Glue can help reattach loose or damaged wood pieces, such as chair legs or table parts. Apply glue to both surfaces, press together and clamp until dry. |
| Straightening Wallpaper Seams | Apply a small amount of glue to the edge of the wallpaper and smooth out with a wallpaper roller for a clean, straight seam that will last. |
| Minor Plumbing Repairs | For small leaks or cracks in PVC pipes, apply a thin layer of Elmer’s Glue to the damaged area and allow to dry. The glue will create a temporary seal until a more permanent fix can be made. |
| Secure Loose Tiles | If you have a loose tile in your bathroom or kitchen, apply a thin layer of glue to the back of the tile before pressing it back into place. Hold in place until the glue dries to ensure a strong bond. |
| Creating Decorative Pieces | Use Elmer’s Glue to create decorative pieces, such as a paper mache bowl or DIY picture frames. The glue will dry clear, making it a great choice for projects where you don’t want the adhesive to be visible. |
From fixing loose furniture to creating unique decor pieces, Elmer’s Glue can help you tackle all kinds of home repair and DIY projects. Its versatility and strong bonds make it an essential item to keep in your toolkit.
Cardboard Furniture
Cardboard furniture is becoming quite popular these days due to its eco-friendliness and affordability. With the help of Elmer’s glue, you can easily create your own cardboard furniture. Here are some simple steps to follow:
Step 1: Gather all the necessary supplies like cardboard boxes, Elmer’s glue, a utility knife, a ruler, and a pencil.
Step 2: Draw the design of the furniture you want to create on the cardboard boxes using a pencil and a ruler. Make sure to consider the dimensions of the cardboard boxes while deciding on the design to ensure that the pieces will fit together properly.
Step 3: Cut out the pieces of your furniture using a utility knife. Be sure to cut along the lines you drew to ensure that the pieces fit together properly.
Step 4: Apply Elmer’s glue on the edges of the cardboard pieces that need to be joined together. Hold the pieces together for a few seconds to ensure that the glue adheres properly.
Step 5: Repeat the process until all the pieces of the furniture are assembled. Once you have completed the assembly process, let the furniture dry for a day before using it.
Elmer’s glue is perfect for creating cardboard furniture as it provides a strong bond that can withstand the weight and pressure of everyday use. It is also eco-friendly since Elmer’s glue is non-toxic and water-based, making it safe for the environment.
Additionally, creating cardboard furniture using Elmer’s glue is a cost-effective way to furnish your home. With just a few supplies, you can create your own unique and stylish furniture pieces that are both functional and environmentally conscious.
Elmer’s glue is an excellent choice for creating cardboard furniture due to its strong bonding capabilities, eco-friendliness, and affordability. Give it a try and see how easy it is to create your own unique and stylish pieces of furniture.
Fixing Loose Tiles
Have you ever experienced the frustration of walking on a loose or wobbly tile in your home? Fear not, as Elmer’s glue can be an easy fix for this common issue.
The process for fixing loose tiles with Elmer’s glue is as follows:
- Begin by cleaning the area around the loose tile. Use a sponge or cloth to remove any dirt and debris.
- If the tile is cracked or broken, repair it before attempting to glue it back in place.
- Apply a small amount of Elmer’s glue to the underside of the tile. Be sure not to use too much glue, as this can cause it to seep out and create a mess.
- Press the tile firmly into place, making sure it is level with surrounding tiles.
- Wipe away any excess glue with a damp sponge or cloth.
- Allow the glue to dry completely. This can take several hours, so it is best to avoid walking on the tile during this time.
- Once the glue is dry, the tile should be firmly in place and no longer wobbly or loose.
Advantages of using Elmer’s glue to fix loose tiles:
- It is an affordable solution for those on a budget.
- The glue dries clear, making it a great option for fixing tiles that are visible in a room.
- Elmer’s glue is readily available at most hardware or craft stores, making it easy to find when you need it.
- The glue is easy to work with, even for beginners.
- It can be used on a variety of surfaces, including ceramic, porcelain, and stone tiles.
Using Elmer’s glue to fix loose tiles is a simple and effective solution that anyone can do themselves at home. By following the steps outlined above, you can have your tiles back in place and secure in no time.
Creating a Faux Marble Finish
A faux marble finish is a great way to add sophistication and elegance to an ordinary piece of furniture or decor. With Elmer’s Glue, you can achieve this beautiful effect in just a few easy steps. Here’s how:
Step 1: Choose your colors. Decide what marble colors you want to mimic, and gather paint or pigment in those colors. Also, prepare a base color for your furniture or decor piece.
Step 2: Apply the base color. This color will show through the cracks in the faux marble finish. Paint the furniture or decor piece with a base color and let it dry completely.
Step 3: Create the veins. Dilute some paint or pigment with water and mix in a generous amount of Elmer’s Glue. Use a small brush to randomly apply the mixture onto your base coat. Use a feather, a sponge, or a brush to create a vein-like pattern in the wet mixture. Let it dry.
Step 4: Add depth. Mix a darker shade of one of your marble colors with the same Elmer’s glue mixture used in the previous step. Add more veins and cracks to your faux marble finish. This layer will create a 3D effect.
Step 5: Highlights. Mix a lighter shade of your colors with Elmer’s glue mixture and use it to add highlights to your faux marble finish.
Step 6: Finishing touches. Once the entire surface has dried, coat it with a protective finish such as a polycrylic or furniture wax.
With Elmer’s glue, creating a faux marble finish is not only possible but also fun and rewarding. You can transform your old furniture into a work of art that will add personality and style to your home.
Conclusion: The Advantages of Elmer’s Glue
Elmer’s Glue is an extremely versatile adhesive with a variety of practical uses across different industries and fields. One major advantage of using Elmer’s Glue is its strong bonding capabilities, making it a reliable choice for many projects. Another advantage is that it is non-toxic and safe for use, making it a popular choice for use in schools, homes, and even for crafting projects with children.
Not only is Elmer’s Glue a strong adhesive, but it also has the ability to dry clear, making it a great choice for any project where aesthetics are important. Additionally, Elmer’s Glue comes in a variety of forms, including liquid, gel, and stick, allowing for greater flexibility and customization in its use.
Another advantage of Elmer’s Glue is that it is widely available and affordable, making it accessible to anyone who needs to use it. It can be found at most hardware stores, craft stores, and even grocery stores. Its affordability makes it a go-to choice for DIY projects and home repairs.
Elmer’s Glue is an excellent adhesive with several advantages that make it a top choice for various purposes. Its strong bonding capabilities, non-toxic nature, clear drying quality, different forms, availability, and affordability make it an ideal choice for anyone looking for a reliable adhesive. Whether you are working on a school project, a home repair, or a crafting project, Elmer’s Glue is definitely a product worth considering.
Frequently Asked Questions
What is the difference between Elmer’s Glue and other types of glue?
Elmer’s Glue is a PVA (polyvinyl acetate) glue, which means it is a water-based adhesive that is non-toxic and easy to clean up. Other types of glue such as super glue or epoxy are typically stronger, but can be more difficult to work with and harder to clean up.
Can Elmer’s Glue be used on fabric?
Yes, Elmer’s Glue can be used on fabric, but it may not hold up as well as other fabric-specific glues. It is best for simple projects like hemming or attaching decorations to clothing, rather than high-stress or high-wear areas.
Is Elmer’s Glue safe for children to use?
Yes, Elmer’s Glue is non-toxic and safe for children to use. It is a popular choice for arts and crafts projects in schools and at home.
Is Elmer’s Glue waterproof?
No, Elmer’s Glue is not waterproof. It is water-soluble and will dissolve if exposed to water. If you need a waterproof adhesive, you should look for a different type of glue.
Can Elmer’s Glue be used on glass?
Yes, Elmer’s Glue can be used on glass, but it may not stick as well as other types of glue that are specifically designed for glass. Make sure the glass is clean and dry before applying the glue, and allow it to dry completely before handling the object.
Does Elmer’s Glue dry clear?
Yes, Elmer’s Glue dries clear. This makes it a great choice for projects where you don’t want the adhesive to be visible, such as paper crafts or decorative projects.
Can Elmer’s Glue be used as a sealer?
Yes, Elmer’s Glue can be used as a sealant if you mix it with water in a 1:1 ratio. This creates a sealant that can be used on paper, cardboard, or other porous surfaces.
Is Elmer’s Glue good for woodworking?
Elmer’s Glue is a popular choice for woodworking projects because it dries clear and is easy to sand. It is best for non-structural applications such as filling cracks or attaching veneer.
Can Elmer’s Glue be used on plastic?
Elmer’s Glue is not ideal for use on plastic, as it may not adhere well to the surface. It is best to use a plastic-specific adhesive for projects involving plastic materials.
What is the shelf life of Elmer’s Glue?
Elmer’s Glue has a shelf life of approximately two years if stored properly in a cool, dry place with the cap tightly closed. However, once opened, it should be used within six months for best results.