Have you ever wondered how those intricate cake decorations hold together so perfectly? The secret lies in the glue – edible glue, that is! But what exactly is edible glue, and why is it so important in cake decorating? In this article, we’ll explore the ins and outs of edible glue and provide you with tips and tricks on how to use it effectively. So grab your apron and spatula and let’s get started!
What is Edible Glue?
Edible glue is a specially-formulated glue that is safe for consumption and used for decorating cakes, cupcakes, and other desserts. It is also known as food glue or cake glue. The purpose of using edible glue is to securely attach decorations to baked goods, without compromising the quality or flavor of the dessert.
Edible glue is typically made from food-grade ingredients, such as Tylose powder, Royal icing, or melted chocolate, that are mixed with water to create a viscous and sticky consistency. The glue is safe for consumption since it does not contain any harmful chemical additives that regular store-bought glues may have.
Edible glue is an essential tool for cake decorators and pastry chefs since it has a unique formulation that allows it to adhere to a variety of materials, including fondant, gum paste, sugar paste, and chocolate. It is also ideal for attaching delicate decorations such as sugar flowers, pearls, or cake toppers onto desserts.
Edible glue is a safe and effective adhesive that is used in cake decoration to keep cake tiers in place, affix decorations to cakes, cupcakes or cookies, and make cake toppers or figurines. It is a must-have in any baker’s toolkit.
Why Use Edible Glue?
Edible glue is a popular tool for bakers and confectioners because it provides a safe, easy-to-use, and edible way to attach edible decorations to cakes, cookies, candies, and other treats. Unlike regular glue, which is not safe for consumption, edible glue is made from edible ingredients, such as tylose powder or royal icing, so it can be used on food without causing harm to anyone who eats it.
Using edible glue can also make decorating easier and more efficient. It creates a strong bond between different edible items, allowing confectioners to create complex and intricate designs without worrying about their decorations falling apart. Additionally, since edible glue is designed to be used with edible items, it won’t affect the taste or texture of the food it’s applied to.
Another advantage of using edible glue is that it opens up a world of creative possibilities for decorators. With the ability to attach decorations that were previously impossible to incorporate into their creations, bakers and confectioners can unleash their imaginations and take their cakes, cookies, and other treats to the next level.
Nowadays, there are various types of edible glue available to choose from, each with unique properties and uses. It is worth experimenting with different types and brands to find the one that suits your needs and preferences best.
Whether you’re a professional baker or just enjoy making sweets at home, edible glue is an invaluable tool to have in your decorating arsenal. With its safety, ease of use, and creative potential, it’s no wonder that edible glue has become a staple of the baking world.
Types of Edible Glue
There are several types of edible glue that can be used for different purposes in cake decorating. Each of them has its own unique qualities that make it suitable for certain tasks.
Tylose Glue: Tylose glue is made by mixing Tylose powder with water and allowing it to rest overnight. It is known for drying quickly and strongly, making it ideal for attaching heavy decorations such as fondant figures or flowers. It can also be used to create edible glue strings by mixing it with royal icing.
Royal Icing Glue: Royal icing glue is made by mixing royal icing with water until it reaches the desired consistency. This type of glue dries hard and is perfect for attaching decorations such as flowers, butterflies, or other delicate fondant decorations to cakes.
Chocolate Glue: Chocolate glue is made by melting high-quality chocolate and mixing it with vegetable shortening until it reaches a smooth and runny consistency. It is perfect for attaching delicate decorations to cakes, especially those made of chocolate. It dries with a slight glossy sheen, making it ideal for attaching chocolate curls, shards, and other decorative elements to cakes.
When choosing the right type of edible glue for your project, consider the weight and size of the decorations, as well as the type of surface you will be attaching them to. Additionally, ensure that your glue is the right consistency for your project, as over-diluted glue may not hold the decorations firmly in place, while a glue that is too thick may be difficult to work with.
Link: If you’re interested in making your own non-toxic and safe slime at home, you can create a homemade version known as Flarp without glue. Check out our article on how to make Flarp without glue for more information.
Tylose Glue
Tylose glue, also known as gum-tex glue, is a popular choice for decorating cakes, cookies, and other sweets. It is made from tylose powder, which is a derivative of cellulose, a natural substance found in plant cell walls.
One of the key benefits of Tylose glue is its ability to create a strong bond between different types of materials such as fondant, gum paste, and even chocolate. The glue is quite versatile and can be used for a variety of applications including attaching decorations, making flowers and figures, and creating edible glue strings.
To make Tylose glue, it is important to first mix tylose powder with water and let it sit for several hours or overnight. The powder will dissolve and the mixture will turn into a sticky glue-like consistency. It is important to mix the Tylose glue well and to strain it before using it to ensure that there are no lumps or clumps that could affect the final result.
One of the advantages of Tylose glue is that it dries quickly, which can save time when working on a project. However, the glue can also be quite thick and difficult to apply, especially for small and delicate decorations. If this is the case, it may be necessary to thin the glue slightly using a small amount of water or corn syrup to achieve the desired consistency.
Tylose glue is a versatile and reliable option for anyone working with edible decorations. However, it is also important to keep in mind that there are other types of edible glue available that may be better suited for specific projects. If you are having trouble with Tylose glue, try experimenting with one of these other options or check out our troubleshooting section for more advice.
**Anchor Text: How to Thin Super Glue**
Royal Icing Glue
Royal icing glue is a type of edible glue that is perfect for attaching decorations, like flowers and figures, to your cakes. It is made from royal icing, which is a traditional icing made from powdered sugar, egg whites, and cream of tartar. One of the main advantages of royal icing glue is that it is very strong, which means that your decorations will stay in place without any issues. Additionally, it dries hard, which makes it perfect for attaching heavier decorations that need a little more support.
Making Royal Icing Glue
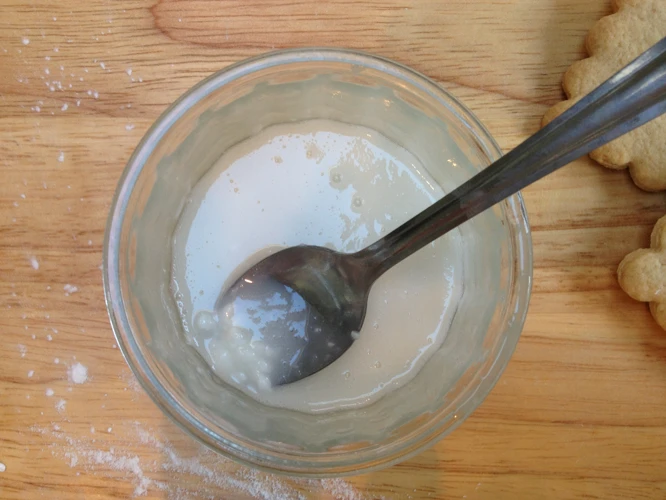
To make royal icing glue, you will need to make a batch of royal icing first. You can find many recipes for royal icing online, but a basic recipe involves whisking together one pound of powdered sugar, three egg whites, and a half teaspoon of cream of tartar. Once you have made the royal icing, you will need to thin it down to make it into the right consistency for glue. You can thin royal icing using water, but you should do so very slowly. Add a few drops of water at a time and mix well until the icing has reached the desired consistency. You want the royal icing glue to be thick enough to hold its shape, but thin enough to easily spread onto your decorations.
Using Royal Icing Glue
Royal icing glue can be used in much the same way as other types of edible glue. To use it, first, prepare your surface by cleaning it and making sure it is dry. Then, apply a small amount of the royal icing glue to your decoration or to the cake where you want the decoration to be placed. Carefully position the decoration and press down gently to make sure it adheres. Hold it in place for a few seconds to allow the glue to set. Repeat with any other decorations until you have completed your design. If you have leftover royal icing glue, you can store it in an airtight container in the fridge for a few days.
Troubleshooting Royal Icing Glue
One potential issue with royal icing glue is that it can become too thick or too thin, which can impact its ability to hold decorations. If your royal icing glue is too thick, you can thin it down by adding a small amount of water and mixing well. If it is too thin, you can thicken it by adding a little more powdered sugar and mixing well. Another potential issue is that the glue can clog the tip of your piping bag. If this happens, try gently squeezing the bag to force out any air bubbles or pieces of dried icing. If that doesn’t work, you may need to switch to a larger tip or use a different type of glue altogether.
Ultimately, royal icing glue is a great option for anyone looking for a strong, easy-to-use edible glue. With a little practice and some troubleshooting, you’ll be able to attach all kinds of decorations to your cakes in no time.
Chocolate Glue
Chocolate Glue: Another popular type of edible glue is chocolate glue. This glue is perfect for attaching decorations to cakes, cupcakes, and cookies. You can make chocolate glue by melting some chocolate in a double boiler or the microwave. Once the chocolate has melted, you can add some light corn syrup or glucose syrup to it. Stir the mixture until it becomes smooth and shiny. You can also add some cocoa butter or vegetable oil to the mixture to help thin the glue if needed.
One of the advantages of using chocolate glue is that it has a great taste. This can come in handy when you are creating decorations for a dessert that needs a little extra something. Chocolate glue is also easy to use and dries quickly. However, one downside of chocolate glue is that it can harden over time, which can make it difficult to remove decorations from your dessert.
Pro tip: If you find that your chocolate glue is too thick, you can add a small amount of vegetable oil or cocoa butter to thin it out. This will make it easier to work with and help ensure that your decorations stick to your dessert properly.
In case you have trouble with your chocolate glue setting properly, you can learn more about adjusting the consistency of glue by reading our article on how to thin PVA glue. If your glue bottle clogs frequently, you can also check out our guide on how to keep glue bottles from clogging.
How to Use Edible Glue
Step 1: Choose Your Glue
Before you start using edible glue, you need to choose the type that will work best for your project. As mentioned earlier, there are several types of edible glue available. Depending on your project, you’ll want to choose the best one to use. Tylose glue is a popular glue for cake decorating and edible decorations, while royal icing glue is great for attaching decorations to cookies or gingerbread houses. Chocolate glue is perfect for attaching chocolate decorations to cakes and cupcakes.
Step 2: Prepare Your Surface
To ensure that the edible glue adheres properly to your surface, you need to prep the surface. This could include smoothing it out or applying a small amount of water to it. This step is especially important if you’re attaching decorations to fondant or frosting.
Step 3: Apply the Glue
Now it’s time to apply the glue to the surface. You can use a small paintbrush or a piping bag to apply the glue. If you’re using tylose glue, you’ll want to mix it with warm water first, but be careful not to make it too runny. If you’re using royal icing glue, you’ll want to put a small amount on the back of your decoration and then attach it to your surface. Remember, a little goes a long way with edible glue.
Step 4: Let It Dry
Once you’ve applied the glue and attached your decoration, you need to let it dry. This can take anywhere from a few minutes to a few hours, depending on the type of glue you’re using and the size of your decoration. Be patient and don’t try to move or adjust the decoration until the glue is completely dry. This will prevent it from sliding or falling off.
It’s important to note that if you’re having trouble with your edible glue, there are troubleshooting solutions that can help. If your glue is too thick, you can thin it with a small amount of water or alcohol. Alternatively, if your glue is too thin, you can add more tylose powder or powdered sugar. If you’re still having issues, you may want to consider switching to a different type of glue that may work better for your project.
By following these simple steps, you’ll be able to use edible glue successfully and create stunning edible decorations for your cakes and desserts.
Step 1: Choose Your Glue
Choosing the right type of edible glue is crucial in achieving successful results with your project. There are several types of edible glue available on the market.
Tylose Glue: This type of glue is made from the Tylose powder and water. It is suitable for creating intricate decorations such as flowers or delicate figurines. Tylose glue forms a strong bond, dries clear, and is ideal for use with fondant or gum paste.
Royal Icing Glue: This glue is made from powdered sugar, meringue powder, and water. It is commonly used to decorate cakes and cookies. This type of glue dries hard and is perfect for attaching heavier decorations such as gingerbread houses or candy pieces.
Chocolate Glue: Chocolate glue is made by melting chocolate and mixing it with corn syrup or glucose syrup. It’s perfect for attaching chocolate decorations or pieces of chocolate onto a cake or dessert. Chocolate glue is also ideal for repairing broken chocolate pieces.
When choosing an edible glue, it’s essential to consider the specific project requirements and the materials you will be working with. Some types of edible glue are best suited for specific materials. For example, Tylose glue is ideal for working with fondant or gum paste, while royal icing glue is best used for more substantial decorations and gingerbread houses.
It’s essential to make sure your glue has the right consistency. If the glue is too runny, it won’t hold the decorations in place. If it is too thick, it will be challenging to apply. To thin your glue, you can add water or a little lemon juice.
Remember to always follow the manufacturer’s instructions and use the glue as directed. If you are not sure which type of glue to use for your project, don’t hesitate to do some research or seek advice from experts in the field.
If you’re interested in learning more about different types of glue, you can check out our article on how to thin super glue, what to use instead of super glue, or what is the difference between Mod Podge and glue.
Step 2: Prepare Your Surface
Step 2: Preparing Your Surface
Before applying the edible glue, it is important to make sure that the surface you will be gluing onto is clean and dry. Any moisture or debris on the surface can cause the glue to not adhere properly, resulting in a messy final product.
If you are gluing fondant onto a cake, make sure the cake is already covered in a layer of buttercream or ganache. This will help the fondant adhere better and create a smoother finish.
For other surfaces like paper or glass, you will need to take extra precautions to ensure the glue securely sticks. Wiping the surface down with rubbing alcohol and letting it dry thoroughly will remove any residue and ensure the surface is completely clean.
If you are unsure whether the surface is suitable for the glue, it is always a good idea to do a test patch first before applying it to the entire area. This can help you avoid any complications or mistakes during the main project.
Internal html link:
If you are gluing paper onto glass, check out our article on how to glue paper to glass for more specific instructions and tips.
Step 3: Apply the Glue
Step 3: Apply the Glue
Now that you have chosen your edible glue and prepared your surface, it’s time to apply the glue. The application process will vary depending on what you are using the glue for.
For attaching small decorations or details, you can use a small brush or toothpick to apply a small amount of glue to the back of the piece. Be sure to use a steady hand to ensure precise placement.
If you are using the glue to attach larger pieces or cover a larger surface area, you may want to use a piping bag or squeeze bottle for more control. Simply fill the piping bag or squeeze bottle with your prepared glue and apply it evenly to the surface.
When using a piping bag or squeeze bottle, it’s important to work quickly to avoid the glue drying out. You can also cover the tip of the piping bag or squeeze bottle with a damp cloth to prevent clogs.
Pro-tip: To prevent excess glue from spoiling the look of your creations, use a small amount of glue and apply it sparingly. You can always add more glue later if needed.
If you are struggling with applying the glue, there are many resources available online that can help. For instance, if you need help gluing vellum paper to glass, check out our article on how to glue vellum paper to glass. If you are gluing carbonless forms together, our guide on how to glue carbonless forms might be helpful. And if you’re interested in making your own glue from plants, our article on how to make glue out of plants can guide you through the process.
Remember to always follow safety guidelines when handling edible glue and to keep it away from children and pets.
Step 4: Let It Dry
Once you have applied the edible glue to your project, it’s important to allow it to dry properly. The amount of time required for drying will depend on a few different factors; the type of glue you are using, the thickness of the glue layer, and the humidity and temperature of the environment you are working in.
Timing is Key
As a general rule, it is wise to allow your edible glue to dry for at least 24 hours. However, you may need to adjust the drying time depending on the specific project you are working on. If you are attaching a small adornment to a dessert, for example, you may only need to wait a few hours until the glue is dry enough to hold the weight of the piece. For a larger and more complex project, it may take several days for the glue to fully cure.
Patiently Waiting
Once you have applied the glue, it’s crucial that you avoid touching or moving the project until it is fully dry. If you handle the item too soon, you risk creating cracks or bumps in the glue which could damage the overall look of the project. You should also keep the item in a cool, dry place while it dries to prevent moisture from interfering with the curing process.
Checking for Dryness
To check if the glue is dry, gently touch the surface of the glue with the tip of your finger. If it feels tacky or wet, then it’s not ready yet. If it feels firm and dry, then it is safe to handle and move.
Filling in Gaps
If you find that there are some gaps or spaces in your project after the glue has dried, don’t worry! This can be easily remedied by applying another layer of glue and allowing it to dry again. It’s important to always allow each layer to dry fully before adding another layer on top.
Remember, patience is key when using edible glue. Allow yourself plenty of time to complete your project and don’t rush the drying process. With a little bit of practice, you’ll quickly become an expert at using edible glue for all of your baking and decorating needs.
Advanced Techniques

For those who already have some experience using edible glue, there are several advanced techniques that can take your decorations to the next level. These techniques require a bit more patience and practice, but the results are worth it.
Creating Edible Glue Strings
One technique that can elevate any cake or dessert design is creating edible glue strings. To make these delicate decorative elements, you’ll need to use a slightly thinner consistency of edible glue. Start by thinning out your glue with a bit of water until it reaches a runnier consistency.
Next, load your glue into a piping bag fitted with a fine tip. Hold the bag at a 90-degree angle to your surface and pipe out a thin line of glue. Then, quickly lift the piping bag away to create a string of glue.
You can use these strings to create delicate loops and flourishes on cakes or even to spell out letters and numbers.
Using Glue for Cake Toppers and Figures
Another advanced technique is using edible glue to create cake toppers and figurines. If you’re creating a figure out of fondant or gum paste, you can use your glue to attach different body parts together.
For example, if you’re creating a fondant horse, you can use edible glue to attach the head, body, legs, and tail together. This ensures that your figure is sturdy and won’t fall apart.
You can also use edible glue to attach decorative elements to your cake toppers, such as flowers or bows.
Conclusion
Using edible glue can take your cake decorating skills to the next level. Whether you’re a beginner or an experienced decorator, there are various types of glue to choose from and techniques to master.
By following the simple steps of choosing the right glue, preparing your surface, applying the glue, and allowing it to dry, you’ll be able to create stunning cake designs that are sure to impress. And with a bit of practice, you’ll be able to master advanced techniques like creating edible glue strings and using glue for cake toppers and figures.
Creating Edible Glue Strings
One advanced technique for using edible glue is creating edible glue strings. This technique involves producing a thin and even line of edible glue that can be applied to various cake decorations, such as flowers, leaves, or lettering. This is a great way to add intricate details to your cake design.
Step 1: Choose the Right Consistency
For creating edible glue strings, you need to adjust the consistency of your glue accordingly. It should be slightly thicker than the usual consistency of glue. This helps to hold the shape of the string and not dissolve too quickly.
Step 2: Prepare Your Piping Bag
To create the edible glue string, you need to have a piping bag ready with a small round piping tip fitted. Fill the bag with the glue and ensure there are no air pockets in the bag.
Step 3: Practice on a Flat Surface
Before you apply the glue strings to your cake decorations, it’s a good idea to practice first on a flat surface. This allows you to master the technique and ensure that the consistency of your glue is right.
Step 4: Apply the Glue Strings
When you’re ready to apply the glue strings to your cake decoration, hold the piping bag vertically and apply gentle pressure. Move the bag in a consistent and steady motion to create the desired shape and length of the string. Depending on the length and shape of the string, you may need to stop and start again to create a seamless appearance.
Step 5: Let It Dry
Once you’ve applied the edible glue string to your cake decoration, it’s important to let it dry completely before moving it or adding additional decorations. This will ensure that the glue has stabilized and will hold the decoration in place.
Creating edible glue strings can be a challenging technique to master, but with practice, you’ll be able to create beautiful and intricate designs on your cake. Remember to adjust the consistency of your glue, practice on a flat surface, and let the strings dry completely for the best results.
Using Glue for Cake Toppers and Figures
When it comes to decorating cakes, using edible glue can be a game changer, especially when creating cake toppers and figures. Edible glue is ideal for attaching various edible elements like fondant and gum paste decorations to cakes.
Cake Toppers
Cake toppers are an essential part of any cake decoration, and edible glue can make it easy to create beautiful and intricate designs on cupcakes, cakes, and other baked goods. Once you have created your fondant or gum paste topper, you can use edible glue to attach it to the cake surface.
To apply the glue, simply use a food-safe brush to apply a small amount to the area where you want your topper to go. Gently place the topper on the cake and lightly press it down to make sure it sticks.
For more significant and heavier cake toppers with multiple layers, it helps to apply the glue and allow it to dry for about 30 seconds before placing the topper. This technique gives the glue enough time to become tacky and hold the topper firmly.
Cake Figures
Edible glue is also perfect for creating cake figures. Whether you’re making a bride and groom, cartoon characters, or animals, edible glue will hold all the figurine’s components together.
To make different parts of your figure stick together, apply a small amount of edible glue to the surface where one part will attach to another. At the same time, try not to apply too much glue since it could cause the fondant or gum paste to melt and deform.
It’s essential to be patient and let the glue dry completely before moving onto the next part of the figurine. This step is crucial, especially if the figure has to stand upright since it prevents the parts from sagging or falling apart.
Using edible glue for creating cake toppers and figures is an excellent way to make lovely and intricate designs, and it’s incredibly easy to use with simple techniques. By following the glue’s instructions and being patient, you can create stunning cake decorations and leave your guests impressed and craving more.
Troubleshooting Edible Glue Issues
When working with edible glue, issues can arise that can be frustrating and can ruin your hard work. However, don’t panic! There are some common problems that can be solved easily with a few tips and tricks.
Solution 1: Adjust Consistency
One of the most common issues with edible glue is the consistency. When the glue is too thin or too thick, it can cause problems. If the glue is too thin, it will not hold the pieces together. On the other hand, if the glue is too thick, it will be difficult to apply and may cause the pieces to break.
To adjust the consistency, simply add more powder or water to the glue mixture depending on the type of glue you are using. If you are using tylose glue, add more powder to thicken it. If you are using royal icing glue, add more water to thin it. Be sure to adjust it gradually, so that you don’t overdo it and cause more problems.
Solution 2: Change Glue Type
If adjusting the consistency does not work, you may need to change the type of glue you are using. Different types of edible glue work better for different projects. If you are working on a project that requires a strong hold, consider using tylose glue. If you need a glue that dries more quickly, consider using royal icing glue. And if you are working with chocolate, consider using chocolate glue.
In some cases, you may need to experiment with different types of glue to find the one that works best for your project. Don’t be afraid to try new things and don’t get discouraged if it doesn’t work out the first time. With a little practice, you will become an expert at using edible glue.
By following these troubleshooting tips, you can avoid common issues and achieve a successful outcome with your edible glue projects. Remember to always experiment, be patient, and have fun!
Solution 1: Adjust Consistency
If you’re having issues with your edible glue, one solution is to adjust its consistency. If your glue is too thin, it may not be strong enough to hold your decorations in place. Conversely, if it’s too thick, it may be difficult to work with and may not dry properly.
How to Adjust Consistency
To adjust the consistency of your edible glue, you can add more or less water or sugar depending on the type of glue you’re using. If you’re using Tylose glue, adding a small amount of water can help thin it out. If you’re using royal icing glue, adding more sugar can help thicken it up.
Tips for Adjusting Consistency
When adjusting your glue’s consistency, it’s important to make small changes at a time. Add a little bit of water or sugar and mix well before adding more. This will help you avoid over-thinning or over-thickening your glue and will give you greater control over its consistency.
Keep in mind that different factors can affect your glue’s consistency. Humidity, temperature, and the type of surface you’re working with can all impact how your glue performs. Be sure to adjust your recipe accordingly based on these factors.
Common Issues with Consistency
If your glue is too thick, you may notice that it’s difficult to spread and adhere to your decorations. It may also take longer to dry, which can be frustrating. On the other hand, if your glue is too thin, it may not be strong enough to hold heavier decorations in place, and your decorations may begin to sag or fall off entirely.
By adjusting your glue’s consistency, you can help it perform better and overcome any issues you may be experiencing. Remember to make small changes and be patient as you work to find the perfect consistency for your project.
Solution 2: Change Glue Type
If adjusting the consistency of your edible glue doesn’t solve your problem, the next solution is to try changing the type of glue you’re using.
Tylose glue is great for creating edible glue that will harden quickly and firmly. It’s perfect for using with delicate decorations that require a strong bond. However, it can be difficult to work with as it can become thick and pasty if not used immediately after preparing.
Royal icing glue is a popular choice for cookie and cake decorating. It’s made from powdered sugar and egg whites and can be easily adjusted for the desired consistency. Royal icing glue dries hard and is great for projects that require a strong bond and a smooth surface.
Chocolate glue is perfect for attaching decorations to chocolate surfaces. It’s made by melting chocolate and mixing in a small amount of vegetable oil to create a smooth consistency. Chocolate glue dries quickly and creates a strong bond between the chocolate and the decoration.
If you’re having issues with your current edible glue, consider experimenting with a different type to see if it resolves the problem. You may find that one type works better for your specific project than another.
Conclusion
In conclusion, edible glue is a versatile and essential tool for all baking and confectionery needs. With its variety of types and ease of use, it can help create stunning and unique designs on cakes, cookies, and more.
However, like with any tool, there may be troubleshooting issues that arise. It is important to understand how to adjust the consistency of the glue and when it may be necessary to switch to a different type of edible glue to achieve the desired result.
But with the right technique and practice, edible glue can elevate any baking project to the next level. From creating intricate cake toppers to simple yet elegant decorations, the possibilities are endless.
So next time you find yourself in need of a reliable adhesive for your baking creations, consider using edible glue. Its versatility and ease of use are sure to impress and leave a lasting impact on any confectionery creation.
Frequently Asked Questions
1. Is edible glue safe to consume?
Yes, edible glue is specifically designed for consumption and is made with food-grade ingredients.
2. Can I make my own edible glue?
Yes, you can make your own edible glue using ingredients such as tylose powder, water, and icing sugar.
3. What can I use edible glue for?
Edible glue is commonly used in cake decorating, particularly for attaching fondant, gum paste, and other decorating elements.
4. How long does it take for edible glue to dry?
The drying time will vary depending on the type of glue and how much is applied, but generally, it takes around 30 minutes to an hour for edible glue to fully dry.
5. Can I use edible glue on fresh fruit?
Yes, you can use edible glue on fresh fruit, but it is important to keep in mind that the moisture content in the fruit can affect the adhesion of the glue.
6. Can I use edible glue on chocolate?
Yes, you can use chocolate glue to attach decorations to chocolate, but it is important to use a thin layer and let it dry completely before handling.
7. How long does edible glue last?
Edible glue typically has a shelf life of several months if stored properly in a cool, dry place.
8. Can I use edible glue for making gingerbread houses?
Yes, edible glue is commonly used for assembling gingerbread houses and other edible structures.
9. How do I clean up excess edible glue?
You can clean up excess glue with warm water and soap or a damp cloth. It is important to clean it up promptly to avoid staining or damage to the surface.
10. Can I use edible glue instead of traditional adhesive for non-food related projects?
No, edible glue is not a suitable substitute for traditional adhesive as it is specifically designed for consumption and may not have the same properties as regular glue.