Maintaining your guitar not only keeps it looking great but also ensures its longevity and optimal sound quality. DIY guitar maintenance is a valuable skill for any musician, allowing you to tackle various issues, from adjusting the action to fixing minor cosmetic damages. One such challenge is dealing with super glue spills, which can occur during quick fixes or modifications.
Understanding Super Glue Accidents on Guitars
It’s not uncommon for guitarists to use super glue for minor repairs like securing a loose inlay or fixing a chipped nut. However, accidents happen, and super glue can end up in places it shouldn’t. Knowing how to sand super glue from guitar surfaces is essential to preserve your instrument’s appearance without causing further damage.
Identifying Super Glue Residue on Your Guitar

Super glue residue can be a clear or cloudy blemish that sticks out against the guitar’s finish. It can feel rough to the touch and may affect the instrument’s smoothness, potentially impacting playability. Spotting these areas is the first step in restoring your guitar’s pristine condition.
Tools and Materials for Super Glue Removal

Before you begin to remove super glue from guitar surfaces, it is important to gather the proper tools and materials. These will ensure a safe and effective removal process without damaging the guitar’s finish.
Choosing the Right Super Glue Solvent for Guitars
Selecting an appropriate super glue solvent for guitars is crucial. Look for solvents that are designed for use on musical instruments, as they will safely break down the adhesive without harming the guitar’s finish. Always test the solvent on an inconspicuous area first to ensure compatibility.
Gathering Sanding Supplies
- Fine-grit sandpaper
- Micro-mesh pads
- Tape for masking off areas
- Soft cloths
- Protective eyewear
Preparation for Sanding Super Glue from Guitar
Preparing your workspace and guitar for the sanding process is a step that cannot be overlooked. This preparation sets the stage for a successful and tidy removal job.
Protecting the Guitar’s Surface
Use masking tape to shield the surrounding areas from accidental sanding. This helps to localize the work to just the affected spot and avoid unnecessary scratches or damage to the guitar’s finish.
Assessing the Extent of Super Glue Coverage
Evaluate how much of the guitar’s surface is covered by super glue. This assessment will determine the amount of sanding needed and help you plan your approach to tackle the issue effectively.
Sanding Tips for Guitars
Sanding is a delicate process that requires patience and precision, especially when working with fine instruments like guitars. The right technique can make all the difference.
Gradual Sanding Techniques
Start with the finest grit sandpaper and gently work the area. Progress to slightly coarser grits only if necessary. This gradual approach minimizes the risk of removing too much material from the guitar’s surface.
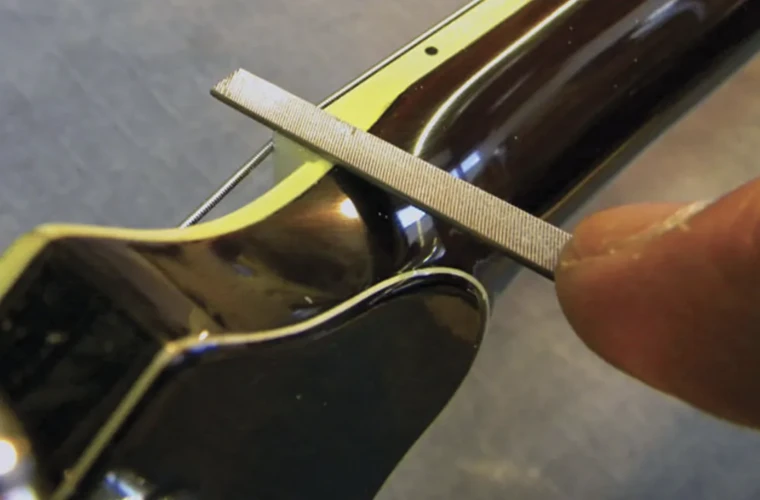
Dealing with Difficult Areas
Certain areas, like curves and edges, can be challenging to sand. In these cases, use smaller pieces of sandpaper and a light touch to carefully work on the super glue without affecting the surrounding finish.
Super Glue Removal Techniques
While sanding is effective, combining it with other super glue removal techniques can yield better results. These methods can help to preserve the integrity of the guitar’s finish.
Applying Super Glue Solvent Carefully
Apply the solvent with a cotton swab to the affected area. Allow it to penetrate the super glue for a few minutes before attempting to gently scrape or rub the residue away.
Gentle Scraping Methods
Occasionally, you can use a plastic scraper or the edge of a credit card to lift the softened glue. Be incredibly gentle to avoid gouging the wood or finish underneath.
Guitar Finishing Techniques
After the super glue has been removed, it’s important to refinish the area to match the rest of the guitar. This step is essential in making the repair work invisible.
Smoothing the Affected Area
Once the bulk of the glue is gone, use fine-grit sandpaper or a micro-mesh pad to smooth the area thoroughly. The goal is to make the surface level and even with the rest of the guitar’s body.
Applying Finish for Consistency
Choose a finish that matches your guitar’s original sheen, whether it’s matte, satin, or gloss. Apply the finish carefully, blending it into the surrounding area for a seamless look.
Guitar Refinishing After Super Glue Removal
If the affected area is extensive or if the original finish has been compromised, you may need to consider more comprehensive guitar refinishing options.
When to Consider Complete Refinishing
If sanding and spot refinishing don’t yield satisfactory results, or if the guitar has multiple damaged areas, a complete refinishing may be in order. This is a more advanced procedure that might require professional assistance.
DIY Refinishing Options
For those with experience in woodworking and finishing, DIY refinishing can be a rewarding project. You’ll need the right materials and a dust-free environment to apply the new finish properly.
Final Checks and Additional Guitar Repair Tips
Once you’ve completed the sanding and refinishing process, it’s time to do a final check to ensure the quality of your work.
Ensuring a Clean and Even Finish
Examine the guitar in good lighting to confirm that the finish is smooth and even. Check from different angles to spot any inconsistencies that may need further attention.
Preventing Future Accidents
Learning from this experience can help prevent future super glue mishaps. Always work carefully and keep super glue away from your guitar unless absolutely necessary. Store adhesives securely and out of reach when not in use.
If you’re a guitar enthusiast looking to tackle some DIY repairs or modifications, understanding how to properly handle adhesives can be crucial. For those specifically dealing with super glue mishaps, our guide on how to sand super glue on a guitar can be incredibly helpful. And if you find yourself in a sticky situation, you might also want to check out our tips on how to unstick super glue. For those dealing with footwear repairs, our article on how to melt shoe glue could provide the solution you need. Plus, for the guitarists out there, don’t miss our step-by-step tutorial on how to glue a guitar nut properly to ensure your instrument is in top playing condition.
Conclusion: Confidence in Fixing Super Glue on Guitar
With the right tools, techniques, and a bit of patience, you can fix super glue on guitar surfaces effectively. Whether you’re dealing with a minor spill or a larger issue, the skills you’ve developed through DIY guitar maintenance will serve you well. Remember that every repair improves your abilities, contributing to your confidence as a guitar owner and musician.