The nut of a guitar may seem like a small component, but it plays a crucial role in the instrument’s overall functionality and tone. Attaching this piece properly is essential for both the playability and sound quality of the guitar. In this guide, we’ll delve into the intricacies of how to glue a guitar nut and ensure it contributes positively to your instrument’s performance.
Importance of a Properly Glued Nut
Ensuring the nut is securely fastened to the guitar neck is vital for several reasons. It holds the strings at the correct height, maintains proper alignment, and affects the intonation of the instrument. A loose nut can cause strings to buzz or slip, leading to tuning instability and a compromised playing experience.
Understanding Nut Adhesive Options
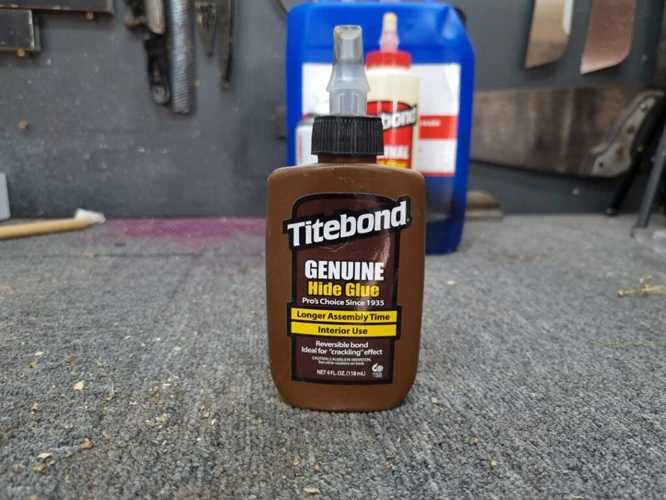
When selecting a nut adhesive, it’s important to choose a product that provides enough hold without damaging the guitar if removal is needed. Cyanoacrylate (super glue) and wood glue are commonly used options, with each having its specific benefits. The choice of adhesive could affect the ease of future repairs and adjustments.
Preparation for Gluing a Guitar Nut
Proper preparation is key to a successful fix for a guitar nut. This stage lays the foundation for a secure and correctly positioned nut that will enhance your guitar’s playability.
Tools and Materials Needed
- Nut adhesive of choice
- Small brush or toothpick for application
- Cloth or protective tape
- Needle-nose pliers or string winder (for string removal)
- Small files or sandpaper (if nut adjustment is needed)
Loosening the Guitar Strings
Begin by carefully loosening the strings. This will allow you to remove the old nut or reposition it without tension from the strings interfering. Take this opportunity to inspect the strings for any wear that might warrant replacement.
Protecting the Guitar Surface
Before proceeding, it’s essential to shield the guitar’s surface. Use a soft cloth or protective tape around the nut area to prevent any adhesive spills from damaging the finish of the instrument.
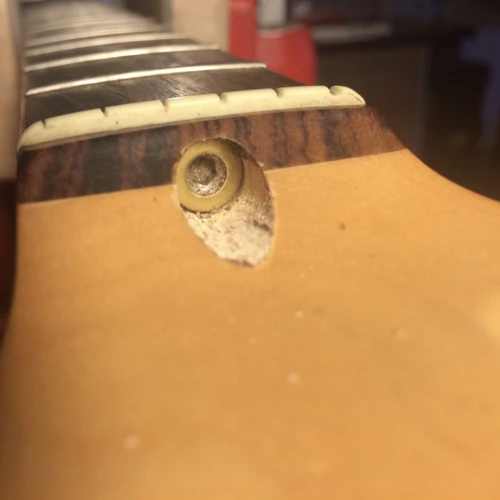
Examining the Guitar Nut and Slot
A thorough examination of both the nut and its slot is critical before reattaching it. This ensures that the nut will sit correctly and function as intended once glued back in place.
Identifying Issues with the Nut
Look for any cracks, uneven surfaces, or other signs of wear on the nut. These issues could affect string spacing and action height, leading to potential tuning and playability problems.
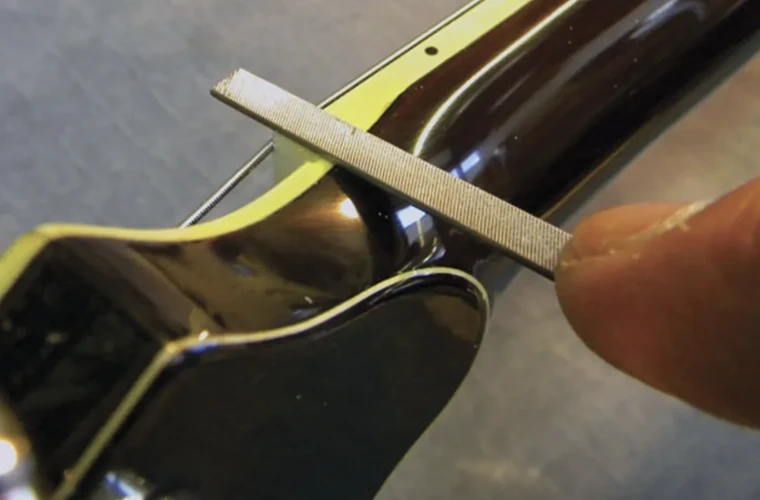
Cleaning Old Glue from the Nut Slot
Carefully remove any residual glue from the slot using a small file or sandpaper. A clean slot is necessary for a strong bond and proper nut alignment.
Steps to Glue Guitar Nut
With the preparatory steps complete, it’s now time to proceed with the actual gluing process. Precision and attention to detail will ensure the best results.
Applying the Nut Adhesive
Use a small brush or toothpick to apply a conservative amount of adhesive to the nut or the slot. Avoid excess glue, as it may seep onto the guitar’s finish or make future removal difficult.
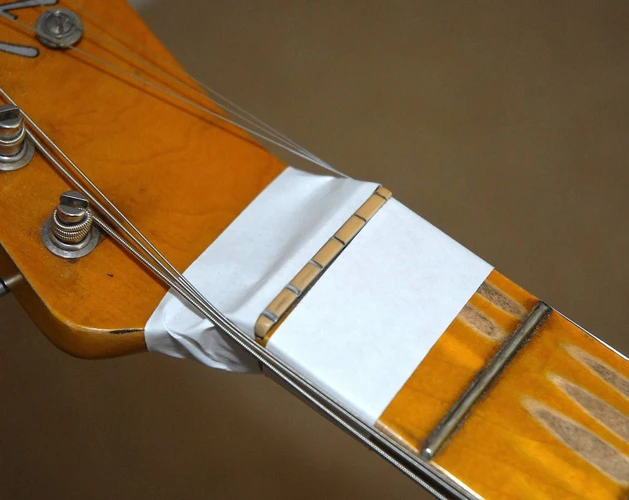
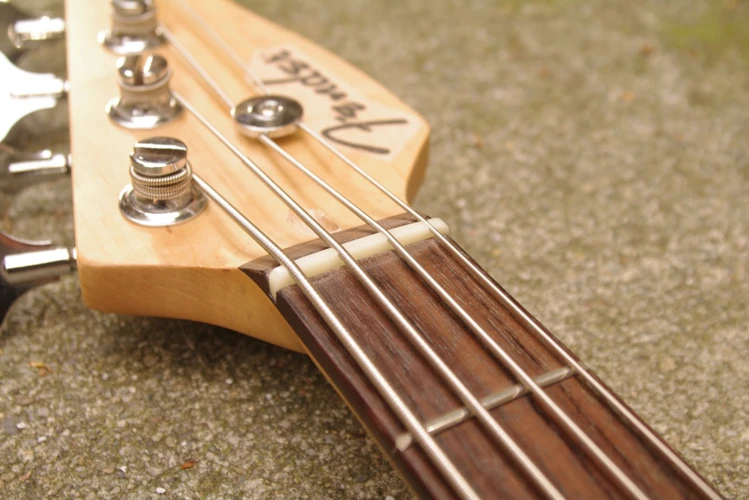
Positioning the Nut for Optimal Performance
Place the nut carefully into the slot, aligning it so the strings will pass over it evenly. This positioning is crucial for maintaining proper string spacing and action.
Securing the Nut in Place
Once the nut is positioned, gently press it down to secure it in place. Be sure the adhesive makes contact with both the nut and the slot for a firm bond.
Drying and Testing the Glued Nut
After installing the nut, it’s important to allow sufficient time for the adhesive to cure fully. Only then can you accurately test the nut’s functionality.
Waiting Time for Adhesive to Set
Adhesive drying times can vary, so refer to the product’s instructions for an accurate timeframe. Generally, a few hours should be ample for the glue to set, but overnight curing is often recommended.
Re-tuning and Playing Test
Once the adhesive has set, re-tune your guitar and conduct a playing test. Listen for any buzzing or tuning issues, which may indicate that further adjustments are necessary.
Acoustic Guitar Maintenance and Nut Care
Regular upkeep of your acoustic guitar, including the nut, is essential for longevity and consistent sound quality.
Regular Maintenance Tips
- Wipe down the nut and strings after playing to remove oils and residue.
- Inspect the nut regularly for signs of wear or damage.
- Consider a professional setup periodically to ensure all components are functioning optimally.
When to Consider Nut Replacement
If the nut is severely worn or damaged, it may be time for a nut replacement. This will restore proper action and intonation to your guitar.
Electric Guitar Setup and Adjusting the Nut
An electric guitar setup requires a different approach, with specific attention to the nut’s role in the instrument’s overall action and intonation.
Adjusting Nut Height for Optimal Action
The nut height can dramatically impact the action of an electric guitar. Adjust it carefully to ensure strings are neither too high nor too low, preventing fret buzz and ensuring comfortable playability.
Fine-Tuning the Electric Guitar Setup
After making nut adjustments, fine-tune the rest of the setup. This includes checking the neck relief, string height at the bridge, and pickup height for an optimized playing experience.
DIY Guitar Repair and Luthier Tips
For those interested in DIY guitar repair, here are some tips to guide you through nut-related work and beyond.
Common DIY Guitar Repair Mistakes
One of the biggest mistakes in DIY repair is rushing the process or using incorrect tools, which can lead to further damage. Take your time and use the right equipment for each task.
Luthier Tips for Nut and Setup Work
Experienced luthiers often recommend practicing repairs on less valuable instruments first. They also stress the importance of patience and attention to detail for successful outcomes.
Guitar Setup Tips for Optimal Sound
A well-setup guitar can make a world of difference in playability and sound. Here’s how the nut comes into play.
Does Gluing the Nut Change the Tone?
A properly glued nut, in itself, won’t change the tone of your guitar. However, a well-positioned nut contributes to the instrument’s overall tonal balance and clarity.
Finalizing Your Guitar Setup
After addressing the nut, ensure that every other aspect of the setup is also fine-tuned. This includes string action, intonation, and pickup alignment for electric guitars.
Conclusion: The Importance of a Well-Glued Nut
The nut’s role in a guitar’s functionality cannot be overstated. It’s a central piece that, when properly glued and maintained, contributes significantly to the instrument’s performance.
Benefits of Proper Nut Adhesion
A secure nut ensures stable tuning, optimal string height, and clear intonation, enhancing the playing experience. It’s a simple yet crucial aspect of guitar maintenance.
If you’re diving into the world of guitar maintenance and repair, you might find yourself needing to secure a guitar nut. For a comprehensive guide on this task, our article on how to glue a guitar nut is a great place to start. And if you’re working with different materials or looking to expand your DIY knowledge, you may also be interested in our articles on how to glue PETG and tips for how to sand super glue on a guitar for those times when you need a flawless finish after making repairs.
When to Seek Professional Guitar Repair
If you’re uncertain about any steps in the gluing process, or if you encounter issues beyond your skill level, seeking professional guitar repair is recommended. A skilled technician can provide the expertise needed to maintain your instrument’s integrity and sound quality.