When it comes to home improvement projects, or even crafting, it’s not uncommon to find yourself in need of gluing polystyrene to wood. However, this task can quickly turn into a headache if you don’t have the right tools or knowledge. That’s why we’ve created this complete guide on how to glue polystyrene to wood. In this article, you’ll learn about the reasons behind this type of adhesive application, how to choose the right adhesive, surface preparation, adhesive application techniques, methods for joining the two materials, post-glueing treatments, and safety precautions. So, let’s get started on bringing your next project to life!
Why Glue Polystyrene to Wood?
Polystyrene foam and wood are popular construction materials, and both are commonly used in the home renovation and construction industry. Polystyrene foam is popularly used for insulation and packaging applications, while wood is used extensively in furniture making and home construction. Gluing polystyrene foam to wood is usually done to provide a combination of insulating and supportive properties, which may increase the strength and durability of the overall construction.
For instance, you may want to glue polystyrene foam to wooden walls or the roof sheathing under the shingles as an alternative to traditional fiberglass insulation. The polystyrene may provide additional insulation, while the wood provides strength and support for the overall construction. Another example of gluing polystyrene foam to wood is in creating a robust and lightweight prototype model in architecture, design, and engineering.
Also, gluing polystyrene foam and wood together helps to reduce thermal transfer which is the heat transfer from warmer to cooler materials. Reducing thermal transfer is important to maintain comfort and reduce energy bills in various construction applications of polystyrene and wood. Gluing polystyrene foam to wood is primarily done for insulation, support, and resistance to thermal transfer.
Choosing the Right Adhesive
When it comes to bonding polystyrene foam and wood, choosing the right adhesive is crucial for a secure and long-lasting bond. With so many different types of adhesives available, it can be overwhelming to pick the right one. Fortunately, by understanding the properties of each adhesive, you can avoid costly mistakes and ensure a successful project. Let’s explore some of the best adhesive options for bonding polystyrene foam to wood. If you’re interested in bonding different materials, such as how to glue ceramic pot, and more, take a look at our website for helpful articles.
PVA Glue
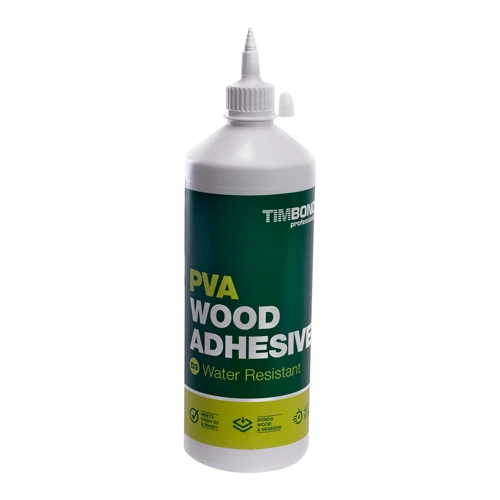
PVA glue, also known as white glue or school glue, is a water-based adhesive that is easy to use and a popular choice for gluing polystyrene foam to wood. PVA glue is affordable, readily available, and easy to clean up.
Here are some tips for using PVA glue for bonding polystyrene foam and wood:
- Apply an even layer of PVA glue to both the wood and polystyrene foam surfaces, using a brush or roller.
- Let the glue dry completely before joining the two surfaces together.
- Apply pressure evenly across the joined surfaces using clamps or weights.
- PVA glue can take up to 24 hours to reach maximum strength, so it’s important to let the joined pieces sit undisturbed during this time.
- If you need to speed up drying time, use a fan or a dehumidifier to create a dry and warm environment.
It’s important to note that PVA glue may not be the best choice for bonding polystyrene foam to wood if the finished project will be exposed to moisture. In this case, a waterproof or water-resistant adhesive may be required.
For more information on gluing different materials together, check out our articles on how to glue plastic to concrete and how to glue veneer.
Solvent-Based Adhesives
When it comes to glueing polystyrene to wood, solvent-based adhesives are another option to consider. These adhesives have a strong and quick-setting bond, making them ideal for projects that require a strong bond. However, they must be used with caution as they can emit strong fumes that can be harmful to health. It’s important to use them in a well-ventilated area and wear protective gears like a mask or gloves.
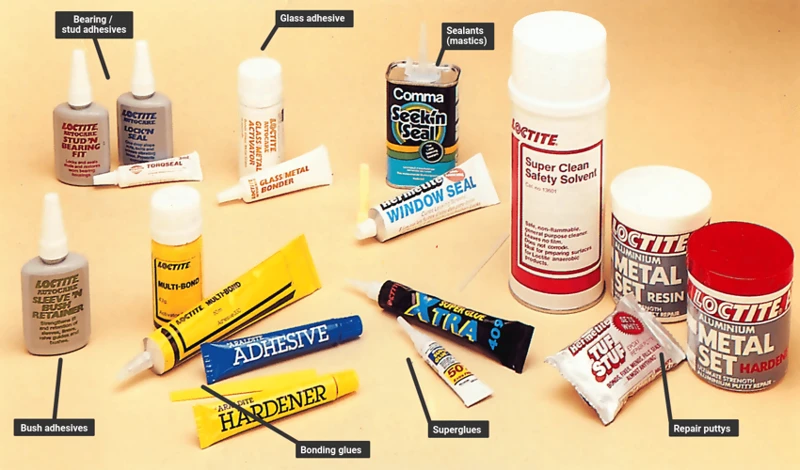
Here are some popular solvent-based adhesives that can be used for gluing polystyrene to wood:
| Adhesive | Features |
|---|---|
| Polystyrene Cement | This adhesive is specially formulated to bond polystyrene to other materials, including wood. It works by melting the surface of the polystyrene and creating a strong bond, making it an ideal adhesive for polystyrene and wood. |
| Super Glue | Super glue can be used to bond polystyrene to wood. However, it’s important to note that not all super glues are suitable for this task. Look for a super glue that’s specifically designed for bonding plastic and wood, as it will have the necessary bonding strength and flexibility to withstand pressure and temperature changes. |
| Epoxy | Epoxy is a two-part adhesive that creates a very strong bond between polystyrene and wood. However, it takes longer to dry and cure than other types of adhesives. It’s also more difficult to remove once it’s set. Epoxy is best used for projects that require a very strong bond or for projects where other adhesives have failed. |
It’s important to follow the manufacturer’s instructions when using solvent-based adhesives. These adhesives often have different drying and curing times, and using them incorrectly can weaken the bond or cause damage to the materials being bonded. It’s important to test the adhesive on a small, inconspicuous area before applying it to the entire surface, as some adhesives can discolor or damage certain types of materials.
If you need information on how to glue other materials, here are some useful articles:
- How to Glue Java Fern to Rock – DIY Guide
- How to Glue Broken Sandstone – Complete Guide
- How to Glue Ceramic Pot – Step-by-Step Guide
- How to Glue ABS Plastic – Complete Guide
- How Strong Is Super Glue on Plastic?
- How to Glue Countertop Edge – Complete Guide
- How to Glue Countertop to Cabinet – Step-by-Step Guide
- What Is Rubber Glue Used For?
Construction Adhesives
Construction adhesives are another type of adhesive that can be a good option for bonding polystyrene to wood. This type of adhesive is commonly used in construction projects where a strong, permanent bond is required. Some common types of construction adhesives include:
- Polyurethane construction adhesive
- Modified silicone adhesive
- Modified epoxy adhesive
- Phenolic adhesive
Polyurethane construction adhesive is one of the most commonly used types of construction adhesive. It is known for its strong bonding ability and flexibility. This type of adhesive works well on both porous and non-porous surfaces.
Modified silicone adhesive is also a good option for bonding polystyrene foam to wood. This adhesive is known for its high-performance bonding and durability. It is commonly used in applications that require a waterproof bond.
Modified epoxy adhesive is another option that is commonly used in construction applications. This adhesive provides a strong, permanent bond and is ideal for bonding materials with different coefficients of thermal expansion.
Phenolic adhesive is a type of adhesive that is known for its strong bonding ability and resistance to extreme temperatures. It is commonly used in applications that require high strength and durability.
When using construction adhesives, it is important to follow the manufacturer’s instructions carefully for best results. In general, these adhesives should be applied in a thin layer and left to dry completely before clamping or applying pressure. It is also important to avoid getting the adhesive on your skin, as it can be difficult to remove and may cause irritation.
Epoxy
Epoxy adhesives are a popular option for bonding polystyrene foam to wood due to their strong bonding capabilities. They are two-part adhesives that need to be mixed just before application. The mixture consists of a resin and a hardener that when combined create a strong chemical bond. Here’s a detailed breakdown of the pros and cons of using epoxy for polystyrene foam to wood bonding:
| Pros | Cons |
|---|---|
| Dries Clear: Epoxy dries to a clear, hard finish, making it ideal for applications where the adhesive might be visible. | Long Drying Time: Epoxy has a relatively long drying time, usually taking several hours to fully cure. |
| High Strength: Epoxy adhesives are among the strongest available and provide an extremely durable bond between polystyrene foam and wood. | Requires Mixing: Epoxy is a two-part adhesive that requires mixing prior to application. Careful attention needs to be given to the specific mix ratio to ensure proper bonding. |
| Can Fill Gaps: Epoxy can be used to fill small gaps between the polystyrene foam and wood, providing additional support for the bond. | Strong Odor: Epoxy has a strong odor that can be irritating to some individuals. Adequate ventilation is necessary when working with this adhesive. |
| Waterproof: Epoxy provides a waterproof bond, making it ideal for outdoor applications. | Difficult to Remove: Once epoxy has fully cured, it is extremely difficult to remove. |
Epoxy adhesives are an excellent choice for polystyrene foam to wood bonding due to their high strength and ability to fill gaps. However, they do have a long drying time and require careful mixing to ensure a proper bond. Additionally, the strong odor and difficulty in removing cured epoxy should be taken into consideration before use.
Surface Preparation
To ensure a strong bond between polystyrene foam and wood, proper surface preparation is crucial. Before applying any adhesive, you must first make sure that the surfaces are clean and ready for bonding. A poorly prepared surface can result in a weak bond, and the whole project may fall apart. It is essential to take your time and fully prepare the surfaces before moving on to the application of the adhesive. In this section, we will go over the necessary steps for proper surface preparation, including cleaning, roughing, and priming the surfaces. By following these steps, you can ensure a strong and long-lasting bond between polystyrene foam and wood.
Cleaning the Surface
The first step to prepare for gluing polystyrene to wood is to clean the surface. Any dirt, dust, or debris can hinder the adhesive’s ability to bond strongly. Cleaning the surface is a vital step that should not be skipped. Here’s how to clean the surface effectively:
- Remove dust: Use a soft-bristled brush to sweep away any loose dirt or dust particles. This will help to ensure a clean surface for gluing.
- Wipe the surface: Use a damp cloth to wipe the surface of the wood. Avoid using anything too wet as too much moisture could damage wood. Dry the surface thoroughly before proceeding with the adhesive application.
- Scrape off any old adhesive: If there are any remnants of old adhesive on the surface, use a scraper or putty knife to remove them carefully. Pay attention to the corners and tight spaces where dirt can easily accumulate.
- Use a cleaner: If you are dealing with stubborn stains or dirt on the surface, use a cleaner that is suitable for polystyrene and wood. Apply it to a clean cloth and gently rub the surface until the stains are removed. Rinse off the cleaner residue with a damp cloth and let the surface dry completely.
By following these cleaning steps, the surface is free from dirt, oil, grease, or any debris that prevents proper bonding. A clean surface enhances the adhesive’s ability to form a strong bond, ensuring that the polystyrene foam sticks to the wood surface securely.
Roughing the Surface
Before gluing polystyrene to wood, it’s essential to rough up the surface of both materials. This step is crucial as it allows the adhesive to penetrate into the surface pores, creating a stronger bond. Here are some steps to follow when roughing the surface of polystyrene foam and wood:
- Prepare the surface: Start by cleaning the surface of both materials. Remove any dust, dirt, or debris that may be present. Use a clean cloth to wipe the surface thoroughly.
- Use sandpaper: Once the surface is clean, use a coarse-grit sandpaper to rough up the surface of both materials. Sandpaper with grits between 80 and 120 is ideal. Rub the sandpaper gently in a circular motion over the surface of the wood. Be sure to apply pressure evenly across the surface. For polystyrene foam, use a different technique. Instead of sandpaper, use a wire brush to create a textured surface on the foam.
- Don’t overdo it: Avoid oversanding the surface of the wood or the polystyrene foam. Doing so can create gouges, pits, or scratches in the material, which can affect the bond between the materials and the glue.
- Clean the surface: After roughing up the surface, be sure to clean it again with a clean cloth. Remove any sawdust or debris that may have accumulated on the surface.
Roughing up the surface of polystyrene foam and wood doesn’t have to be a difficult or time-consuming process. However, it’s an essential step that should not be skipped. By following the steps above, you can ensure that the adhesive will bond securely to the surface and create a strong, lasting bond.
Priming the Surface
Before gluing polystyrene foam to wood, priming the surface is an essential step to ensure proper adhesion. Priming creates a protective barrier that improves bonding and prevents the adhesive from penetrating deeply into the wood pores, which may weaken the surface.
To prime the surface, you’ll need a primer that is compatible with both materials. Look for a primer that is specifically designed for polystyrene foam and wood bonding. When selecting a primer, make sure to check the label to ensure it is safe for use on both materials. Here are some recommended primers for this task:
| Primer | Material Compatibility | Benefits |
|---|---|---|
| Polyurethane Primer | Polystyrene foam and wood | Water-resistant, provides a strong bonding and insulation |
| Acrylic Primer | Polystyrene foam and wood | Fast-drying, dries clear and protects against moisture |
| Shellac Primer | Polystyrene foam and wood | Dries quickly, seals wood knots and sap streaks, and provides good adhesion |
After choosing the primer, follow these steps to prime the surface:
- Clean the surface: Remove any dust, dirt, or debris from the surface using a soft cloth or brush.
- Apply the primer: Apply the primer evenly to the wood using a brush or roller. Make sure to cover the entire surface. If using a spray primer, follow the manufacturer’s instructions carefully.
- Let the primer dry: Allow the primer to dry completely according to the manufacturer’s instructions. Typically, it takes around 1-2 hours to dry.
- Sand the surface: Once the primer is dry, use fine-grit sandpaper to lightly sand the surface. This will ensure a smoother surface and a better bond.
- Clean the surface again: Use a tack cloth or a damp cloth to wipe away any dust from sanding. Your surface is now ready for gluing.
Following these steps carefully ensures that the primer adheres to the surface properly, which improves the quality of the bond and increases the effectiveness of the adhesive. Proper surface preparation and priming greatly reduce the risk of adhesive failure and result in a long-lasting bond between polystyrene foam and wood.
Application of Adhesive
Now that you have chosen the right adhesive and properly prepared the surface, it’s time to start applying the glue. The way you apply the adhesive will largely depend on the consistency of the adhesive and the size of the surface area you are working with. The application process can be done through various means such as using a brush, spray, or roller. This section will provide a step-by-step guide on how to apply adhesive effectively for optimal bonding between polystyrene foam and wood.
Using a Brush
One effective method for applying adhesive when gluing polystyrene to wood is by using a brush. This method allows for more control over the application process, ensuring that the adhesive is spread evenly and covers the necessary areas.
Here are the steps to follow:
- Begin by pouring a small amount of adhesive onto a clean surface. Be careful not to use too much, as excess adhesive can result in a weaker bond.
- Using a paintbrush, dip the bristles into the adhesive and evenly spread a thin layer onto the polystyrene foam. Be sure to cover the entire surface of the foam that will be glued to the wood.
- Next, apply a thin layer of adhesive to the corresponding area of the wood surface. Again, spread the adhesive evenly and cover all areas that will come in contact with the polystyrene foam.
- Once both surfaces are coated with adhesive, carefully press the polystyrene foam to the wood, ensuring that both surfaces make full contact.
- Apply pressure to the glued surfaces to ensure a strong bond. You can use weights or clamps to keep the materials in place as the adhesive sets.
- Allow the adhesive to dry completely according to the manufacturer’s instructions before moving on to the next steps in the process.
Using a brush to apply adhesive can be a simple and effective method for ensuring a strong bond between polystyrene foam and wood. However, it is important to remember to use the right type of adhesive for your specific project, as well as following proper surface preparation and safety precautions.
Using a Spray
When using a spray adhesive to glue polystyrene to wood, follow these steps:
- Step 1: Set up your work area in a well-ventilated space. A spray adhesive can release fumes that can be harmful when inhaled.
- Step 2: Hold the can of spray adhesive about six to eight inches away from the surface of the wood and foam. Be sure to have the spray in a straight and consistent line across the entire surface.
- Step 3: Spray the wood surface first. Ensure to cover the entire area completely before applying the spray to the polystyrene.
- Step 4: Apply the adhesive directly onto the polystyrene surface only if it requires a thin and even coating of adhesive.
- Step 5: Allow the adhesive to become tacky before placing the polystyrene onto the wood. Holding the foam at an angle of 45 degrees, lean one edge of the foam gradually onto the adhesive, smoothing the foam down as you lay it onto the wood to minimize air pockets.
- Step 6: Press down firmly all over the foam’s surface to guarantee a secure bond on the wood surface. Use a roller or a flat object to remove any air trapped between the foam and wood surface.
- Step 7: Wait for the adhesive to set and cure as directed by the manufacturer’s instructions before proceeding to the next step in the project.
When using spray adhesive, make sure to wear gloves and eye protection to avoid any direct exposure to adhesive chemicals. Follow the manufacturer’s safety instructions to minimize hazards and ensure proper results.
Using a Roller
To apply adhesive to larger surface areas, a roller can be used. It is particularly useful for even distribution and avoiding bumps or lumps in the glue. Here are the steps to using a roller for gluing polystyrene to wood:
- Step 1: Pour the adhesive onto a clean and dry tray or paint tray.
- Step 2: Dip the roller into the adhesive and make sure it is evenly coated.
- Step 3: Begin rolling the adhesive over the polystyrene foam in one direction. Use moderate pressure and ensure that the adhesive is spread evenly over the surface of the foam.
- Step 4: Next, apply the adhesive to the wood surface. Again, use moderate pressure, ensuring that there are no bare spots on the wood surface and that it is evenly covered with adhesive.
- Step 5: When both surfaces are evenly coated with adhesive, carefully place the polystyrene foam onto the wood surface. It’s important to be accurate when placing the foam onto the wood surface because the adhesive dries quickly.
- Step 6: Press the foam onto the wood surface using a roller to ensure full surface contact and that there are no air pockets. This will give a stronger bond between the foam and the wood surface.
- Step 7: Allow the adhesive to dry according to manufacturer instructions before removing the clamps or weight.
Using a roller to apply adhesive to polystyrene foam and wood surfaces can be very efficient and effective when done correctly. Just ensure that the surface is clean, dry, and that the adhesive is evenly distributed for better results.
Joining Polystyrene Foam and Wood
When working on a project that involves both polystyrene foam and wood, it’s essential to properly join the two materials. Whether you’re creating a decorative piece of art or building furniture, the right bonding method can be the difference between a sturdy, long-lasting structure and a flimsy, unreliable one. There are several ways to join polystyrene foam and wood, each with its own benefits and drawbacks. In this section, we’ll cover several methods for successfully bonding these materials together.
Clamping and Taping
To ensure a strong bond between the polystyrene foam and wood, clamping and taping are effective techniques to use during the joining process. Follow the steps below to properly clamp and tape the materials together:
- Apply the adhesive: First, apply the adhesive to one surface of either the polystyrene foam or wood. Be sure to use a generous amount of adhesive to cover the entire surface evenly.
- Place the materials together: Next, press the two surfaces together firmly to ensure maximum contact. It is important to do this step carefully, as you do not want to move the materials around and disturb the adhesive.
- Clamp the materials: Once the materials are pressed together, use clamps to hold them in place while the adhesive dries. Select the appropriate size clamp for the task, ensuring even pressure along the entire joint.
- Use tape: After clamping, use tape to further hold the materials together, providing an added level of security. Apply the tape to various areas of the surface to keep it level and prevent movement during the curing process.
- Allow time to dry: The adhesive will take some time to dry fully, so leave it undisturbed for the recommended period specified by the adhesive manufacturer.
Following these steps will ensure a secure bond between the polystyrene foam and wood. Be sure to remove any excess adhesive that may have seeped out from the joint before it dries.
Weight and Pressure Application
When it comes to joining polystyrene foam and wood, using weight and pressure application is one of the effective methods to ensure a strong bond. Here are the steps you should follow:
- Cut a piece of foam that fits the surface of the wood: Measure the area where you want to apply the adhesive and cut a piece of foam to fit the surface of the wood.
- Apply the adhesive to the foam and the wood: Apply the chosen adhesive on the foam surface and the wood surface evenly and thoroughly. Make sure you cover the whole surface area and avoid pooling of adhesive.
- Place the foam on the wood: Place the foam on the wood surface and use your hand or a weight, like a heavy book, to press the foam down onto the wood.
- Add weight: Place more weights, like books, on top of the foam, distributing them evenly. Make sure the foam is in full contact with the wood surface and that no air is trapped in the gap between them.
- Let it dry: Leave the weights on the foam for the recommended drying time of the adhesive. Check the manufacturer’s instructions for accurate drying times.
Using weight and pressure application method can help the adhesive seep into the grain of the wood for better grip, and the expanded polystyrene foam compresses under the weights, enabling better contact between the surfaces. This technique is suitable for larger areas where you have access to heavy objects to use as weights. Always remember to work in a well-ventilated area, wear protective gloves and goggles, and follow the manufacturer’s instructions for the chosen adhesive.
Using Screws and Nails
One effective method of joining polystyrene foam and wood is by using screws and nails. This technique ensures an extra level of stability and rigidity in the final product.
Before driving screws or nails into the materials, pre-drill holes through the polystyrene and into the wood. This will prevent cracking and splitting of the foam. Use a drill bit that is slightly smaller than the nail or screw to be used.
When using screws, choose screws that are long enough to penetrate through the polystyrene and into the wood, but not too long that they pierce through the opposite side of the wood. A good rule of thumb is to use screws that are at least 1.5 times the thickness of the polystyrene foam.
When using nails, choose nails that are long enough to penetrate through the polystyrene and into the wood, but not too long that they pierce through the opposite side of the wood. A good rule of thumb is to use nails that are at least 2 times the thickness of the polystyrene foam.
Using screws or nails to join polystyrene foam to wood also requires careful consideration of the spacing and placement. It is recommended to distribute the screws or nails evenly across the surface to avoid creating stress points or uneven pressure.
To ensure a strong bond, it is advisable to use screws or nails in conjunction with an adhesive. Apply the adhesive to the surface, then place the polystyrene foam in position before driving in the screws or nails.
Here is a summary table for using screws and nails:
| Screws | Nails | |
|---|---|---|
| Length | 1.5 times the thickness of polystyrene foam | 2 times the thickness of polystyrene foam |
| Spacing & Placement | distributed evenly | distributed evenly |
| Pre-Drill Holes | yes, with a drill bit slightly smaller than screw | yes, with a drill bit slightly smaller than nail |
| Use with Adhesive | recommended | recommended |
Using screws and nails to join polystyrene foam to wood is a reliable method that can provide a strong and lasting bond. However, it is important to use caution and follow safety guidelines when handling tools and equipment.
Post Glueing Treatment
Now that you have successfully glued polystyrene to wood using the appropriate adhesive and followed the necessary surface preparation steps, it’s time to move on to post-gluing treatment. This stage is integral to ensure that your project looks neat and professional. It involves various steps such as sanding, painting, and finishing the surface. In this section, we’ll take a closer look at each of these steps and recommend some safety precautions to follow while undertaking them. By the end of this guide, you’ll be equipped with all the necessary information to complete even the most challenging polystyrene and wood glueing tasks with ease. Let’s dive in.
Sanding and Smoothing the Surface
After the adhesive has sufficiently cured, it’s time to sand and smooth the surface to achieve a flawless finish. This step is crucial because a rough surface can affect the paint application, making the final result uneven.
To sand and smooth the surface, follow these steps:
| Step | Instructions |
|---|---|
| 1 | Use a fine grit sandpaper (220-grit or higher) to sand the surface gently. Avoid applying too much pressure, as this can cause the foam to compress or dent, compromising the appearance of the surface. Instead, use soft and circular strokes, focusing on smoothing and removing any imperfections. |
| 2 | After sanding the surface, use a soft-bristled brush or a cloth to remove any debris or dust. This step is crucial because paint will not stick to dust, compromising the final appearance of the surface. |
| 3 | For a flawless finish, it’s beneficial to use a high-density sanding sponge to smooth out the surface gently. These sponges are flexible and will conform to the shape of any surface, ensuring that it is even and smooth, ready for painting. |
| 4 | For hard-to-reach areas, use a sanding block or a sanding pad. These tools are handy for smoothing tight angles or crevices, ensuring that every inch of the surface has been perfectly smoothed. |
Once you’ve finished sanding and smoothing the surface, it’s crucial to remove all the dust and debris with a damp cloth, ensuring that the surface is clean and ready for painting. Taking the time to sand and smooth the surface will ensure a flawless finish that is sure to impress.
Painting the Surface
Once the adhesive has dried and the joint between the polystyrene foam and wood is hardened, you may want to paint the surface to give it a polished look. Before starting the paint job, it is important to consider the type of paint that will adhere well to the porous polystyrene foam and the smooth wood surface.
Choosing the right paint: Water-based acrylic paint is recommended when painting polystyrene foam as it dries quickly and does not contain aggressive solvents that can damage the foam. For wood, oil-based paint is ideal as it is long lasting and has excellent adhesion properties to wood surfaces.
Preparing the surface: First, clean the surface with a soft cloth to remove dirt and dust particles. Fill any cracks or gaps with wood filler and sand the surface smooth. Use light strokes while sanding to avoid damaging the foam. Remove any sanding residue to make the surface clean and smooth.
Priming: The surface must be primed before painting to ensure better adhesion and longevity of the paint. Use a primer that is compatible with both polystyrene foam and wood. Apply the primer with a paintbrush or spray can in thin, even coats. Follow the manufacturer’s instructions for drying time.
Painting: Once the primer is dry, apply the paint in thin coats instead of one thick layer. This will prevent the paint from cracking or peeling over time. Use a paintbrush or spray can to apply the paint. Allow the paint to dry between each layer and apply as many layers as necessary to achieve the desired opacity and coverage.
| Polystyrene Foam | Wood |
|---|---|
| Water-based acrylic paint | Oil-based paint |
| Clean surface with soft cloth | Fill any cracks or gaps with wood filler, sand surface smooth |
| Prime with compatible primer | Prime with compatible primer |
| Apply paint in thin layers | Apply paint in thin layers |
Note: Use a well-ventilated area or wear masks to avoid inhaling paint fumes. Follow the manufacturer’s instructions for cleaning paintbrushes and other equipment after use.
Finishing the Surface
After gluing polystyrene to wood, there are a few steps you can take to finish the surface and give it a polished look. Here are a few ways to finish the surface:
- Sanding: After the glue has dried, sand the surface of the joint using fine-grit sandpaper. This will smooth out any rough spots or bumps in the surface.
- Priming: Now that the surface is smooth, it is important to prime the surface before painting. This will help the paint adhere better and prevent the wood from absorbing too much of the paint, which can result in an uneven finish.
- Painting: Once the surface is primed, it’s time to paint. Choose a paint that is suitable for both polystyrene and wood. A high-quality acrylic or latex paint is usually a good choice. Apply the paint evenly, using a paintbrush or roller. Apply a second coat if necessary.
- Sealing: To add an extra layer of protection to the surface, you can apply a sealant. This will help protect the surface from scratches and stains. A clear polyurethane or varnish is a good choice for sealing polystyrene to wood. Apply the sealant in thin, even coats, allowing each coat to dry before applying the next.
- Decorating: Finally, you can add any additional decorations or embellishments to the surface. This could be anything from stenciling to decoupage. Use your creativity to make the surface unique and eye-catching.
By following these steps for finishing the surface, you can ensure that your glued polystyrene to wood project looks professional and polished. Remember to take your time and work carefully to get the best results.
Safety Precautions
When glueing polystyrene to wood, it’s important to take certain safety precautions in order to avoid any potential negative consequences. Firstly, it’s recommended to wear protective clothing such as gloves and eye protection, especially when working with solvents and construction adhesives. These types of adhesives can emit fumes which can be harmful if inhaled, so it’s important to work in a well-ventilated area.
Another important safety measure is to avoid smoking or using a naked flame near the work area as these adhesives are often flammable. It’s also important to follow the manufacturer’s instructions closely, as different adhesives may have different safety requirements.
Additionally, it’s important to store adhesives and any leftover materials in a safe, cool, and dry place, out of reach of children and pets. This helps to prevent accidental ingestion or inhalation, which can lead to serious health problems.
And finally, it’s important to dispose of any unused adhesive and leftover materials responsibly, following local regulations for disposing of hazardous waste. By following these safety precautions, you can ensure that your glueing project is completed safely and without any negative consequences.
Conclusion
After going through this comprehensive guide on how to glue polystyrene foam to wood, you now have a clear understanding of what it takes to execute a perfect bonding process. One thing you must take note of is that the key to a successful polystyrene to wood bonding lies in the right adhesive choice, proper surface preparation, and correct application techniques.
There are different types of adhesive options available, including PVA glue, solvent-based adhesives, construction adhesives, and epoxy. Depending on the specific needs of your project, you can make an informed decision on which one to choose.
Additionally, surface preparation is vital in ensuring the glue sticks, and we’ve covered some critical steps like cleaning the surface, roughing it up with sandpaper, and priming it.
Application techniques also play a crucial role, and we have discussed the three most common application methods, including using a brush, spray, or roller. It’s essential to take your time and get the application right to achieve a strong bond.
Joining polystyrene foam and wood may require different pressure application methods like clamping, taping, or using screws and nails. Ultimately, achieving a perfect bond is achievable with proper bonding techniques and patience.
After glueing, you can also sand and smooth the surface, paint it, or finish it to achieve your desired look. All these steps cover everything necessary to ensure you achieve the perfect bond between polystyrene foam and wood.
In conclusion, bonding polystyrene foam and wood may seem like a daunting task, but with the right tools, techniques, and expertise, it’s achievable. Take your time, follow the steps carefully, and always prioritize safety precautions. You’ll end up achieving a strong, durable bond that will last for years.
Frequently Asked Questions
Can I Glue Polystyrene Foam to Wood?
Yes, it is possible to glue polystyrene foam to wood using the right adhesive and technique.
What Adhesive Can I Use to Glue Polystyrene to Wood?
You can use PVA glue, solvent-based adhesives, construction adhesives, or epoxy to glue polystyrene foam to wood.
Do I Need to Prepare the Surface before Gluing?
Yes, it is important to clean, rough, and prime the surface before gluing polystyrene foam to wood.
Can I Apply Adhesive with a Brush?
Yes, you can apply adhesive with a brush, but make sure to use a brush that is appropriate for the type of adhesive you are using.
How Can I Join Polystyrene Foam and Wood Together?
You can join polystyrene foam and wood together by clamping and taping, applying weight and pressure, or using screws and nails.
Can I Sand and Smooth the Surface after Gluing?
Yes, you can sand and smooth the surface after gluing, but make sure to use the appropriate grit sandpaper and follow safety precautions.
Do I Need to Paint the Surface after Gluing?
No, you do not need to paint the surface after gluing, but it can enhance the appearance and protection of the surface.
How Do I Choose the Right Adhesive for Gluing?
You should choose an adhesive that is appropriate for the materials you are using, the intended use of the glued object, and the conditions in which it will be used.
Is it Safe to Glue Polystyrene Foam and Wood Together?
Yes, it is safe to glue polystyrene foam and wood together as long as you follow safety precautions and use the appropriate adhesive.
What Should I Do If the Glue Does Not Hold?
If the glue does not hold, you can try applying more pressure or using a different adhesive. You should follow the manufacturer’s instructions and safety precautions when doing so.