As homeowners, nothing is more frustrating than feeling a draft in your home due to poorly sealed windows and doors. One of the best ways to combat this issue is by using weather stripping. However, weather stripping is only as effective as its installation, which is why we’ve put together a step-by-step guide on how to properly glue weather stripping. In this article, we’ll cover everything you need to know, from the materials required to the process itself, so you can ensure your weather stripping is properly installed and your home stays comfortable all year round.
Materials Required
Before you start gluing weather stripping, let’s go over the materials you will need. Having the right materials is crucial to ensure a strong and long-lasting hold. Here are the top materials you will need to complete this project:
- Weather Stripping: This is the rubber or foam material that will create a seal between your door or window and the frame.
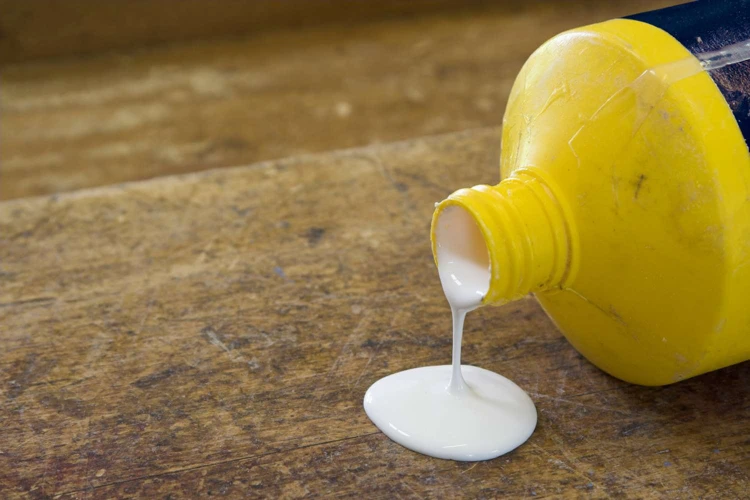
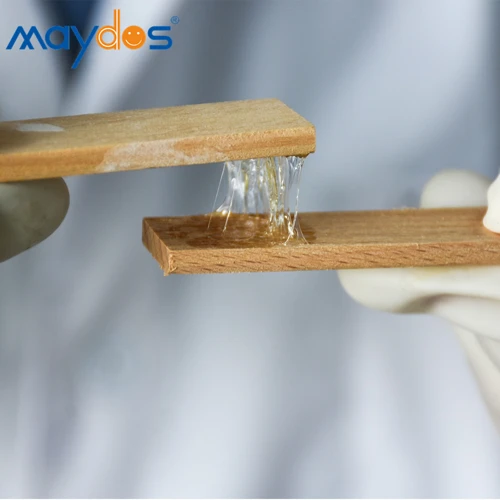
- Glue: You will need glue to attach the weather stripping to the surface. Not all glues are created equal, so make sure you choose the right type of glue for your project.
- Cleaner: A cleaner will help prepare the surface for gluing by removing any dirt, residue or dust.
- Tape Measure: Measuring and cutting the weather stripping to the right length is essential for a proper fit.
- Scissors or Utility Knife: You will need a cutting tool to trim the weather stripping to the correct size.
To ensure the best outcome for your weather stripping project, make sure you have all of the necessary materials. If you need advice on how to make glue sticky again or what glue to use for twine on glass, check out our other helpful articles.
Weather Stripping
Weather stripping is a type of material used to seal gaps around doors, windows, and other openings in your home, preventing unwanted air and moisture from entering. There are several different types of weather stripping, each with its own unique advantages and applications. Some of the most common types of weather stripping include foam tape, V-strip, door sweeps, and silicone rubber. The type of weather stripping you choose will depend on the specific needs and conditions of your home. High-quality weather stripping can be purchased at most hardware stores, home improvement centers, or online retailers such as Amazon.
Types of Weather Stripping:
- Foam Tape: Foam tape is a type of weather stripping made from closed-cell foam rubber. It is easy to apply, inexpensive, and relatively durable. Foam tape is ideal for use in areas with low to moderate traffic, such as around windows and doors.
- V-Strip: V-strip is a type of weather stripping made from flexible vinyl or metal. It is designed to conform to irregular surfaces and is ideal for use in areas with high traffic, such as on sliding doors or garage doors.
- Door Sweeps: Door sweeps are made from rigid metal or flexible plastic and are typically installed on the bottom of doors to seal gaps. They are ideal for use in areas with high traffic or where there is a significant temperature difference between the interior and exterior of your home.
- Silicone Rubber: Silicone rubber weather stripping is highly durable and designed to withstand extreme temperatures and weather conditions. It is ideal for use around windows, doors, and other areas where a high level of protection is required.
When selecting weather stripping, it is important to consider factors such as the size of the gap to be sealed, the level of traffic in the area, and the specific weather conditions in your region. It is also important to ensure that the weather stripping is compatible with the surface it will be applied to.
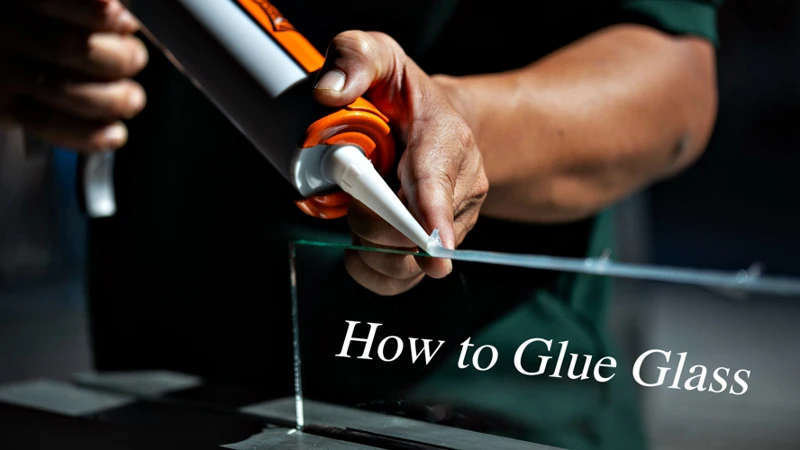
What Glue to Use for Twine on Glass?
Glue
For any weather stripping project, having the right adhesive is essential. There are several types of glue available, and choosing the right one can make a huge difference in the success of your project. Let’s take a look at some of the most popular glue types used for weather stripping:
| Glue Type | Description |
|---|---|
| Silicone adhesive | Silicone adhesive is the most popular type of glue used for weather stripping. It is a clear adhesive that can bond a variety of materials and is known for its durability and flexibility. It is perfect for use in extreme temperatures and is water-resistant. |
| Polyurethane adhesive | Polyurethane adhesive is another strong adhesive that is ideal for weather stripping. It is a two-part adhesive that is mixed together before use and cures quickly. It is extremely strong, making it ideal for use in high-traffic areas. |
| Epoxy adhesive | Epoxy is a two-part adhesive that is known for its strength and durability. It is ideal for use in areas that are subjected to high levels of stress or impact. This type of adhesive is also resistant to water and chemicals. |
| Butyl adhesive | Butyl adhesive is a strong, rubber-like adhesive that is often used for weather stripping. It is inexpensive and bonds well to most materials. It is also easy to apply and remains flexible over time, making it ideal for use in areas that are subjected to vibration or movement. |
It’s important to choose the right glue based on your specific weather stripping material and the area where it will be applied. Using the wrong glue can result in the weather stripping not adhering properly, or the adhesive breaking down over time. Be sure to read the manufacturer’s instructions carefully and select the glue that is recommended for your particular project.
If you are having trouble with sticky glue, check out our guide on how to make glue sticky again.
Cleaner
Using a cleaner on the surface before adhering the weather stripping is an important step in ensuring a strong bond. Choosing the right cleaner is equally important. You want a cleaner that effectively removes any dirt, debris, or old adhesive residue but is also safe for the material of your surface. Do not use a cleaner that contains harsh chemicals or abrasives, as it can damage the surface and affect the integrity of the weather stripping bond.
Here are some options for cleaners for different surfaces:
| Surface | Cleaner |
|---|---|
| Metal | Rubbing alcohol or white vinegar diluted with water |
| Wood | Mild dish soap and warm water |
| Plastic or Vinyl | Multipurpose cleaner or isopropyl alcohol |
Be sure to wipe the surface thoroughly with a clean cloth or sponge to remove any residue left by the cleaner. Wait for the surface to dry completely before proceeding to the next step.
If you need assistance on How to Glue Wallpapers on the Wall, click on the link for more helpful instructions.
Tape Measure
Tape measure is an essential tool when it comes to applying weather stripping. Without precise measurements, your weather stripping may not fit properly, and this can lead to a poor seal, air leaks, and increased energy bills. It’s crucial to use a reliable tape measure to ensure that you get accurate measurements.
Most hardware stores sell tape measures that are specifically designed for home improvement projects. We recommend using a tape measure with a locking mechanism, so that you can lock the measurement in place once you’ve taken the reading. This will help you avoid any mistakes or inaccuracies when transferring measurements.
When measuring your weather stripping, make sure to measure the length and width of the areas where you’ll be applying the stripping. This will help you determine how much stripping you’ll need for the project. It’s always better to have a little extra than not enough, so don’t be afraid to add a few extra inches to your measurements.
As you measure, it’s a good idea to write down the measurements, so that you don’t forget them. You can also sketch out a rough diagram of the area you’ll be working on, and label the measurements on the diagram. This will help you stay organized and ensure that you don’t mix up any of the measurements.
A good-quality tape measure is a must-have tool for any weather stripping project. With the right measurements, you can create a tight seal around your doors and windows, which will help keep your home comfortable, energy-efficient, and protected from the elements.
Internal link suggestion: What to Use Instead of Hot Glue
Scissors or Utility Knife
Having the right tools is crucial when it comes to gluing weather stripping. The weather stripping material needs to be cut to the right size to fit the surface it’s being applied to. That’s where a pair of scissors or utility knife comes into play.
Scissors are perfect for cutting softer weather stripping materials like foam or rubber. You can get a clean, precise cut with minimum effort when working with scissors. However, scissors might not be as effective when it comes to cutting harder weather stripping materials like metal or vinyl.
On the other hand, a utility knife could be a better option when working with harder weather stripping materials. A utility knife, also known as a box cutter, is very versatile and can cut through various materials with ease. A sharp, retractable blade allows you to cut precise lines with control.
Regardless of which tool you choose, it’s important to use a surface to cut on, such as a cutting mat or cardboard, to protect the blade and the surface underneath. And as with any sharp tool, proper precautionary measures should be taken to avoid accidental cuts or injuries.
Preparing the Surface
Before applying the weather stripping, it’s crucial to prepare the surface to ensure optimal adhesion. Failure to do so can result in the weather stripping coming off or not sticking properly. This step is of utmost importance and should never be overlooked. Let’s delve into the steps required to properly prepare the surface for gluing weather stripping. And if you’re curious about other types of glue and their weights, check out how much does glue weigh.
Clean the Surface
Before gluing weather stripping, it is important to prepare the surface. Cleaning the surface is an essential step to ensure that the glue adheres properly. Any dust, debris, or other particles on the surface can prevent the glue from bonding with the surface.
Here are the step-by-step instructions for cleaning the surface:
- First, remove any dirt, dust, or debris from the area where the weather stripping will be applied.
- Use a cleaner that is appropriate for the material of the surface. For example, for a surface made of plastic, use a plastic cleaner. For a metal surface, use a metal cleaner.
- Wipe the surface clean with a cloth or paper towel.
- For stubborn dirt or grime, use a mild abrasive, such as a scouring pad or sandpaper, to gently remove the dirt.
- Finally, wipe the surface clean again with a cloth or paper towel and let it dry completely before applying the weather stripping.
By following these steps, you can ensure that the surface is clean and free of any dirt or debris, promoting a strong bond. Remember, a clean surface is the first step to a successful application of weather stripping.
If you encounter any problems during the cleaning process or need to troubleshoot, check out our article on how to make dextrin glue.
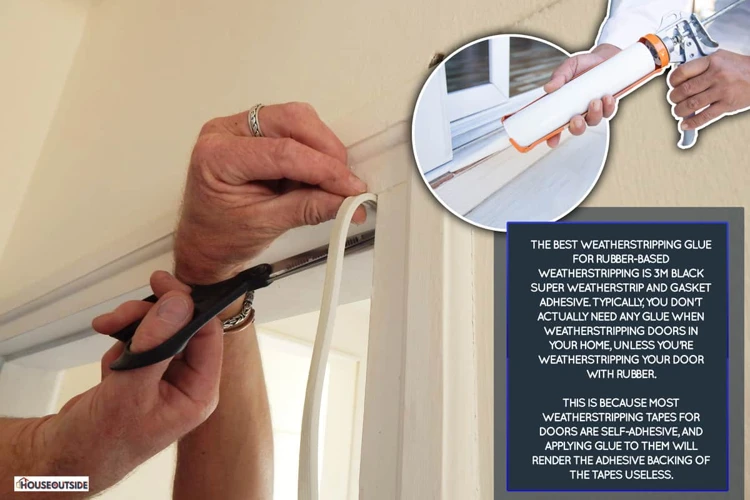
Apply Tape
Before applying the weather stripping, it is important to prepare the surface properly. Applying tape to the surface can help to protect it from any accidental drips of glue. Use a high-quality tape that will not damage the surface. Masking tape is a good option, but if the surface is delicate, use painter’s tape. Apply the tape carefully, pressing it firmly with your fingers to ensure that it adheres well.
Note: If you are unsure about the type of tape to use, check the manufacturer’s instructions or consult with a professional.
Once the tape is in place, use a clean, dry cloth to wipe the surface and remove any dust or debris. This will help the weather stripping to adhere properly and ensure a strong bond.
Internal link: If you need information on how to glue tubular road tires, check out our step-by-step guide.
Measure and Cut Weather Stripping
Before you can apply the weather stripping, you need to measure and cut it to the appropriate size. This can be a bit tricky, so follow these steps carefully.
Step 1: Measure the length of the opening where you will be applying the weather stripping. Make sure to add a few extra inches to ensure that you have enough stripping for a good seal.
Step 2: Now it’s time to cut the weather stripping to the measured length. Use a scissors or utility knife to carefully cut the stripping to the appropriate size. Make sure to cut straight, clean lines to ensure a good fit.
Step 3: If you need to apply the weather stripping to a corner or another specific shape, you may need to make additional cuts. Measure and mark where you need to cut on the stripping, then use your scissors or utility knife to make the cuts.
Step 4: Finally, double-check your measurements and make any necessary adjustments before moving on to the next step.
Remember to take your time when measuring and cutting the weather stripping. If you rush, you may end up with strips that are too short or with irregular edges that won’t create a proper seal. But don’t worry if you make a mistake – just cut another piece to the correct size.
Now that you’ve got your weather stripping cut to the right size, you’re ready to move on to the next step in the process. If you need more guidance, check out our article on How to Glue Wallpaper on the Wall for additional tips and tricks.
Applying the Glue
Now that you’ve prepared the surface, it’s time to move onto the next step: applying the glue. Choosing the right glue is crucial to ensuring a strong bond between the weather stripping and the surface it’s being applied to. In this section, we’ll go over some tips for selecting the right glue and applying it correctly to ensure a strong, long-lasting bond. So, let’s dive in! And if you want to know how to glue ping pong rubber or make shampoo slime without glue, be sure to check out our other articles on those topics!
Choose the Right Glue
Choosing the right glue is crucial to the success of weather stripping installation. A strong adhesive that can bond the stripping material to the surface for a long time is required. Not all adhesives are the same, and some may not work well with certain weather stripping types.
Here are some of the adhesives to consider:
| Adhesive Type | Features | Weather Stripping types |
|---|---|---|
| Cyanoacrylate glue (super glue) | Dries quickly, strong bond, heat-resistant | Vinyl, rubber, foam |
| Silicone adhesive | Flexible, waterproof, heat-resistant | Rubber, vinyl, foam |
| Epoxy glue | Strong bond, heat and chemical-resistant | Plastic, metal, wood, rubber |
| Acrylic adhesive | Fast-drying, strong, flexible | Plastic, rubber, vinyl, foam |
It’s important to choose the right adhesive for your weather stripping material. For example, ping pong rubber requires a specific type of adhesive that is different from what you would use for other materials. Make sure to check the manufacturer’s recommendations and test the adhesive on a small area before applying it to the entire surface.
Note: Avoid using shampoo slime or other homemade adhesives for weather stripping installation. These types of adhesives may not provide a strong enough bond, and your weather stripping may fall off after a few days.
Apply the Glue
When applying the glue, it’s important to do so carefully and precisely. Follow these steps to ensure the best results:
- Apply the glue sparingly: Too much glue can cause the weather stripping to become bulky and uneven. Use just enough to create a thin, even layer on the surface you’re attaching the weather stripping to.
- Apply the glue evenly: Use a small brush or applicator to evenly spread the glue over the surface. Make sure the entire surface is covered and there are no spots with too much or too little glue.
- Pay attention to the ends: The ends of the weather stripping are particularly important to glue down securely. Apply a little extra glue to these areas to ensure they don’t come loose over time.
- Keep the glue away from other surfaces: Be careful not to let the glue smear onto other surfaces or onto the weather stripping itself. This can cause an unsightly mess and make it difficult to attach the stripping correctly.
By following these steps carefully, you can ensure that the glue is applied properly and that the weather stripping will adhere firmly to the surface. Take your time, work carefully, and don’t rush the process.
Wait for the Glue to Dry
After the glue has been applied, it’s important to allow enough time for it to dry completely before attaching the weather stripping. The waiting time can vary depending on the type of glue used, the temperature, and the humidity in the environment.
Here are some general guidelines:
- If using a contact cement, wait about 15-20 minutes until the glue is dry to the touch. It will still feel slightly sticky, but this is normal.
- If using a silicone adhesive, wait at least an hour for the glue to dry completely.
- If using a super glue, wait about 30 seconds to a minute for the glue to dry and set.
It’s crucial that you resist the urge to touch or test the glue before it’s fully dry. Doing so could compromise the bond and cause the weather stripping to come loose. Additionally, avoid exposing the glued surface to any stress or pressure during the drying period.
A few additional tips to keep in mind while waiting for the glue to dry:
- Choose a well-ventilated area to allow for proper airflow, which can help speed up the drying process.
- Keep the weather stripping flat and level to avoid any bumps or wrinkles that may disrupt the bond.
- Double-check the manufacturer’s instructions for any specific drying times or other recommendations.
In the end, waiting for the glue to dry is an essential step in the process of gluing weather stripping. By following these recommendations, you can ensure a strong and long-lasting bond that will help keep drafts and moisture at bay.
Attaching Weather Stripping
Now that you’ve applied the glue, it’s time to attach the weather stripping to your surface. This may seem like a simple task, but it’s important to take your time and do it correctly to ensure that it lasts. In this section, we will go over the steps to properly attach the weather stripping to your surface and ensure that it is secure. Let’s dive in and get started.
Attach the Weather Stripping
Now that the glue has cured, it is time to attach the weather stripping to the surface. It is important to position it correctly to ensure a tight seal. Here are the steps:
| Step | Description |
|---|---|
| 1 | Remove the tape that was used to hold the weather stripping in place. |
| 2 | Slowly and carefully press the weather stripping onto the surface, starting at one end and working your way to the other end. |
| 3 | Use your fingers to firmly press the weather stripping onto the surface. Alternatively, you can use a rubber mallet to gently tap it into place, being careful not to damage the weather stripping or the surface. |
| 4 | If the weather stripping comes with nails or screws, use them to secure it in place. |
| 5 | Make sure the weather stripping is snugly attached to the surface all the way along its length. |
| 6 | Allow the weather stripping to sit undisturbed for at least 24 hours, or as long as the glue manufacturer recommends, to ensure that the glue fully cures. |
Note: If the weather stripping moves or shifts during installation, it may not form a tight seal and will not be as effective. If this happens, you may need to remove it and start again with a new piece. It is better to take your time and install it properly the first time to avoid having to repeat the process.
Wait for the Glue to Cure
After applying the glue, it’s important to wait for it to cure before moving on to the next step. Curing time can vary depending on the type of glue used, so it’s important to read the label for specific instructions. Most weather stripping glue takes around 24 hours to cure completely.
Here are some tips to keep in mind while waiting for the glue to cure:
- Don’t touch or disturb the weather stripping while it’s drying
- Avoid opening and closing the door or window until the glue has properly cured
- Make sure the temperature and humidity levels in the room are optimal for curing the glue
- If you notice any bubbling or shifting in the weather stripping, use a tool like a putty knife or screwdriver to gently push it back into place
It’s important to be patient during this step to ensure that the weather stripping stays firmly in place and provides a tight seal. Rushing the drying process could have negative consequences such as the weather stripping not adhering properly or becoming misaligned. So, take your time and allow the glue to fully cure before testing out the weather stripping.
Test the Weather Stripping
After attaching the weather stripping, it is important to test its effectiveness. This step is crucial to ensure that the weather stripping is not only in place but also working effectively to prevent air infiltration.
To test the weather stripping, start by checking for any gaps or spaces between the stripping and the surface it is applied to. Use a tape measure to measure these gaps and record the measurements in a table like the one below:
| Location of Gap/Space | Measurement |
|---|---|
| Top of Door Frame | 0.5 inches |
| Bottom of Door Frame | No gap |
| Side of Door Frame | 0.25 inches |
If there are gaps or spaces present, these areas will need to be addressed. Use a utility knife to trim the weather stripping if it is too long or if there is excess material that prevents the stripping from making proper contact with the surface.
Additionally, close the door or window and examine the compression of the weather stripping. The stripping should be compressed sufficiently to create a seal against the surface it is applied to. If there is not enough compression, the stripping may need to be adjusted or additional stripping may need to be added.
Testing the weather stripping is an important step to ensure that it is effectively preventing air infiltration. Record any necessary adjustments or areas that need improvement, and make the necessary changes to enhance the effectiveness of the weather stripping.
Maintenance and Troubleshooting
Once you have successfully installed your weather stripping, it’s important to take care of it regularly to ensure its longevity. But even with proper maintenance, sometimes issues can arise that require troubleshooting. In this section, we will discuss how to maintain your weather stripping and how to troubleshoot common problems you may encounter. Let’s dive in.
Regular Maintenance
Regular maintenance of weather stripping is important to ensure its longevity and effectiveness. Follow these steps to maintain your weather stripping:
- Inspect regularly: Make it a habit to inspect your weather stripping every few months. Look for any cracks, tears, separation, or other signs of damage. If you notice any issues, replace the weather stripping immediately to prevent further damage to your home.
- Clean the surface: Before cleaning your weather stripping, remove any dirt or debris from the surface. Use a soft-bristled brush or a damp cloth to remove any dirt buildup. You can also use a mild soap solution to clean the surface. Avoid using harsh chemicals or abrasive cleaners that can damage the weather stripping.
- Dry the surface: After cleaning the surface, use a clean and dry cloth to dry the weather stripping. Make sure the surface is completely dry before you continue with the maintenance process.
- Apply weather stripping lubricant: Use a lubricating spray or oil to keep the weather stripping pliable and prevent it from drying out over time. Apply the lubricant to a clean and dry cloth and rub it gently onto the weather stripping surface. Make sure to wipe off any excess lubricant to prevent dirt and debris buildup.
- Replace damaged weather stripping: If you notice any damage to the weather stripping, it’s important to replace it immediately. Damaged weather stripping can compromise the energy efficiency of your home and make it easier for pests and drafts to enter.
By following these regular maintenance steps, you can extend the life of your weather stripping and ensure that it continues to provide an effective barrier against drafts, pests, and moisture.
Problem Solving
Encountering problems when gluing weather stripping is not uncommon, but thankfully there are some troubleshooting methods that you can try. Here are some common issues and solutions to help you out:
- Weather stripping won’t stick – This problem often stems from poor surface preparation. Make sure to clean and dry the surface thoroughly before applying the glue. Additionally, check if you are using the right type of glue for the materials you are working with.
- Glue is not staying in place – This issue can arise if you are not using enough glue or if you are not waiting long enough for the glue to cure. Try applying more glue and giving it enough time to dry completely.
- Excess glue is visible – If you’ve used too much glue, it can seep out from the sides, making for an unsightly finish. When applying glue, use sparingly and wipe away any excess glue with a damp cloth.
- Weather stripping is peeling off – This can occur due to changes in temperature and humidity levels or over time from natural wear and tear. To fix this issue, remove the old weather stripping entirely and clean the surface before reapplying new strips with fresh glue.
If you’re still experiencing issues after trying these troubleshooting methods, consider seeking help from a professional or seeking additional information from the manufacturer of your weather stripping or glue. Remember that taking the time to properly prepare and apply your weather stripping can save you time and money in the long run by providing better insulation for your home and reducing energy costs.
Conclusion
In conclusion, by following this step-by-step guide, you can successfully glue weather stripping and improve your home’s energy efficiency. It is important to remember to choose the right type of weather stripping and glue for your specific needs. Before applying the glue, make sure to properly prepare the surface by cleaning it and measuring and cutting the weather stripping. When applying the glue, be patient and wait for it to dry completely. Finally, attach the weather stripping and give it time to cure before testing it out. Regular maintenance is also important to ensure that your weather stripping stays in good condition for the long term. If you encounter any problems, refer to the troubleshooting tips in this guide. With these tips and techniques, you can confidently take on the task of gluing weather stripping and enjoy the benefits of a more energy-efficient home.
Frequently Asked Questions
What is weather stripping, and why is it important?
Weather stripping is a material used to seal the gaps around doors and windows, preventing air and moisture from entering or escaping. It improves energy efficiency, reduces noise, and increases comfort.
What type of weather stripping is best for my needs?
Various types of weather stripping are available, including foam, vinyl, and rubber. Foam works well for irregularly shaped gaps, vinyl for moderate climates, and rubber for harsher weather conditions.
What glue should I use to attach weather stripping?
Choose an adhesive that is suitable for the material of your weather stripping. Silicone adhesive is a popular choice as it adheres well to both metal and rubber.
How long does the glue take to dry?
The drying time of the glue depends on the type of adhesive and the environmental conditions. Most glues take between 24 to 48 hours to dry completely.
Can I install weather stripping on my own, or should I hire a professional?
Weather stripping installation can be done by yourself, but it requires basic tools and a good understanding of the process. If you’re unsure, it’s best to consult with a professional.
How often should weather stripping be replaced?
Weather stripping should be replaced every 3-5 years or sooner if it becomes damaged or worn.
How do I know if weather stripping needs to be replaced?
You may notice drafts of air or moisture entering around doors and windows, or the weather stripping may appear cracked, warped, or damaged.
Can weather stripping be used on other areas besides doors and windows?
Yes, weather stripping can be used on other areas such as attic hatches, garage doors, and electrical outlets to prevent energy loss.
What can I do if my weather stripping doesn’t stick properly?
If the weather stripping doesn’t stick properly, try cleaning the surface and applying the adhesive again. If the problem persists, consider replacing the weather stripping.
What’s the best way to remove old weather stripping?
Old weather stripping can be removed using a utility knife or scraper. Be careful not to damage the surface beneath the weather stripping.