Embarking on a DIY wallpaper project can transform your space with a personal touch. Whether you’re aiming for a bold statement wall or a complete room makeover, the key to success lies in meticulous preparation and technique. The task may seem daunting at first, but with the right guidance, anyone can master the art of wallpaper application.
Wall Preparation for Wallpaper
Assessing the Wall Surface
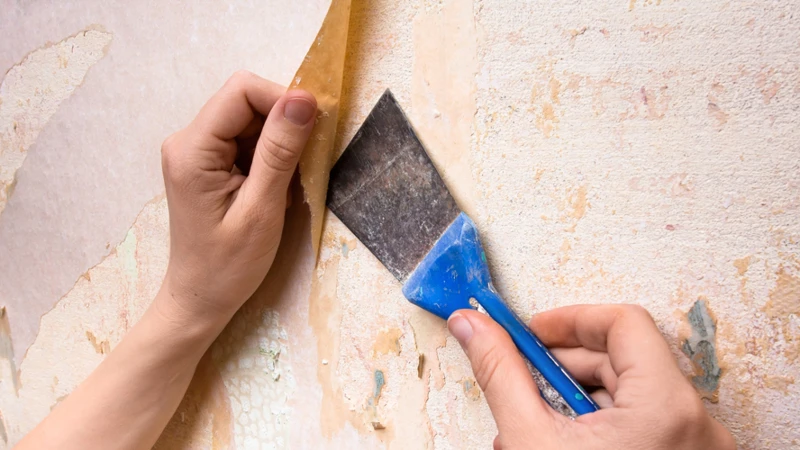
Before diving into the aesthetic aspects of DIY wallpaper, it’s essential to focus on wall preparation for wallpaper. Begin by examining your walls for any imperfections such as holes, cracks, or uneven surfaces. Address these issues with spackle and sandpaper to ensure a smooth canvas for your wallpaper application.
Cleaning and Priming
Once the wall surface is even, the next step is thorough cleaning. Remove dust, dirt, and grease stains, as these can prevent the wallpaper adhesive from bonding properly. After cleaning, apply a coat of primer to create an ideal surface that will help the wallpaper adhere smoothly and last longer.
Choosing the Right Wallpaper Adhesive
Types of Wallpaper Glue
There are various types of wallpaper glue available, each designed for different wallpaper materials and conditions. From clear adhesives for delicate wallpapers to heavy-duty pastes for vinyl coverings, selecting the correct type is a critical factor in the process.
Wallpaper Glue Guide
To aid your selection, consult a wallpaper glue guide, which can provide recommendations based on your specific wallpaper type and the conditions of your room. Factors such as humidity levels and the type of wall surface can influence the choice of adhesive for optimal results.
Wallpaper Application Techniques
Cutting and Laying Out Wallpaper
Before you glue wallpaper, it’s important to cut and lay out your strips. Measure the height of your walls, add a few inches to the top and bottom for trimming, and cut your pieces. Arrange them on the floor to ensure the pattern matches and to identify where to trim excess.
Glue Wallpaper Like a Pro
Applying wallpaper adhesive evenly is crucial. Use a roller or a brush to spread the paste on the back of the wallpaper. Ensure the edges are well-coated, then fold the paper onto itself and let it sit for the recommended time to allow the glue to activate.
Wallpaper Installation Step by Step
Aligning and Hanging Wallpaper
Start hanging wallpaper from the top corner of your wall. Carefully align the paper with the ceiling and adjacent wall, ensuring it’s straight. As you apply the paper, use a wallpaper brush to smooth it out from the center towards the edges, preventing creases.
Wallpaper Smoothing Techniques
Employ wallpaper smoothing techniques to eliminate air pockets and ensure firm adhesion. Use a wallpaper smoother or a dry cloth to gently press the wallpaper against the wall, working from the center outwards to push out any trapped air bubbles.
Finishing Touches
Trimming and Cleaning Up
Once your wallpaper is in place, trim any excess from the top and bottom using a sharp utility knife and a straight edge. Wipe away any excess glue with a damp sponge, being careful not to saturate the wallpaper.
Dealing With Bubbles and Seams
If you encounter bubbles, gently press them out towards the edges. For visible seams, apply a small amount of adhesive underneath and press down. Clean any residual glue immediately to avoid staining.
Wallpapering Tips and Tricks
Here are a few wallpapering tips to enhance your DIY wallpaper experience:
- Allow for a pattern repeat when measuring and cutting.
- Keep a damp cloth handy for quick cleanups.
- Use a seam roller to secure wallpaper edges.
Incorporate these strategies to achieve a professional-looking finish.
Troubleshooting Common Wallpapering Issues
Even with careful planning, issues may arise during wallpaper installation. If the paper isn’t sticking, it may be due to improper wall preparation or the wrong adhesive. If the edges curl, extra paste might be required. Knowing how to react to these situations is part of the wallpapering journey.
If you’re planning a home renovation or simply looking to refresh your space, understanding the process of adhering materials to your walls is essential. For a detailed guide on wallpaper application, check out our comprehensive article on how to glue wallpaper on the wall. But that’s not all – if you’re interested in other wall-adhering projects, you’ll find our tutorials on how to glue a mirror on the wall and how to glue paneling to walls incredibly useful. Also, for a flawless finish, don’t miss our tips on how to seal wallpaper glue to ensure your walls look great for years to come.
Conclusion and Final Thoughts on DIY Wallpaper
DIY wallpaper projects offer a rewarding way to personalize your space. By following the steps outlined, from wall preparation to the final touches, you’ll be equipped to tackle the task with confidence. With patience and precision, you can achieve a stunning transformation that reflects your unique style and craftsmanship.