You’ve just bought a new plastic surface and need to attach velcro to it, but you’re not sure how to do it properly. It can be frustrating when the velcro keeps falling off or the glue becomes too messy. But fret not! There are tips and tricks you can follow to make sure the velcro stays put. In this article, we’ll walk you through the step-by-step process of gluing velcro to plastic, from surface prep to troubleshooting common issues. By the end of this article, you’ll be a pro at attaching velcro to any plastic surface with ease. So grab your glue and let’s get started!
Surface Prep
Before you can glue Velcro to plastic, you need to properly prepare the surface to ensure a strong bond. The surface prep stage involves cleaning the plastic and creating a rough surface that the glue can adhere to. Following the steps in this section will help ensure your Velcro stays securely attached to the plastic surface. Keep in mind that this process can vary depending on what type of plastic you are working with. If you need help with a specific material, check out our guide on how to glue corrugated plastic for more information.
Clean the Surface
Properly cleaning the surface is essential in ensuring a successful bond between plastic and Velcro. The surface should be wiped clean of any dust, debris, or residue using a clean, dry cloth or paper towel. Any moisture or solvents should be avoided as they can interfere with adhesion.
To effectively remove any tough debris or residue, use a mild soap solution and a soft-bristled brush to gently scrub the surface. After cleaning, be sure to rinse the surface thoroughly with water and let it dry completely before moving on to the next step.
It’s also important to note that certain plastics may require additional surface preparation, such as sanding, to create a rough surface for improved adhesion. For example, if you are gluing Velcro to a shiny plastic surface, it may be necessary to sand the plastic to create a rough surface that the glue can adhere to.
If you’re unsure whether or not your plastic surface requires sanding, refer to the manufacturer’s instructions or consult with experts in the industry. It’s always better to take the time to properly prep the surface before gluing to ensure a strong, long-lasting bond.
Note: If you’re looking for advice on how to glue metal to wood, be sure to check out our article “What to Use to Glue Metal to Wood” for tips and tricks specific to that bonding process.
Create a Rough Surface
Creating a rough surface on the plastic is crucial for ensuring a strong bond when gluing Velcro. A smooth surface can prevent the glue from adhering properly and result in the Velcro coming loose. There are a few ways to create a rough surface:
| Method | Description |
|---|---|
| Sand the surface | Use sandpaper to lightly sand the area where you will be attaching the Velcro. This will create a rough surface for the glue to stick to. Be sure to wipe away any dust or debris before applying the glue. |
| Score the surface | If sanding is not an option, use a sharp object like a knife or a pair of scissors to score the surface. This will create small grooves for the glue to grip onto. |
| Apply heat | Using a heat gun or even a hair dryer to apply heat to the surface of the plastic can help create a rough surface. The heat causes the plastic to expand slightly, creating tiny bumps that the glue can adhere to. |
Remember that regardless of the method you choose, it is important to clean the surface thoroughly beforehand to remove any dirt or oils that could interfere with the bond. With a properly prepped surface, your Velcro should stay securely in place for a long time.
If you’re interested in other gluing projects, check out our article on how to glue shells to a mirror.
Choose the Right Glue
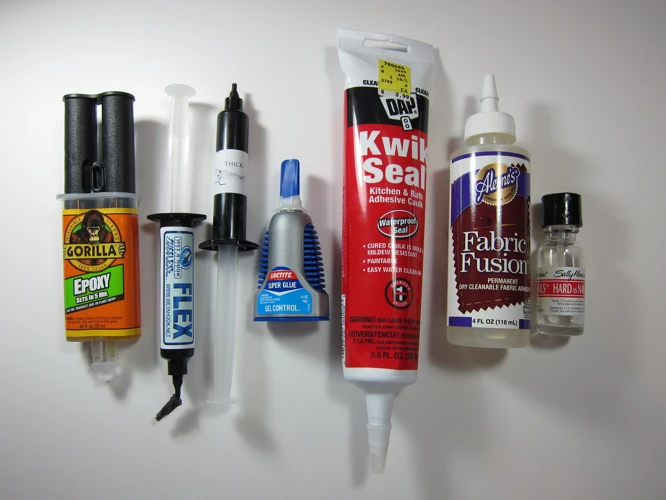
When it comes to bonding velcro to plastic, choosing the right glue is crucial to ensure a strong and long-lasting hold. With several types of glue available in the market, it can be confusing to determine which one will work best for your project. Epoxy, superglue, and hot glue are some of the most popular options. Each type of glue has its own strengths and weaknesses, and choosing the right one largely depends on the specific application. In this section, we’ll discuss each type of glue in detail and help you choose the right one for your velcro and plastic bonding needs. For more information on gluing different materials, check out our article on how to glue metal.
Epoxy
Epoxy is a two-part adhesive that can provide a strong, long-lasting bond between Velcro and plastic surfaces. It is often used for bonding materials that are difficult to glue, making it an ideal choice for plastic surfaces. Epoxy is available in different formulations, each designed for specific applications. When using epoxy to glue Velcro to plastic, it is important to choose the right type for the job.
Here are some tips for using epoxy:
- Choose the right type of epoxy: There are many different types of epoxy available, each designed for a specific application. When gluing Velcro to plastic, choose an epoxy that is specifically formulated for plastics.
- Prepare the surfaces: Before applying epoxy, it is important to clean and dry both the Velcro and plastic surfaces thoroughly. Any dirt, dust or grease on the surface can interfere with the bonding process.
- Measure the epoxy: Epoxy is a two-part adhesive that must be mixed together in precise proportions. Be sure to carefully follow the instructions on the packaging to ensure the epoxy sets properly.
- Apply the epoxy: Once the epoxy is mixed, apply it to the plastic surface in a thin, even layer. Use a toothpick or small brush to apply the epoxy precisely where you need it.
- Attach the Velcro: Carefully place the Velcro onto the plastic surface in the desired location. Press down firmly to ensure good contact between the Velcro and epoxy.
- Allow time to dry: Epoxy takes several hours to dry completely. Be sure to check the manufacturer’s instructions for the exact drying time. Avoid touching the Velcro or disturbing it until the epoxy has fully dried.
When using epoxy, it is important to work in a well-ventilated area and to wear gloves to protect your skin. If you are not familiar with using epoxy, it is a good idea to practice on a scrap piece of plastic before attempting to glue Velcro to the final piece.
To learn more about using epoxy, check out our article on How to Use Epoxy Glue.
Superglue
When it comes to superglue, which is also known as cyanoacrylate glue, it is a convenient option for gluing velcro to plastic surfaces. This type of glue works with a wide variety of plastics, and it sets quickly. However, it is important to remember that superglue can be brittle and reactive to certain materials, so it may not be the best choice for all plastic surfaces.
To use superglue for attaching velcro to plastic, follow these steps:
| Step 1: | Make sure the plastic surface is clean and dry. |
| Step 2: | Apply a small amount of superglue to the plastic surface in the desired location. Note: it is recommended to not use too much as a small drop will be enough to bond the velcro and plastic. |
| Step 3: | Press the velcro firmly onto the superglue, making sure it is aligned as needed. |
| Step 4: | Hold the velcro in place for about 30 seconds to ensure a strong bond. |
| Step 5: | Allow the glue to dry completely before using the velcro. This usually takes about 24 hours. |
It is important to remember to use superglue in a well-ventilated area, as it can give off fumes that can be harmful if inhaled. Also, like with any type of glue, it is advisable to do a small test patch first before applying it to a larger surface. This will help you to check the suitability of the superglue for the plastic surface you intend to use it on.
If you encounter any issues with using superglue for attaching velcro to plastic, such as the glue not sticking or it becoming stringy or messy, check out the troubleshooting section below for some helpful tips to overcome these problems.
Hot Glue
When it comes to gluing Velcro to plastic, hot glue is another option to consider. Hot glue is known for its strong bond and quick drying time, making it a popular choice for a variety of crafting and DIY projects. Here are some tips for using hot glue to attach Velcro:
– First, clean and roughen the surface of the plastic as described earlier.
– Plug in your hot glue gun and allow it to heat up. Once it’s ready, load a glue stick into the gun.
– Apply a small amount of hot glue to the back of the Velcro strip. Use a heat-resistant glove or tool to press the Velcro firmly onto the plastic surface.
– Hold the Velcro in place for a few seconds to ensure that the glue sets.
– Continue gluing the Velcro strip in sections until it’s fully attached to the plastic surface.
Hot glue can be messy, so it’s important to be careful and use it in a well-ventilated area. If you do notice any stray glue strings or excess glue, you can use a pair of scissors to gently trim them away once the glue has fully dried.
It’s important to note that hot glue may not be the best option for all types of plastic. If you’re working with a particularly delicate plastic surface, hot glue may be too strong and could cause damage. In this case, a different type of glue like superglue may be a better choice.
For more information on gluing different materials together, check out our other articles on how to glue Depron, what is the best glue to repair resin figurines, how to glue rope to wood, and how to glue plastic car parts.
Application
Now that you’ve prepped the surface and chosen the right glue, it’s time to start applying the Velcro to the plastic surface. This step requires some precision and a steady hand, as it’s important to ensure that the Velcro is securely attached to the plastic. In this section, we’ll go over some tips and tricks to make the application process as smooth as possible. So, let’s get started on attaching the Velcro to your plastic surface!
Apply Glue
When it comes to applying glue to plastic for Velcro attachment, the process can be a bit tricky. Here are some tips to follow and mistakes to avoid:
| Tip or Mistake | Description |
|---|---|
| Tip: Use a small amount of glue | Using too much glue can cause it to seep out from under the Velcro and create an unsightly mess. A small dab of glue on each spot where the Velcro will be attached is usually enough. |
| Tip: Apply glue evenly | It’s important to apply the glue evenly to ensure that the Velcro will adhere properly. Use a toothpick or a small brush to spread the glue around in a thin layer. |
| Tip: Work quickly | Most types of glue will start to dry almost immediately, so it’s important to work quickly to attach the Velcro pieces. Take care to position them correctly the first time, as they may be difficult to reposition once the glue dries. |
| Mistake: Using the wrong type of glue | Not all glues are created equal when it comes to attaching Velcro to plastic. Epoxy, superglue, and hot glue are all good choices, depending on the type and thickness of the plastic you’re using. Make sure to use a glue that is compatible with both the plastic and the Velcro material. |
| Mistake: Using too little glue | While it’s important not to use too much glue, using too little can result in the Velcro not adhering properly. Make sure to use enough to create a strong bond between the Velcro and the plastic surface. |
| Mistake: Glueing over dirt or debris | Before applying any glue, make sure the plastic surface is clean and free of any dirt or debris. Gluing over a dirty surface will result in a weaker bond and may cause the Velcro to come loose over time. |
By following these tips and avoiding these common mistakes, you can ensure a strong and lasting bond between your Velcro and plastic surfaces.
Attach Velcro
Once the glue has been applied on the plastic and the Velcro strip, it’s time to attach them together. Here are the steps to follow:
- Position the Velcro strip: Carefully place the Velcro strip on the plastic surface where you want it to be attached. Make sure it’s properly aligned with the other Velcro strip or the object it will be attached to.
- Apply pressure: Press down firmly on the Velcro strip. Use your fingers or a tool to ensure the entire surface area of the Velcro strip is making contact with the plastic surface. This will help the glue adhere better.
- Hold in place: Hold the Velcro strip in place for a few moments. Depending on the type of glue you used, you may need to hold it down for a few minutes to allow it to set.
- Repeat for other piece: If you’re attaching another Velcro strip or object to the plastic, repeat the same steps for that piece as well.
Be cautious while attaching the Velcro as the glue might cause sticky mess and ruin the surface. Avoid moving the Velcro strip during the initial minutes of the setting process to avoid any misalignment. Once the glue dries, you can test the bond by gently pulling the Velcro strips apart. If they come apart easily, that means the adhesive needs more time to cure. Conversely, if the bond is too strong, you may need to use a different glue or wait for the humidity and temperature to change.
Best Practices
When gluing velcro to plastic, it’s essential to follow the best practices to ensure your project’s success. These practices involve careful consideration for how you prepare the surface, select the right glue, and apply the glue and velcro. In this section, we’ll explore some of the best practices for gluing velcro to plastic, helping you complete the task with ease and precision. Let’s dive in.
Dry Fit First
Before gluing Velcro on plastic, it is important to do a dry fit first. This means that you should place the Velcro pieces where you want them on the plastic surface without using any glue. This not only allows you to see if the Velcro will fit properly, but it also gives you a chance to make any necessary adjustments.
Why is dry fitting important?
Dry fitting is important because it helps you visualize the final product and ensure that the Velcro will fit properly on the plastic surface. If the Velcro is not aligned correctly, it may not work properly or may even become detached from the surface once it is glued.
How to do a dry fit:
To do a dry fit, simply place the Velcro pieces on the plastic surface where you want them to be. Make sure to align them properly and consider how they will be used. For example, if you are attaching Velcro to a plastic container lid, make sure that the Velcro pieces are positioned in a way that allows the lid to close properly.
What to do if the Velcro doesn’t fit:
If the Velcro doesn’t fit properly during the dry fit, don’t panic! There are a few ways to adjust the placement of the Velcro without having to start over completely. Here are some possible solutions:
| Possible Issue | Possible Solution |
|---|---|
| The Velcro is too big for the plastic surface | Cut the Velcro to the appropriate size |
| The Velcro is too small for the plastic surface | Use a larger piece of Velcro |
| The Velcro is not aligned correctly | Reposition the Velcro until it is properly aligned |
Once you have done a successful dry fit and made any necessary adjustments, you are ready to apply the glue and attach the Velcro to the plastic. Remember to follow the best practices for gluing and consider any potential issues that may arise during the process. By doing so, you can ensure that your Velcro will stick securely to the plastic surface and continue to work properly over time.
Consider Temperature and Humidity
When it comes to gluing Velcro to plastic, temperature and humidity can have a big impact on the success of your project. It’s important to consider these factors before beginning your gluing process. To help you understand how temperature and humidity can affect your results, let’s take a closer look.
Temperature: The temperature of your working environment can greatly impact the effectiveness of your glue. If the temperature is too cold, the glue may not bond properly. If the temperature is too hot, the glue may dry too quickly or not adhere correctly. Make sure to check the recommended temperature range for your chosen glue, and try to work in an environment that falls within that range.
Humidity: Like temperature, humidity can also affect the bonding process. If the air is too humid, the glue may take longer to dry and may not bond as strongly. If the air is too dry, the glue may dry too quickly and not bond as effectively. It’s important to choose a day or time to work when the humidity is stable and in the recommended range for your chosen glue.
To make things easier, we’ve created the following table outlining the recommended temperature and humidity ranges for some of the most popular glues used for Velcro-to-plastic projects:
| Glue Type | Recommended Temperature Range | Recommended Humidity Range |
|---|---|---|
| Epoxy | 60°F – 90°F | 30% – 50% |
| Superglue | 50°F – 100°F | 40% – 60% |
| Hot Glue | 60°F – 100°F | 50% – 70% |
By considering temperature and humidity, and following the recommended ranges for your chosen glue type, you can greatly increase your chances of a successful Velcro-to-plastic bond.
Allow Time to Dry
One of the most important steps in gluing Velcro to plastic is allowing ample amount of time for the glue to dry. Rushing the drying process can negatively impact the adhesive strength and durability of the Velcro attachment. It is essential to follow the recommended drying time as per the instructions provided by the glue manufacturer.
Different types of glues may have different recommended drying times. Typically, epoxy glues take longer to dry, whereas hot glue dries relatively quickly. It is crucial to read the instructions on the glue packaging carefully.
Table 1: Recommended Drying Times for Different Glues
| Glue Type | Recommended Drying Time |
|---|---|
| Epoxy | 24-48 hours |
| Superglue | 10-30 seconds |
| Hot Glue | 2-5 minutes |
After applying the glue, it is recommended to keep the Velcro and plastic surface undisturbed as much as possible. Touching or moving the glued parts can affect the bonding strength. It is best to avoid subjecting the glued sections to any pressure or stress until the glue dries completely.
Waiting for the glue to dry can be time-consuming, but it is crucial for ensuring strong and long-lasting Velcro attachment. Rushing the drying process can lead to an inadequate bond that may come apart with minimal force even after the glue appears dry to the touch. It is best to plan ahead and allow enough time for the glue to dry completely.
Pro Tip: In case of doubt regarding whether the glue has dried completely or not, wait until the recommended drying time has passed before using the Velcro application.
Troubleshooting
Dealing with unexpected outcomes during any DIY project is common, and applying Velcro to plastic is no exception. While the process of gluing Velcro to plastic may seem straightforward, it’s not uncommon to run into issues. However, don’t worry! We’ve put together a list of common problems and their solutions when gluing Velcro to plastic. By understanding and implementing these troubleshooting tips, you’ll be well-equipped to overcome any obstacle that may come your way. So, let’s dive in and see what to do when things don’t go according to plan.
Velcro Won’t Stick
It can be frustrating when Velcro won’t stick to the plastic surface, and this can happen due to several reasons. Here are some common issues and solutions:
| Issue | Solution |
|---|---|
| The surface was not properly prepared. | Re-prep the surface. Clean the surface thoroughly and create a rough surface for better adhesive hold. |
| The glue was not given enough time to dry. | Allow time to dry. Glue needs time to set and create a strong bond. Follow the drying instructions on the glue packaging. |
| The wrong type of glue was used. | Choose the right glue. Some glues work better with plastic surfaces than others. Try using epoxy, superglue, or hot glue for a stronger hold. |
| The Velcro is dirty or damaged. | Replace the Velcro. Clean the Velcro loop and hook surfaces with warm soapy water and allow drying time. If the Velcro is damaged, replace it with new pieces of Velcro. |
| The temperature and humidity conditions were not ideal for curing. | Consider temperature and humidity. Some glues cure better in specific temperature and humidity conditions. Read the glue packaging label for ideal conditions and wait for the optimum weather condition to apply Velcro to plastic. |
By troubleshooting these common issues, you should be able to get Velcro to stick to a plastic surface successfully. Remember to choose the right glue, properly prepare the surface, and follow the manufacturer’s instructions for optimal results.
Glue is Messy or Stringy
Have you encountered the issue of messy or stringy glue when trying to attach Velcro to plastic? This can be frustrating and make the process difficult. Here are some tips to help you avoid this problem:
Firstly, make sure you choose the right glue for the job, as discussed in the previous section. Using the wrong glue can result in messiness or stringiness. Once you have selected the appropriate glue, follow these steps to minimize the risk of a messy or stringy application:
| Tip | Description |
|---|---|
| Cut the tip of the glue bottle at a 45-degree angle | This will help you control the flow of glue and prevent too much from coming out at once. |
| Apply the glue in thin, even lines | Using too much glue can result in messiness and stringiness. |
| Work quickly but carefully | Many types of glue start to dry quickly, so be sure to work efficiently. However, rushing can also lead to a messy application. |
| Clean up excess glue immediately | Use a damp cloth or paper towel to clean up any excess glue before it dries. |
| Practice makes perfect | If you’re new to using glue, don’t worry if your first attempt is messy. With practice, you’ll get better at controlling the flow of glue and applying it neatly. |
By following these tips, you can ensure that your glue application is neat and tidy, making the process of attaching Velcro to plastic much easier.
Velcro Gets Stuck to Glue
It can be frustrating when you’re trying to glue Velcro to plastic and the Velcro gets stuck to the glue instead of the plastic surface. To avoid this issue, follow these tips:
- Avoid Overusing Glue: When applying glue, make sure to use just enough to attach the Velcro to the plastic. If you use too much glue, it can seep through the Velcro and create a mess.
- Allow Glue to Dry: Wait for the glue to dry completely before attaching the Velcro to the plastic surface. This will prevent the Velcro from getting stuck to the glue and provide a strong bond between the Velcro and plastic.
- Use Tape: If you’re concerned about the Velcro getting stuck to the glue, consider using tape to hold the Velcro in place until the glue dries. This will help keep the Velcro securely in place without the risk of getting stuck to the glue.
- Apply Glue Cautiously: When applying glue, make sure to do so carefully and avoid getting the glue onto the Velcro. If any glue gets onto the Velcro, try removing it gently with a damp cloth or cotton swab before it dries.
By following these tips, you can successfully glue Velco to plastic without having to worry about the Velcro getting stuck to the glue. Remember to use just enough glue, allow it to dry completely, use tape if necessary, apply glue cautiously to avoid getting it on the Velcro, and remove any excess glue before it dries.
Conclusion
In conclusion, attaching Velcro to plastic may seem like a daunting task, but with the right preparation and adhesive, it can be done successfully. The key to a secure and long-lasting bond is ensuring that the surface is properly cleaned and roughened before applying the glue.
When it comes to choosing the right glue, there are several options to consider, including epoxy, superglue, and hot glue. Each adhesive has its own strengths and weaknesses, so it’s important to weigh your options and choose the one that best suits your needs.
During application, be sure to apply the glue evenly and allow enough time for it to dry before attaching the Velcro. And before permanently attaching the Velcro, always perform a dry fit to ensure that everything lines up correctly.
It’s also important to consider temperature and humidity levels when gluing Velcro to plastic, as extreme conditions can have an impact on the adhesive’s effectiveness. And in the event that the Velcro doesn’t stick or the glue becomes messy, be sure to troubleshoot and make adjustments as necessary.
Overall, gluing Velcro to plastic is a manageable DIY project that can be accomplished with the right tools and techniques. With a little bit of preparation and patience, you can attach Velcro to plastic securely and confidently.
Frequently Asked Questions
Can Velcro be glued to plastic?
Yes, Velcro can be securely glued to plastic using the right adhesive and proper surface prep.
What is the best glue for attaching Velcro to plastic?
Epoxy, superglue, and hot glue are all effective options for gluing Velcro to plastic. The specific type of glue you choose will depend on the plastic you are working with and the strength and durability you require.
How do I properly prepare the plastic surface for gluing Velcro?
Clean the surface with rubbing alcohol and a lint-free cloth, then create a rough surface by lightly sanding with fine-grit sandpaper.
What if the Velcro won’t stick to the plastic even after gluing?
If the Velcro won’t stick after gluing, it may be due to not allowing enough time for the glue to dry, improper surface prep, or using the wrong type of glue for the plastic you are working with. Reevaluate and make necessary adjustments.
Is there a way to avoid Velcro getting stuck to the glue during the application process?
Yes, you can prevent Velcro from getting stuck to the glue by using small pieces of masking tape to cover the Velcro before applying the glue. Once the glue is dry, remove the tape to reveal the adhesive portion of the Velcro.
How do I know which type of glue to use for my specific plastic?
Research the type of plastic you are working with and refer to the adhesive manufacturer’s instructions to determine which glue will work best for your project.
Can I apply the glue directly to the Velcro tape?
No, you should apply the glue directly to the plastic surface, not the Velcro tape, to ensure maximum bond strength and durability.
What is the best way to ensure a clean and mess-free application of glue?
Using a fine-tip applicator brush can help control the amount of glue applied to the surface and prevent messiness or stringiness.
How long should I let the glue dry before attaching the Velcro?
The drying time can vary depending on the adhesive used. Refer to the manufacturer’s instructions for the recommended drying time before attaching the Velcro.
What are some best practices to keep in mind when attaching Velcro to plastic?
Dry fit the Velcro before applying glue to ensure proper placement, consider the temperature and humidity of your environment, and allow enough time for the glue to dry completely before using the Velcro.