Introduction
Tarps are a versatile and useful material that can protect your possessions or provide a temporary shelter no matter where you are. However, sometimes you may need to cover a larger area than your available tarp size. In such cases, gluing tarps together may be the only solution. But how do you do it effectively? In this comprehensive guide, we’ll show you step-by-step how to glue tarps together, the types of glue to use, factors to consider, common mistakes to avoid, and more. By the end of this guide, you’ll be equipped with all the knowledge you need to effectively glue tarps together and make them resistant to any weather conditions.
What are Tarps?
Tarps, short for tarpaulins, are large sheets of waterproof material that are used to protect objects and areas from the elements. They come in various shapes, sizes, and colors, and are made of different materials such as vinyl, canvas, and polyethylene. Tarps are versatile and can be used in a variety of situations such as covering boats, cars, and other large objects, providing shelter from rain or sun, and many other purposes. They can be found in most hardware or camping stores, and are relatively inexpensive.
Purpose of the Article
The purpose of this article is to provide a comprehensive guide on how to glue tarps together. Tarps are commonly used for a variety of purposes such as covering materials, vehicles, and outdoor spaces. However, they may not always be able to cover the entire area, which is where gluing tarps together comes in handy. This article aims to provide step-by-step instructions on how to properly glue tarps together, as well as information on the different types of glue (such as glue for pearls) that can be used, factors to consider when choosing a glue for tarps, and common mistakes to avoid (like when gluing on a patch). By the end of this article, readers should have a clear understanding of how to glue tarps together successfully and without any issues.
Why Glue Tarps Together?
Why Glue Tarps Together?
Gluing tarps together can be a useful and cost-effective way to create a larger and stronger tarp. Tarps are commonly used for covering anything from equipment, boats, and vehicles, to lumber piles, camping areas, and construction sites. Here are some reasons why gluing tarps together can be beneficial:
| Reasons | |
|---|---|
| Tarps are not always available in larger sizes. | For example, you might need a tarp that is 30 feet by 30 feet, but the largest tarp available in the market is only 20 feet by 20 feet. |
| Creating a custom-sized tarp saves money. | Instead of buying multiple tarps to cover a larger area, gluing them together can create the same result for less money. |
| Gluing tarps together makes them stronger. | When two tarps are glued together, the bond between them creates a stronger barrier against weather and other harmful elements. |
No matter the reason for wanting to glue tarps together, it is important to follow the proper steps and use the appropriate glue to ensure a secure and functional result. Keep reading to learn how to do it step-by-step.
If you are interested in learning how to glue other materials, such as lace, cane webbing, or fabric, be sure to check out our other guides on how to glue lace to a window, how to glue cane webbing, how to glue EVA foam to fabric, how long it takes for fabric glue to dry, how to stiffen fabric with glue, what glue to use on suede, and how to glue cloth to wood. Or, if you’re wondering what the best glue for upholstery is, we’ve got you covered there too with our guide on the best glue for upholstery.
Step-by-Step Guide for Gluing Tarps Together
Gluing tarps together can be a tricky process. However, with proper preparation and technique, it can be done effectively. In this section, we will go through a step-by-step guide on how to glue tarps together. By following these detailed steps, you can ensure that your tarps are securely joined together for your next project or outdoor excursion. So let’s get started!
Step 1: Clean the Tarps
Before gluing tarps together, it is important to make sure that they are thoroughly cleaned to ensure maximum adhesion. Failure to properly clean the tarps can result in a weak bond that may separate over time. Here are some steps to follow when cleaning your tarps:
| Step | Description |
|---|---|
| Step 1 | Remove any dirt or debris from the surface of the tarps. Use a broom or a stiff-bristled brush to sweep away any loose particles or debris. |
| Step 2 | Wash the tarps with soap and water. Use a mild detergent and a soft-bristled brush or sponge to scrub the tarps gently. Pay particular attention to any areas that are heavily soiled. |
| Step 3 | Rinse the tarps thoroughly. Use a hose or a bucket of clean water to rinse away any soap residues or debris. Make sure the tarps are completely clean before proceeding to the next step. |
| Step 4 | Dry the tarps. Allow the tarps to air dry completely before attempting to glue them together. Do not use heat to dry the tarps, as this can damage the tarp material and interfere with the glueing process. |
By following these steps, you will ensure that your tarps are clean and ready for gluing. It is important to note that tarps made of different materials may require different cleaning methods. Always refer to the manufacturer’s instructions for proper cleaning and maintenance. Failure to properly clean your tarps can result in a substandard bond between the tarps that may impact their durability and lifespan.
Step 2: Apply the Glue Evenly
To create a strong bond between two tarps, it is essential to apply the glue evenly. Here are the detailed steps you need to follow to achieve this:
Step 1: Gather the necessary tools and materials required for the gluing process. This includes the appropriate glue type, gloves, a brush, and a notched trowel.
Step 2: Put on gloves to protect your hands from the glue and debris. Ensure that you are wearing gloves that suit the type of glue you are using.
Step 3: Open the glue container and mix the contents using a stir stick. If you are using a two-part epoxy, follow the manufacturer’s directions to mix it correctly.
Step 4: Dip a brush into the glue and apply it evenly to one of the tarps. Ensure that you cover all areas, especially the edges and corners.
Step 5: Take the notched trowel and, at a 45-degree angle, create a series of notches on the glue-covered tarp surface. Ensure that the spacing between the notches is even and consistent and that the notches penetrate to the base layer of the glue.
Step 6: Carefully place the second tarp onto the first, making sure that it is lined up correctly.
Step 7: Press both tarps together with a rolling pin or similar cylindrical object to squeeze out any air pockets and ensure that the glue spreads evenly.
Step 8: Use a notched trowel to make slight notches along the seam. These notches allow the glue to spread more uniformly and also create a stronger bond between the tarps.
Step 9: Let the glue dry according to the manufacturer’s instructions. This time will vary depending on the glue type and environmental conditions.
Step 10: Once the glue has dried, inspect the seam to ensure that it is secure and that no areas were missed during the gluing process.
By following these steps, you can successfully glue tarps together with an even application of glue that will create a durable bond.
Step 3: Join the Tarps Together
Now that you have cleaned the tarps and applied the glue evenly, it’s time to join the tarps together. This is where you need to be careful and ensure that the tarps are joined together tightly and evenly. Here is a step-by-step guide to joining the tarps together:
| Step 1 | Overlap the two tarps where you want them to join. Make sure that the overlap is even and there are no wrinkles or bubbles. |
| Step 2 | Press down on the tarps evenly to make sure they are tightly joined together. Start from the middle and work your way to the edges. This will help to get rid of any air bubbles that may have formed. |
| Step 3 | Use a roller or a flat surface to apply pressure to the joint. This helps to ensure that the glue is evenly distributed and that the tarps are tightly joined together. |
| Step 4 | Let the joint dry for the recommended time before moving or using it. This will ensure that the glue has fully bonded the two tarps together and that the joint is strong and durable. |
Remember to work carefully and deliberately during this step. You don’t want to rush through it and end up with a poorly joined tarp that won’t hold up to use. Take your time and use the right tools to ensure that the tarp joint is strong and long-lasting.
Types of Glue for Tarps
When it comes to gluing tarps together, the type of glue you use can heavily impact the durability and longevity of the bond. It’s important to consider the type of tarp material and the intended use of the tarp before selecting a glue. In this section, we will explore three different types of glue that are commonly used for tarps – silicone sealant glue, epoxy adhesive glue, and welding adhesive glue. We’ll take a closer look at the pros and cons of each type to help you make an informed decision.
Silicone Sealant Glue
One of the most popular glues used for sticking tarps together is silicone sealant glue. Silicone sealant glue is a type of adhesive that is known for its strong bonding capabilities and its resistance to extreme temperatures.
Here’s an overview of some of the key characteristics of silicone sealant glue:
| Characteristic | Description |
|---|---|
| Composition | Silicone-based |
| Curing Time | 24-48 hours |
| Usage Temperature | -40°F to 400°F |
| Water Resistance | Excellent |
| UV Resistance | Excellent |
| Chemical Resistance | Good |
One of the benefits of silicone sealant glue is that it is incredibly versatile. It can be used to bond almost any type of material, including fabrics, plastics, and metals. Additionally, it is resistant to water, UV radiation, and extreme temperatures, making it an ideal choice for outdoor applications.
However, there are also some downsides to using silicone sealant glue. One of the biggest challenges is that it takes a long time to cure. In most cases, you will need to wait at least 24-48 hours before using the tarps, which can be inconvenient if you need them for a time-sensitive project. Additionally, silicone sealant glue is generally not as strong as other types of adhesives, such as epoxy or welding adhesive, so it may not be the best choice if you need an extremely strong bond.
Silicone sealant glue is a good choice for bonding tarps together, especially if you need a waterproof and UV-resistant bond. However, be prepared to be patient while the glue cures, and keep in mind that it may not be the strongest option available.
Epoxy Adhesive Glue
One popular type of glue for tarps is epoxy adhesive glue. This type of glue has a very strong and durable bond, making it a good option for heavy-duty tarps or tarps that will be exposed to outdoor elements.
When using epoxy adhesive glue to join tarps together, be sure to follow the manufacturer’s instructions carefully. Here are some tips for working with this type of glue:
- Make sure the surfaces to be bonded are clean and free from any dirt, oil, or debris.
- Mix the two parts of the epoxy adhesive together thoroughly, as directed by the manufacturer.
- Apply the epoxy adhesive evenly to both surfaces using a small brush or applicator.
- Press the two surfaces together firmly and hold them in place for the recommended amount of time, allowing the epoxy adhesive to dry and cure fully.
- Avoid exposing the glued area to water or extreme temperature changes until the epoxy adhesive has cured completely. This could take up to 24 hours, depending on the product.
Remember that each type of glue has its own specific instructions and properties, so it’s important to choose the right glue for your specific project and application.
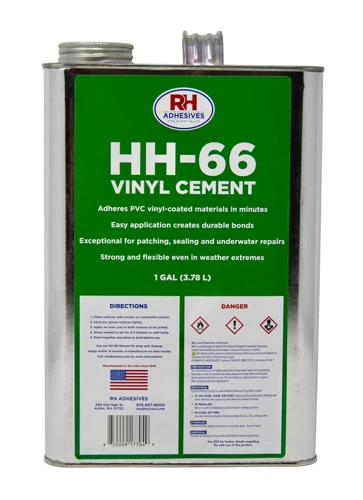
Welding Adhesive Glue
Welding adhesive glue, also known as PVC glue, is another popular type of glue for bonding tarps. This type of glue is specifically designed for polyvinyl chloride (PVC) tarps and is known for its strong and durable bond. It is a solvent-based glue that forms a chemical reaction when applied to PVC surfaces, creating a permanent bond.
Advantages of Welding Adhesive Glue:
- Forms a strong and permanent bond
- Resistant to harsh weather conditions and UV rays
- Can be used on both flexible and rigid PVC tarps
- Dries clear, making it almost invisible
- Cures quickly, taking just a few hours to dry
When using welding adhesive glue, it is essential to observe safety precautions. This type of glue has strong fumes that can be harmful when inhaled, so it is recommended to use it in a well-ventilated area. It is also advisable to wear protective gear such as gloves and safety glasses when handling the glue.
Application of Welding Adhesive Glue:
Before applying the PVC glue, clean the tarps using an appropriate cleaning agent and let them dry completely. Then, follow these steps:
- Spread a small amount of the glue on one of the tarp surfaces using a brush or applicator.
- Press the two tarps firmly together and smooth out any wrinkles or air pockets.
- Wipe off any excess glue with a damp cloth.
- Leave the tarps to bond together for at least 24 hours before use to allow the glue to cure fully.
It is important to note that welding adhesive glue is specifically designed for PVC tarps and should not be used on other tarp materials, such as canvas or polyethylene.
Welding adhesive glue is a great choice for bonding PVC tarps, given its strong and durable bond, resistance to harsh weather conditions, and quick drying time. However, it is essential to observe safety precautions when using this type of glue and to choose the appropriate cleaning agent for the tarp material to ensure the best results.
Factors to Consider When Gluing Tarps Together
When it comes to gluing tarps together, it’s important to take into account various factors that can affect the effectiveness and longevity of the bond. Factors to Consider When Gluing Tarps Together include the type of tarp material, climatic conditions, and the intended use of the tarp. By thoroughly considering these factors before attempting to glue tarps together, you can ensure a successful and long-lasting bond that will meet your specific needs. Let’s take a closer look at each factor.
Type of Tarp Material
When it comes to gluing tarps together, the type of material your tarp is made of plays a crucial role in determining the type of glue you should use. Not all glues work with all types of tarp material, so it’s important to consider this factor before selecting your adhesive.
Here are some common types of tarp material and the corresponding glue types:
| Tarp Material Type | Recommended Glue Type |
|---|---|
| Canvas | Epoxy Adhesive Glue |
| Polyethylene (PE) | Silicone Sealant Glue |
| Polyvinyl Chloride (PVC) | Welding Adhesive Glue |
| Polypropylene (PP) | Epoxy Adhesive Glue |
| Polyester | Silicone Sealant Glue |
Canvas tarps typically require a stronger adhesive like epoxy adhesive glue due to the thick, heavy material. Polyethylene tarps are lighter and more flexible, so silicone sealant glue is a better choice for them. PVC tarps are strong and rigid, making welding adhesive glue the best option. Polypropylene tarps, which are a lightweight alternative to canvas, can be bonded together using epoxy adhesive glue. Polyester tarps are durable and water-resistant, making silicone sealant glue ideal for bonding them together.
It’s important to note that these are general recommendations, and there may be exceptions depending on the specific brand or type of tarp you’re working with. Always read the manufacturer’s recommendations before selecting your glue type. Additionally, perform a small test with the glue on a corner or edge of the tarp to ensure good adhesion and no damage to the material.
Considering the type of tarp material before gluing is crucial to ensure a strong, long-lasting bond. Using the wrong glue may result in the bond weakening over time or even coming apart shortly after gluing.
Climatic Conditions
When it comes to gluing tarps together, it’s important to consider the climatic conditions. Different types of glue are affected by different types of weather conditions. In order to ensure that the glued tarps remain intact, it’s important to choose the right glue for the climate you will be using the tarp in.
Temperature: Extreme temperatures can affect the bond strength of adhesives. For example, extremely high temperatures can cause certain adhesives to soften and lose their adhesion properties, while extremely low temperatures can cause some adhesives to become brittle and crack. Make sure to choose a glue that can withstand the average temperature range of your intended use.
Humidity: High humidity levels can cause some adhesives to cure slowly or not at all. This can lead to weak or incomplete bonds. Conversely, low humidity levels can cause some adhesives to cure too quickly, which can also weaken the bond.
Precipitation: Rain, snow, and other forms of precipitation can all affect the bond strength of adhesives. Some types of glue are water-resistant or even waterproof, which can be useful if your tarp will be exposed to rain or snow. However, other types of glue may not be as resilient and can weaken or dissolve when exposed to moisture.
To summarize, it’s important to choose a glue that is appropriate for the climate in which you will be using the tarp. Consider factors such as temperature, humidity, and precipitation when selecting the right adhesive for the job. A table can help you choose the right adhesive, based on what you’re trying to achieve.
| Climatic condition | Ideal glue type |
|---|---|
| High Temperature | Silicone Sealant Glue |
| Low Temperature | Welding Adhesive Glue |
| High Humidity | Epoxy Adhesive Glue |
| Low Humidity | Silicone Sealant Glue |
| Exposure to Precipitation | Waterproof Adhesive Glue |
By considering climatic conditions when choosing the right glue for your tarps, you can ensure that they will remain intact and provide the desired protection for a longer duration.
Intended Use of the Tarp
When gluing tarps together, it’s important to consider the intended use of the tarp. This will help you choose the right type of glue and ensure that the final product is strong enough for its purpose.
Table: Intended Use of the Tarp
| Type of Tarp | Intended Use | Glue Recommendation |
|---|---|---|
| Canvas Tarp | Heavy-duty outdoor use | Welding adhesive glue |
| Plastic Tarp | Temporary outdoor use | Silicone sealant glue |
| Polyethylene Tarp | General purpose use | Epoxy adhesive glue |
Canvas tarps are thick and durable, making them ideal for heavy-duty outdoor use. Welding adhesive glue is the best choice for gluing canvas tarps together because it creates a strong, permanent bond.
Plastic tarps are lightweight and inexpensive, making them a popular choice for temporary outdoor use. Silicone sealant glue is a good option for gluing plastic tarps together because it is water-resistant and flexible, allowing it to withstand a range of temperatures and weather conditions.
Polyethylene tarps are versatile and commonly used for a wide range of purposes. Epoxy adhesive glue is a solid choice for gluing polyethylene tarps together because it creates a strong and durable bond that can withstand a variety of conditions.
Consider the intended use of your tarp before selecting a type of glue to ensure that the bond will last and the tarp will hold up to its intended use.
Common Mistakes to Avoid When Gluing Tarps Together
When it comes to gluing tarps together, there are certain common mistakes that people tend to make. These mistakes can compromise the effectiveness of the glue and result in a weak bond that does not withstand rough weather or frequent use. To avoid these mistakes, it is important to take note of them and familiarize yourself with the best practices for gluing tarps together. In this section, we will explore some common mistakes to avoid when gluing tarps together, so you can achieve a strong and long-lasting bond for your tarps.
Using the Wrong Type of Glue
Using the wrong type of glue for gluing tarps together is a common mistake that many people make. This can happen either because of ignorance or the assumption that any type of glue can suffice. However, this can result in a weak bond or even damage to the tarps. You must choose the right glue for the specific type of tarp material being used. Here’s a list of the different types of tarps and the recommended types of glue:
- Canvas tarps: Silicone sealant glue is the best option here, as it provides a strong, waterproof bond that won’t damage the material.
- Polyethylene tarps: Epoxy adhesive glue works best here, as it creates a strong bond that’s resistant to wear and tear.
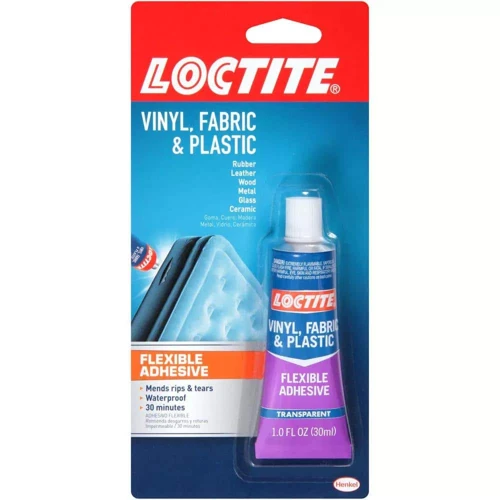
- Vinyl tarps: Welding adhesive glue is the recommended choice here, as it forms a strong bond that is resistant to UV rays and weather damage.
Using the wrong type of glue not only results in a weak bond, but can also weaken the overall integrity of the tarp material – leaving it susceptible to tears and damage. Using the proper glue ensures that the bond formed is strong and long-lasting, regardless of the intended use of the tarp.
Not Allowing Enough Drying Time
One of the biggest mistakes people make when gluing tarps together is not allowing enough drying time. This can lead to the glue not setting properly, which will result in the tarps coming apart and the glue failing.
Why is Drying Time Important?
Drying time is important because it gives the glue time to set and bond the tarps together. If the glue isn’t given enough time to dry, it won’t form a strong bond and the tarps could come apart when tension is applied.
How Long Should You Allow the Glue to Dry?
The drying time for glue will vary depending on the type of glue you use, the temperature and humidity of the room, and the size of the tarps being glued. As a general rule, though, you should allow the glue to dry for at least 24 hours before you subject the tarps to tension or stress.
To be safe, always check the manufacturer’s instructions for the specific type of glue you’re using. They will have information on the recommended drying time for that particular product.
What Happens if You Don’t Allow Enough Drying Time?
If you don’t allow enough drying time, the glue will not form a strong bond between the tarps. This can cause them to come apart when you subject them to tension or stress.
Additionally, if you move or adjust the tarps before the glue has had a chance to dry, the bond may not form correctly, leading to a weaker hold.
Conclusion
Allowing enough drying time is crucial when gluing tarps together. Be sure to follow the manufacturer’s instructions for the specific type of glue you’re using, and give the glue plenty of time to set before allowing tension or stress on the tarps. Taking the time to properly glue the tarps together will ensure a strong bond and a longer-lasting tarp.
| Common Mistake | Why it’s a Mistake | How to Avoid It |
|---|---|---|
| Not Allowing Enough Drying Time | The glue won’t form a strong bond. | Follow the manufacturer’s instructions for drying time and give the glue plenty of time to set. |
| Using the Wrong Type of Glue | The glue may not be suitable for the tarp material and won’t form a strong bond. | Research which type of glue is best for the specific tarp material and intended use. |
| Not Cleaning the Tarps Properly | The glue won’t adhere properly to the tarps if they are dirty or dusty. | Clean the tarps thoroughly before attempting to glue them together. |
Not Cleaning the Tarps Properly
It is crucial to clean tarps properly before gluing them together. Failing to do so will most likely result in a poor bond. Any dirt, dust, or debris on the surface will create a barrier between the glue and the material, preventing the bond from forming correctly. Using a cleaner that is incompatible with the tarp material can also result in unsuccessful bonding.
To properly clean tarps, follow these steps:
| Step 1: | Use a broom or brush to remove any loose debris from the surface of the tarps. |
| Step 2: | Wipe the surface of the tarps with a damp cloth or sponge to remove any remaining dirt or grime. |
| Step 3: | Let the tarps dry completely before proceeding. This step is crucial as the presence of moisture can interfere with the bonding process. |
It is essential to keep in mind that some tarps may require special cleaning, depending on their material. For instance, vinyl and canvas tarps may require different cleaners than polyethylene tarps. Always check the manufacturer’s instructions to determine the appropriate cleaning method before proceeding.
Failing to clean tarps properly can result in a compromised bond that may not hold up against the elements or repeated stress. Properly cleaning the tarps will ensure that the glue adheres correctly and that the bond is as strong as possible.
Conclusion
In conclusion, gluing tarps together is a cost-effective solution for extending the life of your tarps and creating larger coverage areas. However, it is important to take into account the type of tarps being used, the climatic conditions, and the intended use of the tarp before selecting the appropriate glue. Failure to do so can lead to a shorter lifespan of the tarps or the glue not properly adhering to the surface.
To properly glue tarps together, it is important to follow each step in the process, including cleaning the tarps thoroughly, applying the glue evenly, and joining the tarps together with precision. It is also important to use the correct type of glue for the specific type of tarp material being used.
Common mistakes that should be avoided include the use of the wrong type of glue, not allowing enough drying time for the glue to set properly, and not cleaning the tarps properly before starting the gluing process.
Overall, with the right materials and proper technique, gluing tarps together can be a simple and efficient way to extend the life of your tarps and create larger coverage areas. Follow the steps and take the necessary precautions to ensure the best results for your specific needs.
Frequently Asked Questions
Q: Can all types of tarps be glued together?
A: Generally, tarps made of similar materials can be glued together. However, it’s recommended to check the manufacturer’s instructions to ensure compatibility.
Q: Can glueing tarps together be permanent?
A: Yes, depending on the type of glue used, it could be permanent. However, some glue can be removed if necessary.
Q: Can gluing tarps together affect their waterproof properties?
A: It depends on the type of glue used. Some glue may affect the waterproof properties of the tarp while others won’t.
Q: How long does it take for the glue to dry?
A: The drying time of the glue depends on the type of glue used. It could take anywhere from a few hours to several days.
Q: Can gluing tarps together be done without any help?
A: Yes, it can be done without any help.
Q: Can tarps be glued together in any climate?
A: It’s recommended to glue tarps together in a dry climate with a moderate temperature range.
Q: How long can tarps bonded with glue withstand weather conditions?
A: The durability of the bond depends on the type of glue used and the weather or climate conditions. However, a properly glued tarp can withstand most weather conditions for an extended period.
Q: Can glueing tarps together be done with any kind of glue?
A: No, not all types of glue are suitable for tarp bonding. It’s important to use a glue specifically designed for tarps.
Q: Is it possible to remove the glue residue in case of mistakes?
A: Yes, it’s possible to remove the glue residue using a solvent, such as mineral spirits or rubbing alcohol.
Q: Will glueing tarps together affect their flexibility?
A: Depending on the type of glue used, it may affect the flexibility of the tarp. However, some glue is specifically designed to maintain the flexibility of the tarp.