Have you ever wanted to add some structure and stiffness to your fabric projects but didn’t know where to start? Look no further! We’ve got you covered with this DIY guide on how to stiffen fabric with glue. Not only is it a cost-effective method, but it also allows you to customize the level of stiffness to fit your needs. From choosing the right glue to preparing your fabric and work area, we’ve got all the steps laid out for you in a clear and concise manner. So, let’s dive in and transform your fabric projects from flimsy to sturdy.
Choosing the Right Glue for the Job
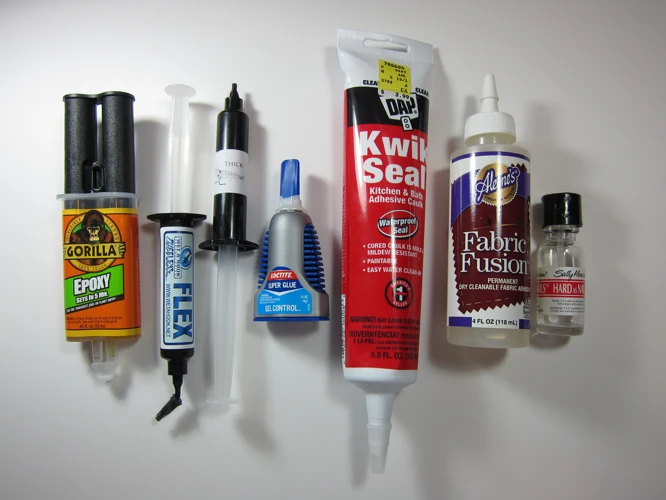
When it comes to stiffening fabric with glue, it’s essential to choose the right glue for the job. The type of glue you use will depend on the project at hand and the fabric you’re working with. You have several options, including white glue, Mod Podge, starch, fabric glue, and even epoxy. Each glue has its unique set of benefits and drawbacks, so it’s crucial to select the right one. Let’s dive into each option and find out more about what type of glue is best for your fabric-stiffening project. If you’re looking for more information on glue for specific projects, consider taking a look at our article on what is fabric glue?.
White Glue
White glue is a popular and affordable option for stiffening fabric. It is widely available and can be found in almost any craft store. White glue is commonly used for a variety of DIY projects and is often called school glue, PVA glue, or Elmer’s glue. This type of glue dries clear and has a strong hold.
| Pros | Cons |
|---|---|
| Easy to find: As mentioned before, white glue can be found in most craft stores, making it a convenient option for anyone who needs to stiffen fabric. | Not waterproof: White glue is not waterproof and should not be used on fabric that will be exposed to moisture or water. |
| Safe: White glue is non-toxic, making it safe to use for all ages. | Takes time to dry: White glue can take a longer time to dry than other stiffening options like starch or fabric glue. |
| Clear finish: Dries clear, so it won’t leave a visible residue on your fabric after it dries. | |
| Can be used on almost any type of fabric: White glue can be used on a wide variety of fabrics, including cotton, linen, and polyester. |
It’s important to note that white glue can make your fabric stiff, but it may not be the best option for all projects. If you’re working on a project that requires a waterproof finish, or if you’re working with delicate fabrics, consider using a different type of glue. Interested in gluing sequins to your newly stiffened fabric? Check out our guide on How to Glue Sequins to Fabric.
Mod Podge
Mod Podge is a popular crafting glue that can be used for fabric stiffening. It is readily available in most craft stores and can be easily applied to your fabric with a brush. Mod Podge comes in a variety of finishes, such as matte or glossy and can be used on a plethora of surfaces. Here is a table to summarize the key points of using Mod Podge for fabric stiffening:
| Advantages | Disadvantages |
|---|---|
| Easy to use with a brush application | Can be expensive compared to other options |
| Dries clear for a professional finish | May not be as strong as other options for heavy fabrics |
| Great for creating a stiff texture without making the fabric completely rigid | May require multiple coats for desired stiffness |
If you decide to use Mod Podge for fabric stiffening it is important to note that, depending on the type of Mod Podge you use, it may not be entirely waterproof. Additionally, if you’re using it for a heavy fabric, like canvas, it may not be the most durable option.
If you need help with other fabric-related projects, be sure to check out our articles on what kind of glue to use on ribbon and how to glue fabric to wood letters.
Starch
Starch is another popular option for stiffening fabric. It is a natural and affordable alternative to the chemical-based glues and can be used on a variety of fabrics. Here are the steps to stiffen fabric with starch:
- Step 1: Mix the starch. Combine a quarter cup of cornstarch with a quarter cup of cold water in a bowl. Stir the mixture until the cornstarch dissolves completely.
- Step 2: Add hot water. Pour two cups of boiling water into the bowl and stir the mixture until it becomes smooth and slightly thick.
- Step 3: Dilute the mixture. Add two more cups of cold water to the mixture and stir well. You should now have a diluted, slightly opaque solution.
- Step 4: Dip the fabric. Submerge the fabric into the starch solution and make sure it is completely coated. Remove any excess starch by squeezing the fabric gently.
- Step 5: Shape the fabric. Stretch the fabric into the desired shape or lay it flat on a covered surface, smoothing out any wrinkles or bubbles.
- Step 6: Let it dry. Allow the fabric to air dry completely. If you’re in a hurry, you can speed up the drying process by using a fan or a hairdryer set on low heat.
Starch is a great option if you want a more natural approach to stiffening fabric. It’s also a good option if you’re working with delicate fabrics that can’t handle the chemicals in glue. However, starch may not be as effective as glue when it comes to creating a stiff shape, so it’s best used for adding a subtle firmness to the fabric.
If you’re unsure which glue or stiffening method to use for your particular fabric, be sure to do a test patch first. Apply a small amount of glue or starch to a corner of your fabric and let it dry completely. Check to see if the fabric feels too stiff or if it retains a natural drape. This will help you avoid any mishaps and ensure that your fabric looks great.
How to glue vinyl fabric is a relevant anchor in this paragraph.
Fabric Glue
Fabric glue is a popular choice for stiffening fabric, especially for those who want to avoid sewing or using a hot iron. Strong and durable, fabric glue is a versatile option that can be used on a variety of fabrics. Unlike some glue types, fabric glue won’t leave any residue, making it perfect for stiffening fabrics that will be on display.
When to Use Fabric Glue
Fabric glue is best for stiffening fabrics that require flexibility, such as cotton and linen. It is also a good option for fabrics that will be exposed to heat or humidity, as fabric glue won’t melt or dissolve like other adhesives might.
Application Process
Before using fabric glue, make sure that your fabric is clean and dry. Then, follow these simple steps:
| Step | Instructions |
|---|---|
| 1 | Lay your fabric on a flat surface with the side you want to stiffen facing up |
| 2 | Squeeze a small amount of fabric glue onto a disposable plastic plate or bowl |
| 3 | Use a foam brush or paintbrush to apply the glue to your fabric, being careful not to over-saturate the fabric |
| 4 | Allow the fabric to dry completely before handling or moving it |
Cautions While Using Fabric Glue
While fabric glue is a safe and easy-to-use option for stiffening fabric, certain precautions must be taken. First, always read the manufacturer’s instructions before using. When using glue, make sure to work in a well-ventilated area and avoid breathing in fumes. Do not let children use fabric glue without adult supervision. Finally, if the glue gets on your skin, rinse with cold water immediately.
Link: /how-to-make-a-no-sew-no-glue-doll-dress/
Epoxy
When it comes to stiffening fabric, epoxy might not be the first option that comes to mind. However, it can work wonders for certain projects. Epoxy is a strong adhesive that is waterproof and heat-resistant. It’s commonly used for bonding materials like metal, wood, and plastic. Here’s how you can use epoxy to stiffen your fabric:
1. Choose the Right Type of Epoxy: There are two main types of epoxy: two-part and one-part. Two-part epoxy consists of a resin and hardener that must be mixed together before use. This type of epoxy is stronger and more durable than one-part epoxy, but it can be tricky to use. One-part epoxy is easier to work with but isn’t as strong as two-part epoxy. Choose the type of epoxy that best suits your project.
2. Mix the Epoxy: If you’re using two-part epoxy, mix the resin and hardener together according to the manufacturer’s instructions. Stir them together until they form a uniform mixture. If you’re using one-part epoxy, shake the bottle well before use.
3. Apply the Epoxy: Lay your fabric flat on a protected surface and apply the epoxy to the area you want to stiffen. Use a small paintbrush or foam brush to spread the epoxy evenly. Make sure you apply the epoxy thinly and evenly. Too much epoxy can make your fabric hard and brittle.
4. Let it Dry: Once you’ve applied the epoxy, let it dry completely. The drying time can vary depending on the type of epoxy you’re using and the humidity in the room. Check the manufacturer’s instructions for the recommended drying time.
5. Sand and Paint: If you want your fabric to have a smooth finish, you can sand it lightly with a fine-grit sandpaper once the epoxy has dried. You can also paint the fabric to give it a different color or texture.
It’s worth noting that epoxy can be difficult to remove if you make a mistake, so make sure you’re careful when applying it. You should also wear gloves and work in a well-ventilated area to avoid inhaling fumes. Remember – epoxy is a strong adhesive that isn’t suitable for all fabrics. Test a small area of your fabric first to make sure it doesn’t discolor or damage the fabric.
Pro tip: If you’re looking to glue polyurethane foam or sponge to your fabric project, epoxy might be a good choice. It’s strong enough to bond these materials together and ensure they stay stiff. However, make sure you test a small area first to ensure that the epoxy won’t dissolve the foam or sponge. Use this tutorial on how to glue polyurethane foam for reference.
Preparing Your Fabric and Work Area
As with any DIY project, proper preparation is key to achieving the desired results. This is especially true when it comes to stiffening fabric with glue. Before diving into the actual process, it’s important to take the time to properly prepare both your fabric and work area. By taking a few simple steps, you can help ensure a successful outcome for your project. So, let’s take a look at what you need to do before diving into the main process.
Washing Your Fabric
Before you dive into stiffening your fabric, it’s important to prepare it properly to ensure the best results. Washing your fabric is a crucial step that should not be skipped. This removes any dirt, debris, or sizing that may interfere with the glue’s ability to adhere to the fabric.
To wash your fabric, start by checking the care label to see if there are any special instructions. If the label allows for washing, proceed to machine-wash the fabric on a gentle cycle using a mild detergent. Avoid using fabric softener as it can coat the fabric fibers and affect the glue’s ability to penetrate.
If the label recommends dry cleaning, take the fabric to a professional cleaner instead. Some fabrics like silk or wool may require special care, so it’s always better to err on the side of caution.
Once your fabric is washed, wring it out gently and dry it thoroughly before moving on to the next step. A wet or damp fabric can cause the glue to become diluted and weaken the stiffness of your final product.
Now that you know how to wash your fabric, it’s time to move on to the next step. But before you do that, you might want to check out some other articles on our website! For example, we have an article on what glue to use on sponge, or if you’re feeling crafty you can read how to make clay glue. If you have a leather jacket that needs patching up, we can also help with how to glue patches on a leather jacket.
Drying Your Fabric
After washing your fabric, it’s important to properly dry it before beginning the stiffening process. Here are some steps to follow for drying your fabric:
- Remove excess water: Before hanging your fabric up to dry, use a clean towel to gently press out any excess water. Avoid wringing or twisting the fabric, as this can cause wrinkles or stretching.
- Squeeze out water: If you’re in a hurry to dry your fabric, you can speed up the process by laying it on a clean towel and rolling it up tightly to squeeze out more water.
- Hang to dry: Once you’ve removed as much water as possible, hang your fabric up to air dry in a well-ventilated area. Avoid direct sunlight, as this can cause colors to fade. If you’re worried about wrinkles, you can hang the fabric over a clothesline or a drying rack to prevent it from touching any surfaces.
- Use a fan: If you need your fabric to dry faster, set up a fan near the drying area to help circulate the air and speed up the drying process.
- Avoid the dryer: While it may be tempting to toss your fabric in the dryer to speed up the drying process, this can cause shrinkage and damage to the fibers, particularly if you’re working with delicate or vintage fabrics.
By properly drying your fabric before stiffening, you’ll ensure that it’s clean, smooth, and ready to take on the stiffening process.
Setting Up Your Work Area
When it comes to stiffening fabric with glue, setting up your work area is crucial for achieving the best results. Here are some important steps to follow:
Cover Your Work Surface: Protect your work surface with a plastic tablecloth or old newspapers to prevent any glue from ruining your furniture.
Gather Your Supplies: Make sure you have all the necessary supplies on hand, including your chosen glue, a bowl for mixing, a spoon for stirring, and a paintbrush for application.
Prepare Your Fabric: Cut your fabric into the desired shape and size before stiffening it. This will make it easier to handle and ensure a more uniform stiffness.
Get Your Gloves On: Put on a pair of disposable gloves to protect your hands from the glue and make it easier to handle the fabric.
Prepare Your Glue Mixture: Follow the instructions on the glue package to mix the appropriate amount of glue with water in the bowl.
Once you have set up your work area, the next step is to start stiffening your fabric. Before you begin, however, it is important to understand which glue is best for your project. Keep reading to learn more about which types of glue are suited for which types of fabrics.
| Supplies | Function |
|---|---|
| Plastic tablecloth or old newspapers | Protect your work surface |
| Bowl for mixing | Mix your chosen glue with water |
| Spoon for stirring | To mix the glue and water evenly |
| Paintbrush | Apply the glue mixture to the fabric |
| Disposable gloves | Protect your hands from the glue |
Stiffening Your Fabric
Now that you have chosen the right glue and prepared your fabric and work area, it’s time to stiffen your fabric! This is the fun part where you get to see your fabric transform into a rigid shape that can hold its own. With the following methods, you can create a variety of stiffness levels depending on your project needs. Let’s dive into the different techniques available for stiffening fabric.
Using White Glue
White glue is a versatile adhesive that can be used to stiffen fabric. Here are the steps to follow when using white glue to stiffen your fabric:
Materials needed:
- White glue
- Water
- A mixing bowl
- A spoon or stirring stick
- A brush or sponge
- Your fabric, cut to the desired shape and size
Steps to follow:
- Mix the white glue with water in a bowl. Depending on the consistency of the glue, you’ll want to approximate a 1:1 ratio of glue and water. Stir the mixture thoroughly until it’s smooth and uniform.
- Spread the mixture onto your fabric with a brush or sponge. Make sure to cover the entire surface of the fabric evenly, taking care not to leave any spots untouched.
- Allow the glue mixture to dry on the fabric. The drying process can take several hours, so be patient. You can speed up the process by placing the fabric in a warm, dry area or by using a hairdryer on a low, cool setting.
- Once the glue is fully dry, your fabric should be stiffened and rigid. If you would like your fabric to be even stiffer, repeat the process with a second coating of glue mixture.
Using white glue is an affordable and easy way to stiffen your fabric, and it yields great results. Just remember to mix the glue and water thoroughly and apply it evenly to the fabric. With a little patience and care, your fabric will be ready to use in no time.
Using Mod Podge
Mod Podge is a popular brand of glue that many crafters use for various DIY projects, including stiffening fabric. To use Mod Podge to stiffen fabric, follow these simple steps:
- Choose the right Mod Podge formula: Mod Podge comes in various formulas, depending on the type of project you are working on. For stiffening fabric, we recommend using Mod Podge Stiffy, which is specifically designed for fabric stiffening.
- Mix the Mod Podge: In a mixing bowl, mix equal parts of Mod Podge Stiffy and water. Stir until the mixture is well-combined.
- Apply the Mod Podge mixture: Dip your fabric into the Mod Podge mixture, making sure that it is completely saturated. Then, wring out the excess Mod Podge mixture from the fabric.
- Shape the fabric: While the fabric is still damp, shape it into the desired shape. You can drape it over a mold, or use your hands to shape it.
- Let it dry: Allow your fabric to dry completely. This may take several hours, depending on the thickness of your fabric and the humidity in the air.
- Repeat if needed: If your fabric is not stiff enough after the first application, repeat the process until you achieve the desired level of stiffness.
By using Mod Podge Stiffy to stiffen your fabric, you can create various DIY projects, such as bowls, ornaments, collages, and more. Plus, Mod Podge is non-toxic and easy to clean up with just soap and water, making it a great choice for family-friendly crafting. Now that you’ve learned how to use Mod Podge to stiffen fabric, give it a try and see what creative projects you can come up with!
Using Starch
When it comes to stiffening fabric, using starch is a popular and affordable option. Starch helps to stiffen your fabric while also keeping it pliable. Here are the steps to follow when using starch to stiffen your fabric:
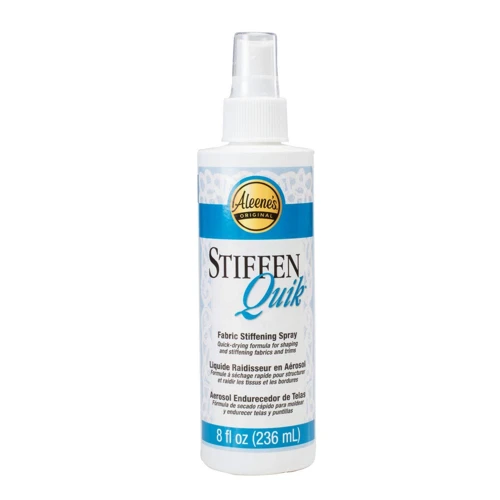
- Step 1: Choose the right starch for your project. Look for spray starch that is specifically designed for fabric. There are various types of spray starch available in the market, such as aerosol cans, pump sprays, and trigger sprays. Make sure to read the label and select the appropriate starch for your fabric.
- Step 2: Prepare your work area. Cover your workspace with a plastic sheet or newspaper to avoid getting starch on your furniture or flooring. Wear old clothes or an apron to protect your clothes from getting stained.
- Step 3: Wash your fabric before applying the starch. This will remove any dirt or residue that could affect the stiffness of your fabric. Use a mild detergent and wash your fabric in cool water. Avoid using fabric softener during washing as it may affect the stiffness of your fabric.
- Step 4: Allow your fabric to dry completely before applying the starch. You can either air-dry your fabric or tumble dry it on a low heat setting.
- Step 5: Once your fabric is dry, lay it flat on your work surface. Shake the starch can well and spray it evenly on both sides of the fabric. Make sure to hold the can at least 8 inches away from the fabric while spraying.
- Step 6: Smooth out any wrinkles or bumps on the fabric by hand. While the fabric is still damp, use your hands to gently smooth out any wrinkles or bumps on the fabric. This will help prevent creases from forming as the fabric dries.
- Step 7: Allow your fabric to dry completely. Depending on the humidity and temperature of your workspace, this can take anywhere from a few hours to overnight. Once dry, your fabric should be stiff and ready to use for your project.
Note: If you need your fabric to be extra stiff, you can apply multiple coats of starch. Just make sure to let each coat dry completely before applying the next one. Starching your fabric regularly can lead to build-up, so avoid using starch on your fabric too often.
Using Fabric Glue
When it comes to stiffening fabric, using fabric glue can be a great option. Fabric glue is specially formulated to work with fabric and can provide a strong and reliable hold. Here are the steps to using fabric glue to stiffen your fabric:
| Steps | Instructions |
|---|---|
| Step 1: | Choose a fabric glue that suits your needs. There are many different types of fabric glue available, each with their own unique properties. Look for a glue that is designed to stiffen fabric and that has good reviews. |
| Step 2: | Prepare your work area by laying down a protective cover. This will help to protect your surfaces from any glue drips or spills. |
| Step 3: | Cut your fabric to the desired size and shape. Remember that the fabric will become stiff after applying the glue, so make sure to accommodate for this in your measurements. |
| Step 4: | Apply the fabric glue to the fabric using a paintbrush or roller. Be sure to follow the instructions on the glue package for application and drying times. |
| Step 5: | Smooth out any wrinkles or bubbles in the fabric using your hands or a flat tool. This will help to ensure that the glue is evenly distributed and that the fabric dries flat. |
| Step 6: | Allow the glue to dry completely. This can take several hours or even overnight, depending on the type of fabric glue you are using. |
| Step 7: | Check the stiffness of the fabric. If it is not as stiff as you would like, repeat the process with another layer of glue. |
When using fabric glue, it is important to carefully follow the instructions on the package. This will help to ensure that your fabric is stiffened properly and that the glue dries clear and does not leave any residue. Fabric glue can be a great option for stiffening fabric, and it is easy to use and relatively inexpensive. Give it a try on your next fabric project!
Using Epoxy
When it comes to stiffening fabric, Epoxy is a relatively uncommon choice, but it can be highly effective for certain projects. Epoxy is a two-part adhesive that creates a tough, durable bond, and it can also harden fabrics and make them more rigid.
Before using epoxy to stiffen your fabric, it’s essential to choose the right type of epoxy. There are various types available, but for fabric stiffening, you should look for a clear, two-part epoxy that is designed for use with porous surfaces. Some popular brands you can try are Gorilla Epoxy or Loctite Epoxy.
Here are the step-by-step instructions for using epoxy to stiffen fabric:
| Materials | Instructions |
|---|---|
| Epoxy resin and hardener | Mix the two components of the epoxy according to the manufacturer’s instructions. Most two-part epoxies come with instructions for mixing, but usually, you will need to mix equal amounts of the resin and hardener. |
| Fabric | Cut your fabric to the desired size and shape, if necessary. Make sure the fabric is clean and dry. |
| Paintbrush | Dip a paintbrush into the mixed epoxy and apply it to the fabric in thin, even coats. Be careful not to apply too much epoxy, as this can cause the fabric to become too stiff and brittle. |
| Plastic wrap or wax paper | Place the fabric on some plastic wrap or wax paper to dry. Make sure the fabric is flat and does not fold or wrinkle while drying. |
| Drying rack | After a few hours, check the fabric to see if it has reached the desired level of stiffness. If it is still too soft, you can add another coat of epoxy and let it dry again. When it’s ready, remove the plastic wrap or wax paper and place the fabric over a drying rack to dry completely before using it in your project. |
Epoxy can be a less popular option because it requires some extra care and can be messy. However, it provides a much stronger and more durable result than most other options. If you’re looking to stiffen fabric to make it more durable or to add structure to a project, epoxy may be the best choice for you.
Drying and Finishing Your Stiffened Fabric
Now that you have successfully stiffened your fabric using one of the methods described earlier, it’s time to complete the process by drying and finishing it. This final step is crucial in ensuring that your stiffened fabric looks and feels the way you want it to. In this section, we’ll go over the different techniques you can use to dry your fabric and the finishing touches you can add to enhance its appearance and durability. So, let’s dive in and learn how to bring your stiffened fabric project to completion.
Air-Drying Your Fabric
One of the easiest ways to dry stiffened fabric is by air-drying. This method does not require any special equipment and can be done in any well-ventilated area. However, it is essential to know the right way to do it to avoid damaging the fabric or encouraging mold growth.
Step 1: After applying the stiffening agent, gently shake off any excess.
Step 2: Lay the fabric flat on a clean and dry surface.
Step 3: Leave the fabric to dry for at least 24 hours. Avoid exposing it to direct sunlight as this can cause the fabric to fade or discolor.
Step 4: Check the fabric after 24 hours. If it feels damp, leave it to dry for another 12-24 hours until it is completely dry.
Step 5: Once the fabric is dry, inspect it for any stiffness. If you need to add more stiffening, repeat the process until you achieve the desired stiffness.
When air-drying your stiffened fabric, keep these precautions in mind.
| Do’s | Dont’s |
|---|---|
| Do spread the fabric out to avoid clumping | Don’t expose the fabric to direct sunlight |
| Do place the fabric on a clean and dry surface | Don’t use a dryer or heat source to dry the fabric |
| Do check the fabric every 24 hours until it is completely dry | Don’t apply too much stiffening agent, which can cause the fabric to become brittle or crack |
By following these steps and precautions, you can air-dry your stiffened fabric with ease and achieve a beautiful, long-lasting result.
Ironing Your Fabric
Once your stiffened fabric has completely dried, it’s time to give it a final touch-up by ironing it. Ironing not only smoothens out any wrinkles but also creates a crisp finish that will last for a long time. Here are the steps you should follow to iron your stiffened fabric:
Step 1: Set your iron temperature to match the type of fabric you are using. If you are unsure about the temperature settings, check the care label for instructions.
Step 2: Lay your stiffened fabric on your ironing board, with the right side facing up.
Step 3: Cover the fabric with a clean, damp cotton cloth. This will help prevent any scorch marks or damage to the fabric.
Step 4: Iron the fabric, applying gentle pressure and moving the iron in a circular motion. Be careful not to use too much pressure, as this can cause the glue to come off.
Step 5: Repeat this process until you have ironed the entire surface of the fabric.
Step 6: Turn the fabric over, so the wrong side is now facing up, then repeat the ironing process, this time without the damp cloth.
Step 7: Once you have finished ironing, let the fabric cool down completely before handling it. This will help set the glue and ensure that the stiffening effect lasts.
By following these simple steps, you can ensure that your fabric has a neat, crisp finish that will make it ideal for a wide range of projects. Remember to always work in a well-ventilated area and to take the necessary safety precautions if you are working with any potentially hazardous materials.
Cutting Your Fabric
After completing the stiffening process, it’s time to cut your fabric to the desired size and shape. Here are some tips to keep in mind when cutting your stiffened fabric:
| Use Sharp Scissors | Be sure to use sharp scissors when cutting stiffened fabric to prevent fraying or damaging the fabric. |
| Draw a Template | If you’re cutting your fabric to a specific shape, draw a template on paper and use it as a guide to cut your stiffened fabric. |
| Measure Twice, Cut Once | Double-check your measurements before making any cuts. You don’t want to accidentally cut too much off your stiffened fabric. |
| Cut Carefully | Take your time and cut slowly to ensure accuracy. It’s better to cut slowly and accurately than to rush and make a mistake. |
| Re-Stiffen if Necessary | If your stiffened fabric becomes softened during the cutting process, reapply your chosen stiffening method to prevent it from fraying or losing its shape. |
Following these steps will help you successfully cut your stiffened fabric to the desired size and shape without damaging it. Once you are finished cutting, you can use your stiffened fabric for a wide range of DIY projects, including bows, flowers, and other home decorations.
Conclusion
After following this DIY guide, you should now have a much better understanding of how to stiffen fabric with glue. Whether you choose to use white glue, Mod Podge, starch, fabric glue, or epoxy, it’s important to understand the pros and cons of each method before beginning your project.
Remember to always prepare your fabric and work area before starting the stiffening process, including washing, drying, and setting up a clean, flat workspace.
When it comes to actually stiffening your fabric, be sure to apply your chosen method evenly and follow the instructions carefully.
Lastly, don’t rush the drying process – allowing your fabric to air dry fully or using a low heat setting while ironing will produce the best results.
By following these steps, you’ll be able to create beautiful, stiffened fabric that can be used for a variety of DIY projects, from home decor to accessories. So unleash your creativity and have fun experimenting with different fabrics and methods!
Frequently Asked Questions
Q: Can any type of glue be used to stiffen fabric?
A: No, not all glue types are suitable for stiffening fabric. The best types of glue for this purpose are white glue, Mod Podge, starch, fabric glue, and epoxy.
Q: What is the difference between white glue and Mod Podge?
A: White glue is a basic adhesive, while Mod Podge is a type of water-based sealer, glue, and finish. Mod Podge is often used in crafting and decoupage projects.
Q: How much starch should I use for stiffening fabric?
A: The amount of starch you should use depends on the size of the fabric and how stiff you want it to be. As a general rule, use 1 cup of starch for every 1 yard of fabric.
Q: Can I use spray starch to stiffen fabric?
A: Yes, spray starch can be used to stiffen fabric, but it is not as effective as other methods. It works best for small areas or pieces of fabric rather than large sections.
Q: Is it necessary to wash the fabric before stiffening it?
A: Yes, it is recommended that you wash and dry the fabric before stiffening it. This will remove any dirt or residue that may interfere with the stiffening process.
Q: Can I use a hairdryer to speed up the drying process?
A: Yes, you can use a hairdryer on a low or cool setting to help speed up the drying process. However, be careful not to overheat the fabric.
Q: Can I iron the fabric after stiffening it?
A: Yes, you can iron the fabric after it has been stiffened. This will help to smooth out any wrinkles or creases that may have formed during the drying process.
Q: Can stiffened fabric be washed after it has been finished?
A: In most cases, yes. However, some methods of stiffening may not hold up well after repeated washing. It is best to test a small area of the fabric first.
Q: Can I cut the fabric before or after stiffening it?
A: It is best to cut the fabric before stiffening it. Cutting the fabric after it has been stiffened may cause it to crack or break.
Q: Can I use stiffened fabric for sewing or quilting projects?
A: Yes, stiffened fabric can be used for a variety of sewing or quilting projects, but it may be more difficult to work with than unstiffened fabric.