Intro
When it comes to crafting and DIY projects, one of the most important things to consider is choosing the right type of glue for the materials you’re working with. This is especially true when it comes to gluing sponge, as not all glues are created equal. Choosing the wrong glue can result in a weak bond or damage to your materials. In this article, we’ll explore the different types of glue that can be used on sponge, and provide tips and recommendations for choosing the best option for your project. Whether you’re working on a crafting project or need to repair a sponge item, this guide will help you make an informed decision. Don’t forget to check out our related articles for information on gluing other materials, such as wood, paper, and denim.
Why is choosing the right glue important?
Choosing the right glue is crucial when working with sponge materials. Using the wrong type of glue can result in a weak bond, causing the sponge to come apart. It is important to consider the type of sponge being used as well as the specific project requirements before selecting a glue. Some glues work better on certain types of sponge or may have stronger holding power than others.
Using the wrong glue can also damage the sponge material, causing it to break down or become discolored. It’s crucial to choose a glue that won’t damage the sponge and will provide a strong, long-lasting bond. The wrong type of glue can also affect the appearance of the project, leaving visible residue or creating an unsightly finish.
One example of the importance of choosing the right glue for sponge is when gluing vinyl to foam. Using the wrong glue can cause the vinyl to wrinkle or peel off, ruining the project. However, with the right type of glue, such as a vinyl cement adhesive, a strong bond can be achieved without damaging the foam. Selecting the right glue not only ensures successful project completion but also prevents any unnecessary damage or costly repairs.
Selecting the right glue is essential for any sponge-related project. It ensures a strong bond, protects the sponge material, and gives the project a professional finish. Consider the type of sponge being used and the specific project requirements before choosing a glue. Take the time to do some research and choose a high-quality glue that will provide a strong, long-lasting bond. For example, if you’re gluing fabric to rubber, you may want to consider using a specialized glue designed for that specific purpose. Check out this helpful guide on how to glue fabric to rubber.
Understanding Sponge Materials
When it comes to crafting or DIY projects, sponge materials can be quite versatile. However, using the right type of glue is essential for ensuring the project’s success and longevity. Understanding sponge materials is the first step to choosing the appropriate adhesive for the project. Different types of sponge may require different types of glues, depending on their density and texture. Whether you’re using sponge for upholstery, painting, or any other project, it’s important to know the types of sponge available and the challenges they present. To learn more about gluing sponges, check out our articles on gluing vinyl to foam, choosing the best glue for upholstery, making starch glue, and gluing different types of cloth.
What types of sponge are common for crafting and other projects?
Sponges are incredibly versatile materials that are commonly used in a variety of crafting and DIY projects. From creating unique textures on paintings to making costumes and accessories, sponges are readily available and easy to work with. When it comes to selecting the right type of sponge for your project, there are a few factors to consider.
1. Cellulose Sponges
Cellulose sponges are the most common type of sponge that can be found at grocery stores, hardware stores, and other retailers. They are typically made from natural materials, such as wood pulp, and are biodegradable. Cellulose sponges are very absorbent, which makes them perfect for cleaning up spills or applying paint to surfaces.
2. Sea Sponges
Sea sponges are natural sponges that are harvested from the ocean floor. They are available in a wide range of shapes and sizes and can be used for a variety of different crafting projects. Sea sponges are particularly useful for creating textures in paintings, as they can be dipped in paint and then dabbed onto the canvas for a unique effect.
3. Polyurethane Foam Sponges
Polyurethane foam sponges are a popular choice for many DIY and crafting projects. They are available in a range of densities and can be easily cut into any shape you need. These sponges are particularly useful for creating custom cushions, pillows, and other soft furnishings.
4. Cosmetic Sponges
Cosmetic sponges are small, disposable sponges that are commonly used for applying makeup. While they are not as versatile as other types of sponges, they can still be useful for a variety of different crafting projects. For example, they can be used for applying small amounts of glue or for dabbing paint on a surface.
5. Cleaning Sponges
Cleaning sponges, such as Scotch-Brite sponges, are designed for heavy-duty cleaning tasks. They are made with abrasive materials that can help to remove tough stains and grime. While they are not typically used for crafting projects, they can be useful for cleaning up messes and spills in your workspace.
When selecting a sponge for your project, consider the type of material you are working with, as well as the effect you want to achieve. Different types of sponges will work best for different tasks. For example, a sea sponge might be perfect for creating organic textures in a painting, while a polyurethane foam sponge might be better suited for creating a custom cushion for a piece of furniture.
Internal link to – /how-to-make-fabric-paint-with-glue/
What challenges does sponge pose?
Sponges are very porous materials that present some challenges when it comes to gluing. The material’s porosity makes it very difficult to get the glue to adhere to the surface properly. Sponges tend to expand and contract, which can weaken the bond between the material and the glue over time. It can be challenging to glue sponges to other materials, such as fabric, plastic or wood.
To give a better understanding of what challenges sponge poses, let’s take a closer look at the properties of this material using a table:
| Challenges of Sponge | Description |
|---|---|
| Porosity | Sponge materials are very porous, which makes it difficult to get glue to adhere to the surface properly |
| Expansion and Contraction | The sponge can expand and contract, which can weaken the bond between the material and glue over time |
| Difficulty Gluing to Other Materials | It can be challenging to glue sponges to other materials, such as fabric, plastic or wood |
To overcome these challenges, it’s important to choose the right glue and application method based on the type of sponge and the materials you are working with. By understanding the properties and challenges of sponge material, you can find the best adhesive to create a strong and long-lasting bond. If you want to glue photos to canvas using a sponge, check out our article “How to Glue Photos to Canvas” for more information.
Types of Glue for Sponge
When it comes to using glue on sponge materials, not all adhesives are created equal. Choosing the right type of glue for your sponge project is crucial to ensuring a strong and long-lasting bond. There are several types of glues available on the market, each with its own unique properties and applications. Let’s take a closer look at some of the most popular glue options for sponge and what makes them stand out. By the end of this article, you’ll have a better understanding of which glue type is best suited for your sponge project.
1. Contact Cement
Contact cement is a popular choice for gluing sponge materials. This type of glue is often used for projects that require a strong bond. Contact cement is a type of adhesive that is applied to both surfaces being joined. Once the glue dries, it forms a strong bond.
Advantages: Contact cement is ideal for gluing sponge materials together, as it creates a bond that is both strong and durable. This type of glue is also waterproof, making it ideal for projects that will be exposed to moisture. Contact cement can also be used on a variety of different surfaces, including wood, metal, plastic, and more.
Disadvantages: One disadvantage of using contact cement is that it can be messy to work with. This type of glue requires careful application, as it can easily get on other surfaces. It is also important to use contact cement in a well-ventilated area, as the fumes can be harmful if inhaled.
Table:
| Advantages | Disadvantages |
|---|---|
| Creates a strong and durable bond | Can be messy to work with |
| Waterproof | Requires careful application |
| Can be used on a variety of surfaces | Fumes can be harmful if inhaled |
When using contact cement on sponge materials, it is important to follow the manufacturer’s instructions carefully. Be sure to apply the glue only to the surfaces being joined, and avoid getting it on other surfaces. It is also important to allow the glue to dry fully before bonding the two surfaces together. With proper application, contact cement can be a strong and effective choice for gluing sponge materials together.
2. Epoxy
One of the most popular and versatile types of glue for sponge is epoxy. Epoxy is a two-part adhesive that consists of a resin and hardener that are mixed together before use. When the two parts are combined, they create a chemical reaction that hardens the adhesive and creates a strong bond.
Here are some of the advantages and disadvantages of using epoxy on sponge:
| Advantages | Disadvantages |
|---|---|
|
|
If you decide to use epoxy on your sponge project, it’s important to remember to mix the two parts thoroughly before applying it to the sponge. You should also be aware that epoxy can be difficult to remove once it has hardened, so it’s important to use it carefully and avoid getting it on surfaces or areas where it’s not intended to be used.
Epoxy is a reliable and durable option for gluing sponge materials together. While it may take longer to dry and require some extra care during application, it can provide a strong, lasting bond that is resistant to a variety of environmental conditions.
3. Super Glue
When it comes to bonding sponge materials, super glue can be a quick and convenient option. Also known as cyanoacrylate, super glue is a fast-drying adhesive that forms a strong bond between the surfaces it is applied to. However, there are a few things to keep in mind when using super glue on sponge.
One downside is that super glue can be brittle, which means it may not be the best choice for materials that will be under a lot of stress or movement. Another thing to consider is that not all super glues are created equal. Some are better suited for porous materials like sponge. For example, cyanoacrylates with a low viscosity are able to penetrate sponge materials better, resulting in a stronger bond.
It’s also important to note that super glue can be difficult to remove from skin and other surfaces, so be sure to take proper precautions when using it. Using gloves or protective gear can prevent accidental skin bonding.
Here is a table comparing the pros and cons of using super glue on sponge materials:
| Pros | Cons |
|---|---|
| Fast-drying | Brittle bond |
| Forms a strong bond | Difficult to remove from skin |
| Convenient to use | Not all types are suitable for sponge |
Super glue can be a good option for bonding sponge materials as long as you choose the right type and take necessary safety precautions. It’s always important to consider the specific needs of your project and the properties of the materials you are working with when selecting a glue.
4. Silicone Adhesives
When it comes to bonding sponge materials, using silicone adhesives can be a great option. These adhesives are known for their strong bonding ability and versatility. They can be used on a wide range of materials including rubber, plastic, metal, and of course, sponge.
Advantages of Silicone Adhesives:
| Advantages | Explanation |
|---|---|
| Waterproof | One of the best things about silicone adhesives is that they are completely waterproof. This means that they can be used for projects that will be exposed to moisture or even submerged in water. |
| Flexible | Silicone adhesives remain flexible even after they have dried, which can be beneficial for projects where movement or flexibility is required. |
| Temperature resistant | These adhesives can withstand extreme temperatures, both hot and cold. This makes them ideal for projects that will be exposed to outdoor elements such as sun, rain, or snow. |
| Non-toxic | Silicone adhesives are non-toxic and safe to use on projects that involve skin contact or even on items that will be used for food handling. |
Disadvantages of Silicone Adhesives:
Despite their many benefits, silicone adhesives do have a few disadvantages. One of the main drawbacks is that they can take a long time to dry, sometimes up to 24 hours or more. Additionally, they can be messy and difficult to remove once they have cured.
How to Apply Silicone Adhesive on Sponge:
Applying silicone adhesive to sponge materials requires careful preparation. The surface of the sponge should be clean and dry before application. It is important to note that silicone adhesives do not bond well with porous materials, so make sure to apply the adhesive in a thin layer to avoid any excess.
To apply the adhesive, first, squeeze a small amount onto a piece of cardboard or other disposable material. Then, use a small brush or applicator to spread the adhesive onto the sponge. Be sure to apply the adhesive evenly, avoiding any clumps or bumps.
Conclusion:
Silicone adhesives can be an excellent choice for bonding sponge materials. Whether your project requires a waterproof, flexible, temperature-resistant, or non-toxic bond, silicone adhesives deliver. Be sure to consider their slower drying time and potential messiness when deciding if they are the right choice for your project.
5. Hot Glue
Hot glue is a popular and versatile adhesive that is often used for crafting and DIY projects. It is a type of thermoplastic adhesive that melts when heated and solidifies when cooled, creating a strong bond. Here are the key details about hot glue that you need to know:
| Pros | Cons |
|---|---|
| Quick and easy: Hot glue dries in just a few seconds, making it ideal for projects that require a fast turnaround time. | Not ideal for high-stress applications: Although hot glue forms a strong bond, it is not suitable for applications that require long-term durability or that will be exposed to high levels of stress. |
| Easy to use: Hot glue is available in convenient sticks that can be inserted into a glue gun and quickly melted for use. | Not waterproof: Hot glue is not resistant to water, so it may not be the best choice for projects that need to be waterproof or exposed to moisture. |
| Works on various materials: Hot glue can be used on a wide range of materials, including fabric, foam, plastic, wood, and more. | Not suitable for high-temperature applications: Hot glue can begin to soften and lose its bond strength at high temperatures. |
When using hot glue on sponge materials, there are a few tips to keep in mind. First, be sure to select a low-temperature glue gun to avoid damaging the sponge. Second, apply the glue evenly to the surface of the sponge and press the two surfaces together firmly to ensure a strong bond. Finally, avoid using hot glue on thin or delicate sponges, as the heat from the glue gun may cause them to melt or deform.
Hot glue is a flexible adhesive that is ideal for many crafting and DIY projects. However, it may not be the best choice for applications that require long-term durability or exposure to moisture or high temperatures.
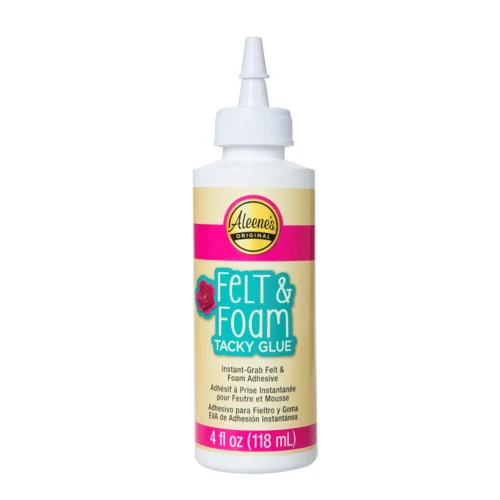
6. Fabric Glue
Fabric glue is another option for bonding sponge materials. This type of glue is specifically designed for use on fabrics, and generally comes in a liquid form. Some popular brands include Aleene’s Original Tacky Glue and Fabri-Tac.
Advantages:
- Fabric glue dries clear, making it a good choice if you don’t want the adhesive to be visible.
- It also has a flexible bond, which is important for materials that will bend or flex.
- Fabric glue is also machine washable and dryable, making it ideal for projects that will be exposed to moisture or frequently washed.
Disadvantages:
- While fabric glue is designed for use on fabrics, it may not be as strong on sponge materials as other types of glue.
- It may also take longer to dry than some other types of glue.
- It is not ideal for use with heavy or thick materials.
When using fabric glue on sponge, it is important to follow the manufacturer’s instructions carefully. Apply the glue in a thin, even layer to both surfaces you want to bond together. Press the surfaces firmly together and allow the glue to dry completely before handling the project.
Tip: To ensure a strong bond, consider using a clamp or heavy object to keep the surfaces pressed together while the glue dries. This will help ensure a tight, secure bond that will hold up over time.
7. Foam Adhesive Spray
Foam adhesive spray is a popular option when it comes to adhering sponge materials. This type of glue is generally designed to specifically adhere to foam and porous surfaces, making it an ideal choice for projects involving sponges.
Foam adhesive spray is easy to use and can cover large surface areas quickly and evenly. It is also considered a relatively stronger glue compared to some other types of adhesives, meaning that it can create a secure bond that will hold up well over time.
However, it is important to note that there are some downsides to using foam adhesive spray on sponge materials. For one, the spray can be quite messy, which can result in overspray or uneven coverage – especially if you’re not careful. Additionally, once it is applied, foam adhesive spray can be difficult to remove or reposition. This is because the glue is designed to create a permanent bond, which can be challenging to undo once it has dried.
To help you decide if foam adhesive spray is the right choice for your sponge project, here is a table outlining its pros and cons:
| Pros | Cons |
|---|---|
| Easy to use | Messy application |
| Creates a strong bond | Difficult to remove or reposition |
| Can cover large surface areas quickly and evenly |
Foam adhesive spray can be a useful option for certain sponge projects, particularly those that require a strong and permanent bond. However, it is important to be aware of its drawbacks, particularly when it comes to potential mess during application or the difficulty of making adjustments after the fact. If you do choose to use foam adhesive spray, be sure to follow the manufacturer’s instructions carefully and work in a well-ventilated area to avoid inhaling any fumes.
Choosing the Right Glue for Your Project
Now that we understand the types of glue available for sponge and their respective strengths and weaknesses, it’s important to choose the right glue for your specific project. This can be a perplexing decision, but considering a few key factors can make it easier. By taking the time to carefully evaluate these considerations and methodically apply your chosen glue, you’ll be rewarded with a secure and long-lasting bond that can withstand the challenges that working with sponge often poses. Let’s dive into the factors you should consider when selecting a glue for your sponge project.
Factors to consider
When choosing the right glue for your sponge project, there are several factors to consider. Here are some important ones:
- Type of sponge: The type of sponge you are using is important as it affects the level of absorbency, texture, and surface area. For example, natural sponges are more porous and may require a stronger adhesive compared to synthetic sponges.
- Surface: Consider the surface the sponge will be adhered to. Is it porous or non-porous? Will it be exposed to moisture or extreme temperatures? These factors can impact the bond strength and durability of the glue.
- Strength: Depending on the weight and size of the project, you may need a stronger glue to ensure a secure bond.
- Drying time: The drying time of the glue is important to consider, especially if you are working on a time-sensitive project.
- Flexibility: If the sponge will be bent or stretched, you need a glue that can withstand the movement without breaking the bond.
- Color: Some glues may dry clear, while others might be tinted. Consider the color of the glue to ensure it matches the sponge and surface you are working with.
- Toxicity: Always consider the potential toxicity of the glue you are using and ensure proper ventilation when using it.
Considering these factors will help you choose the right glue for your sponge project, ensuring a strong and lasting bond. Always follow the manufacturer’s instructions for best results, and test the glue on a small, inconspicuous area before applying it to the entire project.
How to apply glue on sponge materials
When it comes to applying glue on sponge materials, there are some important tips to keep in mind. Here are some steps to follow for successful bonding:
- Clean the surface: Before applying any glue on the sponge material, ensure that the surface is clean, dry and free from any dirt, dust or debris.
- Choose the right glue: Picking the right glue for the sponge material is crucial. As discussed earlier, there are several types of glue available for different types of sponges.
- Apply the glue: Depending on the type of glue being used, apply a small amount onto one of the surfaces that will be bonded together. Be sure to follow the manufacturer’s instructions for application.
- Press the sponge: Once the glue is applied, carefully press the two surfaces together. Apply pressure for the recommended amount of time to ensure a strong bond.
- Allow time to dry: Once the two surfaces are bonded, allow ample time for the glue to dry completely. Avoid moving or disturbing the sponge material until the glue has fully cured.
It’s important to note that the success of the bond will depend on the type of glue used, the surface preparation, and the quality of the sponge material. Always read the instructions provided by the manufacturer before using any glue, and take proper safety precautions. By following these steps, you can ensure a strong and long-lasting bond between sponge materials.
Conclusion
After considering the different types of glue options available for sponge materials, it’s clear that the most important factor in choosing the right glue is understanding the nature of the sponge material and the specifics of your project.
It’s important to consider the purpose of the project, as well as the durability and strength required of the bond. For example, a craft project may only require a temporary hold, while a household repair project may require a more long-lasting bond.
Additionally, the texture and density of the sponge material must be taken into account. Some types of sponges are more porous and absorbent, while others have a smoother surface. This will affect the type of glue that will work best for bonding the material properly.
It’s also crucial to follow the manufacturer’s instructions for each type of glue. This will ensure that the glue is applied correctly and that the bond is strong enough for the intended use.
In general, it’s recommended to use a glue that is specifically designed for porous materials, like sponges. This will ensure that the bond is strong and long-lasting. Avoid using glue that is not specifically designed for porous materials as it will not be effective.
In conclusion, choosing the right glue for sponge materials requires careful consideration of the project’s purpose, the texture and density of the sponge material, and manufacturer’s instructions. By following these guidelines, you can ensure that your project is successful and the bond between the sponge and any other materials will be strong and long-lasting.
Frequently Asked Questions
1. Can I use regular glue on sponge?
Regular glue is not recommended for sponge materials as it does not provide enough adhesion and may not hold up over time.
2. What is the best glue for sponge?
The best glue for sponge will depend on the specific project and the type of sponge being used. However, contact cement, epoxy, and silicone adhesives are often good choices.
3. Can I use fabric glue on sponge?
Fabric glue can be used on some types of sponge, but it may not work well on all materials. It’s important to test the glue on a small, inconspicuous area first before applying it to the entire surface.
4. Will hot glue work on sponge?
Hot glue can work on some types of sponge, but it may not provide the strongest hold and may not work well for heavy-duty projects.
5. How do I apply contact cement to sponge?
Contact cement should be applied to both the sponge and the surface it will be adhered to. Allow the glue to dry for several minutes before pressing the two surfaces together.
6. Can I use foam adhesive spray on sponge?
Foam adhesive spray can be used on certain types of sponge, but it’s important to choose an adhesive spray specifically designed for foam materials and to follow the instructions carefully.
7. Will silicone adhesive hold up to water exposure on sponge?
Silicone adhesive is often waterproof and can hold up well to water exposure on sponge materials.
8. What types of sponge are best for crafting projects?
Common sponge materials for crafting projects include craft foam, sponge sheets, and natural sea sponge.
9. Can I use super glue on sponge?
Super glue can work on some types of sponge, but it may not be the best choice for larger or heavier objects as it may not provide enough strength and hold.
10. How long does it take for epoxy to dry on sponge?
The drying time for epoxy on sponge will depend on the specific product being used. However, most epoxy will dry within 24 hours. It’s important to follow the manufacturer’s instructions for best results.