As you gaze out of your window, have you ever wished to add a touch of elegance and grace to it? Look no further than gluing lace onto your window! It may seem like a daunting task, but with the right materials and a step-by-step guide, anyone can do it. In this article, we will provide you with all the necessary information on how to properly glue lace to a window, ensuring that it looks flawless and beautiful. So, grab your materials and prepare yourself for a fun and creative project!
Materials Needed
Before you begin gluing lace to a window, it’s important to gather all the necessary materials. First, you’ll need your piece of lace. You can use any type of lace, but it’s recommended to use a cotton or polyester lace as they tend to hold up better over time.
To clean the window, you’ll need a microfiber cloth or paper towels and a window cleaner. Alternatively, you may use a mixture of vinegar and water for a more natural cleaning solution.
To measure and cut the lace to fit your window, you’ll need a measuring tape and a pair of scissors. Be sure to measure the dimensions of your window accurately, taking into account any curves or corners that may require extra lace.
Next, you’ll need to choose the right type of glue for your project. Popular options include liquid glue, spray adhesive, and glue dots. Liquid glue is a good choice for adding lace to irregularly shaped windows, while spray adhesive works well for larger surfaces. Glue dots can be a good option for smaller lace pieces.
In addition to the above items, you may also want to have a ruler or straight edge on hand to help with measuring and cutting. It can also be helpful to have a craft knife for trimming any excess lace.
Remember to prepare your work area by covering it with a drop cloth or old towels to prevent any glue from getting on your surfaces. Taking the time to gather all the necessary materials beforehand will make the gluing process smoother and more efficient.
If you’re interested in learning about how to glue feathers to paper or how to glue crystals to fabric, check out some of our other helpful articles on the topic.
Preparing the Window
Before gluing lace to a window, it’s necessary to prepare the window properly to ensure that the lace adheres well and looks neat once it’s glued on. This is an important step that should not be skipped. Similar to other craft projects, proper preparation is the key to a successful outcome. In this section, we’ll cover everything you need to know to prepare your window before gluing the lace on. From cleaning the window to measuring the lace to fit properly, we’ll help you achieve the best possible results. Let’s get started! If you need some inspiration for your next crafting project after finishing with gluing lace, check out how to glue crystals to fabric.
Clean the Window
Before you glue the lace to the window, it’s very important to clean the window properly. This step ensures that the lace will adhere properly to the surface and also allows the lace to be fully visible through the window.
To start, gather the necessary cleaning supplies such as a non-ammonia glass cleaner, paper towels, and a microfiber cloth. You can also use a mixture of vinegar and water if you prefer a natural cleaning solution.
Next, wipe down the window with your chosen cleaning solution and paper towels. Be sure to pay special attention to the edges of the window where the lace will be glued. Any dirt or grime left on the window can prevent the glue from adhering correctly.
After wiping the window down with a paper towel, use a microfiber cloth to give the window a final clean and ensure that it’s completely dry before beginning to apply the glue. If the window is not dry, the glue may not adhere as well and the lace may not stick properly.
Once the window is properly prepped and dry, you’re ready to start measuring and cutting the lace to fit the window. If you’re unsure how to measure the lace, check out our previous step on “How to Glue Feathers to Paper” for helpful tips and tricks.
Measure the Lace
Before gluing the lace to the window, you need to measure the lace to make sure it will fit properly. The first step is to measure the width and height of the windowpane where you plan to glue the lace. Use a tape measure to get an accurate measurement. Once you have the measurements, add an inch or two to each side to account for any mistakes and to ensure there is enough lace to glue.
Pro Tip: It’s always better to have too much lace than too little, so be generous when adding extra inches.
After measuring the window, measure the lace itself. You can do this by placing the lace over the windowpane and cutting it to size, leaving an extra inch or two on each side. This method works best if your lace has a simple pattern and if you have a steady hand.
If you’re using a more intricate lace pattern or are unsure of your cutting abilities, lay the lace flat on a table and use a ruler to measure its width and length. Mark each side of the lace with a pencil or a piece of tape to show where to cut. Then, cut the lace carefully using fabric scissors.
Pro Tip: Be sure to use sharp scissors so that the lace doesn’t fray or tear.
Once you have the lace measured and cut to size, lay it over the windowpane to make sure it fits properly. If it’s too big, trim it down until it fits, keeping in mind that you may need to cut off excess lace later in the process.
Now that you’ve measured and cut your lace, you’re ready to start gluing it to the window. But first, let’s discuss the different types of glue you can use for this project. For more information on selecting the right glue for your project, check out our article What Glue to Use for Scrapbooking.
Choosing the Right Glue
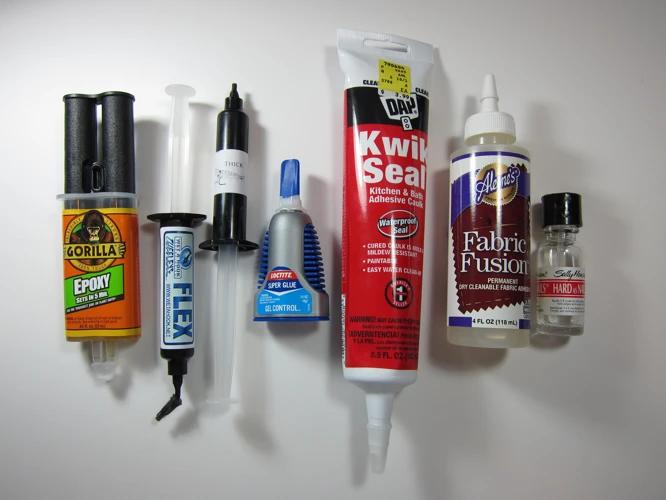
When it comes to gluing lace to a window, choosing the right glue is essential. You want a strong adhesive that will withstand the test of time and hold up against potential wear and tear. Additionally, using the wrong type of glue could potentially damage both the lace and the window. There are several options when it comes to gluing lace to a window, each with their own unique benefits. Let’s explore some of the different types of glue you can use and which one might be best for your project.
Liquid Glue
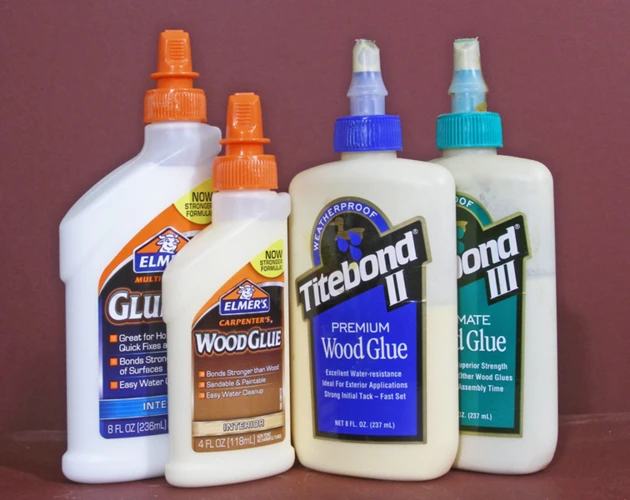
One option for attaching lace to a window is using liquid glue. This can be effective if you are working with a small or intricate piece of lace. Liquid glue allows for precision and control over where the glue is applied and allows for some repositioning time before it sets. However, it’s important to choose a glue that is safe for both the lace and the window. E6000 glue is a popular choice for both fabric and glass and could work well in this situation.
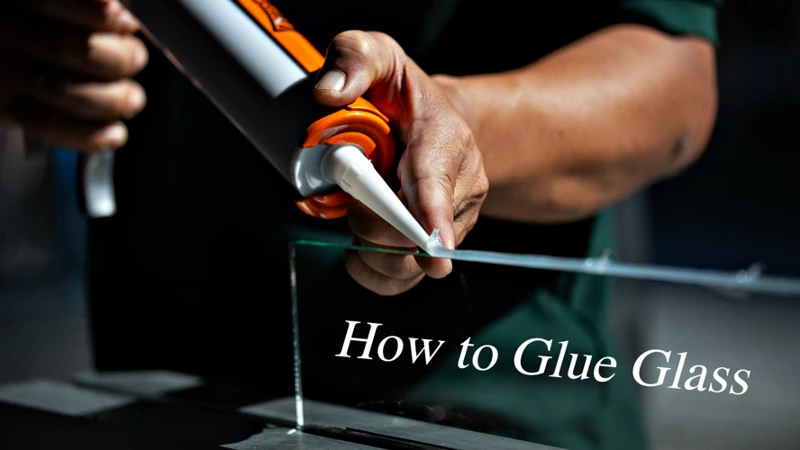
Spray Adhesive
Another option is spray adhesive. This type of glue can be helpful when working with larger pieces of lace, as it evenly distributes the adhesive across the surface. However, it’s important to use a spray adhesive that is safe for the materials you are working with. It’s also important to work in a well-ventilated area when using spray adhesive.
Glue Dots
Glue dots are a great alternative for those who want a strong adhesive but are concerned about the messiness of liquid glue. They are easy to apply, peel, and stick, and can be a good option for smaller pieces of lace. However, it’s important to note that glue dots may not be strong enough for larger pieces of lace or windows exposed to extreme temperatures.
As you can see, there are several different types of glue that can be used when attaching lace to a window. Ultimately, the best type of glue for your project will depend on the size of the lace, the complexity of the design, and the type of window you are working with. If you need additional guidance on which glue to use, try consulting an expert or visiting a craft store for recommendations.
If you’re interested in learning how to use E6000 Glue on fabric, check out this guide.
Liquid Glue
When it comes to gluing lace to a window, one of the most important aspects is choosing the right glue. Liquid glue is a popular choice for those who want a strong hold, but also want to avoid using hot glue. There are many different types of liquid glue available, but not all are suited to gluing lace to a window.
One of the best types of liquid glue for this purpose is clear tacky glue. This type of glue dries clear and has a strong hold, making it perfect for holding delicate lace in place on a window. Another great option is clear craft glue, which is also designed to dry clear and is perfect for use on a variety of materials, including lace.
It’s important to note that when using liquid glue, you should apply it sparingly to avoid creating a mess. A small amount of glue is usually enough to create a strong hold, so there’s no need to use too much.
Here are some pros and cons of using liquid glue for gluing lace to a window:
| Pros | Cons |
|---|---|
| Creates a strong hold | Can be messy if too much is applied |
| Dries clear | Takes longer to dry than hot glue |
| Easy to remove if needed | May not be as strong as hot glue |
Liquid glue is a great option for those who want a strong hold without the use of hot glue. With the right type of liquid glue, you can create a beautiful lace design on your window that will last for a long time. If you are looking for more information on gluing different types of materials, check out our article on what to use instead of fabric glue.
Spray Adhesive
One popular option for gluing lace to a window is using spray adhesive. Spray adhesive is a fast-drying, clear adhesive that can bond a wide variety of lightweight materials, including lace, to a window surface.
To use spray adhesive, you’ll need to take a few precautions to avoid making a mess. Work in a well-ventilated area, or even outside if possible, to avoid inhaling fumes. Cover any nearby surfaces you don’t want to get adhesive on with newspaper or a drop cloth.
Once you have taken these precautions, follow these steps to glue lace to a window using spray adhesive:
| Step | Description |
|---|---|
| 1 | Lay the lace fabric flat on a clean surface, such as a large piece of cardboard. |
| 2 | Hold the spray adhesive can about 6-8 inches away from the lace fabric and spray a light, even coat of adhesive onto the back of the fabric. |
| 3 | Carefully position the lace fabric onto the window surface, and press firmly to adhere the lace to the window. |
| 4 | Trim any excess lace from the window edges, if needed. |
Spray adhesive is a good choice for gluing lace to a window because it creates a strong, yet flexible bond that won’t yellow or crack over time. Just be sure to follow the manufacturer’s instructions and use it in a well-ventilated area for best results.
If you’re looking for other adhesive options, consider using foam adhesive or tacky glue as an alternative. Each option has its own strengths and weaknesses, so it’s important to consider your project needs before choosing an adhesive.
Glue Dots
Glue dots are another option for attaching lace to a window. They are small adhesive circles that come in a roll or sheet. Glue dots are a great option if you are worried about using liquid glue on your window, or if you do not want to deal with the mess of spray adhesive.
To use glue dots, peel one dot off the roll or sheet and place it on the back of the lace. Repeat this process, spacing the dots out evenly around the edges and center of the lace.
Press the lace firmly onto the window, making sure it is straight and wrinkle-free. Use a credit card or your fingers to smooth out any bubbles or wrinkles in the lace.
If you need to reposition the lace, simply peel it off the window and reapply with new glue dots. When you are satisfied with the placement of the lace, trim off any excess with scissors.
One advantage of using glue dots is that they can be removed easily without damaging the window or lace. Simply peel the lace off the window and roll the glue dots off with your fingers.
However, it is important to note that glue dots may not hold up as well as liquid glue or spray adhesive over time. If you live in an area with extreme temperatures or high humidity, you may need to reapply the glue dots more frequently.
Glue dots can be a convenient and mess-free option for attaching lace to a window. While they may not provide as strong of a hold as other types of glue, they are easy to use and remove without damaging your materials.
Glueing the Lace to the Window

Now that you have your lace cut to the right size and have chosen the appropriate adhesive, it’s time for the main event: gluing the lace to the window. Properly gluing the lace to the window is the key to achieving a beautiful and long-lasting result. In this section, we’ll go over the step-by-step process for applying glue to the lace and window, as well as some helpful tips for keeping the lace smooth and wrinkle-free. So grab your chosen adhesive and let’s get started! If you’re interested in other types of gluing projects, check out our article on how to glue tarps together.
Applying the Glue
When it comes to applying glue to the lace, it is important to use the right amount to ensure that it sticks properly to the window. Start by applying a small amount of glue onto the window using a glue applicator or a small paintbrush. You want to create a thin layer of glue that is just enough to hold the lace in place, but not too much that it will cause the fabric to become soggy or the glue to spread out beyond the edges of the lace.
Be sure to apply glue to the edges of the lace as well, since this is often the area that may come undone first. Take your time and work in small sections to prevent the glue from drying out before you have a chance to place the lace on the window. If you are using a spray adhesive, be sure to follow the manufacturer’s instructions and allow proper ventilation to avoid inhaling any fumes.
Remember, different types of glue will require different application methods. If you are using liquid glue, you may need to work in small areas and apply the glue with a brush or applicator, while glue dots are often easier and less messy to apply directly onto the lace itself. Take care not to apply too much pressure, which could cause the lace to wrinkle or the glue to spread.
One alternative to traditional liquid glue is to use self-adhesive parchment paper. Simply cut the paper to the size of the lace and place it on the backside. This may be an especially useful alternative if you are new to working with glue or have concerns about using chemicals in your project.
Proper application of glue is crucial to the success of your project. Be sure to experiment with different types of glue and application methods to find what works best for your lace and window.
Placing the Lace on the Window
Once you have applied the glue to the lace, it is time to place it on the window. This step requires precision to make sure the lace is aligned correctly.
Step 1: Start by aligning the top edge of the lace with the top edge of the window. Use a ruler to ensure that the lace is straight and even.
Step 2: Slowly press the lace onto the window from the top down to the bottom. Avoid pressing too hard and creating any wrinkles or bubbles. If there are any bubbles, gently lift the lace and smooth them out.
Step 3: Once the lace is in place, use a clean, dry cloth or your fingers to press the lace down firmly. Make sure there are no gaps or loose areas.
Step 4: If you’re working with a particularly large window or a long piece of lace, enlist the help of a friend to manage the fabric while you glue. Remember that the glue will dry fairly quickly, so work efficiently.
Remember that you have to work quickly so that the glue doesn’t dry too fast. Follow the steps mentioned above carefully and gently to ensure that the lace is fixed perfectly onto the window.
If you want to add a stained glass effect to your window, you can use parchment paper. To learn how to glue parchment paper to a window, read our detailed article on how to glue parchment paper to a window.
Smooth Out Bubbles or Wrinkles
To ensure your lace adheres seamlessly to your window, it’s important to smooth out any bubbles or wrinkles that may have formed during the gluing process. Using a smooth, flat surface or tool such as a credit card or ruler, gently press down on the lace to remove any air pockets and wrinkles.
Here are some steps to follow:
| Step 1: | Start at the center of the lace and work your way outwards, gently smoothing the fabric towards the edges of the window. |
| Step 2: | Use a light touch when smoothing out the lace, taking care not to stretch or distort the fabric in any way. |
| Step 3: | If you notice any particularly stubborn wrinkles or bubbles, you can use a pin to gently lift up the lace and apply some more glue to the problem area. |
| Step 4: | Once you’ve smoothed out all the bubbles and wrinkles, give the entire piece of lace one final pass with your smoothing tool to make sure everything is firmly in place. |
By taking the time to properly smooth out any bubbles or wrinkles, you’ll ensure that your lace window looks professional and polished, with no unsightly bumps or bulges.
Cut Off Any Excess Lace
After placing the lace on the window and smoothing out any bubbles or wrinkles, you may notice that there is excess lace hanging over the edge of the window. To achieve a clean look, it is important to cut off any excess lace once the glue is dry.
Here are the steps to follow:
| Step | Action |
|---|---|
| Step 1 | Allow the glue to dry completely. This may take anywhere from 30 minutes to a few hours depending on the type of glue you used and the thickness of the lace. |
| Step 2 | Use a pair of sharp scissors to carefully trim the excess lace. Take your time and cut small amounts of lace at a time to avoid cutting off too much and ruining the design. |
| Step 3 | Once you have trimmed all the excess lace, use a small brush or cloth to clean up any leftover bits of lace or glue residue. |
It is important to cut the excess lace carefully and precisely so as not to ruin the overall look of the design. If you are unsure about how much to cut off, start with a small amount and adjust as needed. Remember that it is better to have a little bit of excess lace than to cut off too much and have to start over.
In addition to trimming the excess lace, you may also want to add some decorative touches to your window. Consider using accessories such as ribbons or beads to add an extra element of style to your design.
Cutting off any excess lace is a crucial step in creating a polished and professional look for your window. With patience and precision, you can achieve a beautiful and elegant design that is sure to impress.
Allow the Glue to Dry Completely
Once you have finished gluing the lace to the window, it is important to allow the glue to dry completely before moving on to any finishing touches. Make sure to follow the recommended drying time listed on the glue packaging to ensure a secure bond.
During the drying process, it is essential to avoid touching the lace or the window. Any disturbances could cause the lace to shift or wrinkle, potentially ruining your hard work. It’s also important to keep the window in a safe, dry location while the glue is drying.
If you’re worried about any potential air bubbles or wrinkles, avoid the temptation to try and fix it. Touching the lace during the drying process could cause damage or further distortions in the lace, ultimately affecting the appearance of your finished project.
Patience is key when waiting for the glue to dry. While it may be tempting to try and move on to the finishing touches, rushing this process could ruin all of the effort you’ve put into gluing the lace to the window.
Remember that environmental factors such as humidity and temperature could also affect the drying time, so it’s important to account for these variables and give the glue ample time to dry properly.
By allowing the glue to dry completely, you’ll ensure that the lace is securely attached to the window, and your finished project will be something you can admire and enjoy for years to come.
Finishing Touches
Once the lace is glued onto the window, there are a few finishing touches that can really make it look polished and professional. These touches will help to clean up any remaining residue and ensure that the lace sits neatly on the glass. With just a few extra steps, you can turn a simple lace project into a beautiful and sophisticated addition to any room. Let’s take a look at some of the key finishing touches you can add to your lace window project.
Clean any Residue
After the glue has dried completely, it’s time to clean up any residue that might be left behind. This step is important to ensure that your window looks neat and clean once the project is complete. There are several ways to clean up residual glue from the windowpane and lace.
1. Rubbing Alcohol: One effective way to clean up excess glue is to use rubbing alcohol. Take a cotton ball or a clean cloth and dampen it with rubbing alcohol. Then gently rub the cotton ball or cloth over the glue residue until it starts to come off.
2. Vinegar Solution: Another way to clean up the residue is to use a vinegar solution. Mix equal parts of white vinegar and water, then apply it to the glue residue. Allow the solution to sit for a few minutes before using a clean cloth to wipe away the excess residue.
3. Goo Gone: If you are dealing with stubborn or hard-to-remove glue residue, you can try using a commercial adhesive remover like Goo Gone. Apply a small amount of Goo Gone to the residue and let it sit for a few minutes. Then, wipe away the excess with a clean cloth.
4. Cooking Oil: You can also use cooking oil to help remove glue residue. Apply a few drops of cooking oil to the residue and let it sit for a few minutes. Then, wipe it away with a clean cloth.
Regardless of which method you choose, make sure to use gentle pressure when rubbing the residue to avoid scratching or damaging the lace or the window. With a little bit of elbow grease, you’ll be able to remove any glue residue from your project and have a beautifully decorated window.
Trim Edges of the Lace
Trimming the edges of the lace after gluing it to the window is an important final step to ensure a neat and clean finished look. Here are the steps to achieve this:
- Assess: Assess the lace on the window and decide which areas need to be trimmed. Consider any excess or uneven edges that may be visible.
- Measure: Measure and mark the areas that need to be trimmed using a ruler and a pen. This will ensure consistency in the trimming process.
- Cut: Cut along the marked lines using sharp scissors. Be careful not to cut into the window itself.
- Check: Check the trimmed edges to ensure they are straight and even. Make further adjustments if necessary.
It is important to take care while trimming the edges of the lace to avoid any tears or damage to the lace itself. By following these steps, you can achieve a clean and polished finished look for your lace window decoration.
Add Decorations if Desired
Adding decorations to your newly glued lace window can take it to the next level. Here are some decoration ideas you can try out:
1. Using Ribbon: If you have some ribbon lying around, cut it into small pieces and tie it around the lace border or create bows to add a pop of color. You can use a hot glue gun or fabric glue to attach the ribbon to the lace. Use different colors to create a fun and playful look.
2. Embellishments: You can use beads or sequins to create a unique finish on your lace window. Place the embellishments at random intervals or create a pattern to give it a more cohesive look. Attach using fabric glue or a hot glue gun.
3. Paint: Painting a design on your lace window can be a fun way to add a personalized touch. You can use fabric paint to ensure it stays on the lace or use a regular acrylic paint for a more opaque look. Use a fine brush to create intricate designs or use a sponge brush to create a more abstract effect.
4. Adding Flowers: You can add artificial flowers to the window by attaching them with a hot glue gun or using a wire to wrap around the stems and secure them to the lace. Choose flowers that match the color scheme of your lace and room decor.
Whatever decoration you decide to add, make sure it complements the lace and doesn’t overwhelm it. Be creative and have fun!
Conclusion
After completing the process of gluing lace to a window, you can now sit back and enjoy the beautiful results of your handiwork. Not only does it add a touch of elegance to any room, but it also provides privacy while still allowing natural light to come through.
Remember, proper preparation and choosing the right glue are crucial to achieving a flawless finish. It is also important to allow the glue to dry completely before making any final touches.
If you encounter any issues during the process, don’t panic. Simply take a break, step back, and reassess the situation. More often than not, a little patience and problem-solving can go a long way in achieving the desired outcome.
Overall, gluing lace to a window is an easy and affordable way to enhance the look of any space. So why not give it a try and let your creativity shine through!
Frequently Asked Questions
What is the best type of lace to use for a window?
It is recommended to use a lightweight lace that is not too dense, so the light can pass through it. Some popular options include cotton lace, crochet lace, and eyelet lace.
Can I glue lace directly onto a dirty window?
No, it is important to clean the window thoroughly before gluing the lace onto it. Any dirt, dust, or grime can cause the glue to not adhere properly and may result in the lace falling off.
Which type of glue is best for gluing lace to a window?
There are several options for gluing lace to a window, including liquid glue, spray adhesive, and glue dots. The best option will depend on the type of lace and the desired outcome.
Will the glue damage the window or the lace?
As long as a non-permanent glue is used, the window and the lace should not be damaged during the gluing process. However, it is important to test the glue on a small area first to ensure it does not cause any discoloration or damage the lace.
Can I remove the lace from the window once it is glued on?
Yes, it is possible to remove the lace from the window by gently peeling it off. However, depending on the type of glue used, some residue may remain on the window.
How long does the glue take to dry?
The drying time of the glue will depend on the type of glue used and the thickness of the layer applied. Typically, liquid glue will take around 30 minutes to dry, while spray adhesive may dry within a few minutes.
Should I cut the lace to the exact size of the window?
No, it is recommended to cut the lace slightly larger than the window to allow room for any adjustments during the gluing process. Any excess lace can be trimmed off once the glue is dry.
Can I add decorations to the lace window after it is glued on?
Yes, decorations can be added to the lace window after the glue is dry. However, it is important to ensure that any additional items do not damage the lace or create a hazard for the window.
Can I wash the lace window after it is glued on?
Most types of glue are not designed to withstand washing, so it is not recommended to wash the lace window after it is glued on. Dusting or spot cleaning is the best option to keep the window clean.
How long will the glued lace last on the window?
The longevity of the glued lace will depend on the type of glue used and the conditions that the lace window is exposed to. Typically, the lace will remain intact for several months to a few years with proper care.