Introduction
Foam rubber is a versatile material that is used in a variety of applications, from furniture cushions to packaging materials. When it comes to attaching foam rubber to other surfaces, such as wood or metal, it’s important to use the right adhesive to ensure a strong and long-lasting bond. In this comprehensive guide, we will explore the different types of adhesives available and provide step-by-step instructions on how to properly glue foam rubber. Whether you are a DIY enthusiast or a professional craftsman, this guide will help you achieve professional-looking results. So, let’s dive in!
What is Foam Rubber?
Foam rubber is a type of cushioning material that is commonly used in various applications, including upholstery, mattresses, and packaging. It is made from a variety of synthetic materials and can come in different densities and thicknesses.
One of the most common types of foam rubber is polyurethane foam, which is a flexible and durable material that is often used in cushions, mattresses, and other comfort applications. Another type of foam rubber is polystyrene foam, which is a lightweight and rigid material that is commonly used in packaging and insulation.
Foam rubber can be cut into different shapes and sizes, making it a versatile material for various uses. It can also be covered with a variety of fabrics to meet different needs, including durability, comfort, and aesthetics.
When it comes to gluing foam rubber, it is essential to choose the right type of adhesive for the job. Not all adhesives work well with foam rubber, and some can even damage the material. To learn more about what type of glue to use for upholstery, check out this helpful article here.
Types of Adhesives
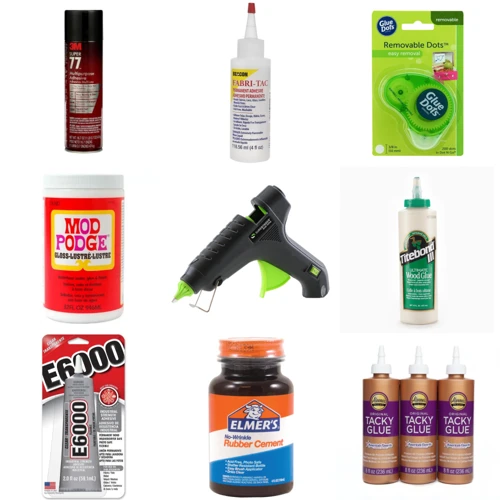
When it comes to gluing foam rubber, choosing the right adhesive is critical to achieving a firm and long-lasting bond. There are different types of adhesives available in the market, and selecting the most suitable one for your project can be perplexing. Should you opt for a water-based or solvent-based adhesive? Or perhaps a contact adhesive would be the best choice? In this section, we will explore the various types of adhesives available for gluing foam rubber, and their unique characteristics. Whether you’re working on a DIY foam cushion or a professional theater prop, understanding the differences between these adhesives will help you make an informed decision. But before we dive in, if you’re interested in other creative glue projects, make sure to check out our guide on how to glue pearls.
Water-Based Adhesives
Water-based adhesives are a popular choice for gluing foam rubber, as they are non-flammable, non-toxic, and easy to clean up with water. These adhesives have a milky white appearance and tend to dry clearer than other types of adhesives. However, they may not be as strong as solvent-based adhesives and may not hold up well under extreme temperatures or moisture.
Here are some common types of water-based adhesives:
| Adhesive | Features |
|---|---|
| PVA glue | A popular choice for general crafting projects. Dries clear and flexible. Not recommended for outdoor use or for bonding heavy items. |
| White glue | Similar to PVA glue, but has a stronger bond. Can be used for general crafting projects, but may not be suitable for bonding heavy items. |
| Latex adhesive | A flexible adhesive that dries clear. Can be used for bonding foam rubber as well as other materials such as wood, paper, and fabric. Not recommended for outdoor use or for bonding heavy items. |
When using water-based adhesives, it is important to follow the manufacturer’s instructions for application and drying time. Keep in mind that these adhesives may require longer drying times than solvent-based adhesives. Additionally, make sure to work in a well-ventilated area and avoid contact with skin or eyes.
Pro Tip: Before applying water-based adhesive, be sure to test it on a small, inconspicuous area of the foam rubber to ensure it does not discolor or damage the material.
Water-based adhesives can be a great choice for gluing foam rubber, especially for general crafting projects or indoor use. However, for more heavy-duty or outdoor applications, it may be necessary to use a stronger adhesive such as a solvent-based adhesive.
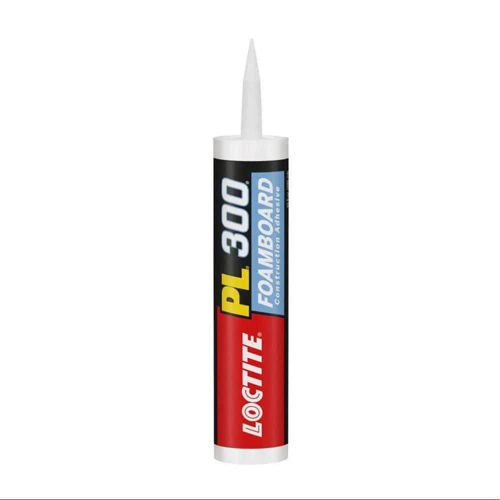
Solvent-Based Adhesives
Solvent-based adhesives are another option for gluing foam rubber. These adhesives are known for their strong bonding capabilities and are resistant to water and heat. They work by dissolving the foam rubber and then creating a strong bond as the solvent evaporates.
However, it is important to note that these adhesives contain harsh chemicals and should be used with caution in a well-ventilated area while wearing protective gloves and a mask. Some common types of solvent-based adhesives include:
| Adhesive Type | Pros | Cons |
|---|---|---|
| Chloroprene | Durable, heat-resistant | May damage foam if not used properly |
| Toluene | Fast-drying, flexible bond | Extremely flammable |
| Methylene Chloride | Strong bond, versatile | Highly toxic |
| Trichloroethylene | Heat-resistant, waterproof | Highly toxic, not environment-friendly |
It is important to choose the appropriate solvent-based adhesive for your specific project and foam rubber type. Some solvents may damage or melt certain types of foam if not used properly. It is recommended to test the adhesive on a small, inconspicuous area of the foam before applying it to the entire surface.
If you are not comfortable using a solvent-based adhesive, there are other options available such as water-based adhesives or contact adhesives. There are also alternative glue options available for specific projects, such as fabric glue or carpet fibers glue which you can learn more about by clicking these links: how to make fabric glue, what to use instead of fabric glue, how to glue carpet fibers.
Contact Adhesives
Contact Adhesives: Contact adhesives offer a long-lasting bond and are ideal for large surface areas or curved shapes. They are versatile and can be used on a variety of materials, including foam rubber. Contact adhesives are available in both solvent-based and water-based formulas, but solvent-based contact adhesives generally have a stronger hold.
| Advantages | Disadvantages |
|---|---|
| Strong and long-lasting bond | Difficult to reposition once applied |
| Works well on large surface areas or curved shapes | May release harmful fumes and require proper ventilation when being used |
| Versatile and can be used on a variety of materials including foam rubber | May require a longer drying time |
When using contact adhesives, it’s important to apply a thin, even layer on both surfaces and allow the adhesive to dry completely before bonding the surfaces together. Once the surfaces are brought into contact with each other, it’s difficult to reposition them, so it’s essential to align the surfaces correctly before bonding.
Expert tip: When working with solvent-based contact adhesives, it’s essential to work in a well-ventilated area to avoid inhaling harmful fumes. It’s also recommended to wear a respirator mask and protective gloves.
In the next section, we will discuss the process of preparing the foam rubber beforehand. But before we move on, if you’re curious about how to glue parchment paper, or how to make felt flowers without glue, check out these helpful articles! However, if you want to know how to glue latex or how to glue fabric to cardboard, be sure to read on. We will provide expert tips to ensure that you achieve the best possible results.
Preparing the Foam Rubber
To ensure that your foam rubber properly adheres to the intended surface, it’s important to properly prepare the foam rubber. This involves cleaning and sanding the surface of the foam rubber. By following these steps, you can help ensure the adhesive properly bonds to the foam rubber and the surface it will be attached to. Additionally, taking the time to properly prepare your foam rubber can potentially extend the life of your project. So, let’s dive into the details! But before we proceed, do you need to learn how to glue parchment paper? Check out our comprehensive guide here.
Cleaning the Surface
Before gluing foam rubber, it’s crucial to clean the surface thoroughly. This will ensure that the adhesive sticks properly and creates a strong bond. The first step in cleaning the surface is to make sure there is no dust, dirt, or debris present on the foam rubber. Use a soft-bristled brush or a vacuum cleaner to remove any loose particles.
Next, wipe down the surface of the foam rubber with a clean, lint-free cloth dampened with rubbing alcohol or acetone. This will remove any oils, grease, or other contaminants that might prevent the adhesive from bonding well. Be sure to clean the entire surface of the foam rubber that will come into contact with the adhesive.
It’s essential to remember not to use too much liquid when cleaning the foam rubber, as this can cause it to become saturated and take longer to dry. Additionally, avoid using harsh cleaning chemicals, which may damage or discolor the material.
If you’re working with a particularly stubborn stain or mark, try using a specialized foam rubber cleaner or mild soap and warm water. Apply the cleaner to a small inconspicuous area first to test its effects on the foam rubber. Rinse the area thoroughly afterward to remove any residual cleaner.
Once the foam rubber surface is clean and dry, you’re ready to move onto the next step in gluing. However, be aware that certain types of foam rubber may require additional preparation steps, such as sanding or roughing up the surface to help the adhesive bond better.
For example, if you’re gluing felt to foam rubber, you may need to use sandpaper to rough up both surfaces before cleaning to ensure a strong bond.
It’s important to note that not all adhesives work equally well with all types of foam rubber. Be sure to choose the right type of adhesive and follow the manufacturer’s instructions carefully for the best results.
Check out other helpful guides on gluing different materials: how to make felt flowers without glue, how to glue latex, how to glue fabric to cardboard, what glue to use on fresh flowers.
Sanding the Surface
Before applying the adhesive to foam rubber, it is necessary to prepare the surface for bonding. Sanding the surface of the foam rubber is an essential step in the preparation process.
Why is sanding important?
Sanding the surface of the foam rubber helps to create a rougher texture that gives the adhesive a better surface area to bond to. Smooth surfaces cannot grip onto adhesives as well as rough surfaces can. Sanding also helps to remove any dirt and oils that may be on the surface of the foam rubber, which can hinder the adhesive’s effectiveness.
Materials needed for sanding
- Sandpaper (choose a grit between 220 and 320)
- Rubber gloves
- Dry cloth
The sanding process
1. Put on rubber gloves to protect your hands from any abrasions that may occur during the sanding process.
2. Take your sandpaper and fold it in half.
3. Start sanding the surface of the foam rubber in a circular motion. Make sure to apply equal pressure throughout the process for even sanding.
4. Be careful not to oversand the foam rubber. This could cause damage to the foam rubber and compromise its structural integrity.
5. Once you have sanded the entire surface of the foam rubber, wipe it down with a dry cloth to remove any debris or dust.
6. Your foam rubber surface is now ready for the adhesive to be applied!
Sanding the surface of foam rubber may seem like a simple step, but it is crucial for successful bonding. By creating a rougher texture and eliminating any dirt or oils, you can ensure a strong and secure bond.
Applying the Adhesive
Now that you have prepared the surface of the foam rubber, it’s time to apply the adhesive. This step is crucial to ensure a strong and long-lasting bond between the foam rubber pieces. There are various methods for applying adhesive, and choosing the right one depends on the size and shape of the foam rubber pieces as well as the type of adhesive being used. In this section, we’ll walk you through the different application methods and provide tips on how to achieve the best results. So let’s dive in and learn how to apply adhesive like a pro.
Brushing the Adhesive
One way to apply adhesive to foam rubber is by brushing. This method is best for small projects and spot gluing. Here’s how to do it:
| Step | Instructions |
|---|---|
| 1 | Prepare the adhesive according to the manufacturer’s instructions. |
| 2 | Stir the adhesive to ensure it is thoroughly mixed. |
| 3 | Dip the brush into the adhesive, making sure to get an even amount on the bristles. |
| 4 | Starting at one end of the foam rubber, brush the adhesive onto the surface in a thin, even layer. |
| 5 | Work quickly and efficiently, as some adhesives dry quickly. |
| 6 | Overlap the brush strokes slightly to ensure even coverage. |
| 7 | Continue brushing until the entire surface to be bonded is covered. |
| 8 | Allow the adhesive to dry for the recommended amount of time. |
| 9 | Repeat on the other surface to be bonded. |
Remember that with brushing, you may not get as strong of a bond as you would with other methods. If you are unsure if this method will work for your project, be sure to test it first.
Spraying the Adhesive
One popular method for applying adhesive to foam rubber is using a spray application technique. This method involves using a spray gun or aerosol canister to apply a fine mist of adhesive to the surface of the foam.
Before starting the process:
- Ensure that the adhesive is compatible with your particular type of foam rubber.
- Equip yourself with protective gear, such as a face mask and protective eyewear for safety.
- Work in a well-ventilated area to avoid inhaling any harmful fumes.
Step by step process:
- Clean the surface of the foam rubber to ensure that it is free of any dirt, dust, or debris.
- Shake the canister thoroughly before spraying, and hold it about 6-8 inches away from the surface of the foam for even application.
- Begin spraying the adhesive onto the surface in a sweeping motion, moving gradually across the surface of the foam.
- Ensure that the entire surface is evenly coated in a light layer of adhesive without getting it too thick.
- Allow the foam to dry according to the manufacturer’s instructions before bonding it with another surface.
It is essential to work quickly and accurately while using this method as it requires a steady and even application of the adhesive to avoid any over-application or under-application. While spraying, be attentive of the environment as it could impact the adhesive and the final result.
Tips:
- If you’re working with a large surface, use a spray gun instead of the aerosol canister to save time and provide more even coverage.
- Practice spraying on a small sample or scrap material before applying it to the larger product to get a feel for the proper technique.
- Don’t forget to clean the nozzle of the spray gun or canister regularly to prevent clogging and ensure even application.
Using this spraying technique method provides a fast and efficient approach for applying adhesive to foam rubber. But still, it is necessary to ensure that the foam isn’t getting too thick with adhesive, which could result in a weaker bond.
Rolling the Adhesive
Rolling the adhesive is another popular method of applying it to foam rubber. It’s especially useful when working with larger surfaces. Here’s how to do it:
- Choose the right roller: For best results, you’ll want to use a roller with a short nap. A foam roller is often the perfect choice because it can apply a thin and even layer of adhesive. Avoid using long nap rollers, as they can leave behind too much adhesive and a bumpy surface.
- Pour the adhesive onto a tray: A paint tray works great for this job. Pour a moderate amount of adhesive onto the tray, making sure not to overfill it.
- Dip the roller into the adhesive: Slowly dip the roller into the adhesive. Make sure to only submerge a small portion of the roller to avoid using too much adhesive at once.
- Apply the adhesive to the foam rubber: Begin by applying the adhesive to the edges of the foam rubber first. Follow this by applying the adhesive to the center of the area, making sure to cover the entire surface with a thin and even layer of adhesive. Keep in mind that rolling may require more adhesive than other methods, but be careful not to apply too much.
- Bond the foam rubber: With the adhesive applied, bond the foam rubber according to the instructions provided earlier in this article.
Rolling the adhesive can be a little challenging for beginners, so don’t be afraid to practice on a small area before committing to a larger, more complex project. Remember to choose a good quality adhesive, ensure a clean and properly prepared surface, and work in a well-ventilated area for best results.
Spreading the Adhesive
When it comes to spreading the adhesive on foam rubber, there are a few different techniques you can use depending on the type of adhesive you have and your personal preferences. Here are a few options to consider:
| Technique | Advantages | Disadvantages |
|---|---|---|
| Notched Trowel | Provides even coverage, helps regulate adhesive thickness | Requires extra tool, can be messy |
| Flat Spreader | Easy to control, minimal mess | May require multiple passes to ensure full coverage |
| Brush | Allows for precise application, good for small areas | Can leave brush strokes, may require multiple coats |
| Spray Gun | Fast application for large areas, even coverage | Requires additional equipment, may be difficult to control overspray |
No matter which spreading technique you choose, it’s important to apply the adhesive evenly and to work in sections to prevent the adhesive from drying out before you have a chance to bond the foam. Additionally, be sure to follow the adhesive manufacturer’s instructions for application and drying times. With the right technique and attention to detail, you can successfully glue foam rubber for your next project.
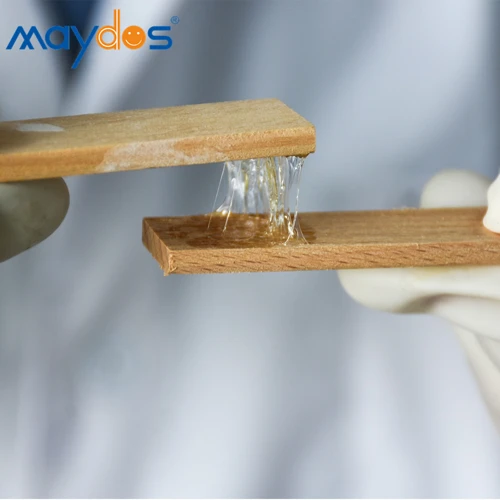
Bonding the Foam Rubber

Assembling foam rubber pieces together can be a tricky task. It is important to bond the foam rubber properly to ensure a secure hold. This step is crucial, as it determines the durability of the final product. Not to worry though, with the right techniques and the appropriate adhesive, bonding foam rubber can be done with ease. In this section, we will explore the different methods for bonding foam rubber and ensure you achieve a secure hold. Let’s dive into the bonding process with aligning the foam rubber.
Aligning the Foam Rubber
Before bonding the foam rubber, it is important to properly align it with the surface it will be adhered to. Improper alignment can result in a skewed or crooked finish. Here are some steps to follow for aligning the foam rubber:
- Measure and mark: Begin by measuring the surface area of the object that you want to attach the foam rubber to. Next, mark the edges of the surface area with a pencil or any other marker. This will give you a guideline when placing the foam rubber.
- Cut the foam rubber: Ensure that the foam rubber is cut to the size you need and make sure it fits properly within the marked area. If necessary, trim the edges of the foam rubber before you proceed to adhere it to the surface.
- Peel and attach: If using a self-adhesive foam rubber, carefully remove the backing paper and align the foam rubber over the surface. Gently press the foam rubber down onto the surface, smoothing out any wrinkles as you go. In case the foam rubber is not self-adhesive, apply the adhesive to the foam rubber and begin the bonding process.
- Aligning corners: When fitting foam rubber in corners, fold it along the corner to prevent creases on the surface. Cut the foam rubber diagonally to perfectly fit the surface area and ensure that it fits snugly in the corner. Refrain from forcing the foam rubber into place as it can cause damage to the surface area.
Remember that proper alignment of the foam rubber is critical to ensure a clean, seamless result. Don’t rush this step and take the time you need to cut and align the foam rubber properly before bonding it to the surface.
Pressing the Foam Rubber
Once the foam rubber is properly aligned with the surface, the next step is to press it down to ensure proper adhesion. This can be done with a roller, a squeegee, or simply by applying pressure with your hands.
Roller: A roller is the most effective tool to press down the foam rubber and create a strong bond with the surface. When using a roller, apply firm pressure and roll over the entire surface, making sure the adhesive is evenly distributed.
Squeegee: A squeegee can also be used to press down the foam rubber. Start at one end of the foam rubber and pull the squeegee in a straight line towards the other end. Apply enough pressure to ensure that the adhesive is evenly distributed.
Hands: If you don’t have a roller or a squeegee, you can also press down the foam rubber with your hands. Make sure to apply firm pressure and work your way over the entire surface to ensure that the adhesive is evenly distributed.
No matter which method you choose, make sure to apply enough pressure to ensure proper adhesion. If the foam rubber is not pressed down firmly enough, the bond may not be strong enough and the foam rubber may start to peel away from the surface over time.
Clamping the Foam Rubber
Clamping the foam rubber is an important step in ensuring a strong and lasting bond between the foam rubber and the other surface. It involves applying pressure to the foam rubber and the bonded surface using tools such as clamps or weights.
Choosing the Right Clamps
When selecting clamps for this step, it is essential to choose ones that will provide adequate pressure without damaging the foam rubber. A common option is C-clamps, which are available in various sizes and shapes. However, metal jaws on these clamps can dent or damage the foam.
Tip: To protect the foam during clamping, wrap the metal jaws in cloth or use plastic-tipped clamps.
Another option is spring clamps, which come in various sizes and have plastic jaws that won’t damage the foam rubber. These clamps are also easy to use and adjust, making them a popular choice.
Applying Pressure
Once you have chosen the right clamps, it’s time to apply pressure. Start by placing the foam rubber and the other bonded surface together, making sure they are aligned properly. Then, apply clamps along the edges of the foam rubber, leaving space between each clamp.
Place additional clamps in the center of the foam rubber, working your way out to the edges. Make sure the pressure is evenly distributed and that no parts of the foam rubber lift up.
Tip: To prevent the clamps from slipping, place a piece of cardboard or wood over the clamps.
Duration of Clamping
The amount of time to leave the clamps on the foam rubber varies depending on the type of adhesive used and the surface materials. It is best to follow the manufacturer’s recommendations on drying time.
However, a general rule is to leave the clamps on for at least one hour. This will ensure that the adhesive has had enough time to set and create a strong bond between the foam rubber and the other surface.
After the clamps have been removed, check the bond to ensure it is firm and secure. If there are any areas that have not bonded correctly, reapply the adhesive and clamp those areas again.
Table: Tips for Clamping Foam Rubber
| Tip | Description |
|---|---|
| Protect the foam | Use plastic-tipped clamps or wrap metal jaws in cloth to prevent damage to the foam rubber during clamping. |
| Apply pressure evenly | Start from the edges and work your way towards the center to ensure that pressure is evenly applied and that no parts of the foam rubber lift up. |
| Leave clamps on for at least an hour | Follow manufacturer’s recommendations for drying time. Leave clamps on for at least one hour to ensure a strong bond between the foam rubber and the other surface. |
Drying and Finishing
Once you have successfully bonded your foam rubber, the next step is to allow it to dry and finish the project. This final stage can determine the longevity and quality of your finished product, so it’s important to take your time and pay attention to details. In this section of the guide, we will discuss the necessary steps for drying and finishing your foam rubber project, including drying time and removing any excess adhesive. By following these steps, you’ll be able to complete your project with a professional and polished finish.
Drying Time
Once you have glued the foam rubber, the next step is to let it dry completely. The drying time will depend on the type of adhesive you use and the environmental conditions. The drying time can range from a few hours to overnight. The following table will give you an idea of the drying time for the different types of adhesives:
| Adhesive Type | Drying Time |
|---|---|
| Water-Based Adhesives | About 2-4 hours |
| Solvent-Based Adhesives | About 15-30 minutes |
| Contact Adhesives | About 15-20 minutes |
It is important to allow sufficient drying time to avoid disrupting the bond between the foam rubber and the surface it is being applied to. It is also important to make sure the glued area is not disturbed or exposed to any external force during the drying process. This can cause the foam rubber to shift or move while it is still wet, leading to an uneven or weak bond.
If you are unsure about the drying time for the adhesive you are using, it is always better to wait longer than to rush the process. For best results, wait for at least 24 hours before using or applying any pressure to the glued area. This will ensure that the bond is strong and secure.
Removing Excess Adhesive
After bonding the foam rubber, it’s important to remove any excess adhesive. This not only results in a cleaner finish, but also ensures that the adhesive doesn’t interfere with the overall integrity of the bonded pieces.
Tools and Materials Needed:
| Item | Details |
|---|---|
| Putty Knife | A metal blade with a handle used for scraping off excess adhesive. |
| Mineral Spirits | A solvent used for cleaning and removing stubborn adhesive residue. |
| Clean Cloth | A cloth used for wiping off excess adhesive and applying mineral spirits. |
Steps:
1. Allow the adhesive to dry fully before removing any excess. Refer to the adhesive manufacturer’s instructions for drying times.
2. Use a putty knife to carefully scrape off any excess adhesive. Hold the blade at a low angle and only scrape in one direction to avoid tearing the foam rubber. Be gentle and avoid using too much force.
3. If any adhesive residue remains, apply a small amount of mineral spirits to a clean cloth and gently rub the residue. Be sure to work in a well-ventilated area and avoid prolonged exposure to the fumes.
4. Continue to rub the residue until it begins to loosen and come off. If necessary, apply more mineral spirits to the cloth and continue to rub gently.
5. Once all excess adhesive has been removed, wipe the surface clean with a dry cloth.
By removing excess adhesive, your foam rubber project will look cleaner and be free of any unwanted residue. Taking the time to do this step correctly will result in a finished product that looks and feels professional.
Expert Tips
When it comes to gluing foam rubber, expert tips can make all the difference in achieving a successful bond. It’s not just about choosing the right adhesive, but also knowing how to test it and properly work with it. In this section, we’ll share some valuable insights from experienced professionals in the industry to help ensure that your foam rubber project is a success. So, take note and get ready to up your gluing game with these expert tips.
Choosing the Right Adhesive
One of the most important steps in gluing foam rubber is choosing the right adhesive for the job. The wrong adhesive can result in weak or failed bonds. Here are some factors to consider when choosing the right adhesive for your foam rubber gluing project:
- Type of foam rubber: Foam rubber comes in different types and densities, and some adhesives work better with certain types than others. For example, water-based adhesives may work well with open-cell foam, while solvent-based adhesives may be better for closed-cell foam.
- Application: Consider how you will be applying the adhesive. Will you be brushing it on, spraying it, or using a roller? Some adhesives are better suited for specific application methods.
- Bond strength: Different adhesives have different bond strengths. Consider how much strength you need for your project. Will the foam rubber be supporting weight or under pressure?
- Drying time: Some adhesives may take longer to dry than others. Consider how much time you have for your project and choose an adhesive with a drying time that works for you.
- Temperature resistance: If your foam rubber item will be exposed to high temperatures, choose an adhesive that can withstand those temperatures.
By considering these factors, you can choose the right adhesive for your foam rubber gluing project and ensure a strong bond that will last. Remember to always follow the adhesive manufacturer’s instructions for use and safety precautions.
Testing the Adhesive
Before applying the adhesive to your foam rubber, it is important to test it first. This will help you determine if the adhesive is compatible with the foam rubber material and if it will hold up over time. Here are some steps for testing your adhesive:
- Step 1: Choose a small piece of foam rubber. Select a small piece of foam rubber that is similar to the material you will be bonding. This will serve as your testing surface.
- Step 2: Apply the adhesive. Apply a small amount of the adhesive to the foam rubber surface, following the manufacturer’s instructions. Allow the adhesive to dry for the recommended amount of time.
- Step 3: Test the bond. Once the adhesive has dried, test the strength of the bond by pulling on the foam rubber. If the adhesive holds up and the bond is strong, then you can use the adhesive for your project.
- Step 4: Consider environmental factors. Keep in mind that the strength of the bond may be affected by certain environmental factors, such as temperature and humidity. It’s a good idea to test the adhesive in different conditions to ensure that it will hold up over time.
- Step 5: Consider the type of foam rubber. Some types of foam rubber may be more difficult to bond than others. If you have a particularly challenging foam rubber material, consider testing multiple adhesives to find the one that works best.
By taking the time to test your adhesive before starting your project, you can ensure that your foam rubber will hold up and that your project will be a success. Remember to always follow the manufacturer’s instructions for best results.
Working in a Well-Ventilated Area
When working with adhesives, it’s important to work in a well-ventilated area. This is particularly crucial when using solvent-based adhesives, which release harmful fumes that can be hazardous to your health. Here are some key considerations to keep in mind:
| Location | Choose a location that is well-ventilated; either outdoors or in a space with plenty of windows and fans. Avoid confined spaces without proper ventilation such as basements and small rooms. |
| Protective Equipment | Wear protective equipment such as gloves and a face mask to prevent contact with the adhesive and inhalation of fumes. |
| Airflow | Ensure that there is adequate airflow in the workspace. This can be achieved by opening windows and doors, or using fans to circulate air. Keep in mind that a lot of air movement can impact the effectiveness of the glue, so strike the right balance. |
| Drying Time | Allow ample drying time to ensure that the adhesive has fully cured before moving the foam rubber or bringing it into a confined space. |
By working in a well-ventilated area, you not only safeguard your health but also ensure that the adhesive can dry and bond effectively. Take precautions to protect yourself, and your foam rubber projects will be successful and safe.
Conclusion
After following this comprehensive guide, you should now be confident in your ability to glue foam rubber successfully. While the process may seem daunting at first, the right adhesive and proper preparation will ensure a strong and durable bond.
Remember to:
– Choose the right adhesive for your project
– Clean and sand the surface of the foam rubber before applying adhesive
– Apply adhesive using the appropriate method (brushing, spraying, rolling, or spreading)
– Align and press the foam rubber firmly together, and clamp if necessary
– Allow sufficient drying time and remove any excess adhesive
Expert tips to keep in mind:
– Test the adhesive on a small area first to ensure it will work effectively
– Work in a well-ventilated area to avoid inhaling fumes from solvent-based adhesives
– Consider using water-based adhesives for a more eco-friendly option
By following these tips and techniques, you’ll be able to create foam rubber projects that are both functional and aesthetically pleasing. Whether you’re creating custom cushions, upholstering furniture, or creating costumes and props, the proper gluing technique is essential for ensuring a successful outcome. So, take your time, follow the steps outlined in this guide, and enjoy the satisfaction of a job well done.
Frequently Asked Questions
How long does foam rubber take to dry after gluing?
The drying time will depend on the type of adhesive used and the thickness of the foam rubber. Generally, it can take anywhere from 30 minutes to several hours.
Can I use any type of adhesive for foam rubber?
No, it’s important to use an adhesive specifically designed for foam rubber. Using the wrong adhesive can result in a weak bond or damage to the foam.
Do I need to sand the surface of the foam rubber before gluing?
Yes, sanding the surface helps to create a better bond by roughening up the surface. It’s especially important for smooth foam surfaces.
Can I use contact adhesive for large surfaces of foam rubber?
Yes, contact adhesive can be a good choice for larger surfaces, but make sure to follow the manufacturer’s instructions carefully for best results.
Do I need to clamp foam rubber after gluing?
Clamping the foam rubber can help to create a stronger bond, especially for thicker foam. However, it’s not always necessary and depends on the type of adhesive used and the surface area glued.
What can I use to remove excess adhesive?
A rag or cotton swab dipped in rubbing alcohol can help to remove excess adhesive. Be gentle to avoid damaging the foam surface.
Is it safe to work with adhesives in a poorly ventilated area?
No, it’s important to work in a well-ventilated area to avoid inhaling harmful fumes. Consider wearing a mask and working near an open window or fan.
Can I reuse a foam rubber piece that has already been glued?
It’s possible, but it may be difficult to achieve a strong bond due to the residual adhesive on the surface. It’s usually best to use a fresh piece of foam rubber.
What should I do if the foam rubber starts to come apart after gluing?
If the bond is weak or starts to come apart, try regluing it using a stronger adhesive and make sure to clean and prep the surface thoroughly before applying the new adhesive.
Can foam rubber be glued to any surface?
While foam rubber can be glued to many surfaces, certain materials may not be suitable for all types of adhesive or may result in a weak bond. Always refer to the adhesive manufacturer’s recommendations for the best results.