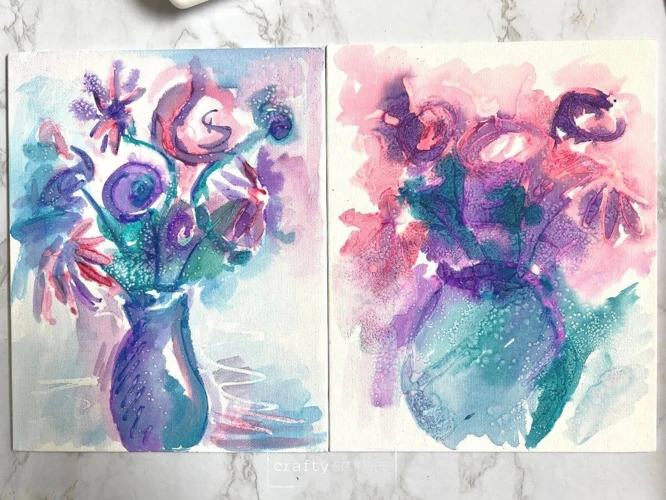
As a novice artist, utilizing watercolors can be daunting, especially if you want an eye-catching outcome. However, have you thought about incorporating glue and salt into the mix to enhance your painting? Though it may sound peculiar, watercolor glue and salt technique is a unique and affordable method to add texture, depth, and complexity to your artwork. In this guide, we will dive into the step-by-step process of painting with watercolor glue and salt to create abstract paintings that catch the eye. Let’s get started!
Materials Needed

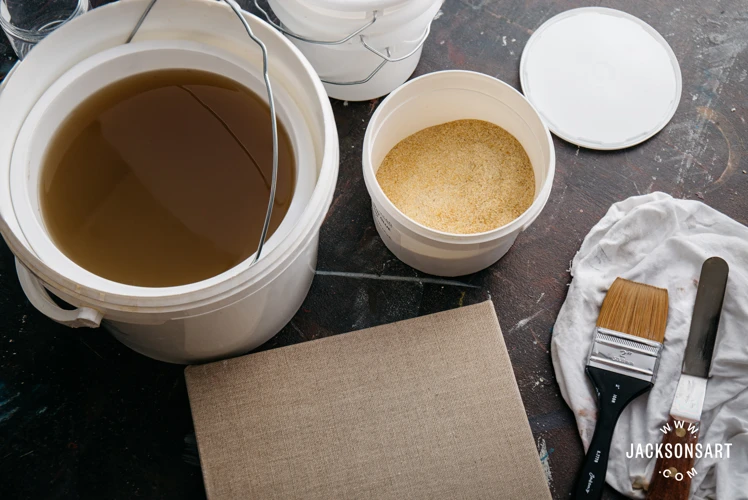
Gathering the necessary materials is the first step in learning how to paint with watercolor glue and salt. Some of the items you’ll need are specialty painting supplies, while others are household items that you may already have on hand. Below is a list of everything you’ll need to get started on your watercolor painting journey. If you’re missing any items, don’t worry- we’ve even included links to articles on how to use some of these materials for other creative endeavors!
Painting Supplies
To begin with, it’s essential to have all the necessary painting supplies before starting your watercolor project. Here are some of the supplies you will need:
- Watercolor Paint: You can use any watercolor paint that you like. However, it’s best to use high-quality watercolor paints to achieve vibrant colors on your painting.
- Watercolor Paper: You will need watercolor paper specifically designed for watercolor painting. It’s recommended to use thick paper or paper with a weight of at least 140 pounds, as thin paper may warp or buckle when it comes into contact with moisture.
- Paintbrushes: Have a variety of paintbrushes on hand for different painting techniques. Small and medium-sized brushes are perfect for watercolor painting as they can create fine lines and details.
- Water: Water is necessary for diluting the paint and cleaning the brushes. You will need a container to hold clean water and another to hold dirty water.
Aside from painting supplies, you will also need some home supplies to prepare your painting surface properly:
- Glue: You will need glue for creating the salt texture on your painting. Any white PVA (polyvinyl acetate) glue will do the trick. You can check how to glue paper onto wood or how to glue foam for more information on how to use glue correctly.
- Salt: Regular table salt will work best for creating texture. You can check the instructions on what is water glue if you’re in doubt about the type of salt is recommended for this process.
- Palette: You will need a palette for mixing your watercolor paints. You can use a plastic or ceramic palette.
Having all these materials ready will ensure that your watercolor painting session is hassle-free and enjoyable. So, gather all the supplies you need before starting your watercolor masterpiece!
Home Supplies
To get started with watercolor glue and salt painting, you will need some home supplies that you probably already have in your house. These items are essential for creating the unique texture and effect that watercolor glue and salt can add to your painting. Here are the home supplies you will need:
- Salt: You can use any type of salt for this technique, such as table salt or sea salt. It’s best to use coarse salt for larger texture and fine salt for smaller texture.
- Glue: Any white glue will work for this technique. If you want to achieve stronger adhesion, use a stronger glue such as PVA glue, which can also be used for tufting (check our articlewhat glue to use for tufting)
- Paintbrushes: You’ll need some paintbrushes for applying paint and glue. Pick a range of sizes to suit the different areas of your painting.
- Cup of Water: You will need a cup of water for wetting your paintbrushes and diluting the paint.
- Paper Towels: This will be handy for drying the excess water off your paintbrush or wiping any mistakes on your painting.
Now that you have a list of home supplies that you’ll need, it’s time to gather them and move on to preparing your painting surface. If you want to learn about other types of glue that you can use for crafting projects, check out our articles about how to glue on rhinestones, what glue will stick fabric to foam, how to glue sequins to fabric, how to glue paper to plastic, how to glue cloth, and what kind of glue to use on ribbon.
Preparing Your Painting Surface
Before you begin painting with watercolor glue and salt, it’s important to properly prepare your painting surface. This will ensure that your watercolor painting turns out just the way you want it to, with vivid colors and interesting textures. You’ll need a few materials and some time to get everything set up, but the end result will be well worth the effort. Let’s take a closer look at the steps involved in preparing your painting surface.
Preparing Your Watercolor Paper
To create a beautiful watercolor painting, one of the most important steps is preparing your watercolor paper. Proper preparation ensures that your paper will absorb the paint evenly and create the desired effect.
Choosing the Right Paper: There are many types of watercolor paper available, each with unique characteristics. The weight, texture, and quality of the paper can greatly affect the final result of your painting. It is recommended to use paper that is at least 140lb (300gsm) and has a fine grain texture for best results.
Stretching Your Paper: Watercolor paper tends to curl and buckle when it becomes wet, which can make it difficult to work with. To prevent this, you can stretch your paper before you begin painting. To stretch your paper, you will need to soak it in water for about 10-15 minutes and then stretch it tightly onto a board or support using tape or clips. Allow the paper to dry completely before painting on it.
Masking Fluid: If you wish to preserve certain areas of your painting and prevent them from being painted over, you can use masking fluid. This is a liquid latex that can be applied to your paper with a brush or nib. Once it has dried, you can paint over it without worrying about ruining the masked areas. Once your painting is complete, you can simply rub off the masking fluid with your fingers or a rubber eraser.
Creating a Border: To create a border around your painting, you can use tape or a ruler to draw a straight line around the edges of your paper. This will give your painting a clean, finished look.
| Materials Needed: | Method: |
|---|---|
| Watercolor paper | Choose paper with a weight of at least 140lb (300gsm) and a fine grain texture. |
| Tape or clips | Use to stretch paper before painting. |
| Board or support | Use for stretching paper. |
| Masking fluid | Use to preserve areas of painting and prevent paint from bleeding. |
| Ruler or tape | Use to create a border around your painting. |
By following these steps and preparing your watercolor paper properly, you will be well on your way to creating a stunning painting using watercolor glue and salt techniques.
Adding Glue
Before adding the salt, you will need to apply glue to your watercolor paper. This will create a resist effect, preventing the paint from evenly saturating the paper. For this technique, white school glue, such as Elmer’s Glue, is perfect.
To apply the glue to your watercolor paper, follow these simple steps:
| Step | Instructions |
|---|---|
| Step 1 | Using a paintbrush, generously apply the glue to the areas of the paper where you want to create a resist effect. This can be done in a pattern or completely covering the paper. |
| Step 2 | Allow the glue to dry completely before moving on to the next step. This may take up to 30 minutes, depending on the amount of glue applied. |
Make sure that the glue is completely dry before you start painting. If you start painting while the glue is still wet, the paint may mix with the glue and ruin the resist effect.
Pro tip: If you want to speed up the drying process, use a hair dryer on low heat. Be sure to hold the dryer at least 6 inches away from the paper to avoid melting the glue or warping the paper.
By applying glue to your watercolor paper, you are creating a barrier that will prevent the paint from saturating evenly. This technique will add an interesting texture to your painting when the salt is added later on.
Adding Salt
Adding salt is a simple but effective technique that can enhance the texture of your watercolor painting. Here are the steps to follow:
| Step | Description |
|---|---|
| 1 | Wait until the glue has completely dried on your paper. You can tell it is dry when it is no longer tacky to the touch. |
| 2 | Choose your salt. Coarse salt will create larger, more defined textures, while fine salt will create smaller, more subtle textures. Experiment with different types of salt to see what works best for you. |
| 3 | Sprinkle the salt onto your painting while the paint is still wet. You can use a salt shaker, or sprinkle it on with your fingers. |
| 4 | Wait for the paint to dry completely before removing the salt. As the paint dries, the salt will absorb some of the pigment, leaving behind a textured, crystallized effect. |
| 5 | Once the paint is dry, gently brush off the salt with a soft-bristled brush. You can also use your fingers to remove any salt that doesn’t come off with the brush. |
Note: Do not use too much salt or press it too hard into the paper, as this can damage the paper or create unwanted textures. Also, make sure to remove all the salt, as any remaining salt can attract moisture and lead to discoloration over time.
Creating Your Watercolor Painting
Now that you have prepared your painting surface, it’s time to create your masterpiece! You may feel a bit overwhelmed at first, but don’t worry. With the right materials and techniques, you’ll be well on your way to painting with watercolor glue and salt like a pro. In this section, we’ll guide you through the steps of choosing your colors, applying your paint, adding details, blending colors, and adding texture with salt. Let’s dive in and unleash your creativity!
Choosing Your Colors
When it comes to choosing your colors for watercolor painting with glue and salt technique, the possibilities are endless. It’s important to consider the mood or feeling you want to convey in your art piece, as well as the level of saturation and contrast you wish to achieve.
To help you get started, here is a table of some common watercolor colors and their corresponding meanings and effects:
| Color | Meaning | Effect on painting |
|---|---|---|
| Red | Passion, energy, warmth | Creates bold and eye-catching statements, can add drama and depth |
| Orange | Friendship, enthusiasm, creativity | Provides warmth and vibrancy, can be used to create a sense of harmony and unity |
| Yellow | Joy, happiness, optimism | Brings a sense of light and energy to your painting, can be used to create contrasts and highlights |
| Green | Growth, nature, harmony | Provides a sense of balance and calmness, can be used to create depth and dimension in landscapes |
| Blue | Tranquility, peace, trust | Can be used to create cool and calming effects, perfect for water scenes and skies |
| Purple | Royalty, luxury, creativity | Can add a sense of mystery and depth to your painting, creates rich and bold statements |
| Brown | Stability, warmth, comfort | Provides grounding and a sense of foundation, can be used to create earthy and natural tones |
| Black | Mystery, sophistication, power | Can be used to add drama and depth, creates striking contrasts with lighter colors |
Remember, experimenting and playing with different color combinations is key to finding your own unique style and voice in watercolor painting. Try incorporating multiple colors and see how they interact with each other, as well as how they react with the glue and salt technique.
Applying Watercolor Paint
When it comes to applying watercolor paint, there are a few things to keep in mind to help create a successful painting. Here are some tips to get you started:
- Start Light – it’s always easier to add more color later than to take it away. Begin by applying a light wash of color to your paper.
- Layer Your Colors – watercolor is all about layering colors to create depth and texture. Build up your colors gradually, allowing each layer to dry before applying the next.
- Blend Colors – use the wet-on-wet technique to blend colors together. Apply a wet wash of one color and then add droplets of a second color to the surface. The two colors will blend and create a soft gradient.
- Use The Right Brush – a good watercolor brush should have soft, flexible bristles that can hold a lot of water. This will allow you to create a smooth, even wash of paint.
- Be Patient – watercolor takes time to dry, and rushing the process can lead to muddy colors and unwanted bleeding. Wait for each layer to dry completely before adding more color.
Remember, watercolor painting is all about experimentation and having fun. Don’t be afraid to try new techniques and push your creativity to the limit!
Adding Details
Now that you have applied the base layer of watercolor to your painting, it is time to start adding more details to bring your painting to life. Here are some tips on how to add details to your painting:
| Tip | Description |
|---|---|
| 1 | Use a small brush: When adding details, use a smaller brush to ensure that your details are precise and not too overpowering. A small brush is also helpful when adding texture and fine lines. |
| 2 | Work from light to dark: Start by adding the lighter details and then gradually build up to the darker details. This technique will help to create depth and dimension in your painting. |
| 3 | Focus on one area at a time: Rather than trying to add details to the entire painting at once, focus on one area at a time. This will allow you to give each area the attention it deserves. |
| 4 | Add highlights: Using a small, fine brush, add highlights to areas that you want to bring forward in the painting. This can help to create the illusion of light and shadow. |
| 5 | Experiment with different techniques: Don’t be afraid to experiment with different techniques when adding details. For example, you can use a dry brush technique to add a rough texture to a surface, or a wet-on-wet technique to create soft, subtle details. |
By following these tips, you can add intricate and captivating details to your painting. Remember to take breaks and step back from your painting to assess your progress and make any necessary adjustments. With patience and practice, you can create a beautiful watercolor painting that is full of intricate details.
Blending Colors
Blending colors is an essential technique to create depth and add dimension to your watercolor painting. Here are some steps to follow for successful color blending:
- Start with the lightest color: When blending, always start with the lightest color to avoid overpowering the other colors. Begin by applying the lightest color to your painting surface.
- Add the second color: Once you have applied the first color, choose the second color and apply it next to the first color while it is still wet. Be sure to blend the two colors together while they are still wet to achieve a smooth transition between colors.
- Continue adding colors: Continue adding colors to your painting in the same manner, applying them next to the previous color while they are still wet and blending them together.
- Use a dry brush: If you want to soften the edges between colors, you can use a dry brush to blend them together gently. Use a light touch with the dry brush to avoid removing too much paint from the paper.
- Experiment with different techniques: There are many different techniques you can use for color blending, including wet-on-wet, wet-on-dry, and dry brush techniques. Experiment with different techniques to find the one that works best for you.
Remember, practice makes perfect when it comes to blending colors in watercolor painting. Don’t be afraid to experiment with different colors, techniques, and styles to create a unique and beautiful painting.
Adding Texture with Salt
To add texture to your watercolor painting, salt is a great agent to use. The salt absorbs the water and pigment from the paint, creating a unique and interesting texture. Here are the steps for adding texture with salt:
| Step | Action |
|---|---|
| 1 | Apply watercolor paint to your paper. Use a brush to apply a generous amount of watercolor paint to the area where you want to create texture. |
| 2 | Add salt to the wet paint. Sprinkle a pinch of salt onto the wet paint. You can use table salt or rock salt, depending on the texture you want to achieve. You can also vary the amount of salt you use to create different effects. |
| 3 | Wait for the paint to dry. Allow the paint to dry completely before removing the salt. This will give the salt enough time to absorb the paint and create the unique texture. |
| 4 | Remove the salt. With a dry brush or your fingers, gently remove the salt from the paper. The salt will leave behind a unique texture that adds depth and interest to the painting. |
Keep in mind that the effect of salt on watercolor paint depends on various factors, such as the amount of water used, the type of paint, and the type of salt. Experiment with different combinations to achieve the desired texture. Adding texture with salt is a simple yet effective technique that can make your watercolor painting stand out.
Finishing Your Painting
As you near the end of your watercolor painting, it’s important to properly finish it for optimal presentation. Completing the final touches can make a significant difference in the overall appearance of your work of art. In this section, we will cover some important steps to ensure that you properly finish and preserve your watercolor painting. From removing the salt to drying your painting, these tips will help your painting achieve the perfect end result. So let’s get started!
Removing Salt
After letting your watercolor painting dry for a few hours, it’s time to remove the salt. This process is fairly simple and requires no special tools or materials. Here’s how to do it:
- First, gently brush off the salt from your painting using a dry brush. Be careful not to rub too hard, as this can damage the paper.
- Next, use a clean cloth or tissue to wipe away any excess salt residue.
- If you notice any areas where the salt has left a residue, take a damp brush and gently scrub the affected area.
- Finally, take a step back and admire your finished watercolor painting!
It’s important to note that removing the salt will also remove some of the paint underneath it. This is normal and part of the intended effect of using salt in watercolor painting. The salt creates a unique texture and pattern that can’t be achieved with traditional painting techniques.
Remember: Don’t be afraid to experiment with different types of salt, or to combine salt with other watercolor techniques, such as using a resist or creating a wash. With a little bit of practice, you can create stunning watercolor paintings that are full of texture and depth.
Drying Your Painting
Once you have finished painting, it is essential to dry your artwork correctly to prevent any damage or blemishes from appearing. Here are some helpful tips for drying your painting:
- Avoid heat: Do not use a hairdryer, heat gun, or any other heating device to dry your painting. This method can cause the watercolor paint to crack, and the colors may shift. It is best to let your painting air dry, which may take a few hours or even overnight.
- Choose a flat surface: Once you have finished painting, lay your paper flat on a clean, absorbent surface. You can use a clean glass surface or a table covered in paper towels or a clean cloth. Make sure that the surface is level to avoid any pigment pooling from wet paint.
- Patience: You should be patient and avoid moving or touching your painting as it dries. Let it dry gently and undisturbed to avoid any unwanted smudging or rubbing, which can damage the surface.
- Humidity: If you live in a humid environment, it may take longer for your painting to dry. The moisture in the air can affect the drying process, so make sure you do not try to rush the process and let the painting dry naturally.
- Check for dryness: Once you think your painting has dried, check it carefully to ensure that it is completely dry. Look for any areas that may still be wet, indicated by a darker color or glossy finish. Check the corners of the paper as well as the middle section. If you find any areas that are still wet, let it continue drying naturally for a few more hours.
By following these steps, you can ensure that your painting dries evenly and maintains its quality and beauty. Taking care to dry properly can even prevent possible damage to the artwork and make it last longer.
Conclusion
After following the steps outlined in this beginner’s guide, you should be well on your way to creating beautiful watercolor paintings using glue and salt techniques. Remember to have fun and experiment with different color combinations and methods of applying your paint.
Not only does this technique offer an opportunity for artistic creativity, but it also provides a therapeutic outlet for relaxation and stress relief. So grab your supplies and get painting! Don’t be afraid to make mistakes – they can often lead to unexpected and beautiful results.
If you’re feeling particularly proud of your final product, don’t hesitate to show off your work! Consider framing your painting or sharing it with friends and family. Whether you choose to keep it as a treasured memento or gift it to a loved one, your watercolor creation is a unique and personal piece of art that holds a special meaning.
Incorporating techniques such as salt and glue can add a new dimension to your watercolor paintings, allowing for rich textures and depth that make your artwork truly stand out. By following the step-by-step instructions provided in this guide, even those new to watercolor painting can experience the joy of crafting a beautiful masterpiece.
Frequently Asked Questions
What types of glue can be used for watercolor painting?
Any water-soluble glue can be used for watercolor painting, but it is recommended to use white school glue or gel medium for best results.
Do I need to use special paper for watercolor glue and salt technique?
Yes, it is recommended to use watercolor paper for this technique as it is thicker and can handle the added moisture from the glue and salt.
How much salt should I use for my painting?
The amount of salt used depends on personal preference and the effect desired. It’s recommended to start with a small amount and gradually add more as needed.
Can I use other types of salt besides table salt?
Yes, experimenting with different types of salt such as sea salt or rock salt can create unique textures and effects in the painting.
How long should I let the glue and salt dry before painting?
It is recommended to let the glue and salt dry for at least 30 minutes before painting, but it’s best to let it dry overnight for best results.
Should I wet the paper before applying glue and salt?
No, the paper should be dry before adding glue and salt to avoid over saturation.
Can I use multiple layers of glue and salt?
Yes, multiple layers can create a layered effect in the painting, but it’s best to let each layer dry completely before adding another.
Can I use this technique on other surfaces besides paper?
Yes, the watercolor glue and salt technique can be used on other surfaces such as canvas or wood, but it’s recommended to experiment with the technique on a small sample first.
How long will it take for my painting to dry?
Drying time can vary depending on the amount of water used in the painting and the humidity in the area, but it’s best to let the painting dry overnight before framing or displaying.
Can I use this technique with other painting mediums besides watercolors?
It’s possible to use this technique with other painting mediums, but it’s recommended to experiment with the technique on a small sample first to ensure desired results.