Have you ever wanted to make a sock puppet, but didn’t have any hot glue? Fear not! In this article, we’ll show you how to make your very own sock puppet without using any hot glue. With just a few simple materials, you’ll be able to create a fun and unique toy that is sure to provide hours of entertainment. So, grab your socks and let’s get started!
Materials Needed
Before jumping into making a sock puppet without hot glue, it’s important to have all the necessary materials. Don’t worry, most of the materials needed for this project are readily available and inexpensive. You might already have them at home! Here are the materials we will be using: socks, felt, scissors, googly eyes, markers or paint, and buttons or pom-poms (optional). If you don’t have some of these materials, they can be easily found at your local craft store or online. So, let’s get started on making your own sock puppet masterpiece! If you want to learn more about gluing and materials, check out our guide on what is fabric glue.
Socks
When it comes to making a sock puppet without hot glue, the type of sock you use is important. You will want to choose a sock that is clean and free of holes. An adult-sized sock is generally best for making a puppet, but you can use a child’s sock if you want to make a smaller puppet.
MATERIALS NEEDED:
| Socks | A clean sock without holes. Adult-sized is preferred. |
| Felt | Assorted colors for decorating your puppet. |
| Scissors | Sharp scissors are necessary for cutting the sock and felt. |
| Googly Eyes | Plastic eyes that move around and add character to your puppet. |
| Markers or Paint | Colored markers or paint to decorate your puppet. |
| Buttons or Pom-Poms (optional) | Additional decorations to add to your puppet for a unique touch. |
You can find all of these materials at a craft store or even in your own home. Once you’ve gathered your materials, you’re ready to start making your sock puppet!
Felt
Felt is an essential material when it comes to making sock puppets without hot glue. Felt is a type of fabric that is commonly used for crafts because of its versatility, durability, and range of colors. You can use felt to create various parts of your sock puppet, such as the mouth, nose, and ears. It is especially useful for adding details to your sock puppet since it does not fray and can easily be cut into different shapes and sizes.
When choosing felt for your sock puppet, it is important to consider the color and texture you want to use. You can use a single color or multiple colors to create a more vibrant and eye-catching puppet. You can also experiment with different textures, such as fuzzy or glitter felt, to add more character to your puppet.
To use felt in making your sock puppet, you will need a pair of scissors to cut it into the desired shape and size. You can glue it onto the sock with fabric glue or use a needle and thread to sew it onto the sock. If you are unfamiliar with sewing, there are plenty of online tutorials and resources that can guide you through the process.
Felt is an excellent and versatile material that can take your sock puppet to the next level. It is easy to work with, available in a range of colors and textures, and can add a unique touch to your creation. For more information on gluing fabric, check out how to glue fabric to canvas.
Scissors
One of the essential materials you need to have when making a sock puppet is a pair of scissors. You will use the scissors to cut your sock according to the size and shape you desire. When choosing scissors, make sure that they are sharp enough to provide a smooth cut. Dull scissors may cause the fabric to fray, which can make the puppet look messy. It’s also important to use scissors that are appropriate for the material you’ll be cutting. For example, you might need fabric scissors if you’re using a thick sock, or fine-point scissors if you’re cutting small details.
To make your puppet’s features, such as the mouth, nose, and ears, you’ll need to use the scissors carefully to create the right shape and size. When cutting intricate shapes, take your time, and use small, gentle cuts to avoid any mistakes. It’s always better to cut less and adjust later than to cut too much and have to start over.
Remember to handle your scissors with care and keep them away from small children to avoid accidents. After you’re done with your scissors, it’s a good idea to clean them and store them safely in a designated spot until the next time you need them.
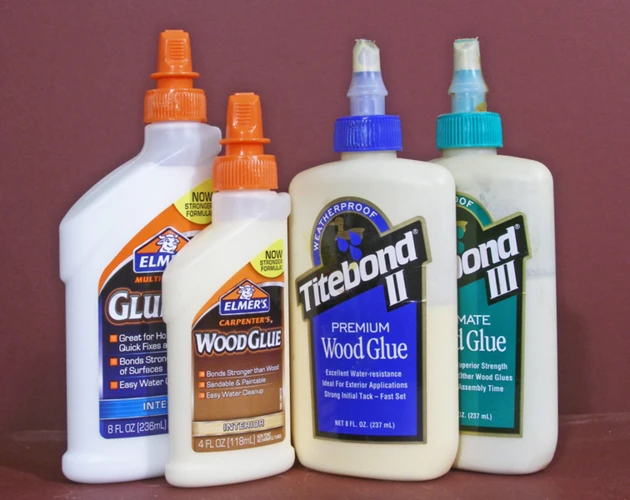
If you’re using fabric scissors and want to ensure that they remain sharp and functioning well for a long time, you might want to consider investing in a sharpening tool or taking them to a professional for sharpening. It’s also crucial to use the appropriate glue that is best suited for your project. If you’re uncertain about which glue to use, check out this article on tacky glue, which is excellent for attaching felt to fabric.
Now that you know how important scissors for this project are let’s get to our next material – felt.
Googly Eyes
Using Googly Eyes is a fun and easy way to bring your sock puppet to life. These cute little plastic eyes with wobbly pupils come in various sizes, making them suitable for any sock puppet project. Plus, they’re widely available at craft stores or online.
To attach Googly Eyes, you will need a sticky material such as glue or double-sided tape. It’s essential to choose the right adhesive that’s compatible with the eyes’ material and the sock fabric. Glue, such as water-based PVA glue, is ideal for most sock puppet materials.
Here are some tips when using Googly Eyes:
| Tip #1: | Pick the appropriate size of Googly Eyes depending on your sock puppet’s overall look and size. Small eyes look good on small puppets, while large eyes match a bigger puppet’s scale. |
| Tip #2: | Decide on the position of the eyes. Placing them too low or too high can affect the puppet’s overall expression. |
| Tip #3: | Experiment with different eye positions and expressions by moving the eyes around before gluing them in place. |
| Tip #4: | Use PVA glue or a suitable adhesive to attach the eyes. Avoid using hot glue as it can melt some types of plastic, or it may not adhere effectively to the sock material. |
Googly Eyes are a fantastic addition to your sock puppet project, providing an easy way to create a fun and cheerful character. With so many colors, sizes, and variations to choose from, you can create unique personalities for each of your puppets.
Glue is essential in attaching Googly Eyes to a sock puppet, but it’s also useful in other craft projects, such as covering a book with fabric.
Markers or Paint
When it comes to decorating your sock puppet, it’s important to have some sort of coloring utensil on hand. This is where markers or paint come in! You can use markers or paint to draw on additional details or designs to your puppet.
Markers are a great choice for younger children or for those who want a more precise look. They are easy to use and there are a variety of colors to choose from. If you decide to use markers, make sure you have a set of washable markers in case of any accidents.
On the other hand, paint can add a more textured look to your sock puppet. You can use fabric paint or even make your own paint by mixing equal parts of white glue and water with food coloring or acrylic paint. If you decide to make your own paint, make sure you test it on a small area of the sock first to make sure it doesn’t bleed or ruin the fabric.
No matter what you choose, markers or paint can add a creative element to your sock puppet that will make it unique and personalized. So, get creative and have fun with it!
As a reminder, if you need to glue any decorations onto your sock puppet, check out our guide on how to glue paper onto wood or learn how to make your own fabric paint with glue in our guide on how to make fabric paint with glue. And if you’re curious about water-based glue, check out our guide on what is water glue.
Buttons or Pom-Poms (optional)
Adding buttons or pom-poms is an optional step that can give your sock puppet a fun and unique look. These decorations can be used for eyes, noses, or even as accessories like a big bow tie or hair accessory. Keep in mind that small parts like buttons can be a choking hazard for young children, so always supervise children when playing with sock puppets.
To attach the buttons or pom-poms, you can use a needle and thread or fabric glue. If you choose to use fabric glue, make sure to follow the instructions carefully and use a glue that is safe for fabrics. Avoid using hot glue since it can melt the fabric and ruin the puppet.
Using colorful pom-poms can add a fun and playful touch to your sock puppet while buttons can give a more classic and sophisticated look. You can even mix and match different styles and colors to create a unique look for your sock puppet.
Tips:
- Choose decorations that match the style of your sock puppet
- Consider using contrasting colors for a pop of color
- Use a glue that is safe for fabric
- Supervise children when using small parts like buttons
If you’re having trouble attaching the decorations, check out our other articles on how to glue carpet fibers or how to glue crystals to fabric for some helpful tips on attaching small items to fabrics.
Step-by-Step Guide

Navigating the process of creating a sock puppet can be a little intimidating for those who are new to the craft or unsure of where to start. But fear not! With this step-by-step guide, you’ll soon be on your way to creating your very own sock puppet. Follow along with each instruction carefully and make sure to take your time, as attention to detail is key in making a quality puppet. Let’s get started!
Step 1: Choose your sock
When it comes to making a sock puppet, the first and foremost step is to pick a suitable sock. Your choice of sock will define the personality of your puppet. Here are some tips to help you choose the right sock for your sock puppet:
| Tip | Description |
|---|---|
| 1. Color | Choose a sock that has a color that matches the personality of your puppet. For example, bright colors like yellow and orange may work well for a cheerful and lively puppet, while darker colors like black or grey could be ideal for a more serious or moody puppet. |
| 2. Size | The size of the sock should be appropriate for the size of your hand. This means that it should fit snugly on your hand without slipping off. |
| 3. Material | Choose a sock made of a material that’s easy to work with. Avoid socks with holes, designs, or textures that might make it difficult to decorate and alter the sock. |
| 4. Coziness | Consider how cozy the sock would be for your hand. A softer and fuzzier sock could make for a more comfortable and enjoyable puppet-making experience. |
By keeping these tips in mind, you’ll be able to choose the perfect sock for your sock puppet, one that suits the personality and style of your puppet.
Step 2: Cut the sock
Now that you have chosen the perfect sock for your puppet, it’s time to start cutting! Follow these simple steps to create the basic shape of your puppet:
- Turn the sock inside out: Before you start cutting, turn the sock inside out so that the seams are facing outward. This will make it easier to cut and sew later on.
- Cut off the toe: Use your scissors to cut off the toe of the sock. This will be the opening for your puppet’s mouth.
- Cut off the heel: Cut off the heel of the sock, but leave a small amount of fabric on either side. This will be the base of your puppet’s head.
- Create the arms: Cut two small slits on either side of the sock, just below the head. These will be the armholes for your puppet. Make sure they are wide enough for your hand to fit through.
Once you have cut the basic shape of your puppet, you can start to get creative and add more details. Remember, the more unique your puppet is, the more fun it will be to play with!
Step 3: Create the mouth
To create the mouth for your sock puppet without hot glue, you can follow these simple steps:
| Materials Needed: | Instructions: |
|---|---|
| Scissors |
Step 1: Cut a small oval-shaped piece of felt in a color that contrasts with your sock. |
| Markers or Paint |
Step 2: Use markers or paint to create a mouth shape and any other details you’d like on the felt oval. |
| Googly Eyes |
Step 3: Glue or sew the googly eyes above the mouth on the sock. |
It’s important to choose a felt color that will stand out against the color of your sock. This will make the mouth more visible. You can also use markers or paint to create additional details on the mouth if you’d like.
When adding the googly eyes, you can either glue them on with fabric glue or sew them on with a needle and thread. This will depend on your personal preference and how durable you want the puppet to be.
Once you’ve completed these steps, your sock puppet will have a cute and expressive mouth that will bring it to life. Experiment with different mouth shapes and colors to create a unique and memorable character.
Step 4: Make the nose and ears
To make the nose and ears of your sock puppet without hot glue, follow these steps:
The Nose:
- Take a small piece of felt and cut out a triangular shape. This will be the base of your nose.
- Then, cut out a smaller triangular shape in a different color or pattern of felt and glue it to the base with fabric glue or a strong craft glue.
- Once the glue has dried, use scissors to trim the edges to create a smooth and symmetrical nose shape.
The Ears:
- Cut two small ear shapes out of felt in your desired color or pattern. You can make them curved, pointed, or any shape you like!
- Attach the ears to the sock using a whip stitch or a blanket stitch, which simply requires threading a needle and passing it through the felt and sock in a looping motion. Make sure to double stitch for durability.
- If you want your puppets ears to stand up, try inserting a small piece of wire or pipe cleaner inside before sewing them on.
Once you’ve completed these steps, your sock puppet is starting to take shape! Next, you can move on to adding the eyes and decorations in step 5.
Step 5: Add eyes and decorate
Now, for the fun part – adding eyes and decorating your sock puppet! The eyes are an essential part of your puppet’s personality. You can use googly eyes or draw eyes with markers or paint. Here’s how to do it:
| If using googly eyes: | If drawing eyes: |
|---|---|
| 1. Decide where you want your eyes to be and use a small amount of glue to attach the googly eyes. | 1. Choose your colors for the eyes and use a pencil to sketch out the shape you want. |
| 2. Hold the eyes in place until the glue dries completely. | 2. Use a thin paintbrush or marker to fill in the eyes with color. |
| 3. Once the glue is dry, you can also add eyebrows or eyelashes using markers or paint. | 3. Be sure to let your eye design dry completely before continuing. |
When it comes to decorating your puppet, the possibilities are endless! You can use markers or paint to add details like freckles, blush, or a mustache. You can also use felt or buttons to add accessories like hats, bow ties, or jewelry. Just let your creativity guide you!
Remember: you don’t have to completely finish your puppet before you start to play with it. As you’re creating, try out different voices and personalities for your puppet to see what works. The most important thing is to have fun with it and let your imagination run wild.
Tips and Variations
With your sock puppet in hand, it’s time to add some personal touches to make it truly unique. Here we’ll provide you with some helpful tips and fun variations to take your sock puppet to the next level. Whether you’re looking to improve the overall appearance or experiment with new designs, we’ve got you covered. So, let’s dive in!
Tips for Making Your Sock Puppets Look Professional
If you want your sock puppet to look more professional and polished, here are some useful tips to keep in mind:
| TIP | DESCRIPTION |
| Use high-quality materials | Invest in good-quality socks and felt to make your sock puppet look and feel nicer. |
| Choose the right colors | Stick to a color scheme when choosing the materials for your sock puppet, so that it looks cohesive and visually appealing. |
| Use detailed facial features | Try to make your sock puppet’s facial features as detailed and expressive as possible. Add eyebrows, eyelashes, or even blush marks if you want to create a more lifelike appearance. This can make your puppet look less like a craft project and more like a real character! |
| Add embellishments | Embellishments like buttons, pom-poms, or a bow can give your sock puppet a unique personality and add some extra charm. |
| Practice your puppeteering skills | Once your puppet is complete, spend some time practicing how to move it and bring it to life. The more comfortable you are with manipulating your puppet, the more professional and polished your performance will look. |
By following these tips, you can take your sock puppet making skills to the next level and create a truly amazing, professional-looking puppet!
Variations
Once you’ve mastered the basics of making a sock puppet, it’s time to get creative! There are endless variations you can make to customize your puppet and make it truly unique. Here are some ideas to get you started:
- Animal Puppets: Turn your sock into an animal! Use felt or marker to create the features of your favorite animal. You can even add ears, whiskers, or a tail.
- Monster Puppets: Let your imagination run wild and create a monster puppet with crazy eyes, horns, and teeth. Use bright colors and fun patterns to make it even more unique.
- Holiday Puppets: Celebrate the holidays with a puppet! Use red and green felt to make a Christmas sock puppet, or add a spooky touch to a Halloween puppet with black and orange accents.
- Character Puppets: Turn your sock puppet into a famous character from a book or movie. Dress it up with a hat or other accessories to really make it stand out.
- People Puppets: Create a puppet that looks like someone you know! Use markers or paint to draw features like glasses or a mustache to make it recognizable.
The possibilities are endless when it comes to customizing your sock puppet. Don’t be afraid to mix and match different materials, colors, and accessories to make it truly unique. Whether you’re making a puppet for yourself or to give as a gift, have fun and let your creativity flow!
Conclusion
In conclusion, making a sock puppet without hot glue is a fun and easy craft that can provide hours of entertainment. With just a few simple materials, you can create a unique and colorful character that will be a hit with kids and adults alike.
So why not give it a try? Not only is it a fun activity to share with friends and family, but it also allows you to be creative and think outside the box. You can customize your puppet with different colors, patterns, and accessories, making each one unique and special.
Plus, making sock puppets can also be educational – it can help children develop their fine motor skills, hand-eye coordination, and creativity. It is also a great way to teach children about recycling, as you can use old socks and other materials that might otherwise go to waste.
Overall, making a sock puppet without hot glue is a great activity for anyone looking for a fun and creative way to spend an afternoon. With these simple steps and materials, you can easily create your own unique and lovable sock puppet. So gather your supplies, follow the steps provided, and let your imagination run wild!
Frequently Asked Questions
1. Can I use any type of sock to make a sock puppet?
Yes, you can use any type of sock, as long as it has a long enough shaft to create the puppet’s head and body.
2. Do I need sewing skills to make a sock puppet?
No, sewing skills are not required to make a sock puppet without hot glue.
3. Can I use something instead of felt?
Yes, you can use any fabric to create your puppet’s features. Felt is just a popular choice because it is easy to work with.
4. Can I wash my sock puppet?
Yes, but it’s best to hand wash it gently and let it air dry.
5. Is it safe for children to make and play with sock puppets?
Yes, making and playing with sock puppets is a safe and fun activity for children of all ages, as long as they are supervised.
6. Can I make multiple sock puppets with one pack of felt?
Yes, depending on the size of your puppets and how many features you want to add, you can make several puppets with one pack of felt.
7. Can I use hot glue instead of felt?
It’s not recommended, as hot glue can be dangerous and may damage the sock material.
8. How long does it take to make a sock puppet?
It typically takes around 30 minutes to make a simple sock puppet, but can take longer if you are adding more features or decorations.
9. What age group is making sock puppets suitable for?
Making sock puppets is suitable for children and adults of all ages, as long as they are capable of using scissors and markers safely.
10. Can I use other materials for decorating my sock puppet?
Yes, you can use any materials you like for decorating your sock puppet, such as fabric paint, stickers, or glitter. Just make sure they are safe and non-toxic.