Imagine bringing an elegant piece of history back to life right in your home. That’s the allure of restoring cane webbing furniture, which combines both beauty and craftsmanship. Whether you’re tackling a thrift store find or preserving a family heirloom, this article will guide you through the process of glue cane webbing.
Understanding Cane Webbing
Cane webbing is the artful technique of weaving rattan vines to create a sturdy and attractive mesh. It’s commonly used in furniture like chair seats and backs, bringing a touch of classic elegance and natural texture to any room.
The Importance of Cane Webbing Repair
Over time, the natural fibers may become damaged or sag, necessitating a cane webbing repair. Not only does this restore the item’s aesthetic appeal, but it also ensures the piece remains functional and safe to use.
Materials Required for Gluing Cane Webbing
Before you embark on DIY cane webbing, gathering all necessary supplies is crucial. This will make the process smoother and help achieve a professional-looking finish.
Selecting the Right Cane Webbing Materials
- Woven cane webbing
- Spline
- Chisel or spline removing tool
- Utility knife
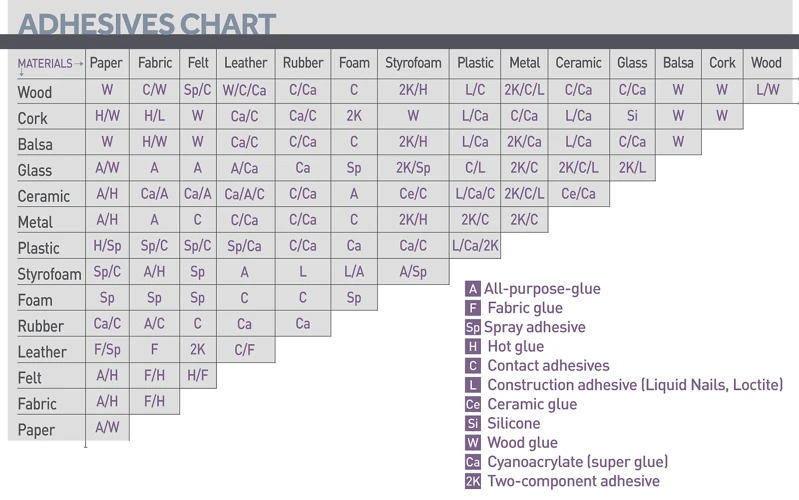
Choosing the Best Cane Webbing Adhesive
For re-caning furniture, a reliable cane webbing adhesive is key. You’ll want something strong, yet flexible, such as PVA glue or a specialized cane adhesive, to secure the webbing in place.
Preparing for DIY Cane Webbing
With your materials at the ready, you’ll want to ensure the furniture piece is clean and ready to work on. This preparation lays the groundwork for a successful restoration.
Cleaning and Prepping the Furniture
Start by thoroughly cleaning the area where you’ll be attaching cane webbing. Remove any dust, old glue, or debris that could interfere with adhesion.
Removing Old Cane Webbing and Adhesive
Use a chisel or a specialized tool to gently remove the old spline and webbing. Take care not to damage the wood as you work.
Attaching Cane Webbing: A Step-by-Step Tutorial
Now, let’s delve into the heart of the cane webbing tutorial. Follow these steps to ensure your restoration project is a success.
Step 1: Measuring and Cutting Woven Cane Webbing
Measure the seat’s dimensions and add a couple of inches on each side for the woven cane webbing. Cut it with a utility knife, ensuring the edges are straight.
Step 2: Soaking the Cane Webbing
Submerge the cut piece in warm water for about 20-30 minutes. This makes the material pliable and easier to work with.
Step 3: Applying Cane Webbing Adhesive
Spread a thin, even layer of cane webbing adhesive along the groove where the cane will be placed. Ensure full coverage for a secure bond.
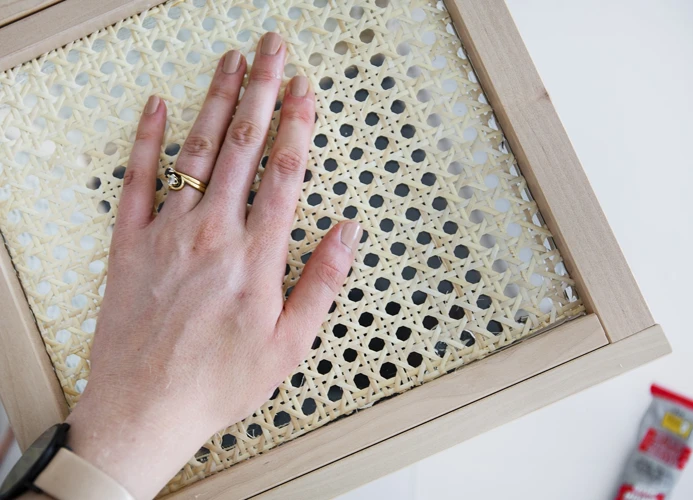
Step 4: Positioning the Cane Webbing
After soaking, place the webbing over the seat, ensuring it’s centered and taut. Press it into the adhesive, starting from the center and working your way out to the edges.
Step 5: Trimming Excess Webbing and Final Adjustment
Once the adhesive begins to set, trim any excess webbing. Make any final adjustments to ensure the cane is straight and even.
Finishing Touches for Re-caning Furniture
The main work is done, but a few finishing touches will ensure your project looks perfect and lasts longer.
Securing the Cane Webbing Edges
Insert the spline into the groove over the webbing, tapping it gently with a mallet. This secures the edges and gives a clean finish.
Restoring Cane Chairs to Their Former Glory
Once the spline is in place and the glue is dry, you’ve successfully completed restoring cane chairs. Stand back and admire your work!
Aftercare: Maintaining Your Restored Cane Webbing
Your chair looks as good as new, but proper care will ensure it stays that way for years to come.
Caring for Your Newly Glued Cane Webbing
Keep your furniture away from direct sunlight and moisture. Dust it regularly and treat it gently to avoid strain on the new webbing.
Preventive Measures for Long-Lasting Cane Webbing
Use cushions to distribute weight evenly and avoid sharp objects that could snag or pierce the cane. These simple steps will extend the life of your work.
Troubleshooting Common Cane Webbing Repair Issues
Even with great care, you might encounter issues. Knowing how to handle them will keep your furniture in top shape.
Handling Loose or Sagging Cane Webbing
If the webbing loosens over time, a light misting with water can tighten it. However, avoid over-wetting to prevent damage.
Replacing Damaged Sections of Cane Webbing
In case of damage, carefully remove and replace just the affected section, following the same steps outlined in this cane webbing tutorial.
Conclusion: Enjoying Your Restored Cane Webbing Furniture
You’ve put in the effort, and now it’s time to relish the results of your DIY cane webbing project.
Reflecting on the DIY Cane Webbing Process
Restoring furniture is a labor of love that not only preserves pieces of history but also instills a sense of accomplishment.
When it comes to DIY projects involving adhesives, it’s always helpful to know the right techniques for the materials you’re working with. If you’re interested in learning how to glue cane webbing — a popular material in furniture restoration and crafting — you might also find our guides on similar topics useful. For instance, if you’re working with rope in your projects, our article on how to glue rope to wood can provide valuable tips for a strong bond. If you’ve had a mishap with nail glue, our tips on how to undry nail glue might save the day. And for those looking into hair extensions, our guide on how to glue in curly weave will walk you through achieving that perfect look. Each of these resources is designed to help you navigate your projects with confidence and ease.
Embracing the Beauty of Restored Cane Pieces
Your restored piece is more than just furniture; it’s a testament to your dedication and the timeless appeal of cane webbing. Enjoy it for many years to come!