Combining the warm appeal of wood with the soft touch of fabric can create both visually appealing and tactilely pleasing projects. Whether you’re crafting a custom piece of furniture or adding a decorative touch to wooden objects, understanding how to attach cloth to wood is essential. This guide will explore various techniques and tips for successfully bonding fabric to wood, ensuring your project not only looks fantastic but also stands the test of time.
Choosing the Best Glue for Cloth to Wood
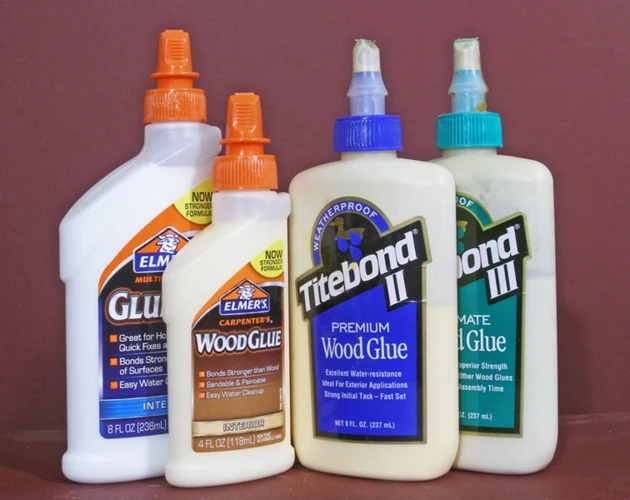
Types of Cloth to Wood Adhesive
There are several adhesives on the market that are suitable for adhering textile to wood. These range from PVA (Polyvinyl Acetate) glues, which are easy to use and clean up with water, to more specialized products like epoxy and fabric-specific adhesives that offer a stronger bond. Each type of glue has its own set of properties, making it important to choose the right one for your project.
Factors to Consider When Selecting Wood and Fabric Glue
- The type of fabric: Lighter fabrics may require a different adhesive than heavier materials.
- Wood surface: Porous woods might absorb glue differently than sealed or treated woods.
- Strength of bond: Consider the best glue for cloth to wood that needs to withstand handling or weight.
- Drying time: Some projects might benefit from a faster-setting adhesive.
Preparation for Gluing Fabric to Wood

Cleaning and Sanding the Wood Surface
For the best results, start with a clean, smooth wood surface. Any dirt or oils can prevent the cloth to wood adhesive from bonding correctly. Sanding the wood lightly will help create a better surface for the glue to adhere to.
Preparing the Cloth for Adhesion
Similarly, the fabric should be free of any dirt, oils, or finishes that might resist the glue. Depending on the material, you may need to pre-wash the fabric to remove any sizing or finishes that could interfere with the adhesive.
Fabric to Wood Glue Techniques
Using Mod Podge for Permanent Fabric Adhesive for Wood
Mod Podge is a popular option for DIY fabric on wood projects. It acts as both an adhesive and a sealant, providing a permanent bond and a protective coat on top of the fabric.
DIY Fabric on Wood with Spray Adhesives
Spray adhesives are great for covering large areas quickly. They provide a uniform layer of adhesive and are excellent for attaching lightweight fabrics to wood surfaces.
Alternative Adhesives for Bonding Fabric to Wood
Other alternatives include silicone-based adhesives, superglue for small applications, or even hot glue for temporary holds. The choice depends on the specific requirements of your project.
How to Attach Cloth to Wood Step-by-Step

Measuring and Cutting Fabric
First, measure the area of the wood you wish to cover. Cut the fabric to size, allowing a little extra for adjustments.
Applying the Adhesive
Apply the chosen wood and fabric glue evenly, according to the manufacturer’s instructions. Be careful not to use too much, as it could seep through the fabric.
Attaching and Smoothing the Fabric
Carefully place the fabric onto the wood surface, starting from one edge and working your way to the other, smoothing out any wrinkles or bubbles as you go.
Drying and Curing Time
Allow ample time for the adhesive to dry. Some glues require clamping or pressing the fabric into the wood until set, while others simply need time to cure.
Finishing Touches
Trimming Excess Fabric
Once the fabric is securely attached and the glue has dried, trim any excess material for a clean, professional finish.
Sealing the Fabric
To protect the fabric and create a durable finish, apply a coat of sealant. This will also make the surface easier to clean and maintain.
Troubleshooting Common Issues
Preventing Bubbles and Wrinkles
To avoid bubbles and wrinkles, apply the glue evenly and smooth the fabric down firmly from the center to the edges. Use a roller or a flat tool to help remove any air pockets.
Adhesive Stains and Spills
If glue spills onto the fabric, act quickly. Follow the adhesive manufacturer’s guidelines for removal, using a damp cloth or a specific cleaning agent as needed.
Adhering Textile to Wood in Special Projects
Decoupage Techniques
Decoupage involves cutting and layering paper or fabric and sealing it onto a surface. This method is ideal for decorative projects and can be adapted for fabric with the use of the right adhesive.
Upholstery Considerations
When upholstering furniture, the fabric to wood glue techniques may vary. Heavier-duty adhesives or staples could be necessary for a secure and lasting fit, especially for furniture that will be used frequently.
Maintenance and Care for Fabric-Covered Wood Items
Maintaining your fabric-covered wood items is crucial for longevity. Clean the fabric according to the type of material and the manufacturer’s instructions. Avoid harsh chemicals that could damage the wood or the glue bond.
Conclusion
Recap of Fabric to Wood Glue Methods
In conclusion, the method you choose for attaching fabric to wood will depend on the materials, the desired finish, and the function of the piece. Whether you opt for Mod Podge, spray adhesives, or another type of glue, the key to success lies in preparation and patience.
Are you working on a craft or repair project that involves adhering different materials to wood? If so, you may find our tutorials quite helpful. For those looking to attach fabric to wood surfaces, we don’t have a specific article on gluing cloth to wood at the moment. However, our guides on related topics such as how to glue carpet to wood, how to glue leather to wood, and how to glue clay to wood can offer you valuable tips and techniques that might also apply to your cloth-to-wood project. Each material requires specific adhesives and approaches, so make sure to check out these resources for a successful bond.
Final Tips for Successful Cloth to Wood Projects
Always test your chosen adhesive on a small area first, follow the manufacturer’s instructions, and allow plenty of time for drying and curing. With these tips in mind, you’re ready to embark on your next fabric and wood crafting adventure!