When it comes to crafting, combining different materials can result in a beautiful and unique product. Gluing leather to wood is a technique that marries the supple elegance of leather with the natural strength of wood. Whether you’re creating a custom piece of furniture or adding a touch of sophistication to your wooden crafts, understanding how to bond leather to wood is essential. This blog post aims to guide you through the process, ensuring a strong and lasting bond between these two versatile materials.
Understanding Leather to Wood Adhesive Options
There are several adhesives on the market suitable for attaching leather to wood. Choosing the right leather to wood adhesive is crucial for the project’s longevity and aesthetic. You’ll want to opt for adhesives that are specifically formulated to handle the unique properties of both materials.
Benefits of DIY Leather and Wood Projects
Engaging in DIY leather and wood projects can be incredibly rewarding. Not only do you have the opportunity to create custom designs that reflect your personal style, but you also gain the satisfaction of crafting something with your own hands. The combination of leather and wood can add a touch of luxury and durability to everyday items.
Choosing the Best Glue for Leather to Wood

Selecting the best glue for leather to wood is pivotal for the success of your project. The ideal adhesive should form a bond that is both flexible and robust, able to withstand the test of time and use. It should also dry clear to maintain the aesthetic integrity of your creation.
Comparing Leather to Wood Glue Techniques
Various leather to wood glue techniques can be employed, each with its own set of advantages. Some might prioritize a quick set time, while others emphasize the strength of the bond. We will explore the pros and cons of different techniques to help you make an informed decision.
Leather Woodworking Adhesive Properties
When we talk about adhesive properties in leather woodworking, we refer to factors such as bonding strength, flexibility, drying time, and the adhesive’s reaction to temperature changes. These properties determine the suitability of the glue for your specific leather and wood craft.
Preparation for Attaching Leather to Wood
Proper preparation is key to ensuring that your leather adheres well to the wood. This includes gathering the right materials and preparing the surfaces to be joined. Skipping this step can result in a weak bond or an uneven finish.
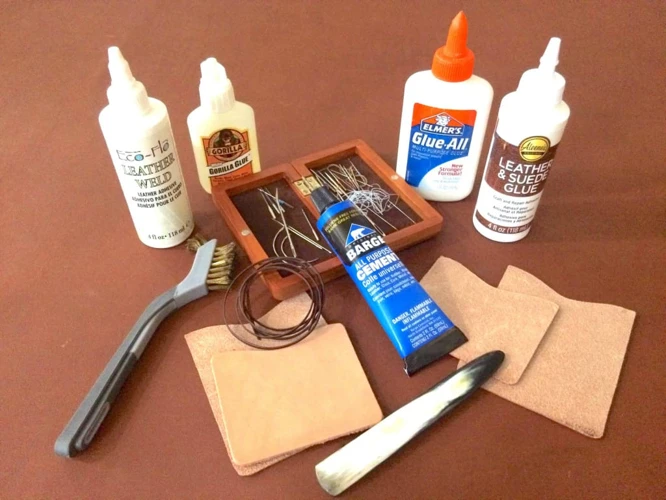
Materials Needed for Leather and Wood Craft
- Leather piece
- Wooden base
- Appropriate adhesive
- Clamps or weights
- Clean cloths
- Sandpaper
Surface Preparation Tips
Ensuring that both the leather and wood surfaces are clean, dry, and free of any oils or dust is paramount. Lightly sanding the wood can create a better surface for the adhesive to grip, while wiping down the leather can remove any residues that might interfere with the glue.
Step-by-Step Guide: How to Bond Leather to Wood
With your materials and surfaces prepared, you’re ready to start the process of gluing leather to wood. This step-by-step guide will walk you through applying the adhesive, attaching the leather, and ensuring the bond cures correctly.
Applying the Adhesive
Apply a thin, even layer of adhesive to both the wood and the backside of the leather. Be careful not to over-apply, as this can result in a messy finish and a weaker bond.
Pressing the Leather onto the Wood
Once the adhesive is applied, carefully place the leather onto the wood. Start from one side and gently smooth it out to the other to avoid air bubbles. Use clamps or weights to apply even pressure across the surface.
Curing the Bond
Allow the adhesive to cure as recommended by the manufacturer. The curing time can vary, but it’s typically between a few hours to a full day. It’s vital not to disturb the project during this time to ensure a strong bond.
Finishing Touches for Leather and Wood Projects
After the adhesive has fully cured, some finishing touches can enhance the durability and appearance of your leather and wood project. These final steps will give your craft a professional look and feel.
Trimming and Cleaning Excess Glue
If any adhesive has seeped out from the edges, carefully trim it away with a sharp knife. Clean any residue with a damp cloth, taking care not to wet the leather excessively.
Sealing and Protecting the Bond
Applying a sealant can protect both the leather and wood from moisture and wear. Choose a sealant that is compatible with both materials and apply it according to the instructions.
Troubleshooting Common Issues
Even with careful preparation and application, you may encounter some issues when gluing leather to wood. Here’s how to address some of the most common problems.
Addressing Weak Bonds
If you notice that the bond between the leather and wood isn’t as strong as expected, it may be necessary to reapply the adhesive. Ensure that the surfaces are properly prepared and that you’re using the correct type of glue.
Removing Excess Glue Without Damage
Excess glue can often be removed with a gentle solvent or by carefully scraping it off with a blade. Always test your method on a small, inconspicuous area first to avoid damaging the materials.
Advanced Techniques in Woodworking with Leather
For those looking to take their woodworking with leather to the next level, there are advanced techniques that can add complexity and artistic flair to your projects.
Incorporating Leather into Complex Wood Designs
Leather can be used to add intricate details or inlays to woodwork. This requires precise cutting and gluing methods to ensure the leather fits perfectly within the wooden design.
Creating Unique Textures and Patterns
Experimenting with different leather textures and patterns can also elevate your projects. Embossing, stamping, or even burning designs onto the leather before attaching it to wood can create a standout piece.
Conclusion: Mastering Leather to Wood Glue Techniques
Combining leather and wood in DIY projects can add a luxurious and custom touch to your creations. By understanding the proper techniques and using the right materials, you can achieve a strong, durable bond that will stand the test of time.
Recap of Key Steps
To recap, selecting the right adhesive, preparing your materials, carefully applying the glue, and allowing it to cure properly are all fundamental steps to a successful leather and wood craft.
When working on a DIY project that involves different materials, knowing the right adhesive techniques can be crucial for a successful outcome. If you’re looking to combine materials like leather and wood, our guide on how to glue leather to wood will provide you with step-by-step instructions and helpful tips. For those who are dealing with other materials, we also have comprehensive tutorials on how to glue rubber to leather, how to glue cloth to wood, and how to glue stone to wood, ensuring you can tackle a variety of projects with confidence.
Additional Resources for Leather Woodworking Enthusiasts
For those eager to delve deeper into the world of leather woodworking, there are many resources available. Online tutorials, workshops, and dedicated crafting communities can offer valuable tips and inspiration for your next project.