Have you ever wanted to create a stunning piece of art by gluing clay to wood? Whether you’re a seasoned artist or a beginner, the process can seem daunting. But fear not, with the right tools and materials, and a comprehensive understanding of the process, you can achieve professional-looking results in no time. In this guide, we’ll take a deep dive into the world of clay to wood gluing, and provide you with step-by-step instructions on how to get the job done. So grab your materials and let’s get started!
Tools and Materials

Before you begin gluing clay to wood, you need to make sure you have the right tools and materials to get the job done. The proper materials and tools will ensure a secure bond between the clay and wood. In this section, we’ll cover the essential items you’ll need to complete this project. From clay and wood to glue and clamps, we’ve got you covered! Let’s dive in.
For those interested in learning how to glue clay back together, be sure to check out our guide on repairing pottery which offers helpful tips and techniques.
Materials
When it comes to gluing clay to wood, the materials you need are relatively simple. However, choosing the right materials can make a significant difference in how well your project adheres and how long it lasts. Here are the key materials you’ll need:
| Material | Description |
|---|---|
| Clay | Choose the right type of clay for your project depending on its purpose, color, and texture. Polymer clay is the most common and versatile clay, though air-dry clay can also work well. |
| Wood | Choose the right kind of wood depending on how durable and aesthetically pleasing you want your project to be. Softwoods, such as pine and cedar, are easier to cut and shape but not as sturdy as hardwoods, such as oak and walnut. |
| Glue | Choose the right type of glue depending on the materials you’re working with and the conditions your project will be exposed to. Epoxy glue and super glue are both strong options, while silicone glue is best for projects that require water resistance. |
| Sanding paper | This material will help you to sand the surface of the wood and the edges of the clay, providing a better grip and stronger attachment. Make sure to choose the right sandpaper’s grit, ranging from coarse to fine. |
| C-clamps or clothespins | Using these materials will help to hold the clay on the wood while the glue dries, ensuring a strong bond. |
| Protective gear | Depending on the type of glue you decide to use, protective gear such as gloves, goggles, and a mask can help protect you from fumes or excessive skin exposure. |
Choose the materials that will best fit the requirements of your project. If you need to learn more about gluing other materials, such as metal to acrylic or repairing lawn mower seats, visit our articles on metal and acrylic, lawn mower seats or any of the other relevant links.
Tools
When it comes to tools, you may already have most of the items you need at home. Here are the tools you will need to properly glue clay to wood:
– Clay: The clay you want to attach to the wood
– Sandpaper: To sand the wood surface and make it rough for better adhesion
– Cloth: To wipe the surfaces of the clay and wood before gluing
– Paintbrush: To apply glue onto the back of the clay
– Glue: Depending on the type of clay and wood, you may need epoxy, PVA, or any other suitable glue
– Clamps: To hold the clay and wood in place while drying
– Protective gear: Gloves and a mask if you are using strong chemicals such as epoxy or cyanoacrylate glue
All of these tools are essential to achieve a strong and long-lasting bond between the clay and wood. If you are missing any of these items, you may be less likely to achieve success when gluing clay to wood. However, if you want to learn more about gluing other materials, check out our other articles such as what is E6000 glue used for or how to glue silicone rubber.
Preparing the Clay and Wood
Before you begin gluing clay to wood, it is important to properly prepare both materials to ensure a strong bond. Preparing the Clay and Wood properly can make the difference between a securely glued project and a frustrating mess. If either material is not properly prepared, the bond between the two will not be strong and the project may fall apart. In this section, we will go over the necessary steps to prepare both the clay and wood for gluing.
Clay Preparation
Preparing the clay is a crucial step in ensuring a strong and lasting bond between the clay and wood. Proper preparation can help the glue adhere properly to the clay surface, preventing it from becoming loose or falling off. Here are some steps to prepare the clay for gluing:
| Step 1 | Knead the clay thoroughly to make it pliable and remove any air bubbles that may cause the clay to crack or break during the gluing process |
| Step 2 | Clean the surface of the clay thoroughly to remove any dirt, dust, or debris using a damp cloth or sponge. |
| Step 3 | Dry the surface of the clay completely, either by letting it air dry or by wiping it with a dry cloth or paper towel. |
| Step 4 | Roughen the surface of the clay gently using sandpaper or a fine-grit abrasive to create a texture that the glue can grip to. Be careful not to sand too hard or the clay may become smooth and shiny, and the glue may not adhere properly. |
| Step 5 | Apply a layer of primer or sealant to the roughened surface of the clay if necessary, to create a smooth and even surface for the glue to adhere to. Allow the primer to dry completely before applying the glue. |
By following these steps, the clay will be well-prepared for gluing and will have a strong adherence to the wood. Remember to be gentle with the clay, as it can be delicate and prone to breakage if handled roughly.
For instance, if you need to know more about gluing pottery, check out our guide on how to glue pottery for some useful tips.
Wood Preparation
Wood preparation is a crucial step to ensure that the clay adheres well to the surface. Ignoring this step can result in a weak bond that will eventually break over time. Proper preparation involves cleaning and sanding the wood surface before gluing. Here are the steps to follow for wood preparation:
Cleaning the Wood:
Before applying any glue, it’s important to clean the wood surface thoroughly. Use a soft cloth or brush to remove any dust, debris, or grease that may be on the surface. Any residue left on the surface can weaken the bond between the wood and clay, so it’s important to be thorough.
Sanding the Wood:
Once the surface is clean, sand it to create a rough texture. The rough texture will give the glue something to grip onto, providing a strong bond. There are various types of sandpaper available, but 120-grit sandpaper is ideal for preparing wood. Start with coarse sandpaper to remove any rough spots and follow with fine-grit sandpaper to even out the surface.
Using a Tack Cloth:
After sanding the wood, it’s essential to remove all the sawdust and debris from the surface. To do this, use a tack cloth. Tack clothes are sticky and help pick up any debris and dust that may be left on the surface. They ensure that the wood is clean and ready for gluing.
Protecting the Wood:
Clay can stain the wood, resulting in an unsightly finish. To avoid this, consider applying a coat of varnish or sealant to the wood surface before gluing. This will create a barrier between the clay and the wood, preventing staining and discoloration.
Proper wood preparation can strengthen the bond between the clay and the wood surface, ensuring that the final product is sturdy and long-lasting. By following the above steps carefully, you can prepare your wood surface for gluing and prevent any potential complications.
If you’re working with a broken clay object, and you need to glue it back together, check out our article on how to glue clay back together. Additionally, if you want to learn how to glue a countertop to a cabinet, check out our article on how to glue countertop to cabinet.
Choosing the Right Glue
When it comes to gluing clay to wood, choosing the right glue is essential to ensure a strong and long-lasting bond between the two materials. With so many types of glue available in the market, it can be perplexing to select the right one for your project. However, certain factors need to be considered when making this decision, such as the type of clay and wood, the required drying time, and the intended use of the finished item. In the following sections, we will go through the different types of glues suitable for clay and wood and the factors to take into account when selecting the right glue for your project. We will also include a link to a helpful article about UV glue, which may be relevant to your decision, if necessary.
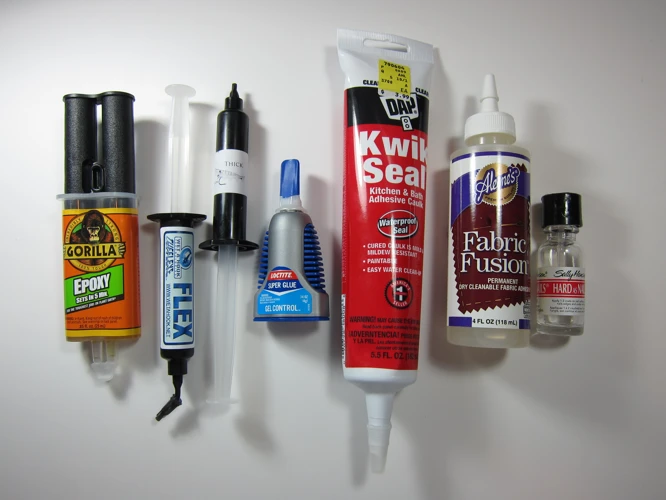
Types of Glues for Clay and Wood
When it comes to gluing clay and wood together, there are many different types of glue available. It’s important to choose the right kind of glue to ensure a strong bond that will last over time. Here are some of the most common types of glues for clay and wood:
PVA Glue – This is a popular choice for bonding clay to wood. PVA stands for polyvinyl acetate, and it’s a water-based glue that dries clear. PVA glue is easy to apply, dries relatively quickly, and is widely available at craft stores. However, it may not be the best choice for outdoor use, as it can break down over time when exposed to moisture.
Epoxy Glue – Epoxy is a two-part adhesive that consists of a resin and a hardener. When mixed together, they form a strong, durable bond. Epoxy is a good choice for bonding materials that have different expansion rates, such as wood and clay. It’s also waterproof and can be sanded or painted once it’s dry. However, it can be messy to work with and requires more preparation time than other types of glue.
Super Glue – Also known as cyanoacrylate glue, super glue is a fast-drying adhesive that can bond clay and wood together quickly. However, it may not be the best choice for larger, heavier objects, as it can become brittle over time. It’s also not recommended for use on porous surfaces, as it can seep into the pores and create a weak bond.
UV Glue – This type of glue is cured with ultraviolet light, which makes it a good choice for bonding clay and wood in hard-to-reach places. It’s also waterproof and resistant to heat and chemicals. However, UV glue can be expensive, and it requires a UV light source to cure properly.
Cyanoacrylate Glue – This glue is commonly known as “instant glue” or “super glue” and is perfect for small projects and repairs. Cyanoacrylate glue also has low viscosity which makes it very good at bonding woods, clays and micro-circuits together. However, it is not recommended to use this glue for anything educational or for anything you expect to last longer.
Each of these types of glue has its own strengths and weaknesses, so it’s important to consider your specific project and needs before choosing a glue type. Remember that some glue types work better with certain types of clay and wood, so research and experimentation may be necessary to find the best option for your project.
Factors to Consider When Choosing Glue
When it comes to choosing the right glue for attaching clay to wood, there are several factors to consider to ensure the best possible outcome. Here are some important things to keep in mind:
- Type of material: Consider the type of clay and wood you are working with, as certain glues may work better on specific materials. Some adhesives may work well on porous materials or may be formulated for specific surfaces.
- Strength: Assess the strength of the bond you require. If you are working with a heavier clay sculpture or object, you may need a stronger adhesive that can withstand the weight. Alternatively, if you are just attaching a small piece of clay to a wooden surface, a less strong glue may suffice.
- Flexibility: Consider the flexibility of the bond you need. If the clay or wood is likely to expand or contract (due to changes in temperature or humidity), you’ll need a glue that can handle the motion without cracking or breaking the bond.
- Color: Think about the color of the glue and how it might affect the appearance of the finished project. While clear or transparent adhesives might be great for some projects, you may need to choose a colored glue that will blend in better with the clay or wood if the bond will be visible.
- Chemical composition: Some adhesives may interact negatively with certain materials, causing discoloration, corrosion, or other damage. Be sure to check the chemical composition of your chosen glue and make sure it won’t damage the clay or wood surfaces.
Ultimately, the right choice of glue will depend on the specific project you are working on. If you need a strong, versatile adhesive that can bond almost any surface, you may want to consider epoxy. If you need a glue that can resist exposure to UV light, you might prefer to use UV-sensitive glue. On the other hand, if you need to attach clay to plastic, you may want to check out our article on using epoxy on plastic. Whatever option you choose, be sure to consider all the factors and follow the manufacturer’s instructions for best results.
Applying the Glue
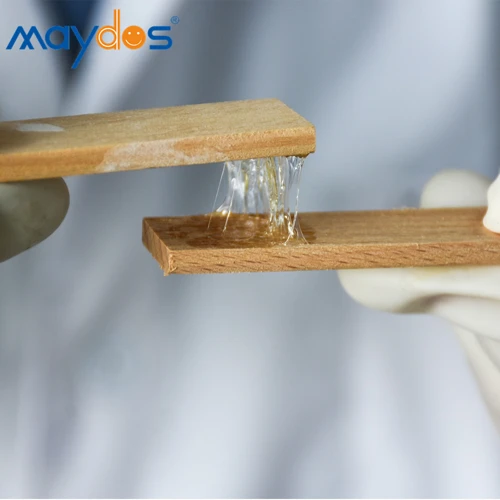
Now that you have prepared your clay and wood, it’s time to move on to the next step: applying the glue. This is a crucial part of the process, as the glue will determine how strong your bond will be. However, with so many different types of glue available, it can be confusing to know which one to use. In this section, we will guide you through the process of choosing the right glue for your project and provide a step-by-step guide on how to apply it correctly. So, get ready to stick it together and create something amazing!
Step-by-Step Guide to Applying Glue
When it comes to gluing clay to wood, the process requires a bit of precision to ensure a secure bond. Follow these step-by-step instructions to apply glue correctly:
| Step 1: | Choose the right glue for your project based on the materials and the conditions it will be exposed to. |
| Step 2: | Clean the surfaces of both the wood and the clay to be glued together. Make sure there is no dust or debris on the surfaces |
| Step 3: | Apply a small amount of glue to the back of the clay piece that will be attached to the wood. |
| Step 4: | Spread the glue evenly over the back of the clay piece. Use a toothpick or other small tool to help spread the glue evenly if necessary. |
| Step 5: | Press the clay piece firmly onto the wood surface. Make sure to hold it in place for at least 30 seconds to ensure a strong bond. |
| Step 6: | Wipe away any excess glue using a damp cloth. Be sure to clean up any excess glue before it dries. |
| Step 7: | Allow the glue to dry completely according to the manufacturer’s instructions before handling the item. |
One important thing to keep in mind is that too much glue can compromise the strength of the bond and lead to a messy finish. It’s better to use a small amount of glue and apply additional layers as needed. By following these steps, you’ll be able to create a strong bond between your clay and wood pieces.
Common Mistakes to Avoid
When it comes to gluing clay to wood, there are some common mistakes that people make that can compromise the strength and durability of the bond. Here are some mistakes to avoid to ensure a secure and long-lasting bond between your clay and wood surfaces:
- Using too much glue: Applying too much glue can result in a weak bond and excess glue seeping out from the edges. Use glue sparingly and only apply a thin, even layer to both surfaces.
- Using the wrong type of glue: Choosing the wrong type of glue can result in a failed bond. Make sure to select a glue that is suitable for both clay and wood surfaces, and consider factors such as drying time and strength.
- Not preparing the surfaces: Failure to properly clean and prepare the surfaces to be bonded can result in a weak bond. Make sure to clean both the clay and wood surfaces thoroughly with a damp cloth and allow them to dry completely before applying glue.
- Rushing the drying process: Depending on the type of glue used, it may take some time for the bond to fully dry and cure. Rushing the drying process by applying pressure or moving the glued surfaces before they are fully dry can compromise the bond.
- Ignoring safety measures: Some types of glue can be harmful if they come into contact with skin or are inhaled. Make sure to follow safety guidelines and use protective equipment such as gloves and a mask if necessary.
By avoiding these common mistakes, you can increase the chances of a strong and durable bond between your clay and wood surfaces. Remember to always work carefully and patiently, and to follow the instructions of your chosen glue for best results.
Drying and Finishing
As much as the gluing process is essential, it is equally important to ensure that the glue sets and dries in the right way. To achieve a long-lasting bond between clay and wood, proper drying and finishing techniques are crucial. Now, let’s delve into the essential steps involved in this last phase of the process. So, grab your materials and tools and let’s get started!
Drying Times for Different Types of Glues
After applying glue to clay and wood, leaving it to dry is crucial to ensure your project has a strong and lasting bond. However, the drying time will depend on the type of glue used. Here are some of the most common types of glue for clay and wood, and the estimated drying time for each:
| Type of Glue | Estimated Drying Time |
|---|---|
| White PVA glue | 24 hours |
| Epoxy glue | 4-6 hours |
| Cyanoacrylate glue (super glue) | 10-20 seconds |
| Hot glue | 2-5 minutes |
White PVA glue: PVA glue is a popular choice for gluing clay to wood due to its water-soluble nature and strong adhesive properties. However, PVA glue requires a longer drying time compared to other types of glue, with an estimated drying time of 24 hours. Make sure not to disturb the project until the glue has completely dried.
Epoxy glue: Epoxy glue is a two-part adhesive that creates a strong and durable bond. It has a faster drying time compared to PVA glue, with an estimated drying time of 4-6 hours. However, it is important to mix the epoxy glue well before applying it to ensure proper adhesion.
Cyanoacrylate glue: Commonly known as super glue, cyanoacrylate glue is a fast-drying adhesive that creates a strong bond. Its estimated drying time is only 10-20 seconds, making it ideal for quick projects or small pieces. However, be careful when applying cyanoacrylate glue, as it can bond skin together and is difficult to remove once it dries.
Hot glue: Hot glue is a versatile adhesive that dries quickly and is easy to apply. Its estimated drying time is only 2-5 minutes, which is ideal for larger projects. However, hot glue may not be the best choice for projects that require a strong and long-lasting bond.
It is important to note that the drying time may vary depending on factors such as humidity, temperature, and the amount of glue used. It is always best to check the manufacturer’s instructions for specific drying times and follow them carefully to ensure the project has a strong and lasting bond.
Finishing Techniques for a Professional Look
After your clay and wood are glued together, it’s important to take steps to give your project a professional-looking finish. Here are some finishing techniques to consider:
| Technique | Description |
|---|---|
| Sanding | Sanding can help smooth out any rough edges or bumps in the clay or wood. Start with a rougher grit sandpaper, such as 100 or 150, and gradually work your way up to finer grits, such as 400 or 600. |
| Painting | If you want to add color to your project, painting is a great option. Choose a paint that is suitable for both clay and wood, such as acrylic or latex paint. Be sure to apply several thin coats of paint, allowing each coat to dry completely before applying the next. |
| Staining | Staining is another way to add color to your project, but it allows the natural grain of the wood to show through. Choose a wood stain that is appropriate for your wood type and apply it according to the manufacturer’s instructions. |
| Sealing | Sealing your project can help protect it from damage, moisture, and wear and tear. Choose a clear sealant that is appropriate for both clay and wood, such as polyurethane or varnish, and apply it in thin coats, allowing each coat to dry completely. |
Remember, the finishing techniques you choose will depend on your personal preference and the overall look you want to achieve with your project. Additionally, consider the environment where your project will be displayed or used – for example, outdoor projects may require different finishing techniques than indoor projects. Experiment with different techniques and finishes to find the perfect look for your project.
Conclusion
In conclusion, gluing clay to wood can be a tricky process, but with the right tools, materials, and techniques, it can be achieved with ease. By following the steps outlined in this comprehensive guide, you can successfully adhere clay to wood and create beautiful, durable crafts and projects.
Remember to always prep your materials properly, choose the right type of glue for your project, and take your time when applying the glue. It is also important to be patient during the drying process and to use finishing techniques to create a professional look.
Whether you’re a seasoned crafter or a beginner, the tips and tricks mentioned in this article will help you to achieve the perfect bond between clay and wood. With a little bit of patience, practice, and creativity, you can create stunning works of art that are sure to impress. So go ahead and get started on your next clay and wood project today!
Frequently Asked Questions
1. Can any type of clay be used for gluing to wood?
Most types of clay can be used for gluing to wood, but air-dry clay is the easiest to work with for this purpose. Polymer clay can also be used, but it requires more steps and techniques for a successful bond.
2. Can any wood be used for gluing with clay?
Most types of wood can be used for gluing with clay, but wood that has been treated or coated with varnish or paint may not bond as well. It is best to use untreated, natural wood for the strongest bond.
3. Will glue damage the clay?
No, if the glue is applied and allowed to dry properly, it should not damage the clay. However, excess glue or improper application can lead to a weaker bond or damaged texture.
4. Can I sand the glued area after it dries?
Yes, you can sand the glued area once it is fully dry. However, it is important to wait until the glue has completely cured so that the bond is not weakened.
5. How long does it take for the glue to dry?
The drying time will depend on the type of glue used. Some glues dry as quickly as 30 minutes, while others may take several hours or overnight to completely dry.
6. Can I paint over the glued area?
Yes, you can paint over the glued area once it is dry. However, it is important to ensure that the bond is strong before painting and to avoid applying too much pressure or water to the glued area during the painting process.
7. Can I use a hot glue gun to glue clay to wood?
Yes, a hot glue gun can be used for gluing clay to wood, but it may not be the strongest bond. Hot glue works well for temporary or lightweight projects, but a stronger glue such as Epoxy or PVA glue is recommended for a permanent and secure bond.
8. How can I remove excess glue from the surface?
To remove excess glue from the surface, you can use a damp cloth or sponge while the glue is still wet. If the glue has already dried, it may require sanding or scraping to remove any excess residue.
9. Can I use tape instead of glue for attaching clay to wood?
Tape can be used as a temporary solution for holding clay to wood, but it is not a permanent or strong bond. It is recommended to use one of the recommended types of glue for a secure and lasting bond.
10. Can clay be stained or varnished after it is glued to wood?
Yes, clay can be stained or varnished after it is glued to wood, but it is important to ensure that the glue has fully cured before applying any additional treatments to the surface.