Have you ever wanted to add some pizzazz to your paper crafts by gluing ribbon to them? It seems like a simple task, but getting the ribbon to stick just right can sometimes be a challenge. Should you use a glue stick, spray adhesive, or more traditional glue? And what’s the best way to prepare the ribbon so it sticks well? Don’t worry, we’ve got you covered! In this article, we’ll provide tips and tricks for gluing ribbon to paper that will help take your crafting to the next level. So grab your ribbon, paper, and glue, and let’s get started!
Materials needed
When it comes to gluing ribbon to paper, having the right materials is crucial to achieve a long-lasting and aesthetically pleasing result. To get started on your project, here are the essential materials you will need. Keep in mind that the materials listed below can also be used for a variety of other crafting projects. If you’re interested in learning how to make felt flowers without glue, you may want to check out this guide.
Ribbon
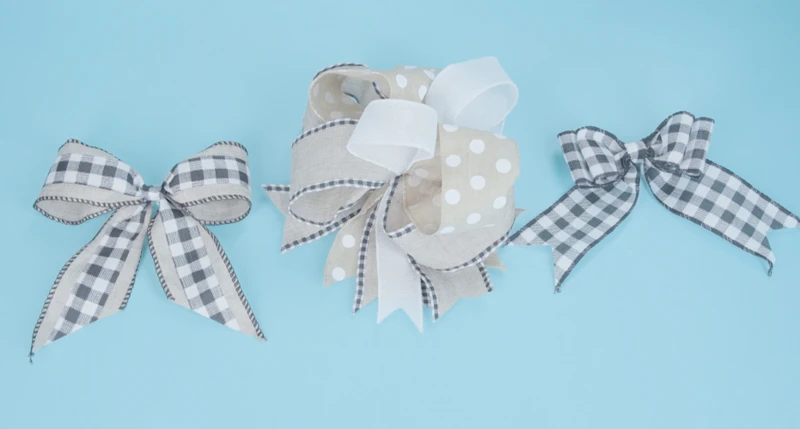
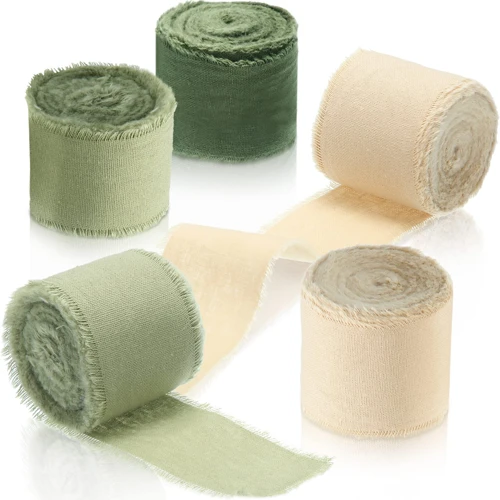
Ribbon is a versatile material that can be used for various crafts, including card-making, scrapbooking, and even hair accessories. When it comes to gluing ribbon to paper, choosing the right type of ribbon is crucial.
Ribbons are available in a variety of materials, including satin, grosgrain, organza, and velvet. Each type of ribbon has its unique texture, thickness, and look. To choose the right ribbon for your project, consider the color and style of your paper, the purpose of the project, and the level of formality.
Material | Properties
— | —
Satin | Smooth and glossy, drapes well, great for formal projects
Grosgrain | Ribbed texture, sturdy and durable, good for bows and accents
Organza | Transparent and light, gives a delicate touch, great for wedding and baby projects
Velvet | Soft and plush, luxurious look and feel, perfect for winter and holiday projects
To add an extra element to your project, you can use textured ribbons, such as ribbons with polka dots, stripes, or glitter. When selecting a ribbon, pay attention to its width. Narrow ribbons are perfect for delicate work, while wider ribbons are ideal for making bows or adding bold accents to your project.
For more creative ideas using ribbon, check out our article on how to use E6000 glue on fabric, or learn how to make doll shoes without hot glue in our guide how to make doll shoes without hot glue.
Paper
When it comes to choosing the paper to glue your ribbon onto, you have several options to explore. First and foremost, it’s important to choose a sturdy paper that won’t tear or wrinkle easily. You can use different types of paper, depending on the project you’re making. Here are a few options to consider:
- Cardstock: This thick paper is perfect for creating greeting cards, invitations, and other decorative items. It’s available in a variety of colors and textures, so you can choose one that complements your ribbon nicely. You can click here to learn how to paint on cardstock paper with watercolors, glue and salt.
- Construction paper: This is another great option for crafting and creating paper decorations. It’s available in a range of colors and thicknesses, and it’s affordable too. However, construction paper can wrinkle easily if too much glue is applied.
- Scrapbook paper: This type of paper is perfect for creating scrapbook pages, as it’s decorative and often comes in coordinating sets. Scrapbook paper is slightly thicker than regular printer paper, but not as thick as cardstock.
It’s also important to consider the size and shape of the paper for your project. For example, if you’re creating a handmade card with ribbon, you’ll want to choose a piece of cardstock that’s folded in half to create the card. On the other hand, if you’re creating a scrapbook page with ribbon, you can choose any size and shape that works for your theme.
When choosing paper to glue your ribbon onto, think about the overall look and feel of your project, as well as the intended use. Whether you’re making a card, a scrapbook page, or a DIY decoration, the right paper can make all the difference. If you want to learn more about gluing paper to fabric, you can follow this link: /how-to-glue-paper-to-fabric/
Glue
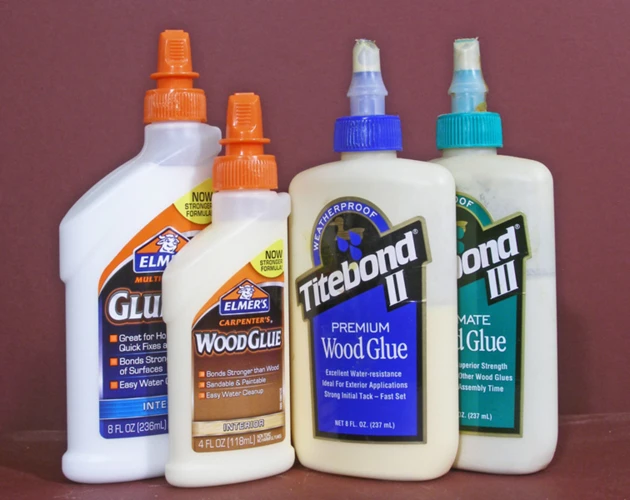
When it comes to choosing the right glue for your ribbon-to-paper project, there are several options available to you. Below is a table comparing the different types of glue you can use, including their advantages and disadvantages.
| Type of Glue | Advantages | Disadvantages |
|---|---|---|
| Aleene’s Original Tacky Glue | Dries clear, strong bond, non-toxic, water-soluble | May take longer to dry than some other options |
| Double-sided tape | Easy to use, no drying time, creates a clean look | Not as strong as other glues, may not adhere well to all surfaces |
| Spray adhesive | Quick-drying, creates a strong bond, even coverage | May be messy to use, can be difficult to control, emits fumes |
| Glue stick | Easy to use, no drying time, available in different sizes and strengths | Not as strong as other glues, may not adhere well to all surfaces |
When choosing your glue, it’s important to consider the type of paper you are using and the strength of bond you require. If you’re unsure which type of glue is best for your project, consider doing a test run on a small section of your paper and ribbon to see how it adheres.
If you’re looking for more information on other types of gluing techniques, check out our guide on craft glue, which covers everything from gluing pressed flowers to gluing cane webbing.
Preparing ribbon for gluing
Before gluing ribbon to paper, it’s essential to prepare it properly to ensure a secure bond. Cleaning ribbon and trimming ribbon edges are two important steps to consider. Cleaning the ribbon ensures that it’s free of dust and debris. Trimming the edges removes any frayed or uneven bits that could interfere with a smooth, tidy finish. Once you’ve prepared your ribbon, it’s time to choose the right glue for the job. If you’re not sure what type of glue to use, check out our article on what glue sticks are and how to use them. If you’re working with foam, you may want to read our guide on how to glue foam.
Cleaning ribbon
Before gluing ribbon onto paper, it’s essential to clean the ribbon properly to ensure that your end product is flawless. Dust and debris can accumulate on the ribbon, making it difficult for the glue to adhere to the surface. Here is a step-by-step guide on how to clean the ribbon to achieve the desired results.
Gather the materials
To clean the ribbon, you’ll require a few items. These include:
| Materials | Description |
| Soft-bristled brush | This is used to remove dirt and dust particles gently. |
| Mild detergent | Use a mild detergent such as dish soap to clean the ribbon. Avoid using bleach or harsh chemicals that can damage the ribbon’s fibers. |
| Bowl of water | You’ll need to soak the ribbon in water. |
| Towel | You’ll need a towel to blot the ribbon dry after rinsing it. |
Cleaning the ribbon
Now that you have all the necessary materials, it’s time to clean the ribbon. Follow these steps:
- Fill a bowl with lukewarm water and add a small amount of mild detergent.
- Place the ribbon into the water and gently agitate it for a few seconds to loosen any dirt or dust.
- Remove the ribbon from the water and rinse it thoroughly with cool water.
- Blot the ribbon with a clean towel to remove excess water. Avoid wringing or twisting the ribbon, as this can damage its fibers.
- Lay the ribbon flat on a towel and allow it to air-dry completely. Avoid using a dryer, as the heat can cause the ribbon to shrink or warp.
Additional Tips
- Before cleaning the ribbon, test a small, inconspicuous area to ensure that the detergent doesn’t discolor the ribbon or damage its fibers.
- If the ribbon is particularly dirty, you may need to repeat the cleaning process several times until it’s clean.
- If the ribbon is delicate, consider hand washing it instead of soaking it in water.
By following these steps, you’re sure to have a clean ribbon that’s ready to be glued to paper. Clean ribbon not only makes it easier for the glue to adhere to the surface but also makes your end product look neat and professional.
Trimming ribbon edges
To prepare your ribbon for gluing, trimming the edges is an essential step that cannot be overlooked. Trim the ribbon edges to ensure they are clean, straight, and free of fraying. Here are some tips to make trimming your ribbon edges a breeze:
- Use sharp scissors: Dull scissors can cause your ribbon to fray and look uneven. Make sure to use a sharp pair of scissors to create clean, neat edges.
- Measure and mark: Before cutting your ribbon, measure and mark where you want to trim it. This will ensure that your ribbon has straight and even edges.
- Cut on a flat surface: Cutting your ribbon on a flat surface helps to ensure that your edges are straight and even.
- Cut at a diagonal angle: Cutting your ribbon at a diagonal angle can create a more polished and sophisticated look. This technique is especially useful if you plan to use the ribbon for gift wrapping or decorating purposes.
- Seal the edges: After trimming your ribbon, you can prevent fraying by sealing the edges with clear nail polish or a fabric sealant.
By taking these trimming tips into account, you can prepare your ribbon for gluing and create a professional-looking finished product. Remember, the attention to detail is what sets the best craft projects apart.
Choosing the right type of glue

When it comes to gluing ribbon to paper, choosing the right type of glue is crucial for a successful outcome. There are several adhesive options to choose from, and each one has its own advantages and disadvantages.
White glue: This is a popular choice for gluing ribbon to paper as it dries clear and is easily available. It is advisable to dilute the glue with a small amount of water to make it easier to apply, especially if you are using a brush.
Glue sticks: These are user-friendly and mess-free. They are easy to apply by simply gliding the stick over the paper where you want the ribbon to go. It is important to note, however, that glue sticks may not be as strong as other types of glue, so they may not be the best choice for heavy or large ribbons.
Spray adhesive: This glue is perfect for larger surfaces and can provide an even coat of adhesive. However, it is important to use this type of glue in a well-ventilated area and to avoid getting it on your skin or nearby objects.
Double-sided tape: This is a quick and easy option that will provide a strong bond. The benefit of double-sided tape is that it is easy to apply and does not require any drying time.
When choosing the right type of glue, it is important to consider the weight and size of the ribbon and paper, as well as the specific project you are working on. It is always a good idea to test a small area first before applying the glue to the entire piece.
Ultimately, the key to success when gluing ribbon to paper is using the right type of glue. Choose the one that suits your specific needs and provides the best results for your project.
Applying the glue
When it comes to gluing ribbon to paper, the application of glue is a crucial step in achieving a secure and long-lasting bond between the two materials. However, the type of glue used and the method of application can greatly affect the outcome. In this section, we will explore the various options for applying glue and the best practices for ensuring a successful application. So, let’s dive in and discover the secrets of proper glue application!
Using a brush
When it comes to applying glue to ribbon and paper, using a brush can be a great option. This method allows for precise application and allows you to control the amount of glue used. Follow these steps when using a brush to glue ribbon to paper:
| Step 1: | Choose a small or medium-sized brush depending on the width of the ribbon and the surface area of the paper. |
| Step 2: | Dip the brush into the glue, making sure to only get a small amount on the bristles to avoid over-saturating the ribbon and paper. |
| Step 3: | Starting at one end of the ribbon and paper, use the brush to apply an even layer of glue to the back of the ribbon. |
| Step 4: | Press the ribbon onto the paper, smoothing it out with your fingers or a clean cloth to ensure there are no bubbles or wrinkles. |
| Step 5: | Repeat the process for any additional sections of ribbon that need to be glued down. |
Remember to work quickly when using a brush to apply glue, as it can dry out fast, especially if using a fast-drying adhesive. Also, be careful not to apply too much pressure when pressing the ribbon onto the paper, as this can cause the glue to squeeze out and create a mess. By using a brush, you’ll be able to easily control the amount of glue used and create a neat and tidy result.
Using a glue stick
Using a glue stick is another common method for attaching ribbon to paper. It is a convenient option as it is mess-free and easy to use. Here are some steps to follow when using a glue stick:
| Step 1: | Unscrew the cap of the glue stick and twist the base of the stick till a small amount of glue is visible. |
| Step 2: | Hold the ribbon in the desired position on the paper and gently rub the glue stick over the entire length of the ribbon’s back. |
| Step 3: | Make sure the edges are also covered in glue. |
| Step 4: | Press the ribbon down onto the paper and hold it in place for a few seconds to ensure it adheres properly. |
| Step 5: | Allow the glue to dry completely before adding any further decorations or embellishments. |
One advantage of using a glue stick is that it does not leave any messy residue. It is perfect for attaching ribbon to paper when working on intricate designs. However, it may not be the best option for thicker ribbons as they may require a stronger hold. In such cases, it is recommended to use a liquid glue or a tape runner instead.
Remember to store your glue stick in a cool and dry place, away from direct sunlight, to ensure its longevity. Always replace the cap tightly after use to prevent the glue from drying out.
Using a spray adhesive
One option for applying glue to the ribbon and paper is by using a spray adhesive. This method can be a quick and efficient way to apply an even layer of glue over a large surface area. Here are some tips for using a spray adhesive:
- Preparation: It’s important to prepare your work area before using a spray adhesive. Cover surrounding surfaces with newspaper or a drop cloth to protect them from overspray. Work in a well-ventilated area to avoid inhaling fumes.
- Testing: Before applying the spray adhesive to your project, it’s a good idea to test it on a small area first to make sure it doesn’t cause any damage or discoloration.
- Distance: For an even application, hold the spray adhesive can about six to eight inches away from the surface and spray in a sweeping motion. Be sure to keep the can moving to avoid oversaturating any one area.
- Timing: Once you’ve sprayed the adhesive, wait a few seconds for it to become tacky before placing the ribbon onto the paper. This will help ensure a strong bond.
- Direction: When positioning the ribbon on the paper, be sure to do so in the direction that you want it to stick. Once the adhesive dries, it will be difficult to reposition the ribbon.
- Overlap: If you’re gluing multiple ribbons onto the paper, be careful not to overlap them too much. This can cause the paper to warp or create bumps under the ribbon.
- Cleanup: After using a spray adhesive, it’s important to clean the nozzle to prevent clogging. Hold the can upside down and spray for a few seconds to clear out any excess adhesive. If any overspray gets on your work surface, clean it up immediately with adhesive remover or soap and water.
Keep in mind that spray adhesive can be difficult to remove once dry, so it’s important to work carefully and make sure the ribbons are positioned correctly before pressing down.
Gluing the ribbon to paper
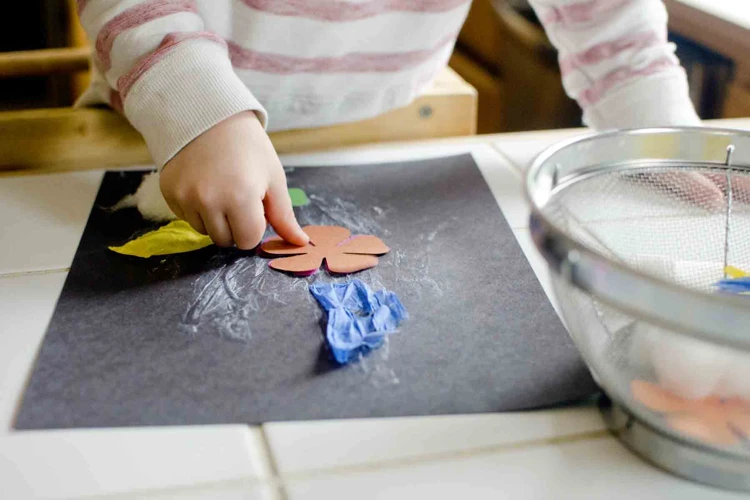
After preparing your ribbon and selecting the right type of glue, it’s time to glue the ribbon onto the paper! This is where your creativity can really shine as you choose the perfect placement for your ribbon. But before you get started, it’s important to understand the best types of paper to use and some helpful tips for ensuring the ribbon stays securely in place without wrinkling or causing glue stains. Let’s dive in and explore some expert tips and tricks for gluing ribbon to paper.
Types of paper to use
When it comes to gluing ribbon to paper, the type of paper you use is just as important as the type of glue you select. The paper you choose must be strong enough to hold the ribbon in place while allowing for flexibility. The following types of paper work best for this task:
- Cardstock: This type of paper is sturdier than standard printer paper and can hold the weight of most ribbons. It also has a smoother surface, making it easier to glue the ribbon down without bumps or wrinkles.
- Vellum: Vellum is a translucent paper that adds a unique touch to any project. It can be a bit trickier to glue ribbon onto vellum, but it can be done. Use a lighter adhesive and apply it sparingly to avoid any warping or staining.
- Scrapbook paper: This type of paper is specially designed for use in crafting and scrapbooking. It is available in a variety of textures and weights, making it an excellent choice for adding ribbon embellishments to your project.
- Construction paper: This paper is thicker and sturdier than standard printer paper, making it an excellent choice for gluing ribbon to paper. Keep in mind that construction paper may have a rougher surface, which can make it difficult to lay the ribbon down smoothly.
When selecting your paper, consider the final use of your project. If you plan on framing or displaying it, choose a paper that will look good for an extended period. If you’ll be mailing or handling the project frequently, consider sturdier paper that can withstand wear and tear. With the right paper and glue, your ribbon embellishments will look fabulous and last for years to come.
Placing the ribbon
When placing the ribbon on the paper, it’s important to decide on the placement before applying any glue. This will prevent the ribbon from sticking in the wrong place. Consider using a ruler or straight edge to ensure that the ribbon is straight when placed on the paper.
Placement tips for different types of paper:
| Type of Paper | Placement Tip |
|---|---|
| Thin or delicate paper | Avoid placing the ribbon directly on any intricate or delicate designs on the paper. Instead, place the ribbon just above or below the design. |
| Textured paper | Consider placing the ribbon in the center of the paper to avoid any bumps or creases. Use a ruler to make sure the ribbon is straight. |
| Heavy cardstock | Place the ribbon closer to the edge of the paper to avoid adding too much weight to the center of the card. This will prevent the card from becoming front-heavy and falling over. |
Remember, it’s okay to experiment with different placements before committing to a final placement. Once you’re happy with the placement, press down firmly on the ribbon to ensure it sticks in place.
Pressing down
Once you have placed the ribbon on the paper, it’s time to press it down and make sure it sticks in place. Pressing down on the ribbon after applying the glue is essential for ensuring that it doesn’t come off and stays firmly in place on the paper.
To press down the ribbon, you’ll need a tool that can apply even pressure to the ribbon and paper. A brayer, or roller tool, is an excellent choice for this purpose. A brayer is a hand-held tool that consists of a cylindrical roller attached to a handle.
Here are the steps you can follow to press down the ribbon using a brayer:
| Step | Description |
|---|---|
| Step 1: | Place the brayer at one end of the ribbon and paper. |
| Step 2: | Apply even pressure to the brayer as you move it slowly over the ribbon and paper. |
| Step 3: | Repeat step 2 until you have gone over the entire ribbon and paper. |
Make sure that you apply enough pressure to the brayer while rolling it over the ribbon and paper. If the pressure is too light, the ribbon may not stick properly to the paper. If the pressure is too heavy, it may cause the glue to spread out and create unsightly glue marks.
If you don’t have a brayer, you can also use a straight-edge tool, such as a bone folder or a credit card, to press down the ribbon onto the paper. Simply lay the straight-edge tool flat on the ribbon and paper and use even pressure to press down on the ribbon as you slide the tool over the entire surface.
Pressing down the ribbon is an essential step in gluing the ribbon to paper, and using the right tool can help you achieve a professional-looking finished product.
Reviving frayed ribbon
When you’re working on a crafting or gift-wrapping project, you may encounter a frayed ribbon that just won’t cooperate. It can be frustrating when the ends of the ribbon start to unravel, making your project look unpolished. But don’t worry, there are several tricks you can use to revive frayed ribbon and salvage your project. With a bit of ingenuity and the right tools, your ribbon can go from shabby to chic in no time. Consider these options for bringing back the beauty of your frayed ribbon and giving your project the perfect finishing touch.
Heat sealing edges
One way to revive frayed ribbon is to heat seal its edges. This process is easy to do and requires only a few materials. Heat sealing helps prevent fraying and ensures that the ribbon stays securely glued to the paper.
To heat seal edges, you will need an iron, a piece of scrap fabric, and of course your frayed ribbon. Follow these steps to get started:
| Step 1: Plug in the iron and set it to the lowest heat setting. This will prevent the ribbon from melting or burning. | Step 2: Cut a piece of scrap fabric to a size slightly larger than your ribbon. |
| Step 3: Lay the ribbon on the scrap fabric with its frayed edge facing downward. | Step 4: Fold the scrap fabric over the ribbon, sandwiching it in between. |
| Step 5: Gently press the iron on top of the scrap fabric, sandwiching the ribbon between the two fabrics. | Step 6: Move the iron back and forth for about 10 to 15 seconds, depending on the width and thickness of your ribbon. Keep the iron flat and do not press too hard. |
| Step 7: Unfold the scrap fabric and carefully peel off the ribbon. You should see that the frayed edges are now sealed and will not fray any further. | Step 8: Repeat the process for any other frayed edges on the ribbon. |
Heat sealing edges is a quick and effective method for reviving frayed ribbon. Just be sure to use a low heat setting and avoid pressing too hard to avoid ruining the ribbon. If you don’t have a scrap fabric, you can also use a piece of aluminum foil to protect the ribbon from direct contact with the iron.
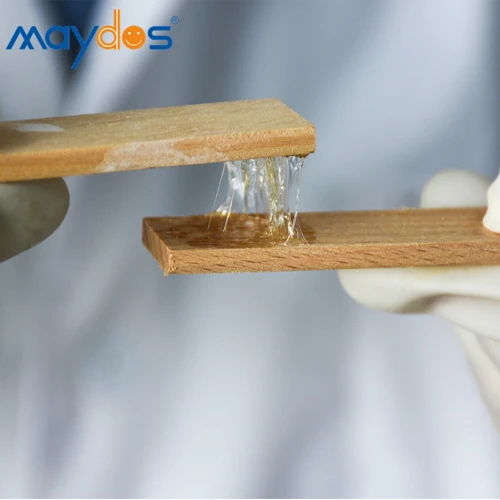
Using fabric glue
When it comes to reviving frayed ribbon, using fabric glue can be an effective solution. Fabric glue is different from regular glue in that it is specifically designed for use with fabrics, including ribbons. This type of glue is available in a variety of formulas, including washable and permanent, and can be found in many craft and fabric stores. Follow these steps to use fabric glue on your ribbon:
- Carefully apply glue: Use a small, fine-tipped applicator to apply a thin layer of fabric glue along the fraying edge of the ribbon. Be careful not to apply too much glue, as this can cause the ribbon to become stiff and brittle.
- Press down: After applying the glue, gently press the frayed edge of the ribbon onto a flat surface to encourage the glue to seep in and bond the fibers together.
- Let dry: Allow the glue to dry completely before handling the ribbon. The drying time may vary depending on the type of fabric glue used, so be sure to check the label for specific instructions.
Using fabric glue can also be a good option for attaching ribbon to paper if other types of glue have not worked or if you prefer a stronger hold. However, keep in mind that fabric glue may not be as easy to remove as other types of glue, so be sure to use it sparingly and only in areas where the glue will not be visible.
Adding finishing touches
You’ve successfully glued the ribbon onto the paper, and now it’s time for the final touches to make your creation stand out. Adding finishing touches can take your project to a whole new level, creating a unique and personal touch that will impress anyone who sees it. This is the fun part where you can let your creativity run wild! Whether you want to add some embellishments or layer the ribbon with other materials, the options are endless. In this section, we will explore some tips and tricks that will help you add the perfect finishing touches to your ribbon and paper project. So, let’s dive in!
Embellishments
A great way to add some extra charm to your ribbon and paper project is to embellish it with decorations. Whether you’re creating a handmade card or a special gift tag, embellishments can really bring your project together. Here are some ideas to get you started:
| Embellishment | Description | How to apply |
|---|---|---|
| Gemstones | Add some sparkle to your project with stick-on gemstones. They come in a variety of shapes and colors, so you can choose ones that match your ribbon and paper. | Peel off the backing and apply the gemstones to the ribbon, using a pair of tweezers if needed. |
| Rhinestones | If you want to add some bling to your project, try using rhinestones. They come in different sizes and colors, and can give your project a sophisticated look. | Apply a small amount of craft glue to the back of each rhinestone and attach them to the ribbon. Use tweezers to help position them if necessary. |
| Buttons | Buttons are a great way to add a touch of vintage charm to your project. You can use buttons in a variety of sizes and colors to match your ribbon and paper. | Sew the buttons onto the ribbon using a needle and thread, making sure to tie a knot in the back to secure them. |
| Ribbon bows | Adding a small ribbon bow to your project can create an elegant and whimsical effect. You can use ribbon that matches the color of your project, or choose a contrasting color for a bold statement. | Cut a small piece of ribbon and fold it into a bow shape. Secure it with a small amount of craft glue and then glue it onto your project. |
| Stickers | If you’re short on time, stickers are a quick and easy way to add some fun to your project. There are a wide variety of stickers available that can be used for a variety of themes, including holidays, animals, and more. | Simply peel off the backing and stick the sticker onto your project. |
With these embellishments, your ribbon and paper project will be sure to make a statement. Whether you’re giving it as a gift or keeping it for yourself, these extra touches will add charm and personality to your creation.
Layering
Layering is a great way to add dimension and interest to your paper and ribbon project. Achieving a professional look while layering requires a combination of choosing the right colors, patterns, and textures.
To create an interesting and eye-catching layered design, you can try combining different widths and colors of ribbon. You can also layer different types of paper with different textures, such as linen, vellum, or glitter.
One way to create an elegant layered design is to layer the ribbon on top of another layer of ribbon or paper, and attach them together with glue. You can also create a three-dimensional look by folding the ribbon or paper and layer them on top of each other.
It’s important to choose colors and patterns that complement each other. Try using a bold patterned ribbon with a solid-colored paper, or vice versa. Avoid using too many busy patterns, as it can be overwhelming to the eye.
To give your layered project a neat and polished finish, trim any excess ribbon or paper using sharp scissors. You can also use decorative scissors or paper punches to create interesting shapes and borders.
Here’s a table summarizing the important points for layering in your paper and ribbon project:
| Important Points for Layering |
|---|
| Choose complementary colors, patterns, and textures. |
| Combine different widths of ribbon and types of paper. |
| Layer ribbon and paper on top of each other for a 3D look. |
| Trim excess ribbon or paper using sharp scissors. |
With these tips and tricks, you’ll be able to create beautiful and unique layered designs in your paper and ribbon projects. Experiment with different colors, patterns, and textures, and have fun with your creativity!
Troubleshooting
Despite taking all the necessary precautions, there may be some common issues that you encounter while gluing ribbon to paper. Don’t worry! In this section, we will provide you with some troubleshooting tips to fix these problems quickly. So, let’s tackle these issues and get back to creating beautiful crafts!
Ribbon coming off
One of the most frustrating things that can happen when gluing ribbon to paper is when the ribbon starts to come off. This can happen for a few reasons, but don’t worry, there are ways to fix it.
Here are some tips to prevent ribbon from coming off:
- Make sure you are using a strong enough glue that is appropriate for use with both ribbon and paper.
- Clean the surface of the paper to ensure it is free of dust, dirt, or any other debris that could interfere with the adhesive.
- When gluing the ribbon down, press it firmly onto the paper to ensure it adheres properly.
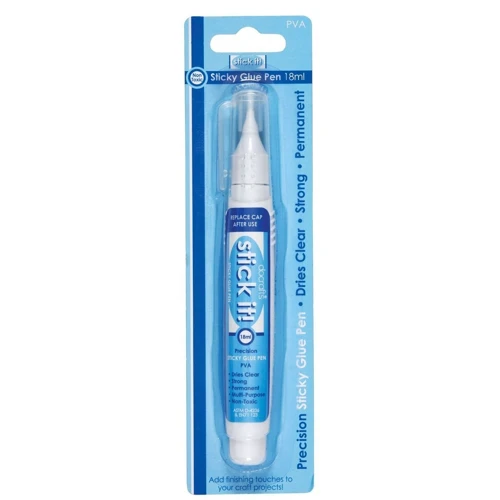
- Consider using a double-sided tape or a glue pen for extra security.
- Avoid bending or twisting the paper and ribbon too much, as this can cause the adhesive to weaken.
- Allow the glue to dry fully before handling the paper and ribbon again.
If your ribbon still comes off, here’s what you can do:
- Remove any remaining glue from both the ribbon and paper using a small amount of rubbing alcohol or nail polish remover.
- Cut a small piece of double-sided tape or glue dot and place it on the back of the ribbon where it came off.
- Carefully reposition the ribbon on the paper and press firmly to ensure it adheres.
- If the ribbon has frayed edges, consider using a fabric glue to help keep the ends in place.
- Let the glue dry fully before handling the paper and ribbon again.
Remember, different types of ribbon and paper may require different techniques and glues. Be sure to test out different options and see what works best for your project.
Wrinkling
One of the most common issues that can occur when gluing ribbon to paper is wrinkling. Wrinkles can be unsightly and can ruin the overall appearance of the project. If you find your ribbon wrinkling during the gluing process, don’t worry, there are ways to fix it. Here are a few tips to help prevent and fix wrinkling:
- Start with a smooth surface: Before gluing the ribbon to paper, make sure that the paper is flat and free from any bumps or wrinkles. Smooth out the paper with your hands or a roller to create a flat surface for the ribbon to adhere to.
- Use the right amount of glue: Overusing glue can cause the ribbon to wrinkle or bunch up when it’s placed on the paper. Use a small amount of glue and spread it thinly and evenly across the surface of the paper.
- Avoid stretching the ribbon: When placing the ribbon on the paper, make sure not to stretch it too much. This can cause the ribbon to wrinkle or bunch up when it’s glued down.
- Smooth out the ribbon: After placing the ribbon on the paper, use your fingers or a roller to gently press it down and smooth out any wrinkles that may have formed.
- Allow for drying time: Let the glue dry completely before handling the paper. This will prevent any accidental wrinkling or shifting of the ribbon.
By following these tips, you can ensure a wrinkle-free finish when gluing ribbon to paper. Remember to be patient and take your time, as rushing can often result in mistakes and unwanted wrinkling. With a little practice and attention to detail, you’ll be able to create beautiful and seamless projects every time.
Glue stains
Dealing with glue stains can be frustrating, but there are ways to remove them from both the ribbon and the paper. Here are some tips to help you get rid of those pesky glue stains:
| Materials needed | Steps to follow |
|---|---|
| Paper towels | 1. Place the affected area face down on a clean paper towel. |
| Warm water | 2. Dampen another paper towel with warm water and gently dab at the stain, avoiding rubbing or scrubbing. |
| Vinegar | 3. If the stain persists, mix equal parts white vinegar and warm water and apply it to the stain with a clean cloth. Blot the area dry with another cloth. |
| Rubbing alcohol | 4. If the vinegar solution doesn’t work, try applying rubbing alcohol to the stain with a cotton ball. Let it sit for a few minutes before blotting dry with a clean cloth. |
It’s important to note that depending on the type of glue you used, some stains may be more difficult to remove than others. Additionally, it’s important to test any cleaning solution on a small, inconspicuous area first to make sure it doesn’t damage the ribbon or paper.
Keep in mind that prevention is always best, so be careful when applying glue to avoid any spills or excess drips. Using a smaller amount of glue and applying it precisely can help reduce the risk of getting glue stains on your project.
Conclusion
After following these simple steps and using the right materials, gluing ribbon to paper becomes an easy task. When choosing ribbon, consider the design and color scheme of your project, and make sure to clean and trim the ribbon edges before gluing. Look for the right type of glue that suits your needs, and apply it with a brush, glue stick or spray adhesive. Experiment with the different methods to find out which one works best for you. When gluing the ribbon onto paper, choose the right type of paper and place the ribbon carefully before pressing down.
If your ribbon is frayed or coming undone, don’t fret. Revive it with a simple heat sealing technique or some fabric glue. For added flair, consider embellishing your project with additional layers of ribbon, or adding other decorative elements.
If you encounter issues such as the ribbon coming off, wrinkling, or glue stains, don’t worry – these are common problems that can be easily addressed with a bit of patience and extra care.
By following these tips and tricks, you can create beautiful and professional-looking paper crafts with ribbons that will impress and delight anyone who sees them. So, get your materials ready and start experimenting with different techniques to see the endless possibilities of gluing ribbon to paper. Happy crafting!
Frequently Asked Questions
What is the best type of ribbon to glue to paper?
Satin and grosgrain ribbons are recommended for gluing to paper as they hold their shape and don’t wrinkle easily.
Can any type of paper be used for gluing ribbon?
Cardstock or thicker paper works best for gluing ribbon as it offers more stability and prevents the paper from wrinkling.
What type of glue is best for gluing ribbon to paper?
A clear-drying glue such as a glue stick, liquid glue, or spray adhesive is recommended for gluing ribbon to paper.
Do I need to prepare the ribbon before gluing it to paper?
Yes, you should clean the ribbon with a damp cloth and trim any frayed edges to ensure a clean and neat appearance.
How do I avoid glue stains on the ribbon?
You can use a piece of wax paper to protect the ribbon from excess glue and avoid getting stains.
What are some embellishments I can add to the glued ribbon and paper project?
You can add sequins, buttons, beads, or other small decorative items to enhance the appearance of your project.
How do I remove excess glue from the project?
You can use a cotton swab or a soft cloth dipped in rubbing alcohol to remove any excess glue from the project.
What should I do if the ribbon begins to come off the paper?
You can reapply some glue to the affected area and press down firmly until the glue dries and the ribbon is secure.
What paper-crafting projects can I use the glued ribbon and paper technique for?
You can use this technique for scrapbooking, card-making, gift-wrapping, and other paper-crafting projects that require a decorative touch.
Can I use a hairdryer to heat seal frayed ribbon edges?
No, it’s not recommended to use a hairdryer as it can melt the ribbon. Use a heat sealing tool or fabric glue instead.