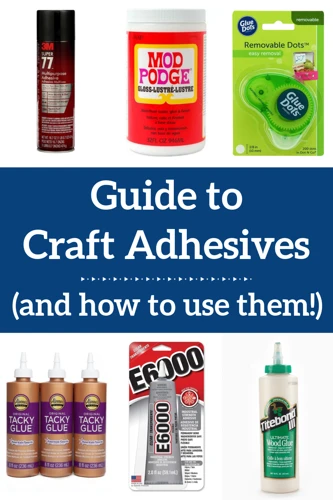
Crafting is a fun and exciting way to express creativity and make beautiful things with your own hands. However, without the right materials, even the most skilled crafter can encounter difficulties. One of the essential tools in any artist’s arsenal is craft glue. But what exactly is craft glue, and how do you choose the right one for your project? In this comprehensive guide, we will explore the various types of craft glue, their uses, how to use them, and safety tips for handling them. By the end of this article, you’ll be equipped with all the knowledge you need to take your crafting to the next level.
What is Craft Glue?
Craft glue is an essential product for anyone who enjoys creating DIY projects or engaging in crafting activities. It is a versatile adhesive that can bond materials like paper, fabric, wood, and plastic. This glue is specially formulated for use in crafts and has unique properties that make it different from other types of adhesives. Whether you are a hobbyist or professional, understanding what craft glue is and how it works can help you achieve your desired results. Later on, we will explore the different types of craft glue available, uses of craft glue, and how to choose the right craft glue for your specific project needs. Keep reading to discover more about this exciting topic! If you need some guidance on how to glue different materials together, check out our helpful guides on how to glue pressed flowers, how to glue beads to fabric, and how to make fabric glue.
Definition
Craft glue, sometimes referred to as crafting glue, is a type of adhesive that is specifically designed for use in various crafting projects, ranging from simple paper crafts to more complex mixed media creations. The term “craft glue” is often used interchangeably with the term “crafting adhesive” and refers to a wide variety of adhesives that are formulated to work with specific materials.
Unlike traditional glue, craft glue is specifically designed to have a low viscosity, making it easier to apply and control when working with delicate materials. It also dries clear and is non-toxic, making it safe for use with children’s projects.
There are a variety of different types of craft glue available on the market, each with its own unique properties and uses. Some of the most common types include water-based glue, solvent-based glue, hot glue, school glue, PVA glue, epoxy glue, super glue, and silicone glue, each with its own composition and intended use.
Regardless of the type of craft glue you choose, it is important to choose the right glue for your specific project. For example, if you are working with paper, you may want to use a glue that is specifically designed for use with paper, such as PVA glue. On the other hand, if you are working with fabric, you may want to use a glue that is specifically designed for use with textiles, such as fabric glue.
Craft glue is an essential tool for any crafter, and its versatility and ease of use make it an ideal adhesive for a wide variety of projects. Whether you are working with paper, fabric, glass, plastic, or metal, there is a craft glue that can help you achieve the results you desire.
#### Internal link:
– Interested in learning how to glue paper to fabric? Check out our step-by-step guide on how to glue paper to fabric for tips and tricks.
Composition
Craft glue is a versatile adhesive that can be used on various materials such as paper, fabric, wood, and metal. The composition of craft glue varies depending on the type of glue and the manufacturer. However, most craft glue formulations include the following components:
| Component | Description |
|---|---|
| Polyvinyl acetate (PVA) | A water-based resin that provides the glue’s bonding properties and dries clear. PVA is the main ingredient in most white glues, school glues, and some decoupage glues. |
| Solvents | Liquid substances that dissolve the glue’s other components and evaporate during drying. Solvents are found in solvent-based glues and some spray adhesives. |
| Thickeners | Substances that increase the glue’s viscosity or thickness for better control and coverage. Thickeners are present in some liquid glues and paste adhesives. |
| Modifiers | Ingredients that enhance or alter the glue’s properties, such as flexibility, water resistance, or heat resistance. Modifiers can be found in some specialty glues and some DIY glue recipes. |
| Curing agents | Chemicals that trigger the glue’s hardening or setting process. Curing agents are present in some two-part adhesives and some epoxy glues. |
It’s worth noting that some craft glue formulations may also include fillers, preservatives, or colorants to achieve specific characteristics or aesthetic effects. However, the above components are the most common in craft glue.
Understanding the composition of craft glue can help you choose the right type of glue for your project and use it effectively. For example, if you need to glue fabric to plastic, you can use a PVA-based glue that is safe for both materials and dries flexible. On the other hand, if you need to glue silicone to fabric, you may need a specialty glue with a silicone modifier that can withstand both materials’ properties. To learn more about specific techniques for using craft glue, check out our guides on how to glue fabric to plastic, how to glue silicone to fabric, and how to glue lace to glass. You may also want to experiment with making your own lace glue by following our recipe and customizing it to your needs.
Types of Craft Glue
Selecting the right type of craft glue is essential for obtaining the best results with your project. With a vast range of adhesives available in the market, it can be quite confusing to figure out which one to choose. Each type of glue has its unique properties, which makes it suitable for specific materials and applications. It is essential to understand the different types of craft glue available and their characteristics. Let’s take a closer look at some of the most commonly used craft glues.
Water-Based Glue
Water-based glue is a popular type of craft glue that is widely used in many different applications. Also known as “white glue” or “school glue,” this type of glue is made from water and polyvinyl acetate (PVA) and is generally non-toxic.
One of the main advantages of water-based glue is that it is easy to clean up with soap and water before it dries. It’s also easy to find and relatively inexpensive compared to other types of glue.
Another advantage of water-based glue is that it dries clear, making it ideal for use in projects where glue residue would be visible. Water-based glue is also acid-free and is therefore safe to use with photos and other delicate materials that could be damaged by acid-containing glues.
However, one of the downsides of water-based glue is that it is not as strong as some other types of glue. It can also be more prone to cracking over time, especially if it is exposed to changes in humidity. For this reason, water-based glue may not be the best choice for heavy-duty projects or for use with materials that will be exposed to a lot of wear and tear.
Table: Comparison of Water-Based Glue
| Product | Application | Drying Time | Bond Strength | Specialty Uses |
|—————–|————————|————-|—————|—————-|
| Elmer’s Glue-All | Paper, cardboard, wood | 30 mins | Medium | School projects, general use |
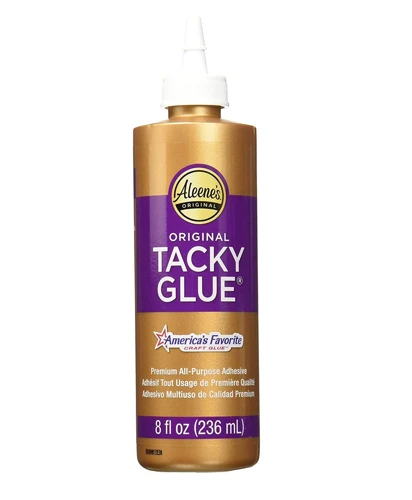
| Aleene’s Tacky | Felt, foam, fabric | 2 hours | Medium | Fabric crafts, jewelry, floral |
| Mod Podge | Decoupage, collage | 15-20 mins | Medium | Sealing, finishing |
| Sobo Premium | Leather, cork, wood | 30 mins | Strong | Leathercraft, woodworking |
| Tombow Mono | Paper, cardstock | 10-15 mins | Strong | Scrapbooking, paper crafts |
Water-based glue is a versatile adhesive suitable for a wide range of craft applications. It can be used for paper crafts, scrapbooking, and fabric projects like glittering and tissue paper crafts. It is also a great choice for crafting with kids, as it is easy to use and non-toxic.
Solvent-Based Glue
Solvent-based glue is a type of craft glue that uses a solvent to dissolve the adhesive and create a strong bond. This type of glue is popular in industrial settings and is known for its strong bonding capabilities. However, it is important to note that solvent-based glues can be hazardous and should be used with caution.
Here are a few types of solvent-based glue and their unique features:
- Chloroprene glue: This type of glue is known for its waterproof and heat-resistant properties. It is commonly used in the automotive industry and for sealing and insulation purposes.
- Vinyl glue: Also known as PVC glue, this adhesive is used to bond vinyl materials. It can also be used to bond plastic and rubber materials.
- Epoxy glue: Epoxy glue is a two-part adhesive that is known for its strong bonding capabilities. It is commonly used for metal, plastic, and wood bonding applications.
- Acetate glue: This type of glue is commonly used in bookbinding due to its strong bonding capabilities and flexibility.
- Polystyrene cement: This type of glue is specifically designed for bonding polystyrene materials. It creates a strong and permanent bond.
When using solvent-based glue, it is important to follow safety guidelines:
- Use in a well-ventilated area to avoid inhaling fumes.
- Wear protective gloves and eyewear.
- Store in a safe place away from children and pets.
- Be mindful of the bonding surface as some solvents can damage certain types of materials.
- Dispose of used glue and containers properly.
In comparison to water-based glues, solvent-based glues are generally more durable and have stronger bonding capabilities. However, they come with a higher level of risk and should only be used by those who are familiar with their proper handling and safety precautions.
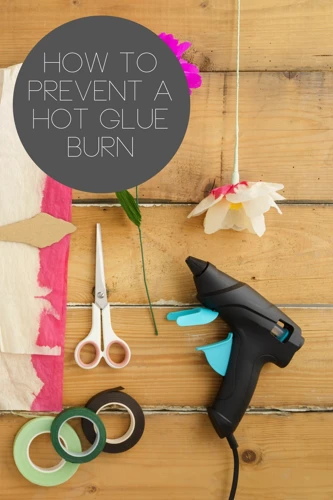
Hot Glue
Hot glue is a fast-drying, thermoplastic adhesive that is applied using a hot glue gun. It is one of the most popular types of craft glue due to its versatility and ease of use. Here are some important things that you need to know about hot glue:
Advantages:
- Hot glue can be applied to a wide range of surfaces, including wood, plastic, and fabric.
- It dries quickly, usually within seconds, making it ideal for projects that require immediate bonding.
- The glue is easy to remove by simply peeling it off.
- You can find glue sticks in various colors and finishes, including clear, white, and metallic.
- Hot glue remains flexible after it dries, allowing it to withstand stress and movement.
Disadvantages:
- Hot glue is not as strong as other types of glue, such as epoxy or super glue.
- It can melt or break down in high temperatures, making it unsuitable for projects that will be exposed to heat.
- The glue can become brittle over time, especially if exposed to sunlight.
- It is not waterproof, which means it is not suitable for outdoor projects or items that will be exposed to moisture.
Tips for Using Hot Glue:
- Always use caution when working with a hot glue gun to avoid burning your fingers.
- Test the glue on a small area first to make sure it will not damage the surface.
- Do not touch the glue while it is still hot and wet. Allow it to dry completely before handling the project.
- Use a low-temperature glue gun for delicate materials like fabric or foam to avoid melting or burning them.
- Apply the glue in a well-ventilated area to avoid inhaling fumes.
Hot glue is an excellent choice for a wide range of crafts and projects, especially those that require fast bonding. However, make sure to consider its limitations and use it appropriately to achieve the best results.
School Glue
School glue, also known as white glue, is a type of craft glue that is commonly used by children and adults alike for a variety of crafts. This type of glue is water-based and is specifically designed to be safe for use by children who tend to accidentally consume the glue.
Composition: School glue is composed of polyvinyl acetate (PVA) emulsion, an adhesive substance that is white when wet but dries clear. This makes it ideal for use in crafts where a transparent finish is desired. It also contains water and small amounts of borax and/or sodium bicarbonate, which are used as preservatives and stabilizers.
Advantages: School glue is incredibly versatile and can be used for various projects. It is great for crafting with paper, cardboard, fabric, and similar materials. It dries clear, making it perfect for use in projects that require transparency.
Disadvantages: This type of glue can take longer to dry and can be prone to wrinkling the paper if not used properly. It is not ideal for use on materials such as wood, metal, or plastic.
To help you better understand the properties of school glue, let’s take a look at the following table:
| Type | Composition | Advantages | Disadvantages |
|---|---|---|---|
| School Glue | Polyvinyl Acetate Emulsion, Water, Borax and/or Sodium Bicarbonate | Versatile, dries clear, safe for children | Takes longer to dry, can wrinkle paper if not used properly |
School glue is a great all-purpose glue that is perfect for a wide range of crafts, particularly those involving paper and similar materials. Its low toxicity and water-based composition also make it safe for children to use. However, it is important to follow proper application techniques to avoid any unintended consequences.
PVA Glue
PVA glue is one of the most commonly used types of craft glue. It is versatile, dries clear, and is easy to clean up. PVA glue stands for Polyvinyl Acetate and is typically water-based. Here are some details about PVA glue:
| Property | Description |
|---|---|
| Viscosity | PVA glue has a medium viscosity which means it is not too thick or too thin. |
| Drying time | PVA glue typically dries within 1-2 hours, but can take longer if applied thickly. |
| Bond strength | PVA glue has a moderate bond strength, making it suitable for general crafting projects. |
| Water resistance | PVA glue is not waterproof, but it can withstand some water exposure without losing its adhesive properties. |
| Special considerations | PVA glue is easy to clean up with soap and water before it dries. It can also be thinned with water if needed, and can be painted over once dry. |
PVA glue is especially useful for paper-based projects such as scrapbooking or making greeting cards. It is also an excellent adhesive for wood, fabric, and some plastics. Because of its clear drying properties, it is preferred over other types of craft glue for projects where the glue line may be visible.
When using PVA glue, it is important to follow the manufacturer’s instructions for application and drying time. PVA glue should not be frozen, as it can cause the glue to separate or break down.
PVA glue is a versatile and easy-to-use adhesive that is suitable for a wide variety of craft projects. Its water-based formula and easy cleanup make it ideal for use with children and adults alike.
Epoxy Glue
Epoxy glue is one of the most versatile and durable types of craft glue. It’s a two-part adhesive that consists of a resin and a hardener. When mixed together in the correct ratio, they form a bond that’s incredibly strong and resistant to water, heat, and chemicals.
Composition: Epoxy glue is made up of two components: a resin and a hardener. The resin is typically a clear, slightly viscous liquid that’s able to flow and seep into small crevices. The hardener is usually a thicker, opaque liquid that’s used in smaller amounts than the resin. When the two components are mixed together, a chemical reaction occurs that causes the mixture to harden and form a strong bond.
Uses: Epoxy glue is ideal for bonding many different types of materials including metal, plastic, wood, ceramic, glass, and stone. It’s also commonly used for repairing and filling cracks, gaps, and holes in various surfaces.
Advantages: Epoxy glue is known for its strength, durability, and ability to withstand harsh conditions. Its strong bond makes it perfect for use in heavy-duty applications, while its ability to fill gaps and holes makes it ideal for repairing various surfaces. Additionally, epoxy glue is resistant to water, heat, and chemicals, making it suitable for use in outdoor or high-temperature settings.
Disadvantages: One of the main disadvantages of epoxy glue is that it can be messy to work with since it requires mixing two different components together. Additionally, it can be difficult to remove once it has hardened, which makes it important to be careful when applying it.
Application: To use epoxy glue, first, make sure that the surfaces to be bonded are clean and dry. Then mix equal parts of the resin and hardener together and apply the mixture to one surface. The two surfaces should then be pressed firmly together and left to dry for the recommended amount of time, which is usually several hours.
Table:
| Pros | Cons |
| ————- |:————-:|
| Strong bond | Messy to work with |
| Durable | Hard to remove once hardened |
| Can fill gaps and holes | |
| Resistant to water, heat, and chemicals | |
| Suitable for heavy-duty and outdoor applications | |
Super Glue
Super glue, also known as cyanoacrylate adhesive, is a fast-drying and highly durable type of glue. It is made from a mixture of cyanoacrylate ester along with an activator to promote the bonding process. Super glue is different from other types of glue as it does not require moisture to activate. Instead, it is activated by the hydroxyl ions found in the air, which makes it perfect for bonding non-porous materials such as metal or plastic.
Advantages of Super Glue
Super glue has several advantages that make it a popular choice for many crafters. Firstly, it dries extremely quickly, usually in just a few seconds, which makes it ideal for quick-fixes and bonding small items together. Secondly, it creates an incredibly strong bond that is difficult to break, and unlike other types of glue, it remains highly secure even with exposure to water or heat. Thirdly, it can be used on a wide variety of materials, including metal, plastic, and rubber.
Disadvantages of Super Glue
Despite its many advantages, super glue does have a few disadvantages. Firstly, it is a very strong adhesive that can be difficult to remove, and if not used carefully, it can stick to fingers and skin. Secondly, it is not flexible and can become brittle over time, making it unsuitable for certain applications. Lastly, it has a very strong odor that can be uncomfortable to work with, and it should be used in a well-ventilated area.
Uses of Super Glue
Super glue is commonly used for bonding metal and plastic materials together, as well as for small DIY projects. It is particularly useful in situations where a strong, durable bond is required quickly, such as for fixing broken jewelry or other small items. It can also be used in conjunction with other types of glue, such as epoxy, to reinforce joints and ensure a stronger bond.
When using super glue, it is important to follow the manufacturer’s instructions carefully and to avoid contact with skin or eyes. It is also recommended to wear gloves and utilize proper ventilation to minimize the potential for inhalation of fumes. Super glue is an excellent adhesive for many DIY projects and is a popular choice due to its quick-drying and highly durable properties.
| Advantages | Disadvantages | Uses |
|---|---|---|
| Dries quickly | Difficult to remove | Bonding metal and plastic |
| Creates strong bond | Becomes brittle over time | Small DIY projects |
| Can be used on various materials | Strong odor | Reinforcing joints |
Silicone Glue
Silicone glue is a versatile type of craft glue that can bond a wide range of materials together. It is a sticky adhesive that provides a strong and flexible hold, making it ideal for use in many different craft projects. Here are some features and benefits of silicone glue:
- Waterproof: Silicone glue is waterproof, which means it can be used for projects that will be exposed to water or moisture, such as outdoor decorations or aquarium ornaments.
- Flexible: Silicone glue remains flexible even after it dries, which makes it perfect for use on materials that may expand or contract, such as rubber or plastics.
- Heat-resistant: Silicone glue can withstand high temperatures without losing its bonding strength, making it ideal for use on heat-resistant surfaces such as metal.
- Quick-drying: Most silicone glue formulas dry quickly, allowing you to move on to the next step of your craft project without delay.
- Clear: Many silicone glues dry to a clear finish, which makes them ideal for use on transparent or translucent materials, such as glass or acrylics.
Silicone glue can be used for a variety of crafting projects, from jewelry making to home repairs. It can be used to bond materials such as:
- Plastic
- Glass
- Ceramic
- Metal
- Wood
- Fabric
To use silicone glue, be sure to:
- Prepare the surface beforehand by cleaning it thoroughly
- Apply the glue in a thin, even layer
- Allow the glue to dry completely before handling the project
- Clean up any excess glue with a specialized adhesive remover or a mixture of vinegar and water.
When using silicone glue, it is important to follow safety measures, as it can be harmful if ingested or if it comes into contact with the skin. Always read the label and use protective gear such as gloves and eye goggles.
Uses of Craft Glue
Craft glue is an indispensable tool for many DIY enthusiasts and crafters alike. It serves as a bonding agent that can securely hold different materials together, giving way to countless creative possibilities. In this section, we’ll explore the diverse applications of craft glue in different projects. From paper and wood to glass and metal, there’s a type of craft glue that works best in each situation. So, let’s dive into the world of craft glue and see how we can put it to use in various crafting endeavors.
Paper and Cardboard
Craft glue is an essential tool for anyone who loves to create paper and cardboard crafts. It can provide a strong bond between the materials, allowing you to create intricate designs and sturdy structures. Here are some of the most popular types of craft glue for paper and cardboard projects:
| Glue Type | Features | Recommended Projects |
|---|---|---|
| Water-Based | This type of glue dries clear and is easy to clean up with water. It is safe for children to use and is ideal for lightweight paper and cardboard projects. | Greeting cards, scrapbooking, paper crafts |
| Solvent-Based | Solvent-based glue is stronger than water-based glue and is ideal for heavier paper and cardboard projects. It dries clear and is not affected by moisture once it has cured. | Poster board, heavy cardstock, cardboard boxes |
| PVA | PVA glue (polyvinyl acetate) is a water-based glue that dries clear and remains flexible after it has cured. It has a stronger bond than regular school glue and is perfect for wet-fold origami or making paper mache projects. | Origami, paper mache, bookbinding |
When working with paper and cardboard, it is important to choose the right glue for the job. For lightweight paper projects, water-based glue is usually sufficient. However, if you are working with heavier cardstock or cardboard, you may want to opt for a stronger solvent-based glue.
To use craft glue for paper and cardboard projects, apply a small amount of glue to one surface and press the two pieces together firmly. For larger projects, consider using a paintbrush to apply the glue evenly over the surface. Always allow the glue to dry completely before handling or moving the project.
Craft glue is a versatile and essential tool for anyone who enjoys creating paper and cardboard crafts. With the right glue and technique, you can create beautiful and sturdy projects that will last for years to come.
Wood and Furniture
When it comes to wood and furniture, craft glue is an essential tool in any DIY enthusiast’s arsenal. Craft glue is perfect for woodworking due to its strong and durable bond. Whether it’s repairing a broken piece of furniture or creating a new piece entirely, craft glue can be your go-to adhesive.
Types of Craft Glue for Wood and Furniture
| Type of Glue | Strength | Drying Time |
|---|---|---|
| Wood Glue | Strong | 24 hours |
| Carpenter’s Glue | Very Strong | 24-48 hours |
| Epoxy Glue | Extremely Strong | 5-10 minutes |
Uses of Craft Glue for Wood and Furniture
Craft glue can be used for various purposes in woodworking and furniture making, including:
1. Joining Wood – Wood glue is perfect for joining two pieces of wood together. It creates a strong bond that can withstand the weight of heavy objects.
2. Repairing Furniture – If you have a broken piece of furniture, craft glue can help fix it. It will hold the pieces together and make it look as good as new.
3. Veneering – Veneering is the process of covering a piece of wood with a thin layer of another material, such as a decorative wood veneer. Craft glue is perfect for this type of work, as it creates a strong bond that won’t come apart.
4. Assembling Furniture – Whether it’s a new piece of furniture that you’re putting together or an old one that you’re restoring, craft glue can be used to help hold everything in place.
Tips for Using Craft Glue for Wood and Furniture
1. Make sure that the surfaces you’re gluing are clean and free of dust and debris. This will ensure a strong bond.
2. Apply the glue in a thin, even layer. Too much glue can weaken the bond.
3. Clamp the pieces together until the glue dries. This will ensure that the pieces stay in place while the glue sets.
Safety Tips for Using Craft Glue for Wood and Furniture
Craft glue is safe to use if used properly, but it’s important to follow some safety tips to avoid accidents:
1. Keep the glue away from children and pets.
2. Wear gloves when applying the glue to protect your hands.
3. Work in a well-ventilated area to avoid inhaling fumes.
Conclusion
Craft glue is an essential tool for anyone working with wood and furniture. With its strong and durable bond, craft glue can be used to join pieces of wood together, repair broken furniture, veneer wood, and assemble furniture. By following some safety tips and proper usage techniques, you can ensure a successful project every time.
Fabric and Textiles
People often use craft glue for fabric and textiles. Craft glue can be used for various fabrics, including cotton, denim, felt, and silk, to name a few. The right type of craft glue depends on the project, fabric, and the desired result.
Water-based glue: This glue is ideal for lightweight fabrics and for collage work. Water-based glue makes it easy to adjust and reposition the fabric before it dries.
PVA glue: PVA glue is great for fabrics because it dries clear and remains flexible. PVA glue can be used to glue sequins, beads, or plastic gems onto fabric.
Silicone glue: Silicone glue works best for fabrics that will be washed frequently as it is water-resistant and can withstand high temperatures. It is great for attaching patches, appliques, and trims.
Epoxy glue: Epoxy glue is not often used for fabrics as its consistency is too thick and can make fabrics stiff. However, it is great for glueing non-porous materials such as plastic buttons to fabric.
When using craft glue for fabric and textiles, here are some tips to keep in mind:
| Tip | Explanation |
|---|---|
| Wash and Iron Fabric | Wash and iron fabric before applying glue to prevent shrinking or damage to the fabric. |
| Overlap Edges | When glueing two pieces of fabric together, overlap the edges slightly to ensure a strong bond. |
| Test the Glue First | Before applying glue to the entire project, test it on a small piece of fabric to ensure it will not damage or discolor the fabric. |
| Use Small Amounts | When applying glue, use small amounts. Too much glue can cause the fabric to become stiff and hard. |
| Slow Drying Glue | If using a slow-drying glue, place a heavy object on the glued area to prevent the fabric from puckering or wrinkling as it dries. |
Craft glue is a versatile adhesive that can be used for a wide range of fabrics and textiles. By selecting the right type of glue and following these tips, you can create impressive fabric projects that will stand the test of time.
Glass and Ceramics
Craft glue is an essential tool for those who love to work on DIY projects. It can be used to bond a variety of materials and surfaces, including glass and ceramics. When it comes to using craft glue on glass and ceramics, it’s essential to choose the right type of glue and follow the proper application procedure. Here are some of the things you should keep in mind when working with glass and ceramics:
- Choose the right glue: When working with glass and ceramics, it’s best to use a clear adhesive such as epoxy or silicone glue. These types of adhesives are specially formulated to bond glass and ceramics effectively. It’s important to choose the right adhesive for the specific project you are working on, such as whether the bond will be exposed to moisture or high temperatures.
- Clean the surface: The glass or ceramic surface should be thoroughly cleaned and dried before applying the glue. Any dirt, grease, or residue can affect the bond and cause it to fail. Use a mild soap and water solution or rubbing alcohol to clean the surface, and then let it dry completely.
- Apply the glue: Apply the glue in a thin and even layer to one of the surfaces that needs to be bonded. It’s best to use a small brush or applicator to ensure the adhesive is evenly spread. When applying epoxy glue or silicone glue, be careful not to apply too much, as it can result in a messy and uneven bond. You should also avoid touching the glue with your fingers, as it can leave oils that can weaken the bond.
- Press and hold: Once the glue is applied, press the two surfaces together firmly. It’s best to hold them in place for a few minutes or until the glue sets. For best results, follow the manufacturer’s instructions on when to release the bond.
When working with glass and ceramics, it’s important to handle them with care, as they can break easily. Following the steps outlined above can help you achieve a strong and durable bond that will last for a long time. Additionally, it’s important to remember that craft glue is not a permanent solution for bonding glass and ceramics. Over time, the bond may weaken and break apart, so it’s essential to handle these items with care.
Plastics
When it comes to working with plastics, there are a few types of craft glue that are specifically designed for this material. Here are some of the top options:
| Type of Craft Glue | Best for | Drying Time |
|---|---|---|
| Epoxy Glue | Bonding plastic to other materials | 24-48 hours |
| Cyanoacrylate Glue | Quick fixes and small projects | Instant |
| Silicone Glue | Bonding plastic to other materials | 24-48 hours |
Epoxy glue is often the go-to option for bonding plastic to other materials such as metal or wood. It is known for its strength and durability. However, it does take a longer time to dry, usually between 24 and 48 hours.
Cyanoacrylate glue, also known as super glue, is a great option for quick fixes and small projects involving plastic. It dries almost instantly and forms a strong bond. However, it may not be suitable for larger projects as it can become brittle over time.
Silicone glue is another option for bonding plastic to other materials. It is known for its flexibility and ability to withstand extreme weather conditions. Like epoxy glue, it may take up to 48 hours to dry completely.
When choosing a craft glue for plastic, it is important to consider the specific project and the types of plastic involved. It’s also important to follow safety precautions and work in a well-ventilated area as some craft glues can emit fumes. With the right craft glue and techniques, you can create durable and long-lasting projects with plastic.
Metal
Craft glue can also be used for metal projects, whether it’s for repairs or embellishments. Here are some types of metal that can be glued with craft glue:
| Metal Type | Recommended Glue Type | Notes |
|---|---|---|
| Steel | Epoxy glue | Epoxy glue is strong enough to bond steel and can withstand heavy-duty use. It can also fill in gaps and cracks in the metal. |
| Aluminum | Silicone glue | Silicone glue adheres well to aluminum and can resist water exposure. It’s also resistant to extreme temperatures, making it ideal for outdoor projects. |
| Copper, Brass, and Bronze | PVA glue or epoxy glue | PVA glue is great for bonding these metals because it dries clear and won’t leave any residue. Epoxy glue is also a good choice for its strong bonding properties. |
| Tin | Hot glue | Hot glue works well for attaching small embellishments onto tin surfaces. However, it may not be strong enough for heavy-duty projects. |
| Iron | Epoxy glue or super glue | Epoxy glue is strong enough to bond iron and can withstand heavy-duty use. Super glue can also be used, but it may not be as strong as epoxy glue. |
When working with metal and craft glue, it’s important to properly prepare the surface before applying the glue. Make sure to clean the surface and remove any rust or debris. Apply the glue evenly and press the surfaces together firmly for a few minutes. Allow the glue to dry completely before handling the project.
Craft glue can be a versatile adhesive for all sorts of metal projects, including jewelry-making, home decor, and repairs. Just be sure to choose the right type of glue for the specific type of metal you’re working with, and follow proper safety precautions when using any type of adhesive.
Jewelry
Craft glue is a versatile adhesive that can be used for various purposes, including jewelry making. When it comes to jewelry, you need a strong adhesive that can securely hold the different components of your jewelry together. Here are some types of craft glue that are suitable for jewelry making:
| Glue Type | Features |
|---|---|
| E6000 | E6000 is a strong industrial-strength adhesive that works well for jewelry making. It dries clear and flexible, making it perfect for attaching stones, beads, and other embellishments to metal, plastic, glass, and leather. |
| Super Glue | Super glue, also known as cyanoacrylate glue, is a fast-drying adhesive that works well for bonding non-porous surfaces together. It works well for attaching metal findings to beads and stones. |
| Jewelry Glue | Jewelry glue is a type of adhesive specifically made for jewelry making. It works well for attaching beads, stones, and findings to metal, wire, and other materials. It has a strong bond and dries clear. |
| Hot Glue | Hot glue is a versatile adhesive that works well for attaching larger embellishments to jewelry. It dries quickly and has a strong bond. However, it may not be suitable for delicate or fine jewelry as it can be bulky and may not dry clear. |
When using craft glue for jewelry making, it is essential to prepare your workspace and materials before you start. Make sure the surfaces are clean, dry, and free from any dust or debris. Apply a small amount of glue to one surface and press the pieces together firmly. Allow the glue to dry completely before wearing or handling the jewelry.
It is also important to note that some types of craft glue may not be waterproof or heat resistant, so you should consider the type of jewelry you are making and the conditions it will be exposed to. Always follow the manufacturer’s instructions and safety guidelines when using craft glue.
Leather
Leather is a versatile material that requires the use of a strong and flexible adhesive for crafting. Craft glue is the perfect solution for all types of leather crafts, from making bags and shoes to working on upholstery projects. Here are some tips on how to use craft glue for leather crafting:
1. Choose the right glue: For leather craft projects, it is recommended to use PVA glue, epoxy glue, or contact cement. PVA glue is ideal for lightweight leather projects such as jewelry, while epoxy glue is more suitable for heavy-duty leather tasks such as shoe making. Contact cement is a type of solvent-based glue that creates a strong and permanent bond for heavy-duty leather projects.
2. Apply glue evenly: When applying glue to leather, make sure to spread it evenly over the entire surface. Use a brush or a small spatula to apply the glue, and avoid using too much glue, as it can seep through the leather and leave stains.
3. Let the glue dry: Once you have applied the glue, give it some time to dry. Drying time can vary depending on the type of glue used and the ambient temperature, so be sure to consult the instructions provided by the manufacturer. Do not touch the leather until the glue has fully dried, as this can cause the bond to weaken.
4. Bond the parts: Once the glue has dried, it is time to bond the leather parts together. Gently press the parts together and use a clamp or a heavy object to hold them in place until the glue sets. This can take anywhere from a few minutes to several hours, depending on the type of glue used.
5. Clean-up: Once you have finished bonding the leather parts, clean any excess glue using a damp cloth. Avoid using solvents such as acetone, as they can damage the leather.
Using craft glue for leather projects can save time and provide a reliable adhesive solution. Be sure to select the appropriate type of glue for your project and follow the manufacturer’s instructions carefully to achieve the best results.
Landscaping and Terrariums
Craft glue is an excellent choice for landscaping and building terrariums. It is widely used to create faux landscapes that can add a touch of life to your living spaces. Here are some possible uses and tips on how to use craft glue for landscaping and terrarium making:
1. Gluing miniature models: Craft glue can be used to hold miniature models in place within a landscape. These models can range from small animals, trees and bushes, to larger structures such as houses and buildings. It’s important to choose a glue that will hold these delicate models in place without overwhelming them or causing them to become overburdened with glue.
2. Decorating a terrarium: Terrariums are miniature versions of landscapes that can be kept indoors. They are perfect for people who want to bring the outdoors into their homes. Craft glue can be used to secure stones, moss, and other natural objects in the terrarium. It is essential to choose a glue that is safe for use with plants and will not harm them.
3. Adding plants to a landscape: Use craft glue to add small plants to your landscape. Some people prefer to use artificial plants that require less maintenance. In either case, it is essential to choose a glue that can hold the weight of the plant without causing it to fall or droop.
4. Securing rocks: Glue rocks and pebbles in place with craft glue to create a natural look. Choose a glue that dries clear to avoid ruining the natural look of the rocks.
5. Sticking surfaces: Craft glue is useful for sticking surfaces together. When creating a landscape or terrarium, you may need to glue two items together. Using a high-quality glue ensures that the bond is strong and durable.
When working with craft glue for landscaping and terrariums, it is essential to follow safety precautions to avoid any accidents. Wear gloves to protect your hands and avoid skin contact with the glue. Choose a well-ventilated area to work in and avoid inhaling the fumes from the glue.
Craft glue is an essential tool for creating beautiful landscapes and unique terrariums. With its versatility and strong adhesive properties, it can be used to glue items together securely and make sure they stay in place. Just remember to choose the right glue for your project, follow safety precautions, and have fun creating your masterpiece!
Re-purposing Items
Re-purposing items is a fun and environmentally friendly way to give new life to old or unused things lying around the house. It not only saves money but also reduces waste and helps reduce our carbon footprint. Craft glue is a great tool when it comes to re-purposing items as it can bind different materials together.
Here are some unique ideas for re-purposing items using craft glue:
| Object Repurposed | Idea |
|---|---|
| CDs/DVDs | Use craft glue to stick CDs/DVDs together to make a colorful disco ball for a party decoration or Christmas ornament. |
| Bottle Caps | Glue bottle caps together in different patterns to make coasters or funky wall art. |
| Jars | Transform old jars into unique candle holders by gluing decorative stones, shells, or beads on the outside. |
| T-Shirts | Make a no-sew T-shirt tote bag by cutting off the sleeves and bottom of an old T-shirt and folding it in half. Use craft glue to secure the bottom edges and create straps from the cut-off sleeves. |
| Magazines | Create paper beads by cutting up old magazines into long triangular strips, rolling them up tightly, and gluing the ends to secure. String them together to make a colorful necklace or bracelet. |
| Picture Frames | Add texture to plain picture frames by gluing on buttons, seashells, or small stones. |
| Broken Jewelry | Give new life to broken jewelry by gluing pieces onto a plain purse or jean jacket for a unique and personalized accessory. |
As you can see, there are endless possibilities when it comes to re-purposing items using craft glue. The only limit is your imagination!
Candle Making
Candle Making with Craft Glue
Craft glue is a versatile adhesive that can be used to create unique and interesting candles. Here are some examples of how you can incorporate craft glue in your candle making projects:
| Technique | Instructions |
|---|---|
| Adding Decorations |
1. Use craft glue to attach dried flowers, ribbons, or other decorations to the outside of a pillar candle. 2. Apply a small amount of glue to the back of each decoration, then press it onto the candle’s surface. 3. Allow the glue to dry completely before lighting the candle. Note: Avoid adding decorations near the wick of the candle, as they can ignite and cause a fire. |
| Covering Jar Candles |
1. Select a jar that is slightly larger than your candle. 2. Apply a thin layer of craft glue to the outside of the jar. 3. Carefully place the candle inside the jar, making sure that the wick is centered. 4. Use a paintbrush to apply a second layer of glue over the candle and jar. 5. Allow the glue to dry completely before lighting the candle. Note: If your jar is too small, the glue may cause the candle to crack or split. Also, make sure that the glue is completely dry before lighting the candle to prevent any wax from igniting. |
| Creating a Mosaic |
1. Cut small pieces of tissue paper, colored tissue, or decorative paper into different shapes and sizes. 2. Apply a thin layer of glue to the outside of a glass votive holder. 3. Apply the paper pieces in a mosaic pattern, using more glue as needed. 4. Allow the glue to dry completely before lighting the candle. Note: Use caution when using tissue paper, as it can become transparent and may not hold up well over time. |
Craft glue opens up a whole new world of possibilities when it comes to candle making. From adding decorations to covering jar candles and creating mosaic designs, your creativity is the limit. However, it’s important to follow safety precautions to prevent any accidents when working with craft glue and lit candles.
Other Crafts
When it comes to other crafts, the possibilities with craft glue are endless. Here are some unique and creative ways to use craft glue that you may not have thought of before.
1. Mosaics: Create colorful mosaics using small pieces of tiles, glass or stones and secure them using craft glue.
2. Decoupage: Decoupage is the art of covering objects with decorative paper or fabric using glue. You can decoupage almost anything, from picture frames to furniture.
3. Quilling: Quilling is a technique that involves rolling and shaping thin strips of paper to create intricate designs. Craft glue can be used to hold the paper in place.
4. Scrapbooking: Use craft glue to attach photos, paper, and other embellishments to your scrapbook pages.
5. Collages: Create collages by cutting out images from magazines and newspapers and gluing them onto a canvas or poster board.
6. Clay crafts: Craft glue can be used to attach beads or other embellishments to clay creations.
7. Button art: Use craft glue to attach colorful buttons to a canvas creating a unique and textured piece of art.
8. Glitter projects: Sparkle up your crafts by adding glitter to paper, fabric, or other surfaces using craft glue.
9. Candle Holder Decoration: Use craft glue to add embellishments to glass candle holders, like seashells, sand, and beads, to create beautiful home decor.
10. Puppet-making: Create puppets using felt, foam, and other fun materials and glue them together using craft glue.
Now, armed with creative ideas, it’s time to put your craft glue to use and enjoy the endless possibilities of your craft projects.
How to Choose the Right Craft Glue?
Choosing the right craft glue is crucial to the success of your craft project. With so many different types of craft glue available, it can be a perplexing task to figure out which one to use. Here are some tips to help you choose the right craft glue for your project:
Type of Material: Consider the type of material you are working with. Different types of craft glue work better on different materials. For example, if you are working with paper or cardboard, a water-based glue like PVA glue or school glue would be ideal. If you are working with wood, a wood glue would be a better option. Make sure to choose a glue that is designed to work with the material you are using.
Strength: Think about how strong you need the bond to be. If you need a permanent bond, an epoxy glue or super glue would be the best option. If you need a temporary bond, a craft glue that is designed to be repositionable would be a better choice.
Drying Time: Consider how long the glue takes to dry. If you need to make adjustments to your project after gluing, a glue with a longer drying time would be preferable. If you need the glue to dry quickly, a hot glue gun would be the best option.
Clarity: If you need the glue to be invisible on your project, consider choosing a clear craft glue. Some types of craft glue dry with a yellow tint, which may not be desirable for certain projects.
Application: Think about how you will be applying the glue. Some types of glue are better suited for certain applications. For example, a glue stick is great for applying glue to paper, but would not be suitable for applying glue to wood.
Brand: Finally, consider the brand of craft glue. Some brands are known for their quality and reliability, while others may be less reliable. Do some research to find a brand that is known for producing high-quality craft glue.
By considering these factors, you can choose the right craft glue for your project and ensure that your project turns out just the way you want it to.
How to Use Craft Glue?
Craft glue is a versatile adhesive that can be used in a variety of projects. Knowing how to use craft glue properly is essential for achieving the desired results. Whether you are a beginner or an experienced crafter, it is important to follow the correct steps to ensure that your project is successful. In this section, we will outline the necessary steps for preparing, applying, and cleaning up craft glue for a variety of different materials. So, let’s dive in and explore the world of craft glue!
Preparation
Before starting any craft project, it’s essential to prepare the surface and the tools that you will be using. Preparation ensures that the glue adheres properly and keeps your project secure. Here are some preparation guidelines that will make your crafting experience more enjoyable and successful.
| Crafting Surface | Tools Needed |
|---|---|
| Make sure that the surface you will be gluing is clean and devoid of any dust, grime, or debris. Use a damp cloth to wipe it down and allow it to dry completely before applying the glue. | Get the right tools for the job. Depending on the adhesive you’re using, you may need a brush, spatula, or applicator to apply the glue in the right amount and avoid any mess. |
| If you’re working with porous materials such as wood, cardboard, or fabric, you may need to pre-treat the surface with a primer. Priming your surface helps the glue adhere better and stops it from soaking into the material. | If you’re using hot glue, make sure that your glue gun is preheated and ready to use. Keep in mind that hot glue can be dangerous and should be handled with care. |
| If you’re gluing two materials together, make sure that they fit well and are aligned. You don’t want to apply the glue and find out that the pieces don’t stick well together. You can use clips or clamps to hold the pieces in place while the glue dries. | Depending on the type of glue you’re using, you may need to mix two components together before applying. Read the instructions carefully to avoid any mistakes. |
By following the preparation guidelines indicated above, you’ll ensure that your crafting project adheres well, lasts longer, and looks great. Proper preparation will also minimize the risk of any adhesive accidents and ensure that your workspace is safe and tidy.
Application
When applying craft glue, there are a few important steps that need to be followed to ensure a successful bond. Here are some tips for proper application:
| Step | Description |
|---|---|
| 1 | Ensure that both surfaces to be bonded are clean and dry. Any dirt, dust, or moisture can hamper the effectiveness of the glue. |
| 2 | Apply a thin layer of glue to one surface. If using a water-based glue, it is important to work quickly as it dries faster than other types of glue. |
| 3 | Press the two surfaces together firmly but gently. Be sure to align them properly as once they are pressed together, they cannot be repositioned. |
| 4 | Use a clamp or other tools to hold the surfaces together until the glue dries. Follow the drying time indicated on the glue package. For most glues, this can range from a few minutes to several hours, depending on the type of glue and the materials being bonded. |
| 5 | Wipe away any excess glue that may have seeped out between the surfaces. This can be done using a damp cloth or sponge. |
Remember to always follow the manufacturer’s instructions when using craft glue to ensure that you are using the product correctly and safely. With proper application, craft glue can form a strong and lasting bond between a variety of materials, making it a versatile tool for any crafting or DIY project.
Clean-Up
When it comes to using craft glue, it’s essential to clean up any excess adhesive once you’re done with your project. Here are some tips for cleaning up craft glue like a pro:
- Act fast: Clean up the excess glue as soon as possible before it dries out and becomes harder to remove.
- Use a damp cloth: A damp cloth is the most effective tool to remove wet glue from surfaces. Simply wipe the glue and rinse the cloth frequently.
- Use a scraper: For larger chunks of dried glue, use a scraper to remove as much glue as possible before using a damp cloth. Be careful not to scratch any surface.
- Use nail polish remover: For stubborn dried glue residue, acetone-based nail polish remover can be used. Apply a small amount of the remover to a cotton swab and rub it gently on the glue.
- Use vinegar and baking soda: A mixture of vinegar and baking soda can also help remove dried glue. Mix equal parts of vinegar and warm water and apply it to the glue. Let it sit for a few minutes, then sprinkle a small amount of baking soda over the glue. Scrub the glue with a toothbrush or a scrubber sponge.
- Dispose of glue properly: Make sure to dispose of any excess glue and used materials properly, according to the manufacturer’s instructions or your local regulations.
Remember, safety always comes first when cleaning up craft glue. Wear gloves and protect your skin from prolonged exposure to harsh chemicals. With a little effort, your project will look professional and clean, and you’ll have a clean workspace to start your next crafting adventure.
Safety Tips for Using Craft Glue
When working with craft glue, there are several safety precautions that should be taken to prevent accidents and injuries. Here are some safety tips for using craft glue:
1. Read the labels and instructions carefully: It is important to read the labels and instructions of the craft glue before using it. There may be specific warnings or precautions that you need to be aware of.
2. Use in a well-ventilated area: Most types of craft glue emit fumes that can be harmful if inhaled. It is recommended to use glue in a well-ventilated area to minimize the chances of any health problems.
3. Wear protective gear: To avoid any contact with the skin, it is advised to wear gloves when working with craft glue. If there is a risk of the glue contacting the eyes, goggles should be worn as well.
4. Store in a safe place: Craft glue should be stored in a safe place, away from the reach of children and pets. It should also be kept in its original container with the lid tightly closed.
5. Clean up spills immediately: If glue spills onto a surface, it should be cleaned up immediately to prevent it from hardening and becoming difficult to remove.
6. Do not ingest: Craft glue is not safe to ingest. It should be kept away from food and drinks, and hands should be washed thoroughly after use.
7. Dispose of properly: Craft glue should be disposed of properly according to the manufacturer’s instructions. It should not be poured down the drain or thrown in the trash.
By following these safety tips, you can ensure that your crafting experience is a safe and enjoyable one. Remember to always take precautions and read the labels before using any craft glue.
FAQs
As an avid crafter, you may have some lingering questions about the versatile tool in your arsenal – craft glue. We understand that choosing the right glue can be overwhelming, and you may be wondering about its various properties and safety measures. In this section, we will address some of the most commonly asked questions about craft glue, so you can use it effectively and with confidence. Let’s dive in and clear up any confusion.
Is craft glue waterproof?
Craft glue varies in their waterproof capabilities and it mainly depends on the type of glue being used. Some craft glues are designed for waterproofing purposes, while others are not. Here is a table that summarizes the waterproof capabilities of different types of craft glue:
| Type of Craft Glue | Waterproof Capability |
|---|---|
| Epoxy Glue | Waterproof |
| Super Glue | Water Resistant, not Waterproof |
| PVA Glue | Not Waterproof |
| Silicone Glue | Waterproof |
| Hot Glue | Not Waterproof, but can be used for waterproofing applications with certain precautions |
| Solvent-Based Glue | Waterproof |
| School Glue | Not Waterproof |
It is important to note that even if a craft glue is labeled as waterproof, there may still be certain factors that can compromise its ability to withstand water exposure. For example, exposure to extreme weather conditions or prolonged exposure to water can still cause damage to waterproof glue.
It is always best to refer to the manufacturer’s instructions for proper usage and limitations of the glue. If waterproofing is a crucial requirement for your project, it is recommended to choose a glue that is specifically designed for waterproofing purposes like epoxy glue, silicone glue, or solvent-based glue.
Can I use craft glue on edible decorations?
When it comes to crafting with edible decorations, many people wonder whether craft glue is safe to use. And the answer is a bit complicated.
Firstly, it’s important to note that not all craft glue is safe for consumption. In fact, most types of craft glue are toxic and should not be used on edible decorations.
However, there are some non-toxic, food-safe craft glues on the market that are specifically designed for use with edible decorations. These types of glues are typically made from natural ingredients and are safe to use on items like cake toppers, sugar flowers, and other edible decorations.
Before using any craft glue on edible decorations, it’s essential to make sure that the glue is explicitly labeled as food-safe or non-toxic. Read the label carefully, and look for ingredients like water, sugar, and natural gums. These types of ingredients are typically safe and non-toxic.
It’s also important to note that some food-safe glues may not provide the same level of adhesion as traditional craft glue. If you’re using edible decorations on a cake or other baked goods, make sure to test the glue first and ensure that the items will stay in place.
If you’re not sure whether a particular glue is safe for use on edible decorations, it’s always better to err on the side of caution and avoid using it altogether. Instead, look for alternative methods of securing edible decorations, such as using edible glue made from a mixture of water and sugar.
Remember, when it comes to crafting with edible decorations, safety should always come first. Always read labels carefully, use caution, and, if in doubt, consult a professional before using any glue or adhesive on your baked goods or other edible items.
Can craft glue be removed?
Craft glue can be removed, but the method for removal depends on the type of glue and the surface it is stuck to. Here are some ways to remove craft glue:
- Water-based glue: This type of glue can be removed with warm, soapy water. Pour the soapy water onto the glue, and rub it with a cloth. If the glue is still stubborn, you can use white vinegar or rubbing alcohol, but be cautious with these as they may cause damage to certain surfaces.
- Solvent-based glue: Solvent-based glue usually requires a solvent to remove it. Try to use the same solvent as the one used in the glue. For example, if you used a glue that is dissolved in acetone, then use acetone to remove it. Be cautious in using solvents as they can be harmful to your skin or inhaling the fumes.
- Hot glue: Hot glue can be peeled off easily. First, allow the glue to cool and then use a sharp object or your fingers to peel it off. Some residue may be left behind, but that can be removed with rubbing alcohol or fingernail polish remover.
- PVA glue: PVA glue is water-soluble, therefore, it can be removed with warm, soapy water before it dries completely. If it has already dried, then use white vinegar or rubbing alcohol.
- Epoxy glue: Epoxy glue is a strong adhesive, so it needs a strong solvent like acetone or rubbing alcohol to remove it. You can pour the solvent onto the glue and allow it to sit for a few minutes before wiping it off with a cloth.
- Super glue: Super glue can be removed with acetone. Apply acetone to the glue and allow it to sit for a few minutes before rubbing it off with a cloth. Be cautious when using acetone as it can be harmful to your skin.
- Silicone glue: Silicone glue can be removed with a silicone sealant remover. Apply the remover to the glue and wait for it to soften before wiping it off with a cloth.
Craft glue can be removed, but the method of removal depends on the type of glue and the surface it is stuck to. Always read the label on the glue before using it and follow the instructions for removing it carefully.
Is it safe to use craft glue on skin?
Craft glue is not safe to use on skin and should be avoided at all costs. While some craft glues may claim to be skin-safe or non-toxic, it’s important to remember that these products are not intended for direct skin contact.
Here are some reasons why:
- The chemicals and ingredients in craft glue can cause irritation or allergic reactions when they come into contact with skin. Some people may experience redness, itching, or swelling after using craft glue on their skin.
- Craft glue is not formulated to be absorbed by the skin, and can cause skin damage or discoloration if left in contact for extended periods of time.
- There is a risk of accidentally ingesting craft glue that has been applied to the skin, which can lead to serious health problems.
If you do accidentally get craft glue on your skin, it’s important to remove it as soon as possible. You can try using soap and water, rubbing alcohol, or a specialized adhesive remover to gently dissolve the glue and wipe it away. It’s important to avoid peeling or scraping at the glue, as this can cause further irritation or damage to the skin.
Here are some tips to keep in mind:
- Always wear protective gloves when handling craft glue or other adhesives.
- Keep craft glue away from children and pets to prevent accidental ingestion.
- If you have a skin allergy or sensitivity, avoid using craft glue altogether.
- If you experience a skin reaction or other adverse effects after using craft glue, seek medical attention right away.
Craft glue is not safe to use on skin and should be avoided. Always read the label and follow the manufacturer’s instructions when using craft glue or any other adhesive product. If you do accidentally get craft glue on your skin, take steps to remove it as quickly and safely as possible to avoid any further complications.
Conclusion
In conclusion, crafting is a creative outlet that brings joy to many people, and craft glue plays an important role in making those creations come to life. With a comprehensive understanding of what craft glue is, the types available, their respective uses, and how to choose and use them, you are well-equipped to embark on your crafting journey.
Remember to choose the right glue for the project at hand and practice safety measures to avoid any mishaps. When in doubt, do a small test run before committing to a larger project.
Craft glue allows for endless possibilities to create unique and beautiful crafts. With its versatility and strong bonding properties, you can effectively bring together a variety of materials to form a cohesive and long-lasting finished product.
So go ahead, let your creativity flow, and use craft glue to bring your imaginative and unique crafting ideas to life. Happy crafting!
Frequently Asked Questions
It depends on the type of craft glue. Some craft glues, like epoxy glue and silicone glue, are waterproof, while others, like school glue and PVA glue, are not.
No, it is not safe to use craft glue on edible decorations. Instead, use food-safe adhesives specifically designed for use on edible items.
Yes, most craft glues can be removed with solvents like acetone or rubbing alcohol, or with warm soapy water. However, some stronger glues like epoxy or super glue may be more difficult to remove.
No, it is not recommended to use craft glue on skin as it can cause irritation or allergic reactions. If it accidentally gets on the skin, wash it off with warm soapy water.
What type of craft glue is best for paper crafts?
PVA glue, also known as white glue, is the best type of craft glue for paper crafts. It dries clear and won’t wrinkle or warp paper.
Can hot glue be used on plastic?
Yes, hot glue can be used on some types of plastic, but it may not adhere well to all plastics. Test a small area first before using it on your project.
What type of craft glue is best for jewelry making?
Epoxy glue is the best type of craft glue for jewelry making because it forms a strong, durable bond and can be used on a variety of materials.
What should I do if I accidentally glue my fingers together?
If you accidentally glue your fingers together, don’t panic. Soak the affected area in warm soapy water until the glue softens, then gently pull your fingers apart. If the glue is super glue or epoxy glue, seek medical attention.
Can craft glue be used as a sealant?
No, craft glue should not be used as a sealant as it is not designed for that purpose. Instead, use a clear sealant specifically designed for your project.
What type of craft glue is best for landscaping and terrariums?
Silicone glue is the best type of craft glue for landscaping and terrariums. It forms a strong, waterproof bond and can be used on a variety of surfaces.