When it comes to crafting, the marriage of diverse materials can lead to stunning results. Gluing paper to fabric is a technique that offers infinite possibilities for creativity and customization in DIY endeavors. Understanding the nuances of paper to fabric bonding is essential for achieving a perfect finish that is both aesthetically pleasing and durable.
The Basics of Paper to Fabric Bonding
Bonding paper to fabric involves a delicate balance; it requires a careful selection of adhesives and a precise application process. The goal is to create a strong, lasting bond without damaging either the paper or the fabric. By mastering this craft, you can embellish textiles with beautiful paper patterns or create intricate designs that stand the test of time.
Benefits of Crafting with Paper and Fabric
Crafting with paper and fabric opens up a world of artistic expression. This combination allows for a fusion of textures and colors, adding depth to any project. From personalized greeting cards affixed to pillows to scrapbook embellishments on tote bags, these mixed-media creations can be truly unique.
Fabric Glue Guide for DIY Paper Fabric Projects
Embarking on DIY paper fabric projects requires understanding the various adhesives available and knowing which one to choose for your specific project. A reliable fabric glue guide is indispensable for crafters looking to explore this art form.
Choosing the Best Glue for Paper to Textile
The best glue for paper to textile ensures a firm hold without leaving stains or causing wrinkles. Factors to consider include the weight of the paper, the type of fabric, and the intended use of the finished product. Water-based adhesives are generally preferable as they are less likely to cause discoloration.
Fabric Adhesive Tips and Tricks
- Always test the glue on a scrap piece before applying it to your project.
- Use a thin layer to prevent the adhesive from seeping through the paper.
- Allow ample drying time for a secure bond.
Step-by-Step Paper Fabric Adhesive Techniques
Adhering paper to fabric is a process that can be learned and perfected with practice. Follow these step-by-step paper fabric adhesive techniques to ensure a successful outcome.
Preparing Your Materials
Begin by ensuring that both the paper and fabric are clean and free of any oils or dust. If necessary, iron the fabric to remove wrinkles, providing a smooth surface for the paper to adhere to.
Attaching Paper to Cloth Using Various Adhesives
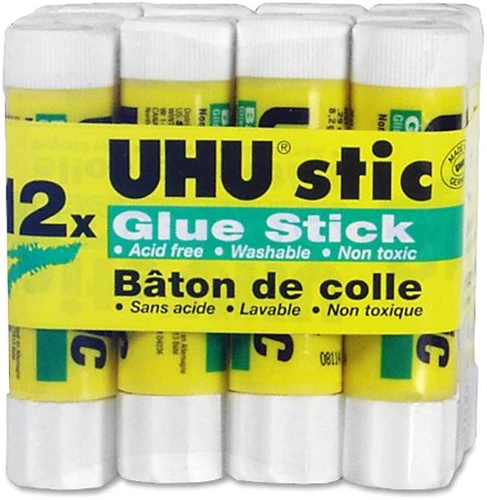
The choice of adhesive can make a significant difference in the final product. Glue sticks are ideal for light papers and small projects, while spray adhesives can provide an even coat for larger areas.
Glue Sticks vs. Spray Adhesives vs. Fabric Glue
Glue sticks are convenient and mess-free, suitable for quick projects. Spray adhesives offer a uniform layer but require a well-ventilated area due to fumes. Fabric glue, on the other hand, is formulated specifically for textile projects and provides a strong, flexible bond.
Temporary Paper to Fabric Bonding Methods
Sometimes a project requires a temporary bond between paper and fabric. There are methods that allow for the attachment without a permanent commitment.
Using Tape or Stitches for Temporary Attachment
Double-sided tape can hold paper in place temporarily, which is perfect for fittings or trial placements. Basting stitches are another option, allowing for adjustments before the final gluing.
Permanent Gluing Solutions for Paper and Fabric Art
For those projects that require a lasting bond, permanent gluing solutions are the key to enduring paper and fabric art.
Using Hot Glue for a Durable Finish
Hot glue guns provide a strong bond that dries quickly, ideal for heavier papers or fabrics. However, this method requires careful handling to avoid burns and ensure even distribution.
Iron-on Adhesive for a Strong Bond
Iron-on adhesive sheets or tapes melt to create a durable bond between paper and fabric when heat is applied. This method ensures a flat, secure attachment suitable for numerous applications.
Cleaning and Maintenance of Glued Paper-Fabric Creations
Maintaining the integrity of your glued paper-fabric creations is crucial for their longevity. Cleaning and maintenance must be done with care to preserve the artwork.
Does Glue Stick Wash Out of Fabric?
Some glue sticks are water-soluble and may wash out of fabric, while others are designed to withstand laundering. Always check the product’s specifications before washing your craft.
Removing Adhesive from Fabric Safely
In the event that you need to remove adhesive from fabric, it’s important to do so gently to avoid damage. Solvents or adhesive removers can be used, but they should be tested on a discreet area first.
Advanced Techniques and Creative Ideas
Once you’ve mastered the basics, exploring advanced techniques and creative ideas can take your projects to new heights.
Innovative DIY Paper Fabric Projects
Experiment with layering different types of paper and fabric, or incorporating embellishments like beads and sequins for innovative DIY paper fabric projects that stand out.
Creating Artistic Pieces with Paper and Fabric
Combine various textures and patterns to create one-of-a-kind artistic pieces. Paper and fabric can be manipulated in numerous ways to achieve the desired effect, from 3D sculptures to intricate wall hangings.
Common Questions and Solutions
As crafters explore the realm of paper and fabric, questions inevitably arise. Here, we address some common concerns and offer solutions.
Can You Use Elmer’s Glue on Fabric?
Elmer’s Glue can be used on fabric for temporary bonds; however, it may not withstand washing and is not the best choice for permanent projects.
Is Super Glue Suitable for Paper to Fabric?
Super Glue is not ideal for paper to fabric as it dries rigid and can cause the fabric to stiffen and the paper to wrinkle or discolor.
Conclusion: Unleashing Your Creativity with Paper and Fabric
Gluing paper to fabric is an art form that allows for endless creativity. The techniques and tips provided in this guide aim to inspire and equip crafters with the knowledge to embark on their own unique projects.
Recap of Fabric Adhesive Techniques
We’ve explored various paper fabric adhesive techniques, from using glue sticks for light applications to iron-on adhesives for a permanent bond. Remember to choose the right glue for the job and prepare your materials properly.
Are you looking to take your crafting skills to the next level? Whether you’re working on a mixed-media project or simply looking to attach different materials together, our guides can help. Discover the ins and outs of adhering various materials with our tutorials. Learn how to combine paper with fabric in our comprehensive article on how to glue paper to fabric. Or, if your creative endeavors call for other combinations, such as attaching fabric to sturdier bases or uniting paper with other surfaces, check out our specific guides on how to glue fabric to cardboard, how to glue paper to plastic, and how to glue paper to metal. Each guide is designed to help you achieve the best results for your unique craft projects.
Encouragement for Future Crafting Endeavors
The world of crafting with paper and fabric is vast and exciting. With the right approach and a bit of practice, anyone can create stunning works of art. So go ahead, gather your materials, and unleash your creativity!