Are you looking for a fun and easy activity to do with your kids or friends? Maybe you’ve heard about the latest craze- slime! While some slime recipes can be complicated and require special ingredients, making slime with only glue and water is a simple and accessible option. In this step-by-step guide, we’ll take you through the process of making your own slime from scratch. With just a few supplies and a little creativity, you can create a mesmerizing slime that will provide hours of entertainment. So let’s get started!
Materials Needed
In order to make slime with only glue and water, you will need a few simple materials. These materials are easy to find and likely already in your home. Without further ado, let’s take a look at the materials required for this DIY activity. Don’t have white glue on hand? Check out how to make slime with jot glue! Want to add some color to your slime? You can learn how to color glue or how to make slime with glitter glue and baking soda. If you are also interested in cleaning your mixing bowl, check out how to dry glitter glue quickly for some useful tips.
1. White glue
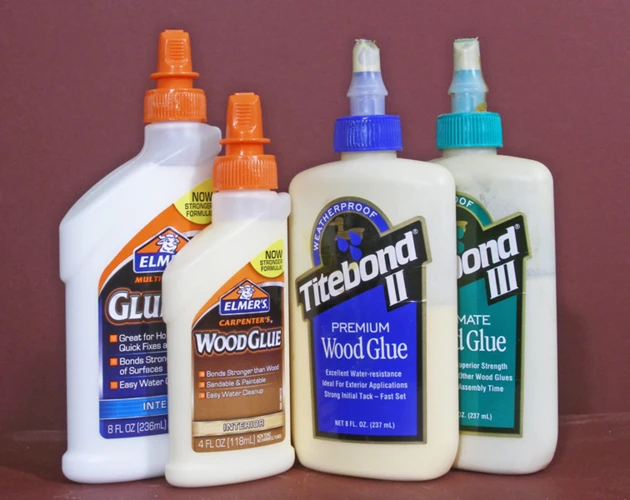
To make slime with only glue and water, the first material you’ll need is white glue. White glue is an essential ingredient in many DIY projects and is the perfect glue to use for this slime recipe. It is also known as school glue or PVA glue, which stands for polyvinyl acetate.
One reason white glue is ideal for this slime recipe is that it is non-toxic and safe to use. It comes in a liquid form, making it easy to pour and mix with other ingredients without leaving any lumps or clumps. You can find white glue in most stores that sell craft supplies, or you can order it online.
There are different types of white glue available in the market, but for this recipe, it’s best to use clear-drying white glue, as it gives the slime a shiny and transparent appearance. Another benefit of using clear-drying white glue is that it makes it easier to add colors, glitter, or other types of textures to the slime.
It’s essential to remember that the amount of white glue you’ll need for this recipe largely depends on the consistency you desire. If you want a softer and more stretchy slime, you’ll need to use more glue. On the other hand, if you want a firmer and less stretchy slime, you’ll need to use less glue.
Here is a table summarizing the key details about white glue for making slime:
| Type of glue | Recommended for Slime? | Where to buy it |
|---|---|---|
| White glue (PVA glue) | Yes | Most craft stores, or online |
| Clear-drying white glue or school glue | Highly recommended, gives slime a transparent appearance | Most craft stores, or online |
| Glitter glue | Not recommended, as it doesn’t give the same consistency as regular white glue | Stores that sell school supplies or online (click here to learn more about glitter glue) |
Using clear-drying white glue is the best option to make slime with water only, as it gives the slime a transparent appearance and makes it easier to add colors or glitter. If using another type of glue to create slime, it may result in a different consistency, and the end result may not be as desired.
2. Water
Water is the key ingredient for making slime with only glue. It is important to note that the water should be at room temperature. This helps to ensure that the glue and water mix well and produce the desired consistency.
Here are some quick tips when it comes to using water for making slime:
- Use distilled water: For best results, it is recommended to use distilled water instead of tap water. This is because distilled water doesn’t contain any minerals or impurities that could affect the consistency of the slime.
- Don’t use too much: It is important to use the right amount of water when making slime. If you use too much water, your slime may become too watery and won’t hold up well. Use the right ratio of glue and water for perfect slime consistency.
- Filtered water is an alternative: If you don’t have distilled water, filtered water is an alternative to tap water. This is because filtered water has fewer impurities compared to tap water. However, avoid using sparkling or carbonated water as it can ruin the consistency of the slime.
Although water is the only ingredient apart from glue needed to make slime, having some other optional ingredients handy can help take your slime to the next level. Adding glitter or food coloring to the mixture can help make the slime more visually appealing. For those interested in crafting and DIY projects, why not check out our cool guide on how to make snowflakes out of glitter glue? Or, if you’re curious about using the right kind of glue for crystals and jewelry making, check out our article on what glue to use for crystals.
3. Mixing bowl
When making slime with only glue and water, having a mixing bowl is an essential component. Not just any bowl will do, it is important to have a bowl that is clean and free of any contaminants. This will ensure that the mixture remains pure and that the glue and water bond together correctly.
Choosing a Mixing Bowl
When selecting a mixing bowl, there are a few things to keep in mind. First, choose a bowl that is large enough to hold the amount of slime you plan to make. It is better to have a bowl that is too big than too small. This will prevent the mixture from spilling over the edges and making a mess.
Secondly, consider the type of material that the bowl is made from. Plastic bowls are a better choice than metal or ceramic bowls when making slime since they are less likely to break if dropped. Additionally, they are easy to clean and won’t rust or corrode over time.
Lastly, it is important to have a designated bowl specifically for making slime. Avoid choosing a bowl that you use for other types of food or cooking. This will prevent any cross-contamination and ensure that your slime is safe and free of any harmful bacteria.
| Pros | Cons |
|---|---|
| Plastic bowls are less likely to break if dropped. | Plastic can absorb colors and scents if not cleaned thoroughly. |
| Plastic bowls are easy to clean and won’t rust or corrode over time. | Plastic can be scratched easily with sharp utensils or abrasive cleaning tools. |
| Having a designated bowl specifically for making slime prevents cross-contamination. | Plastic bowls can sometimes warp or melt if exposed to high temperatures. |
Conclusion
When making slime, having a sturdy and clean mixing bowl can make all the difference in the final product. A plastic bowl, in particular, is the perfect choice due to its durability, ease of cleaning, and non-reactive properties. So, be sure to choose the right mixing bowl and follow the steps carefully to ensure the perfect slime every time.
If you want to know how to make slime with UHU glue, check out our step-by-step guide. Or if you want to explore other ways of making slime, you can check out our articles on “How to Make Slime with Glue, Detergent, and Baking Soda” or “How to Glue Swarovski Crystals”.
4. Spoon or stir stick
Having a spoon or a stir stick is essential for making slime with only glue and water. It helps to ensure that the glue and water are mixed properly and the slime gets the right consistency. Using a spoon or a stir stick also helps to prevent the mixture from sticking to your hands.
Here are some options for spoons or stir sticks to use:
| Option | Pros | Cons |
|---|---|---|
| Plastic spoon | Cheap and readily available | Can break easily |
| Metal spoon | Durable and easy to clean | Can be hot or cold to the touch |
| Wooden spoon | Natural and eco-friendly option | May absorb moisture and break over time |
| Plastic stir stick | Reusable and easy to clean | May not be as effective for mixing as a spoon |
It’s important to note that whatever option you choose, make sure it’s clean before using it to mix the slime. A dirty spoon or stir stick can affect the texture and quality of your slime.
Now that you know a little more about selecting the right spoon or stir stick, it’s time to start making your glue and water slime. If you’re interested in different types of slime that require different materials, check out our guide on how to make slime with glue, detergent, and baking soda. Or if you’re feeling crafty, learn how to glue Swarovski crystals with our article on how to glue Swarovski crystals.
Step-by-Step Guide
Now comes the fun part – it’s time to make slime! Follow these simple steps and you’ll have a batch of slime in no time at all. Get ready to get a little messy, but have a lot of fun in the process. Don’t worry if you’re a little unsure – we’ll guide you through each step. Let’s get started!
1. Squeeze the glue
To get started on making your slime with only glue and water, the first step is to grab your white glue and squeeze it into a mixing bowl. Depending on how much slime you want to make, you may need to adjust the amount of glue. Make sure to squeeze out as much glue as possible and place it all in the mixing bowl. This will be the base of your slime, so it’s important to get enough glue to achieve the desired consistency.
When choosing your glue, it’s important to select a quality brand such as Elmer’s glue, which is known for producing reliable results. One of the benefits of using glue in your slime mixture is that it provides the stickiness that allows the slime to stretch and come together, while also being easy to work with. Glue can be easily found at most craft stores, making it a convenient option for making slime at home.
To maximize the amount of glue you can get out of the bottle, try storing it upside down for a few hours prior to using it, or gently warming it up in warm water for a few minutes. This will help the glue flow more easily and make it easier to squeeze out. Once all of the glue is in the bowl, move on to the next step in the process.
2. Add water
Once you have the white glue in the mixing bowl, the next step is to add water. This step is essential to achieve the desired consistency – not too runny or too rubbery. So, how much water should you add? Well, that depends on the amount of glue you used. As a general rule of thumb, you should add an equal amount of water to glue.
Here’s how to add water to the glue:
- Measure the amount of glue you have in the mixing bowl.
- Take an equal amount of water and pour it into the bowl.
- If you’re not sure about the amount of water to add, start with a small amount and gradually increase until you get the consistency you want.
It’s important to note that if you add too much water, your slime will be too runny and not hold its shape. On the other hand, if you don’t add enough water, the slime will be hard and tough to play with.
Pro Tip: If you’re looking for a stretchier slime, then add a little bit more water than the amount of glue you used. However, if you want a thicker slime, then use less water than glue.
Keep in mind that adding water might dilute the color of the glue, so if you’re looking to create colorful slime, you may need to add food coloring at this stage.
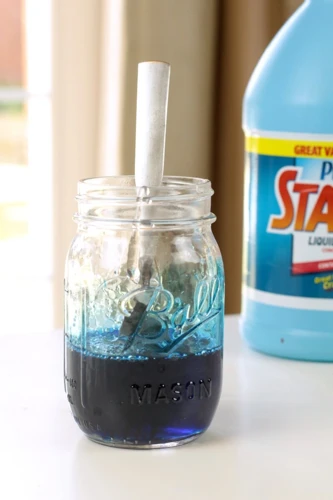
3. Stir the mixture together
Once you have added water to the glue, it’s time to start stirring the mixture together. This step is crucial in ensuring that all the glue and water is properly mixed together, resulting in a smooth and consistent slime. To help you visualize the process, we have outlined the steps in an easy-to-follow table:
| Step 1: | With your spoon or stir stick, begin to mix the glue and water together. Start with slow and gentle movements, making sure not to spill any of the mixture out of the bowl. You’ll see the mixture become more and more liquid as you stir. |
| Step 2: | Continue stirring for about a minute, making sure that there are no clumps of glue left in the mixture. If you notice any clumps, use your spoon to break them up and continue stirring until the glue is fully incorporated with the water. |
| Step 3: | Once you have stirred the mixture together, you should have a consistent bowl of slime. If you want your slime to be thicker or runnier, you can adjust the ratio of glue to water in your next batch to achieve the desired consistency. |
Remember, a well-stirred mixture is key to producing high-quality slime. Take your time and make sure that the glue and water are completely combined before moving on to the next step. With the right consistency, your slime will be perfect for stretching and molding to your heart’s content!
4. Knead the slime
Now that you have mixed your glue and water together, it’s time to knead your slime. Kneading is an important step in making slime because it helps to activate the ingredients and make sure they are fully combined.
Step 1: Scrape the slime out of your mixing bowl onto a clean, flat surface.
Step 2: Use your hands to knead the slime. The slime will be very sticky at first, but as you knead it, it will become less sticky and more stretchy. Knead the slime for at least 5-10 minutes to get the right consistency.
Step 3: If the slime is too sticky or wet, add a small amount of glue and knead it in. If the slime is too dry or stiff, add a small amount of water and knead it in. Keep adjusting until you have the desired consistency.
Step 4: Once you have the right consistency, your slime is ready to play with! You can stretch it, pull it, bounce it, and even make bubbles with it.
Remember to always wash your hands before and after playing with slime, and keep it away from your face and mouth to avoid ingestion.
Kneading your slime may take some time and effort, but the end result is worth it. Your slime will be smooth, stretchy, and a lot of fun to play with!
Tips for Perfect Slime
After creating your slime, you may want to take it to the next level. With a few tips, you can turn your basic DIY slime into a unique and personalized creation. Here are some ideas to enhance your slime-making experience:
1. Add food coloring for color
If you want to add some pizzazz to your slime, consider adding food coloring. You can easily find food coloring at your local grocery store or online. Use the following table as a guide for selecting the right amount of food coloring to add to your slime:
| Amount of Slime | Amount of Food Coloring |
|---|---|
| Small batch (1/4 cup glue) | 1-2 drops |
| Medium batch (1/2 cup glue) | 3-5 drops |
| Large batch (1 cup glue) | 6-10 drops |
Note: Start with a small amount of food coloring and add more as needed. A little goes a long way!
To incorporate the food coloring into your slime, add the drops of coloring to the glue mixture before adding the water. Mix the food coloring into the glue until it is evenly distributed. Then, proceed with adding water and stirring the mixture together.
If you want to experiment with different colors, try mixing two or more colors together to create a new shade. For example, mixing red and blue food coloring together will give you purple slime.
Remember to have fun and get creative with your slime!
2. Add glitter for texture
Adding glitter to your slime can give it a fun and unique texture that is sure to be a hit! Glitter comes in a variety of colors and sizes, so you can choose one that suits your preferences. To add glitter to your slime, follow these steps:
| Step 1: | Pour a small amount of glitter into the mixing bowl with your glue and water mixture. It is important to only add a little bit at a time, as too much glitter can affect the texture of the slime. |
| Step 2: | Use your spoon or stir stick to mix the glitter into the slime thoroughly. Make sure that all of the glitter has been evenly distributed throughout the slime. |
| Step 3: | Knead the slime for a few minutes to help evenly distribute the glitter and ensure that the texture is consistent throughout the slime. |
Keep in mind that while glitter can be a fun addition to your slime, it can also create a mess if not handled properly. Make sure to work on a surface that can be easily cleaned, or use a tray or plastic sheet to contain any excess glitter. Adding glitter can also make the slime slightly more brittle, so be careful not to overdo it and keep the slime in an airtight container when not in use. With these tips, you can make beautiful and fun glitter slime to enjoy with friends and family!
3. Adjust glue-to-water ratio for desired consistency
Achieving the perfect slime consistency is all about finding the right glue-to-water ratio. Too much glue can result in a slimy mess, while too little glue can make the mixture too stiff and difficult to work with. To make the process easier, use a measuring cup or spoon to measure out the ingredients.
The table below shows recommended glue and water ratio for different types of glue to achieve the desired consistency:
| Type of Glue | Glue-to-Water Ratio |
|---|---|
| Elmer’s White School Glue | 1/2 cup of glue : 1/4 cup of water |
| Clear Glue | 1/2 cup of glue : 1/4 cup of water |
| Metallic Glue | 1/2 cup of glue : 1/4 cup of water |
| Glitter Glue | 1/4 cup of glue : 1/8 cup of water |
Remember that the amount of water you add can vary depending on factors such as the humidity in your area. If the slime seems too sticky, add more water a little at a time until you achieve the desired consistency. Conversely, if the slime is too liquidy, add more glue a little at a time.
By adjusting the glue-to-water ratio, you can create slime that is perfect for stretching, molding, and squishing. Don’t be afraid to experiment until you find the ideal consistency for your slime.
Cleaning Up
After making slime, it’s important to clean up properly to ensure that the fun doesn’t turn into a messy nightmare. By following these simple cleaning tips, you can enjoy your new slime creation without any hassle. Let’s take a look at how to store leftover slime and clean up your mixing bowl and spoon.
1. Store leftover slime in an airtight container
It’s important to store any leftover slime in an airtight container to prevent it from drying out. This will allow you to use the slime again in the future and save materials. Here are some storage tips to ensure your slime stays fresh:
| Tips | Description |
|---|---|
| 1. Use a sealable container | Make sure your container has a tight-fitting lid to prevent air from getting inside and drying out the slime. |
| 2. Store in a cool, dry place | Avoid storing the slime in direct sunlight or in a hot and humid area. This can cause the slime to melt or break down. |
| 3. Keep away from pets and small children | Although slime is non-toxic, it’s not meant to be ingested. Keep it out of reach of pets and small children who may mistake it for food. |
| 4. Check on the slime periodically | Make sure to check the slime every few days to see if any moisture has accumulated. If it has, drain off any excess liquid and knead the slime before storing it again. |
Follow these tips to preserve your leftover slime and you’ll be able to enjoy it for many future play sessions.
2. Clean mixing bowl and spoon immediately with warm water
After making your slime, it’s important to clean up properly to avoid any leftover residue. To clean your mixing bowl and spoon, follow these simple steps:
- First, use warm water to rinse off as much of the glue and slime as possible from the bowl and spoon.
- Then, use a scrub brush or sponge to remove any remaining residue.
- Alternatively, you can also use vinegar or baking soda to help loosen up any stubborn slime residue.
- Be sure to rinse the bowl and spoon thoroughly with warm water to remove all traces of the cleaning solution.
- Finally, dry the bowl and spoon with a clean towel or allow them to air dry completely before putting them away.
Cleaning up immediately after making your slime will ensure that your bowl and spoon stay in good condition, and prevent any leftover residue from sticking to other surfaces. Additionally, storing your leftover slime in an airtight container will help keep it fresh for longer, allowing you to enjoy your slime for days to come!
Conclusion
In conclusion, making slime with only glue and water is an easy and fun DIY project that anyone can do with just a few simple materials. Not only is it a great way to pass the time and keep your hands busy, but it can also be a stress reliever and a way to express your creativity.
By following this step-by-step guide, you’ll be able to create your own batch of slime in no time. Remember to adjust the glue-to-water ratio as needed to achieve your desired consistency, and feel free to add in food coloring or glitter to make your slime truly unique.
When you’re finished playing with your slime, be sure to store any leftovers in an airtight container to keep it from drying out. And don’t forget to clean your mixing bowl and spoon with warm water to avoid any sticky messes.
So go ahead, give it a try and have fun exploring all the different ways you can customize your slime. You may just discover a new hobby that you love!
Frequently Asked Questions
1. Can I use clear glue instead of white glue?
Yes, clear glue can be used instead of white glue. However, the color of the slime may be slightly different.
2. Is it safe to add food coloring to slime?
Yes, it is safe to add food coloring to slime. Just make sure to use a food coloring that is safe for consumption.
3. Can I substitute water for another liquid?
No, water cannot be substituted for another liquid. Using a different liquid may result in a different consistency or texture of slime.
4. How do I know if I have the right consistency of slime?
The slime should be stretchy and not too sticky. If it is too sticky, add a small amount of glue. If it is too hard, add a small amount of water.
5. Can I add other ingredients to the slime, like essential oils?
Yes, other ingredients like essential oils can be added to the slime. However, be sure to research the safety of the ingredient before adding it.
6. How long will the slime last?
The slime can last for a few days to a few weeks, depending on how it is stored and used.
7. Can I make slime without glue?
Yes, there are alternative slime recipes that do not require glue. Some use ingredients like cornstarch or yogurt instead.
8. Can I microwave the slime?
No, do not microwave the slime. It can become very hot and may cause burns.
9. How do I clean slime off surfaces?
Use warm, soapy water and a cloth to clean slime off surfaces.
10. Can I use a mixer or blender to make the slime?
No, using a mixer or blender to make the slime can result in a different consistency and texture.