Embellishing everyday items with Swarovski crystals can transform them from ordinary to extraordinary. The luxurious sparkle of these precision-cut gems adds a touch of elegance to any project. However, the process of applying these crystals requires patience, a steady hand, and knowledge of the right techniques to ensure a long-lasting finish.
Understanding Swarovski Flatback Crystals Application
When it comes to Swarovski flatback crystals application, it’s crucial to understand the nuances that make the process successful. These crystals have a flat reverse side coated with a platinum foiling that enhances their adhesive capacity, allowing them to bond securely to various surfaces when applied correctly.
Swarovski Crystal Adhesive Guide
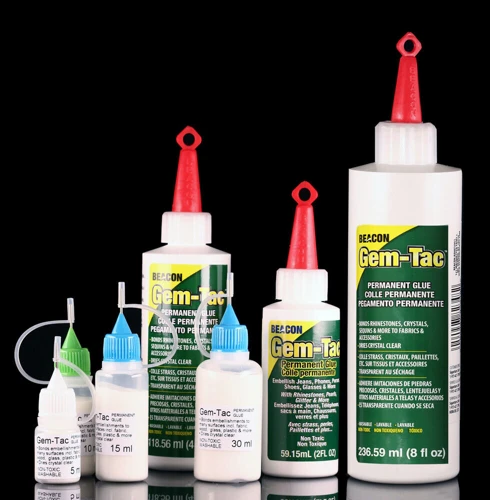
Not every adhesive is suitable for securing Swarovski crystals. The Swarovski crystal adhesive guide is an indispensable resource for selecting the right glue that will not only hold the crystals firmly but also preserve their brilliance without causing damage.
Selecting the Best Glue for Swarovski Crystals
The longevity of your embellishments hinges on the choice of adhesive. Using the best glue for Swarovski crystals ensures that your work remains intact, reflecting the crystals’ allure without the risk of them falling off prematurely.
Adhesive Types and Their Uses
- Epoxy Resins: Known for their strong bond and durability.
- Superglues: Quick drying but may cloud the crystal.
- Fabric Glues: Designed for bonding crystals to textiles.
Factors Influencing Glue Selection
Several factors come into play when selecting an adhesive, such as the material you’re adhering the crystals to, the environment the item will be subjected to, and the flexibility required. Each of these aspects can influence the bond strength and longevity of your design.
Preparation for Swarovski Crystal Embellishment
Before embarking on the creative journey of embellishing with Swarovski crystals, adequate preparation is key. This sets the foundation for a smooth and successful application process.
Choosing the Right Swarovski Crystals for Your Project
Selecting the appropriate size, color, and shape of Swarovski crystals is essential to achieving the desired effect for your project. Consider the final look you aim to create and choose accordingly.
Preparing the Crystals and Workspace
Organizing your crystals and ensuring a clean, well-lit workspace facilitates a more efficient and enjoyable application process. Gather all necessary tools and ensure the surface to be embellished is clean and free from oils or debris.
DIY Swarovski Crystal Projects: Step-by-Step Tutorial
DIY Swarovski crystal projects can range from simple designs to intricate patterns, depending on your skill level and the complexity you wish to achieve. Here’s a step-by-step tutorial to guide you through the process.
Bonding Swarovski Crystals to Fabric
When bonding Swarovski crystals to fabric, it’s important to use a flexible glue that will move with the material. Apply the adhesive sparingly to avoid seepage, and secure the crystal using a gentle pressing motion.
Attaching Swarovski Crystals: Non-Fabric Surfaces
For non-fabric surfaces such as glass, metal, or plastic, ensure that the adhesive chosen is compatible with both the surface and the crystals. Apply a tiny amount to the crystal and place it carefully onto the surface.
Hotfix vs. Non-Hotfix Application Methods
Hotfix crystals come with a heat-activated adhesive on the back, while non-hotfix crystals require a separate glue. Choose the method that best suits your project’s needs and your preferred application technique.
Tips for Gluing Swarovski Crystals
Effective application of Swarovski crystals can be ensured by following some expert tips for gluing Swarovski crystals. These insights help in achieving a professional finish that lasts.
Applying the Adhesive
Apply adhesive with precision, using a toothpick or a specialized applicator. This will prevent excess glue from overshadowing the crystal’s brilliance.
Placing the Crystals
Place each crystal carefully and press down lightly to ensure a strong bond. Use tweezers or a wax-tipped tool for better accuracy and control.
Drying and Curing Time for Swarovski Crystals
Allow adequate time for the adhesive to dry and cure completely. Rushing this process can compromise the bond and lead to loose crystals.
How to Secure Swarovski Crystals for Longevity
To secure Swarovski crystals effectively, ensure that the entire flatback is in contact with the glue and the surface. Do not disturb the piece until the adhesive has fully cured.
Aftercare and Maintenance
Once your Swarovski crystal embellishment is complete, it’s vital to know how to care for it to maintain its sparkle and integrity over time.
Fixing Mistakes and Removing Excess Glue
If you make a mistake, act quickly to adjust the crystal before the glue sets. Any excess adhesive can be removed with a cotton swab dipped in adhesive remover, being careful not to touch the crystal surface.
Preserving Your Swarovski Crystal Embellishment
To preserve your Swarovski crystal embellishment, handle the item with care, clean it gently, and avoid exposing it to harsh chemicals or extreme temperatures.
Advanced Techniques and Creative Ideas
For those looking to push the boundaries of creativity, advanced techniques and innovative projects can elevate your Swarovski crystal applications to new heights.
Innovative DIY Swarovski Crystal Projects
Explore the vast possibilities, from creating intricate jewelry pieces to embellishing home décor. The options are limitless for those willing to experiment.
From Simple to Sophisticated: Elevating Your Designs
Start with simple projects to build your confidence and gradually move to more sophisticated designs as you master the art of applying Swarovski crystals.
Conclusion: Unleashing Your Creativity with Swarovski Crystals
Embellishing with Swarovski crystals can be a rewarding and enjoyable craft. With the right techniques and a bit of practice, you can create stunning, professional-looking results.
Final Thoughts on How to Attach Swarovski Crystals
Whether you are a novice or an experienced crafter, understanding how to attach Swarovski crystals is the key to successful projects that shine with a touch of luxury.
If you’re a DIY enthusiast or a crafter looking to add some sparkle to your projects, our article on How to Glue Swarovski Crystals is a must-read. It provides step-by-step instructions and tips to ensure your Swarovski flatbacks stay firmly in place. For those interested in homemade adhesives, you might also enjoy our guide on how to make starch glue, perfect for various paper crafts. And for the hobbyists who love RC cars, don’t miss our tutorial on how to glue Traxxas tires to keep your vehicle in top racing condition.
Encouragement to Explore and Create
With the knowledge and tips provided, feel empowered to explore the world of Swarovski crystal embellishment. Let your creativity lead the way and enjoy the sparkling results of your labor.


