As we try to create a comfortable and inviting outdoor space, one essential element that can add the right texture and warmth to the area is an outdoor carpet. However, installing outdoor carpeting is not as straightforward as it may seem. It requires patience, accuracy, and proper adhesive techniques to ensure it lasts and withstands outdoor elements. In this guide, we’ll take you through a step-by-step process on how to glue outdoor carpeting effectively. Whether you’re laying it over concrete, wood, or other surfaces, this guide has got you covered. So let’s dive in and explore how to make your outdoor space more cozy and inviting!
Step 1: Prepare the Area
Before you begin gluing outdoor carpeting, it is important to properly prepare the area to ensure a secure and long-lasting hold. This step is crucial for ensuring that the carpet adheres firmly and does not come loose over time. In this section, we will cover the necessary steps to take before applying glue to your outdoor carpeting. These steps include cleaning the surface and measuring the area. By following these steps, you can ensure that your outdoor carpeting will be securely glued down and withstand outdoor weather conditions.
Clean the Surface
Before installing outdoor carpeting, it is important to thoroughly clean the surface where it will be placed. This will ensure that the carpet adheres properly and lasts longer. Use a strong cleaner to remove any dirt, debris, or stains on the surface.
Table: Tips for Cleaning Outdoor Carpet Surface
| Step | Actions |
|---|---|
| Step 1 | Remove any loose dirt or debris using a broom or vacuum cleaner. |
| Step 2 | Scrub stains and dirt spots with a strong cleaner and a brush. Make sure to remove all dirt and stains from the surface. |
| Step 3 | Rinse thoroughly with water to remove any remaining cleaner. |
| Step 4 | Let the surface dry completely before moving on to the next step. |
It’s important to note that the type of cleaner used will depend on the type of surface the carpet will be glued to. For example, if you are gluing outdoor carpeting to wood, refer to the article “How to Glue Carpet to Wood” for information on what type of cleaner and glue to use. If you’re gluing the carpet to aluminum, “How to Glue Carpet to Aluminum” may be of particular help.
Measure the Area
To ensure that the outdoor carpet fits perfectly on the surface, precise measurements need to be taken. Inaccurate measurements could result in the carpet being too small or too large for the area. This could lead to unnecessary wastage of carpet and additional expense. It is crucial to measure the area properly using a measuring tape before cutting the carpet.
Here’s how to measure the area:
| Step 1 | Remove all obstacles from the area where you plan to install the carpet. You need to measure an open space to determine the exact size of the carpet you require. |
| Step 2 | Using a measuring tape, measure the length and width of the area where you need to install the carpet. Make sure to measure every nook and corner of the area to ensure that you get accurate measurements. |
| Step 3 | Once you have measured the length and width, multiply the two measurements to get the total square footage needed for the area. Make sure to write down the measurements in a notepad, so you don’t forget. |
It’s always advisable to measure the area twice to avoid errors in measurements. In case you’re unsure of how to measure the area, you could seek professional assistance.
Once you have proper measurements from the area, you can then proceed to cut the carpet to fit the size. Following the correct installation technique is essential to ensure that the carpet stays put and doesn’t peel off. If you’re unsure of which glue to use for this process, check out our guide on what glue to use for backsplash for some helpful tips.
Step 2: Cut and Fit the Carpet
Ensuring a precise fit for your outdoor carpeting is crucial before moving forward with the installation process. By taking the time to properly measure and cut the carpet, you can avoid unwanted bumps and wrinkles in the finished product. This step will also help minimize the amount of trimming required as you glue it down. Make sure to take your time and be as meticulous as possible during this part of the installation process. In the end, it will be worth it. Ready? Let’s get started! If you need to glue carpet to plywood, check out our guide here.
Cut the Carpet to Fit
One of the most important steps in gluing outdoor carpeting is to cut the carpet to the correct size. It is important to measure the area accurately beforehand to ensure that you have enough carpet for the project. Once you have measured the area, use a utility knife or carpet cutter to cut the carpet to size.
Tip: It is always better to cut the carpet slightly larger than the area you need to cover. This allows for any mistakes or errors in measuring, and gives you room to adjust the carpet later on.
When cutting the carpet to size, use a straight edge to create a clean, straight line. Make sure to cut through the carpet backing as well, not just the fibers on top. Once you have cut the carpet to size, roll it up and take it to the area where you will be installing it.
Important: If you are gluing the carpet in a boat or marine setting, follow specific instructions for boat carpeting to ensure proper adhesion and longevity. Check out our guide on how to glue boat carpet for more information.
Another useful tip: If you need to install quarter round or trim, install it before cutting the carpet. Check out our guide on how to glue quarter round for more information.
Important: If you are gluing vinyl flooring, make sure to use the correct adhesive for the job. Check out our guide on what to use to glue down vinyl flooring for more information. If you are specifically gluing down vinyl tile, check out our guide on how to glue down vinyl tile.
One more useful tip: If you need to glue down laminate flooring, check out our guide on how to glue laminate for more information.
Note: If you are installing artificial grass, make sure to follow specific instructions for your chosen product. Check out our guide on how to glue artificial grass for more information.
By following these tips and choosing the correct adhesive for the job, you can ensure that your outdoor carpet installation will be a success.
Test the Fit
After you have cut the outdoor carpet to fit the area you want to cover, it’s time to make sure it fits perfectly. This step may seem like an extra effort, but it’s crucial to ensure that you don’t end up with a carpet that’s too small or too large for the area.
To test the fit, lay the cut carpet on the ground and position it where you want it to be installed. Make sure to trim any excess carpet that’s hanging off the edges if necessary. Then, step back and take a look at the overall fit. Visualize how the carpet will look like and envision how it will blend with the surroundings.
You may want to walk around the carpet and see if it feels comfortable underfoot. Pay attention to any bumps or overlaps that may get in the way of walking or sitting. Also, take note of any areas that may need trimming or additional adjustments.
To help with the fitting process, it’s useful to create a table to record the dimensions of the area and the carpet to ensure a perfect fit. Here’s an example:
| Area Dimensions | Carpet Dimensions | Adjustments Required |
|---|---|---|
| 10 ft x 12 ft | 12 ft x 14 ft | Trim 2 feet off one side |
| 8 ft x 10 ft | 8 ft x 11 ft | Trim 1 foot off one side |
| 12 ft x 15 ft | 12 ft x 15 ft | No adjustments required |
By keeping track of the dimensions of the area and the carpet, you can easily see which areas need trimming and adjustments. This can help you avoid mistakes and make sure that the installation process goes as smoothly as possible.
Once you’re happy with the fit, it’s time to move on to the next step and apply the glue.
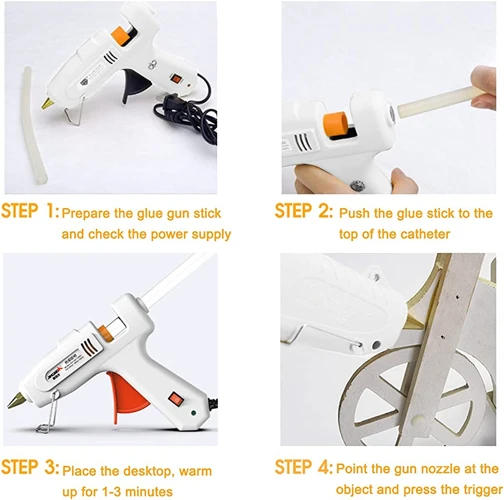
Step 3: Apply the Glue
Now that you have cleaned and measured the area and cut and fit the outdoor carpeting, it’s time to move on to the next step of the process: applying the glue. This is a crucial step in ensuring that the carpet adheres properly to the surface and withstands outdoor elements like rain and heat. But before you start applying any glue, it’s important to choose the right type of glue and follow the proper application methods. In this section, we’ll guide you through the steps for applying glue in sections and making sure that your outdoor carpeting stays firmly in place.
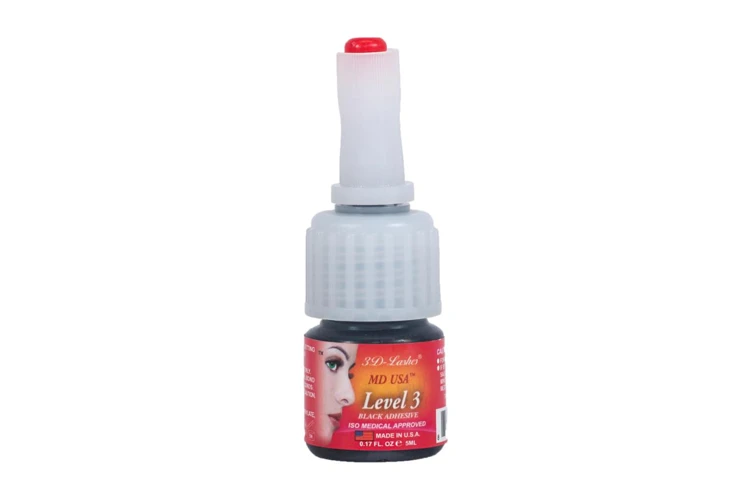
Choose the Right Glue
Choosing the right glue is crucial in ensuring that your outdoor carpeting stays in place for a long time. Not all adhesives are suitable for outdoor use, and some may deteriorate when exposed to extreme weather conditions. Here are some of the top options you can consider:
| Glue Type | Advantages | Disadvantages |
|---|---|---|
| Latex-based adhesive | – Easy to use and dries quickly. – Can be easily cleaned with water while still wet. – Suitable for outdoor use. – Non-toxic and doesn’t emit harmful fumes. |
– May not be suitable for extreme weather conditions. – Can become brittle over time. – May not provide a strong bond. |
| Epoxy adhesive | – Can withstand extreme temperatures and weather conditions. – Provides a strong and long-lasting bond. – Can be used on a variety of surfaces. – Resistant to chemicals and moisture. |
– Can be difficult to work with. – Can emit harmful fumes during application. – Takes longer to dry. |
| Contact cement | – Provides a strong and permanent bond. – Can be used on a variety of surfaces. – Dries quickly. – Waterproof and resistant to high temperatures. |
– Can be difficult to remove if applied incorrectly. – Can emit harmful fumes during application. – Requires careful handling to avoid skin and eye irritation. |
| Pressure-sensitive adhesive | – Easy to use and dries quickly. – Suitable for a variety of surfaces. – Resistant to moisture and temperature changes. – Can be easily removed if necessary. |
– May not provide a strong enough bond for heavy traffic areas. – Can be affected by extreme weather conditions. |
When choosing the right glue, consider the climate in your area, the type of surface you are applying the carpet to, and the expected foot traffic. Make sure to follow the manufacturer’s instructions carefully for best results.
Apply the Glue in Sections
When applying the glue for outdoor carpeting, it’s important to work in sections to ensure proper adherence. Here’s a table breaking down the process:
| Step | Action |
|---|---|
| 1 | Apply a thin, even layer of glue to the surface, using a trowel or notched spreader. |
| 2 | Place the edge of the carpet onto the glued section of the surface. Use a carpet roller to press the carpet firmly onto the glue and surface. |
| 3 | Continue to apply glue and lay carpet in small sections, making sure to press down firmly each time. |
| 4 | Work your way across the surface until the entire area is covered. |
| 5 | Allow the glue to cure for the recommended time before walking on or using the area. |
By working in smaller, manageable sections, you can avoid the glue drying out before you have a chance to lay the carpet. It also allows you to make any necessary adjustments as you go along, ensuring a smooth, even application. Always make sure to read the manufacturer’s instructions for the specific type of glue you are using, as drying times and application methods may vary.
Step 4: Secure the Carpet
Now that you have applied the glue and carefully placed the outdoor carpet, it is time to secure it firmly in place. This step is crucial to ensure that the carpet stays in place and stands up to heavy foot traffic. Follow these simple but effective techniques to achieve a long-lasting and beautiful outdoor carpet installation.
Smooth Out the Carpet
Once the carpet is in place, it’s important to smooth out any wrinkles or bumps before the glue sets. Here are a few tips for achieving a smooth finish:
- Start from the center: Begin smoothing the carpet out from the center and work your way outwards, pressing down firmly as you go.
- Use a broom: A broom can be useful for pushing out any remaining air pockets and smoothing out the carpet fibers.
- Check for bubbles: Make sure to press down on any raised areas or bubbles, as these will only get worse with foot traffic over time.
- Trim excess: If there are any areas where the carpet extends past the edge of the installation area, trim it down to size before securing it in place.
By taking the time to smooth out the carpet now, you’ll ensure that it looks great and will last for years to come.
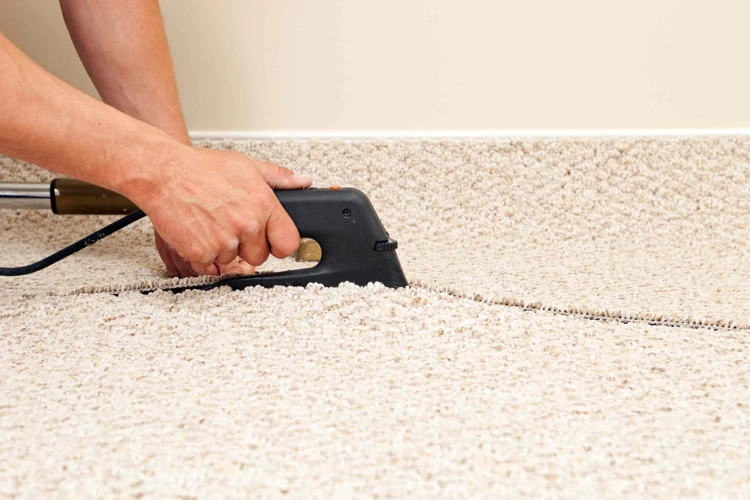
Use a Roller
When it comes to securing the outdoor carpet in place, using a roller is an essential step. This tool will help to smooth out any wrinkles or air bubbles that may have formed during the installation process. It is recommended to use a 75-pound linoleum roller for this job, which can be rented from most hardware stores.
To use the roller, begin at one end of the carpet and work your way towards the other end. Apply pressure evenly as you roll, ensuring that the glue is evenly distributed and that the carpet is firmly secured to the surface. It may be necessary to go over certain areas more than once to ensure that the carpet is completely flat and secure.
Tip: When using the roller, start in the middle of the carpet and work towards the edges. This will help to push out any air bubbles that may have formed during the installation process.
Using a roller is a crucial step in the carpet installation process, as it helps to ensure that the carpet is secured in place and will not shift or move over time. Take your time with this step, working slowly and methodically to ensure that the carpet is completely flat and free of any wrinkles or bubbles.
| Pros: | – Helps to evenly distribute glue | – Secures the carpet firmly in place | – Smooths out any wrinkles or air bubbles |
|---|---|---|---|
| Cons: | – Can be heavy and difficult to maneuver | – May be challenging to get into tight corners or small spaces | – Requires caution to avoid damaging the carpet |
Using a roller is an essential step in the carpet installation process, and will help to ensure that your outdoor carpet looks great and lasts for years to come.
Step 5: Trim and Finish
As you near the end of your outdoor carpeting project, it’s time to focus on the finishing touches. After successfully gluing the carpet in place, the next step is to trim away any excess material and seal the edges to prevent fraying. These final details ensure not only a polished look but also help extend the life of your outdoor carpeting. In this section, we’ll go over the precise steps for trimming and finishing your newly secured outdoor carpet.
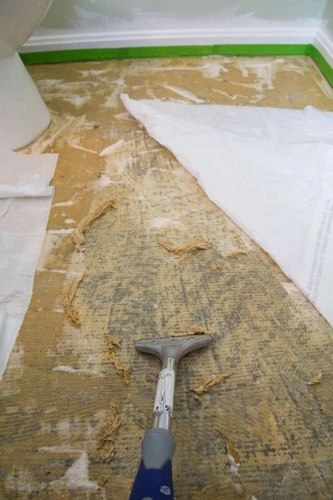
Trim Excess Carpet
Once you have secured the outdoor carpeting into place with a strong adhesive, it’s time to trim away any excess material. This is an important step, as leaving excess carpet can create tripping hazards and a messy appearance. To effectively trim the excess carpet, you will need a sharp utility knife and a straight edge.
Step 1: Begin by carefully placing the straight edge onto the excess carpet and running the utility knife along it to create a clean edge. Repeat this process along all edges of the carpet until all excess material has been removed.
Step 2: Be sure to use caution when using the utility knife, as it is easy to accidentally cut into the underlying surface or damage the newly laid carpet. Always double-check your measurements before making any cuts and proceed slowly and carefully.
Step 3: Once the excess material has been removed, vacuum the entire area to remove any debris or loose fibers. This will give the outdoor carpet a clean and polished appearance.
Step 4: If you notice any areas where the carpet is still loose or not securely attached, apply additional adhesive before trimming away the excess carpeting. It’s important to ensure that the entire carpet is firmly in place before completing this final step.
By taking the time to carefully trim away any excess carpeting, you can achieve a seamless and professional-looking installation. Additionally, removing any tripping hazards will help to ensure the safety of those who will be using the outdoor space.
Seal the Edges
Sealing the edges of your outdoor carpet is an important step to ensure its longevity and prevent it from fraying or coming loose. Here are some steps to follow to seal the edges of your installed carpet:
- Trim the edges: First, use a sharp pair of scissors to trim any excess carpet that is extending beyond the edges of your installation area. This will ensure that the edges are clean and neat.
- Apply seam sealer: Use a seam sealer specifically designed for outdoor carpets. Apply it to the edges of the carpet using a small brush or roller. Make sure to apply it generously to ensure it covers the entire edge.
- Spread the sealer: Next, use a putty knife or other similar tool to spread the sealer evenly over the edges of the carpet. This will create a strong bond between the carpet and the sealer.
- Let it dry: Allow the seam sealer to dry completely before walking or placing any furniture on the carpet. This may take several hours depending on the humidity and temperature in your area.
Taking the time to properly seal the edges of your outdoor carpet will ensure that it looks great and lasts for years to come. It will also prevent water or debris from seeping under the carpet and causing damage. Remember to follow all instructions on the seam sealer product you choose, and take care to apply it correctly for maximum effectiveness.
Conclusion
After following these step-by-step guidelines on how to glue outdoor carpeting, you will have a beautiful and fully functional outdoor carpet that will enhance the aesthetic value and comfort of your outdoor space. Remember to always prepare the area by cleaning the surface and measuring the area, before cutting and fitting the carpet to size. The right glue is also important, as well as applying it in sections and securing the carpet with a roller. Once the carpet is in place, trimming excess carpet and sealing the edges will provide a neat and professional finish.
It’s important to note that the quality of the installation depends greatly on the skill and attention to detail of the person doing the installation. It may be worth considering hiring a professional if you’re not confident in your own abilities.
Overall, the process of gluing outdoor carpeting is a relatively simple and easy DIY project for any homeowner looking to improve the look and feel of their outdoor living space. With the right tools, materials, and techniques, it can be accomplished in just a few easy steps, and the results will be well worth the effort. Whether you’re covering a balcony, deck or patio, or creating an outdoor entertainment area, this guide will help you achieve the desired results. So go ahead and give it a try – you’ll be amazed at the difference a little outdoor carpeting can make!
Frequently Asked Questions
What type of outdoor carpet should I use?
It is recommended to use a carpet that is specifically designed for outdoor use, such as marine carpeting or an all-weather carpet.
Can I glue outdoor carpet to any surface?
No, the surface must be clean, smooth, dry and structurally sound. Suitable surfaces include concrete, wood or asphalt.
What is the best way to clean the surface before gluing?
The best way is to use a pressure washer, but if you don’t have one, a broom or stiff brush can be used to remove loose debris and dirt.
How do I measure the area for the outdoor carpet?
Measure the length and width of the area with a tape measure and multiply the two dimensions together to get the total square footage needed for the carpet.
What is the best way to cut the carpet to fit?
Use a sharp utility knife or carpet cutter to make clean, precise cuts. Be sure to cut the carpet to the correct size before gluing.
How can I test the fit of the carpet before gluing it down?
Roll the carpet out onto the surface and adjust it as needed. Make sure it fits snugly without any gaps or overlap.
Can any adhesive glue be used?
No, you should use a glue that is specifically designed for outdoor carpet. Look for an all-weather carpet adhesive that is waterproof and strong.
How should the glue be applied?
The glue should be applied in sections using a notched trowel. Spread the glue evenly and work in one section at a time.
Do I need to use a roller once the carpet is in place?
Yes, a carpet roller is essential to press the carpet into the glue and ensure a strong bond. It can also help to smooth out any wrinkles or bumps.
What is the best way to seal the edges of the carpet?
Apply a line of silicone sealant around the edges of the carpet to prevent water from seeping underneath. Smooth out the sealant with a caulk smoothing tool or your finger.