Have you been wondering how to attach plexiglass to metal? Whether you’re working on a DIY project or repairing a household item, gluing plexiglass to metal may seem like a daunting task. But fear not! In this comprehensive guide, we’ll walk you through the necessary steps to get the job done. From preparing the surfaces to choosing the right adhesive and applying it correctly, we’ve got you covered. Plus, we’ll even share some tips and tricks to ensure a successful outcome. So, let’s dive in and learn how to glue plexiglass to metal like a pro!
Tools and Materials
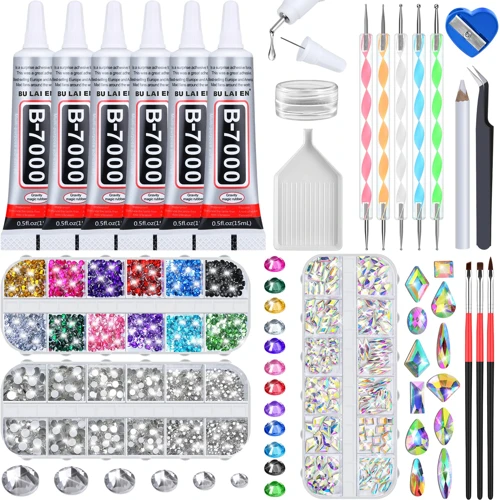
When it comes to gluing plexiglass to metal, having the right tools and materials can make all the difference in achieving a strong and lasting bond. In this section, we’ll cover everything you need to know about the essential tools and materials required for this project. From various adhesives to basic hand tools, understanding what you need and how to use it will streamline the process and help ensure a successful outcome. So, let’s dive into what you’ll need!
Tools and Materials:
Tools
When choosing tools for gluing Plexiglass to metal, it’s important to have the right ones to ensure a successful project. Here are some essential tools that you’ll need:
- Clamps: to hold the Plexiglass and metal in place while curing.
- Safety glasses: to protect your eyes from any stray adhesive.
- Razor knife: to cut the Plexiglass to size.
- Measuring tape: to ensure accuracy when measuring the Plexiglass.
- Sandpaper: to prep the surface of the metal for glue adhesion.
- Caulk gun: to dispense the adhesive.
- Paintbrush: to apply the adhesive evenly.
- Drill or driver: to make holes in the Plexiglass and metal if necessary.
Having these tools on hand will make the gluing process smoother and more efficient. Additionally, having safety glasses and being cautious while handling sharp tools is important to prevent injuries.
If you’re looking for more information on gluing different materials, check out our guide on how strong is super glue on metal for tips and tricks on adhesive strength on metal surfaces.
Materials
When it comes to necessary materials, there are several options when it comes to gluing plexiglass to metal. The materials you need may vary based on the type of adhesive you choose to use. Below is a table of common materials you might need.
| Material | Explanation | Where to Find |
|---|---|---|
| Plexiglass Sheets | The material to be adhered to metal. | Hardware store or online. |
| Metal Surface Cleaner | Used to clean the metal surface prior to applying adhesive. | Hardware store or online. |
| Measuring Tape/Ruler | To measure the right length and size of plexiglass sheet. | Hardware store or online. |
| Saw | To cut the plexiglass sheet. | Hardware store or online. |
| Sandpaper | Used to smooth out the edges of plexiglass after cutting. | Hardware store or online. |
| Epoxy Adhesive | Suitable for bonding metal and plexiglass type of surfaces, can be used in hairline crack in wood as well. | Hardware store or online. Check out an anchor how-to-glue-a-hairline-crack-in-wood. |
| Acrylic Cement | Forms strong bonds between plexiglass and metal surfaces. | Hardware store or online. Check out what-is-acrylic-glue. |
| Double-Sided Tape | A tape with adhesive coating on both sides, suitable for joining plexiglass and metal surfaces. | Hardware store or online. |
| Clamps and/or Tape | Used to hold the pieces of plexiglass against a metal surface while the adhesive cures. | Hardware store or online. |
| Safety Equipment | Wearing safety goggles and gloves are recommended when working with plexiglass and adhesive. | Hardware store or online. |
Before selecting your materials, consider the specific needs of your project. For example, if you are gluing plexiglass to brick, you would need different materials, such as a different type of adhesive and potentially different safety equipment.
Preparation
Before gluing Plexiglass to metal, it is important to properly prepare both surfaces to ensure a strong bond. Preparing the surfaces involves thorough cleaning and measuring and cutting the Plexiglass to the correct size. It also involves selecting the right adhesive for the job. This step is crucial as it determines the success of the final outcome. No matter what surface you’re gluing to Plexiglass, preparation is key for a solid bond. If you want to learn about gluing other materials, check out our guides on how to glue wood to fiberglass, how to glue stainless steel, how to glue wood to brick, how to glue clay back together, how to glue broken plastic, how to glue ceramic, and how to use Tenax marble glue.
Cleaning the Surface
Before gluing plexiglass to metal, it is important to properly clean the surface to ensure a strong bond. It is recommended to follow these steps:
- Remove any debris: Use a soft cloth or brush to remove any dirt, dust, or debris from both the plexiglass and metal surface. This step is essential to ensure the adhesive properly bonds with the surface.
- Wash with soap and water: After removing debris, wash the surfaces with a mild soap and warm water. Then, rinse thoroughly with clean water and dry with a lint-free cloth. This will remove any remaining contaminants from the surface.
- Use rubbing alcohol: After washing and drying the surfaces, use rubbing alcohol to fully clean the surfaces. Soak a lint-free cloth or cotton ball in rubbing alcohol and wipe down the surface. This will remove any oils or residue that might interfere with the bond.
- Dry thoroughly: Once the surfaces are cleaned with rubbing alcohol, let them dry completely. This step is important to ensure the adhesive cures properly.
It’s important to note that any residue or debris left on the surface can weaken the bond between the plexiglass and metal. It’s recommended to wear gloves while cleaning the surface to avoid leaving any fingerprints or oils on the surfaces. By taking the time to properly clean the surfaces, you can ensure a strong and long-lasting bond between the plexiglass and metal.
Measuring and Cutting Plexiglass
Before gluing plexiglass to metal, it is important to accurately measure and cut the plexiglass to ensure a perfect fit. Here are the steps to follow:
Step 1: Gather your materials. For this task, you will need a measuring tape, a straight edge, a scoring tool, and a saw suitable for cutting plexiglass.
Step 2: Measure the plexiglass. Use the measuring tape to determine the width and length of the plexiglass required for your project.
Step 3: Mark the cutting lines. Use the straight edge to mark the lines you need to cut on the plexiglass. Make sure to mark the cutting lines on the protective film to avoid scratching the plexiglass.
Step 4: Score the plexiglass. Use the scoring tool to gently score the plexiglass along the marked cutting lines. Make sure to apply firm but gentle pressure to avoid cracking the plexiglass.
Step 5: Cut the plexiglass. Use the saw to slowly and carefully cut along the scored line. Make sure to keep the saw blade moving at a steady speed to avoid overheating the plexiglass.
Step 6: Remove the protective film. Once the plexiglass is cut, carefully peel off the protective film. Make sure to handle the plexiglass with care to avoid scratching or cracking it.
It is important to note that cutting plexiglass can sometimes produce sharp edges, so it is recommended to use sandpaper to smooth out any rough edges. It is also important to wear protective gear such as safety glasses and gloves to avoid any injuries.
Following these steps will ensure that your plexiglass is accurately measured and cut to fit your project perfectly.
Choosing the Right Adhesive
When it comes to bonding plexiglass to metal, choosing the right adhesive is crucial for a strong and long-lasting hold. With several options available on the market, it can be challenging to determine which one will work best for your specific project. To help you make an informed decision, let’s explore some key factors to consider when selecting an adhesive for your plexiglass and metal bonding needs.
Epoxy
When it comes to gluing plexiglass to metal, one of the most popular choices for adhesive is epoxy. Epoxy is a two-part adhesive that consists of a resin and a hardener. When mixed together, these two components create a strong and durable bond that can handle a variety of different materials, including plexiglass and metal.
Advantages of using epoxy:
- Epoxy is incredibly strong and durable, which means it can handle heavy loads and high-stress situations.
- It has excellent gap-filling properties, which means it can fill in any small gaps or imperfections in the surface to create a strong bond.
- It is resistant to water and most chemicals, which makes it a great choice for outdoor and industrial applications.
Disadvantages of using epoxy:
- Epoxy can take a while to cure, which means you’ll need to be patient and allow plenty of time for the adhesive to set properly.
- It can be tricky to work with, as the resin and hardener need to be mixed together in specific ratios to ensure a strong bond.
- Epoxy can sometimes be brittle, which means it may not be the best choice for applications that require flexibility or shock-absorption.
How to use epoxy to glue plexiglass to metal:
- Clean the surfaces of both the plexiglass and metal with a clean cloth and rubbing alcohol. This will help ensure that the surfaces are free from grease, dirt, and oil.
- Measure out the correct amount of resin and hardener according to the manufacturer’s instructions, and mix them together thoroughly.
- Apply the epoxy to one of the surfaces using a brush or spatula, being careful not to apply too much.
- Press the two surfaces together firmly, and use clamps or tape to hold them in place while the adhesive cures.
- Allow the epoxy to cure completely according to the manufacturer’s instructions. This may take several hours or even overnight.
- Once the epoxy is fully cured, trim any excess adhesive from around the edges of the bond using a razor blade.
- Sand and polish the bond area to create a smooth and even surface.
Epoxy is a great choice for gluing plexiglass to metal, as it offers a strong and durable bond that can handle a variety of different conditions. However, it does require some patience and care during the application process to ensure that the bond is strong and long-lasting.
Acrylic Cement
Acrylic cement is a popular adhesive option for bonding plexiglass to metal. This adhesive is made with a mixture of solvents that dissolve the plexiglass surface, fusing it to the metal surface. When using acrylic cement, it’s important to take certain precautions due to the strong chemicals involved.
Advantages of Acrylic Cement:
| Advantages | Details |
| Strong Bond | Acrylic cement creates a permanent bond between plexiglass and metal surfaces. |
| No Clamping Required | This adhesive does not require clamping, minimizing the risk of damaging the plexiglass surface. |
| Fast Drying Time | Acrylic cement sets quickly, allowing users to complete projects in less time. |
Precautions when Using Acrylic Cement:
| Precaution | Details |
| Ventilation | Acrylic cement contains strong solvents that can be toxic when inhaled. Users must ensure that there is adequate ventilation in the workspace. |
| Safety Gear | Wearing gloves, a respirator, and eye protection is essential when working with acrylic cement to avoid skin and eye irritation. |
| Acrylic Sheet Thickness | Acrylic cement is not recommended for use on sheet thicknesses greater than 1/8 inch, as it can cause the sheet to craze. |
Application Process:
When using acrylic cement to bond plexiglass to metal, it’s important to follow the recommended application process to ensure a strong bond.
1. Clean the surfaces to be bonded thoroughly.
2. Apply the acrylic cement to the metal surface using a brush or applicator.
3. Allow the acrylic cement to dry for a few seconds until it becomes tacky.
4. Place the plexiglass onto the metal surface and hold it in place for a few minutes until the bond sets.
5. Allow the bond to cure for about 24 hours before sanding or finishing the edges.
By following these steps and using the appropriate precautions and safety gear, users can create a strong and permanent bond between plexiglass and metal surfaces using acrylic cement.
Double-sided Tape
Double-sided tape is an easy-to-use adhesive option for attaching Plexiglass to metal. This type of tape is typically made with a foam or plastic core coated with adhesive on both sides. It is designed to be strong and durable and can hold materials together without the need for clamps or curing time.
Advantages of Double-sided Tape:
- Quick and easy to apply
- No need for additional tools or equipment
- Creates an immediate bond
- Can be used for temporary or permanent applications
Choosing the Right Tape:
Not all double-sided tapes are created equal, and it’s important to choose the right one for your specific project. Look for a tape designed specifically for use on Plexiglass and metal surfaces. 3M Super Strength Molding Tape and Gorilla Heavy Duty Double Sided Mounting Tape are two popular options.
Application Process:
Before applying the tape, make sure that both the Plexiglass and metal surfaces are completely clean and dry. Cut the tape to the desired length and apply it to one of the surfaces. Press firmly to ensure a strong bond. Remove the protective backing from the tape and carefully place the other surface on top, pressing firmly to create a tight seal.
Considerations:
Double-sided tape may not be strong enough for heavier or more permanent applications. Extreme temperatures and humidity levels can affect its adhesion, so it may not be suitable for outdoor use or in environments with fluctuating temperatures.
Removal:
If you need to remove the Plexiglass from the metal surface, the tape can be peeled off easily. Use a plastic scraper or putty knife to help remove any stubborn adhesive residue.
Double-sided tape is a convenient and versatile option for attaching Plexiglass to metal surfaces. Consider your specific project needs before choosing this adhesive option, and always follow the manufacturer’s instructions for best results.
Application Process
Now that you have properly prepared both the Plexiglass and metal surfaces, it’s time to start applying the adhesive. Before you begin, it’s important to select the right adhesive for the job as it can greatly affect the durability and appearance of the final product. In this section, we will explore the application process for the three most common types of adhesive: epoxy, acrylic cement, and double-sided tape. Follow these step-by-step instructions to ensure a strong and long-lasting bond between Plexiglass and metal.
Applying Epoxy or Acrylic Cement
When it comes to bonding plexiglass to metal, the two most effective adhesive options are epoxy and acrylic cement. While both types of adhesive are capable of creating a strong bond, the application process for each material differs slightly. Let’s take a look at how to apply each of these adhesives to effectively glue plexiglass to metal.
Epoxy adhesives consist of two parts that must be mixed together before application. Follow these steps to apply it:
| Step 1 | Mix equal parts of the resin and hardener in a small container. |
| Step 2 | Use a brush to apply a thin layer of the mixed epoxy to the metal surface where you want to attach the plexiglass. |
| Step 3 | Press the plexiglass firmly onto the metal surface, making sure it’s positioned correctly. |
| Step 4 | Clamp the plexiglass in place and let the epoxy dry completely. This usually takes at least 24 hours. |
Keep in mind that epoxy can be messy and difficult to work with, so be sure to wear protective gloves and work in a well-ventilated area.
Acrylic cement is a type of solvent-based adhesive that chemically bonds the plexiglass to the metal. Here’s how to apply it:
| Step 1 | Apply a small amount of acrylic cement to the metal surface. |
| Step 2 | Carefully position the plexiglass on the metal surface. |
| Step 3 | Clamp the plexiglass in place and let it sit for 24 to 48 hours, or until the cement has fully cured. |
Unlike epoxy, acrylic cement produces fumes that can be harmful if inhaled. Be sure to use it in a well-ventilated area and wear protective gear such as gloves and a respirator.
By following these steps, you can successfully apply epoxy or acrylic cement to bond plexiglass to metal. Remember to choose the adhesive that best fits your project’s needs and always prioritize safety during the application process.
Applying Double-sided Tape
When it comes to gluing plexiglass to metal, double-sided tape can be a quick and easy solution. Here’s how you can apply double-sided tape to your materials:
- Prepare the surfaces: Clean both the metal and plexiglass surfaces thoroughly with rubbing alcohol and a clean cloth. Make sure the surfaces are completely dry before proceeding to the next step.
- Cut the tape: Measure the length of the metal edge and cut a strip of double-sided tape to match. Make sure the tape is wide enough to provide enough bonding surface, but not too wide that it will appear out of place or get squeezed out when the two surfaces are joined.
- Apply the tape: Peel off one side of the tape and carefully apply it to the metal surface. Press down firmly on the tape to make sure it’s adhered properly.
- Position the plexiglass: Carefully place the plexiglass onto the tape with the metal edge aligned with the edge of the tape. Once again, press down firmly on the plexiglass to ensure it’s adhered to the tape.
- Remove the backing: Peel off the remaining backing from the tape. Make sure to pull it away at a 45-degree angle to avoid pulling the tape off the metal surface.
- Press together: Once the backing is removed, press the metal and plexiglass surfaces together firmly to ensure the tape sticks well.
- Double-check: Double-check that the plexiglass is aligned with the metal and that the tape is not visible from the outside. If it is, use a razor blade to carefully trim away any excess tape.
Remember that double-sided tape may not provide as strong of a hold as other adhesives, so it’s important to choose the right tape for the job and make sure it’s applied properly. Additionally, double-sided tape may not work well for larger or heavier pieces of plexiglass, so be sure to consider the weight and size of your materials before deciding on this method.
Curing and Finishing
After the adhesive is applied, the curing and finishing process is crucial for ensuring a solid bond between the plexiglass and metal. It’s important to allow the adhesive to fully cure before trimming the edges and polishing the surface. Safety measures should also be taken during this stage to avoid any injuries. Here are the steps to properly cure and finish your plexiglass and metal project.
Curing Time
After you have applied the adhesive to the plexiglass and metal, you must give it enough time to cure properly before handling the materials. The curing time for adhesives can vary depending on the type of adhesive used, the environmental conditions, and the amount of adhesive used.
Epoxy: Epoxy adhesives generally have a curing time of 24-48 hours. However, many factors affect the curing time of epoxy adhesives, including the brand and type of adhesive and the temperature and humidity of the environment. Always refer to the manufacturer’s instructions for specific curing times.
Acrylic Cement: Acrylic cement sets quickly, usually within 5-15 minutes and has a full cure time of 24 hours. This type of adhesive typically works best for small to medium sized projects, but not for larger jobs since it will fully cure too quickly to make adjustments.
Double-sided Tape: Double-sided tapes generally have a quick bonding time. Once both surfaces are brought in contact with each other, they usually bond immediately. Double-sided tapes are not recommended for heavy loads, and they can fail over time, which is why they’re typically used for smaller projects.
During the curing process, you should avoid touching or applying any pressure onto the plexiglass and metal for the recommended curing time. This will prevent any shifting or movement of the materials, which can cause the adhesive to fail. Once the adhesive has fully cured, you can proceed to trimming and sanding the edges of the materials, and polishing the surfaces as required.
It is important to note that the curing time for the adhesive should not be rushed, as this may cause the bond to weaken. Similarly, it’s important to ensure that the materials are not moved or disturbed before the adhesive has had enough time to cure. Following the manufacturer’s instructions for curing the adhesive is crucial to obtaining a secure and long-lasting bond between the plexiglass and metal.
Trimming the Edges
Once the adhesive has fully cured, it’s time to trim the edges of your newly bonded plexiglass and metal parts. Use a sharp blade or a fine-grit sandpaper to achieve smooth, straight edges.
Step 1: Mark the Cut
First, mark the area where you want to cut on both the plexiglass and the metal parts. Use a ruler or measuring tape to ensure that your cut is straight and precise.
Step 2: Cutting Plexiglass
When cutting the plexiglass, use a fine-toothed saw or a sharp blade to make a gentle, controlled cut. It’s important to take your time and apply even pressure to avoid cracking or shattering the material.
Step 3: Cutting Metal
For the metal part, use a metal saw or a pair of heavy-duty tin snips to make your cut. Again, take your time and apply gradual, even pressure to ensure a smooth cut.
Step 4: Sanding the Edges
Next, use a fine-grit sandpaper to smooth out any rough edges and create a seamless finish. Be sure to handle the plexiglass with care to avoid scratching or gouging the surface.
Step 5: Finishing Touches
Finally, clean the edges of both the plexiglass and metal parts with a soft cloth and alcohol to remove any residue or debris. Apply a clear coat of acrylic sealer to the plexiglass to protect it from UV damage and surface scratches.
Trimming the edges of your plexiglass and metal parts is a crucial final step in achieving a secure, long-lasting bond. Take your time, use the proper tools and techniques, and remember to handle the plexiglass with care to achieve a professional-looking finish.
Sanding and Polishing
Once the adhesive has cured and the excess material has been trimmed away, it’s time to sand and polish the area for a smooth and professional finish. Sanding and polishing is an important step in the process as it not only removes any bumps or ridges but also brings out the shine of the plexiglass.
Sanding Process
Firstly, use medium-grit sandpaper to sand the edges of the plexiglass where it meets the metal. Gently sand in a circular motion, being careful not to exert too much pressure as it could cause the plexiglass to crack or break. After sanding the edges, move on to the larger surface area of the plexiglass.
Using a fine-grit sandpaper, start sanding the plexiglass surface in a back-and-forth motion. This process will help to remove small scratches, bumps, and ridges. Repeat this step with an even finer-grit sandpaper until the surface is entirely smooth.
Polishing Process
After sanding, it’s time to polish the plexiglass. In this step, use a polishing compound such as a jeweler’s rouge or a plastic polishing agent.
Apply the polishing compound to a clean, soft cloth and begin polishing the plexiglass surface in a circular motion. Continue polishing until the entire surface is glossy and smooth. Repeat the polishing process with a clean cloth until the plexiglass shines brightly.
Final Thoughts
Sanding and polishing the surface of the plexiglass not only improves the appearance of the project but also makes it smooth to the touch. Remember to sand gently and gradually move to finer-grit sandpaper. Finally, using a good-quality polishing compound will leave a stunningly glossy finish.
Tips and Tricks

After you’ve chosen the perfect adhesive and followed the application process, you may encounter some unexpected challenges. Fear not, because there are tips and tricks that can help you achieve the perfect bond between your plexiglass and metal. Here are some techniques that can make the gluing process easier and more effective:
Using Clamps or Tape
Using Clamps or Tape
When gluing plexiglass to metal, it’s important to make sure that both materials are held tightly together to ensure a strong bond. Clamps or tape can help achieve this.
Here are some tips for using clamps or tape during the application process:
- Position the clamps or tape strategically. Before applying adhesive, determine where the clamps or tape should be placed to hold the plexiglass and metal securely in place. Depending on the size and shape of the objects being glued together, you may need multiple clamps or tapes to ensure proper alignment.
- Choose the right size clamps. When selecting clamps, make sure they are the right size to hold the materials securely but not too tight as to bend the plexiglass or metal.
- Apply pressure gradually. When tightening the clamps or tape, apply pressure gradually to avoid any sudden movements that could cause the materials to shift or move.
- Protect the surfaces. To prevent damage to the surfaces, place a layer of protective material such as felt or cardboard between the clamps or tape and the plexiglass or metal.
- Use caution with tape. Double-sided tape can be a good alternative to clamps, but it’s important to use caution when removing the tape after the adhesive has cured. Pulling the tape too quickly or forcefully can damage the plexiglass or metal surfaces.
Using clamps or tape can be an effective way to hold plexiglass and metal together during gluing. Remember to choose the right size and position the clamps or tape strategically to ensure a strong and secure bond.
Warming the Plexiglass
Heating plexiglass before gluing can help to reduce the likelihood of cracking or breaking due to stress. Here are some steps to follow when warming up your plexiglass:
- Use a heat gun: A heat gun is a handheld device that you can use to warm up the surface of your plexiglass. Hold the heat gun at a distance of about six inches from the surface, and move it back and forth in slow, steady motions.
- Start with a low setting: Begin heating your plexiglass on a low setting to avoid damaging it with too much heat. Gradually increase the temperature until the surface begins to feel slightly warm to the touch.
- Be patient: It’s important not to rush the heating process. Take your time and allow the plexiglass to warm up slowly and evenly.
- Avoid overheating: Be careful not to overheat your plexiglass. If the surface starts to become discolored or warped, stop heating immediately.
Remember to exercise caution when handling hot plexiglass. Always wear gloves or other protective gear to avoid burns, and be sure to allow the surface to cool before attempting to glue it to metal.
Avoiding Air Bubbles
When gluing plexiglass to metal, air bubbles can be a common issue that arises during the application process. These bubbles can cause weak spots in the bonding and ultimately compromise the integrity of the adhesive bond.
To avoid air bubbles, proper technique and preparation are key. Here are some tips to follow:
| Tip | Description |
|---|---|
| Apply adhesive in thin, even layers | Applying adhesive in an even layer prevents the buildup of excess glue, which can cause air bubbles. |
| Use a toothpick | Using a toothpick to spread the adhesive can help to ensure that the glue is spread evenly and thinly across the surface without over-applying. |
| Avoid excessive pressure | Pressing too hard on the plexiglass can cause air pockets to form. Avoid this by applying gentle, consistent pressure to the material and allowing the adhesive to work its way into the gaps between the plexiglass and metal. |
| Eliminate any gaps | Make sure that there are no gaps between the metal and the plexiglass before applying adhesive. This will help to ensure that the adhesive is evenly distributed and the bond is strong without any weak spots. |
| Use a release film | A release film can help to prevent air bubbles by providing a barrier between the plexiglass and metal. This will help to ensure a smooth, even application of adhesive without any pockets of air forming. |
By following these tips, you can help to ensure that your adhesive bond is strong and bubble-free. If you do encounter air bubbles, carefully remove the adhesive and start again with a fresh application, following these guidelines to ensure a successful bond.
Safety Considerations
When working with plexiglass and metal, it’s important to consider your safety. Adhesives can be toxic and working with sharp tools can be dangerous. Here are some safety considerations to keep in mind throughout the process:
Wear protective gear: Always wear gloves, safety glasses, and a dust mask when handling plexiglass. This will help protect your skin from chemicals and cuts, your eyes from flying debris, and your lungs from inhaling any dust.
Work in a well-ventilated area: Epoxy and acrylic cement emit fumes that can be harmful if inhaled. Make sure you work in a well-ventilated area, or use a respirator mask if necessary.
Use caution when cutting: Always use a sharp blade when cutting plexiglass to avoid cracking or shattering. Take your time and use caution when handling the sharp edges.
Avoid skin contact with adhesives: Epoxy and acrylic cement can cause skin irritation or even chemical burns. Avoid skin contact as much as possible. If you do get adhesive on your skin, wash with soap and water immediately.
Store adhesives safely: Keep adhesives out of reach of children and pets. Store them in a cool, dry place to avoid exposure to heat or moisture.
By following these safety considerations, you will help ensure that your project is completed safely, and with minimal risk to your health. Don’t forget to dispose of any waste materials or adhesives properly, according to local regulations.
Conclusion
Wrapping Up: Successfully Glueing Plexiglass to Metal
In conclusion, gluing plexiglass to metal can be a daunting task, but with the right tools, materials, and techniques, it can be done with ease.
To ensure that the adhesive bonds well, it is essential to clean the surfaces thoroughly and make accurate measurements. Additionally, selecting the appropriate adhesive is crucial in forming a lasting bond between the plexiglass and metal.
Epoxy and acrylic cement are the most common and highly recommended adhesives for this kind of project, while double-sided tape serves as a quicker and more comfortable alternative.
After applying the adhesive, curing time is essential. A necessary tip is to use clamps or tape to hold the materials together while the adhesive cures. This ensures that the plexiglass and metal join firmly.
Once the adhesive has cured, finishing the piece is the following step. The edges should be trimmed, sanded, and polished to create a smooth finish. This enhances the overall appearance of the project.
When it comes to safety, wearing the correct protective gear is crucial. Given that the process involves working with chemicals, it is vital to take extra precautions.
In conclusion, by following the techniques in this guide, you can successfully glue plexiglass to metal, creating a long-lasting and aesthetically pleasing result. Remember to take your time in preparation and application and keep safety at the forefront of your mind. Happy gluing!
Frequently Asked Questions
What is plexiglass?
Plexiglass is a type of transparent plastic made from acrylic, often used as a substitute for glass due to its durability and lightweight.
Can you glue plexiglass to metal?
Yes, you can glue plexiglass to metal using the proper adhesive.
Can you use regular glue for plexiglass?
No, regular glue is not recommended for plexiglass as it may cause it to warp or crack.
What is the best adhesive for gluing plexiglass to metal?
Epoxy and acrylic cement are the two most recommended adhesives for gluing plexiglass to metal.
Can you drill through plexiglass?
Yes, you can drill through plexiglass, but it is important to use the correct drill bit and technique to avoid cracking or chipping the material.
What tools do I need to glue plexiglass to metal?
You’ll need a clean cloth, a ruler or measuring tape, a cutting tool (such as a saw or rotary tool), the selected adhesive, and clamps or tape (optional).
How do I clean the surface before gluing plexiglass to metal?
Use a clean cloth and a specialized acrylic cleaner to remove any dirt, grease or other impurities.
How long does it take for the adhesive to cure?
Curing time varies depending on the type of adhesive and environmental conditions, but it can take anywhere from a few minutes to a few hours.
Do I need to wear gloves when handling the adhesive?
It’s recommended to wear gloves to prevent the adhesive from sticking to your skin.
Is it safe to sand or polish plexiglass?
Yes, but make sure to wear a dust mask and eye protection when sanding or polishing to avoid inhaling or getting particles in your eyes.