When it comes to bonding acetal, there are many factors to consider, including the properties of acetal, the types of adhesives available, and proper surface preparation techniques. It can be a perplexing task to choose the right adhesive and make sure you achieve a strong bond. That’s why we’ve put together this comprehensive guide to help you through the process, step by step. By the end of this article, you’ll have a better understanding of how to glue acetal successfully and create durable bonds that will stand the test of time. So let’s dive in!
What is Acetal?
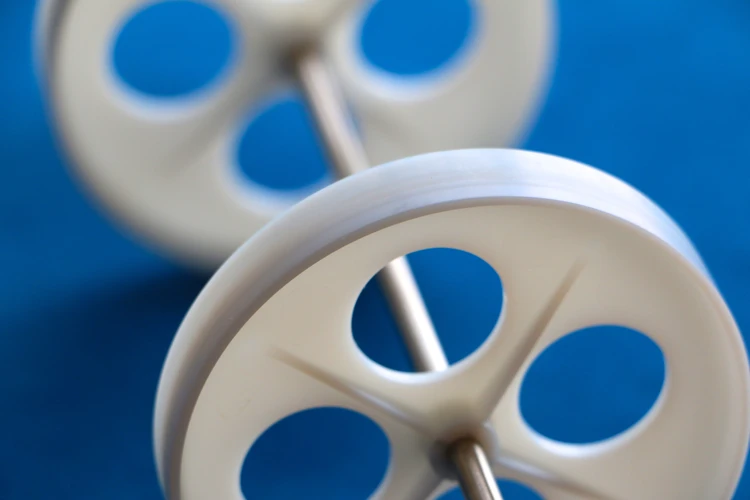
Acetal is a thermoplastic material that has become increasingly popular in various industries due to its high stiffness, dimensional stability, and low friction coefficient. Its excellent mechanical properties make it a go-to choice for manufacturers of gears, bearings, and other precision parts. As a beginner or even an experienced individual, it can be challenging to choose the right adhesive for gluing Acetal. Understanding the properties of the material and the types of adhesives available is crucial for successful bonding. Let’s dive deeper into what makes Acetal a unique material and understand what makes it different from other materials like wood, glass, or stone.
Properties of Acetal
Acetal, or polyoxymethylene (POM), is a thermoplastic material used in various industries because of its excellent properties. Some of the remarkable properties of acetal include:
- High Strength: Acetal is highly resistant to wear, impact, and fatigue, making it a perfect choice for applications that require high strength.
- Low Friction: Acetal has a low coefficient of friction, which means it has excellent sliding properties. This property makes it ideal for manufacturing bearings and gears.
- Dimensionally Stable: Acetal has excellent dimensional stability, which means it does not change its shape or size even under high-stress conditions. This property makes it useful in precision parts and electrical applications.
- Chemical Resistance: Acetal is resistant to many chemicals, solvents, and fuels. However, it can be attacked by some strong acids and bases.
- Excellent Moldability: Acetal has excellent moldability properties and can be molded into different shapes and sizes, making it useful in various industries.
- Hydrolysis Resistance: Acetal has excellent resistance to hydrolysis, which means it can withstand exposure to water without breaking down or corroding.
These properties make acetal an excellent choice for many applications. However, it’s important to choose the right adhesive when bonding acetal to other substrates. Some adhesives may not work effectively, leading to weak or failed bonds. In the next section, we’ll discuss the different types of adhesives that work well for bonding acetal.
If you want to learn how to glue other materials, such as rocks to wood, wood to glass, or ceramic pots, check out our other articles at /how-to-glue-rocks-to-wood/, /how-to-glue-wood-to-glass/, and /how-to-glue-ceramic-pot/.
Why is Choosing the Right Adhesive Important?
Choosing the right adhesive is crucial when working with Acetal. Using the wrong adhesive can lead to weak bonds, which can result in part failure, damage, or injury. Some adhesives may also react with Acetal, causing it to weaken or break apart. It’s essential to consider the type of joint required, the environment the bonded parts will be exposed to, and the stresses the joint will endure. Using the right adhesive will ensure a strong, durable bond that is long-lasting. For example, if you want to glue acetal to stone, you need to choose appropriate adhesive for these materials. The best adhesive for this job will depend on the type of stone and the structure of the joint. Similarly, if you want to glue shells to a mirror, you’ll need to consider the adhesive’s strength, transparency, and ability to resist moisture and humidity. On the other hand, if you need to glue a tile back on, you may need an adhesive with a fast curing time and a high viscosity to ensure a strong bond between the tile and the wall. By choosing the right adhesive for your project, you’ll not only enhance its strength and durability but also minimize the risks of part failure and damage.
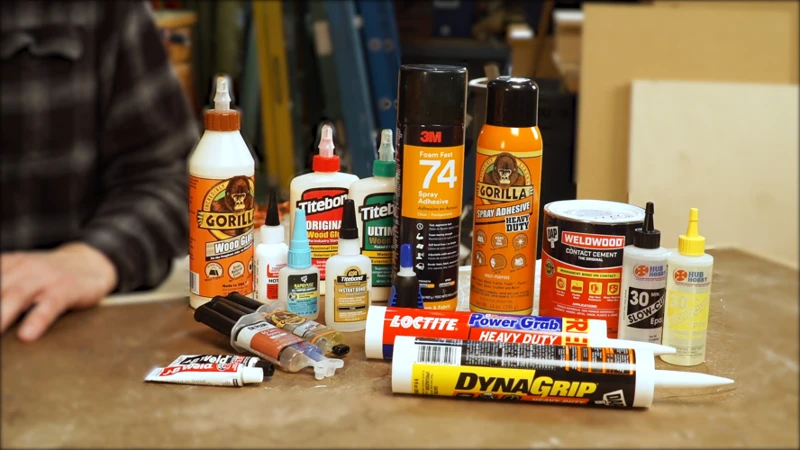
Types of Adhesives for Acetal
When it comes to bonding Acetal, choosing the right adhesive is crucial to ensure a strong and long-lasting joint. There are several types of adhesives available for Acetal, each with its own unique properties and advantages. It’s important to carefully consider the application requirements, such as the strength and durability needed, as well as the compatibility with the materials being bonded. In the following sections, we’ll explore some of the most popular types of adhesives used for Acetal and their characteristics. Whether you need to know how to glue stone to stone, how to glue shells to a mirror, or how to make strong glue, understanding the various adhesive options for Acetal can help you find the best solution for your particular bonding needs.
Epoxy Adhesives
Epoxy adhesives are a popular choice for bonding acetal due to their high strength and durability. They consist of two parts – a resin and a hardener – which are mixed together before application. The mixture begins to cure once the two parts are combined and can take anywhere from a few minutes to several hours to fully cure, depending on the specific product.
Advantages of using epoxy adhesives for acetal:
- Epoxy has excellent gap-filling capabilities, which allows for bonding uneven or irregular surfaces.
- It has high shear strength, which means it can withstand heavy loads without breaking.
- It has good chemical resistance, making it suitable for use in harsh environments.
- It can be used to bond a wide range of materials in addition to acetal.
Application tips:
- Make sure to mix the resin and hardener together thoroughly before applying. Uneven mixing can result in weak spots in the bond.
- Apply the adhesive evenly to both surfaces being joined.
- Clamp the parts together until the adhesive has fully cured.
If you’re looking for more information on other specific bonding needs, check out our article on how to glue stone to stone, how to glue shells to a mirror, how to glue a tile back on, how to make strong glue, what is the strongest glue for plastic on metal, how to glue a silicon substrate to silicon, or how to glue up a table top.
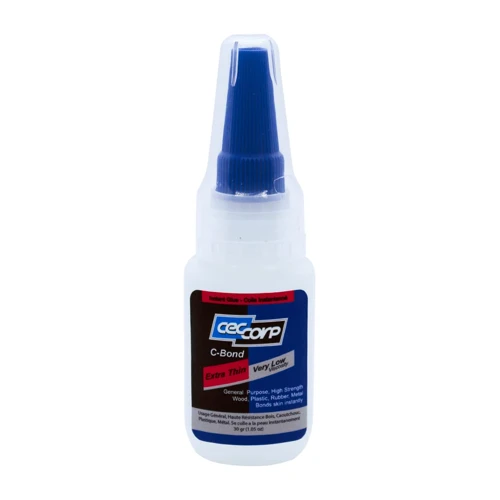
Cyanoacrylate Adhesives
Cyanoacrylate adhesives, often referred to as “super glue,” are a fast-setting adhesive option for bonding Acetal. These adhesives work through a process known as anionic polymerization, which occurs when the cyanoacrylate monomers come into contact with small amounts of water on the surface.
Advantages of Cyanoacrylate Adhesives:
- Fast drying time
- Strong bond
- Easy to apply
Disadvantages of Cyanoacrylate Adhesives:
- Not suitable for large bonding surfaces
- Brittle after curing, which can cause cracking under stress
- Can lead to skin irritation and should be handled with care
When using cyanoacrylate adhesives, it’s important to apply the adhesive sparingly as excess adhesive can weaken the bond and make the joint brittle. A recommended technique for application is to apply a small amount of adhesive to one surface and press the two surfaces together, holding them in place for several seconds.
Precautions:
- Wear gloves to avoid skin irritation
- Ensure proper ventilation when using the adhesive in an enclosed area
- Store the adhesive in a cool, dry place
Cyanoacrylate adhesives can be a good choice for small bonding surfaces and quick projects, but it’s important to be aware of their limitations and handle them with care.
Methacrylate Adhesives
One of the types of adhesives suitable for bonding Acetal is Methacrylate Adhesives. These adhesives are commonly known as MMA, which stands for Methyl Methacrylate. MMA adhesives are ideal for bonding Acetal as they can withstand the chemical resistance and moisture levels that Acetal exhibits.
Advantages of Methacrylate Adhesives:
- Methacrylate Adhesives can bond dissimilar materials including Acetal to metal or plastic surfaces.
- The curing process of Methacrylate Adhesives is fast, usually less than an hour, and can even be accelerated by heating.
- They have good tensile strength and are resistant to impact and vibration.
- They can tolerate exposure to extreme temperatures and weather conditions without losing adhesion.
Disadvantages of Methacrylate Adhesives:
- They’re sensitive to UV light, which can cause discoloration and degradation.
- MMA adhesive has a very strong odor during the curing process, which can be unpleasant and require proper ventilation.
- The application process requires skill and experience as they demand precise quantity ratio mixing to ensure the strongest bond possible.
Proper surface preparation is essential for bonding Acetal with Methacrylate Adhesives. The surface must be thoroughly cleaned and free from any dirt, oil, or grease. Any roughened surface must be smooth to achieve the strongest bond possible.
Important tips when using Methacrylate Adhesives:
- It’s suggested to use gloves and protective clothing and work in a well-ventilated area when using MMA adhesives.
- Ensure the mixed adhesive is applied to the surface before it begins to thicken.
- Clamping the parts is necessary to allow the adhesive to cure correctly.
- The joint should be allowed to cure for the recommended time before putting it under stress or pressure.
If you need to bond Acetal, Methacrylate Adhesives are a viable option. They have some unique advantages, such as fast curing times and resistance to moisture and temperature fluctuations. However, the application process requires skill and experience to ensure the bond is strong and long-lasting.
Acrylic Adhesives
Acrylic adhesives are specially designed for bonding Acetal, they have higher shear strength compared to other adhesives. These adhesives are commonly used in high-stress applications where durability is key. Acrylic adhesives can be used to bond a wide variety of materials, which makes them suitable for multiple industries.
Advantages of Acrylic Adhesives
Acrylic adhesives have many advantages, making them a popular choice for bonding Acetal. The following are some of the advantages of using acrylic adhesives:
| Advantages | Description |
| High strength | Acrylic adhesives have better shear strength compared to other adhesives, making them ideal for high-stress applications. |
| Fast curing time | Acrylic adhesives cure quickly, which means they can be used to bond parts that require fast bonding times. |
| Good chemical resistance | Acrylic adhesives have excellent chemical and solvent resistance, making them ideal for use in harsh environments. |
| Good gap filling ability | Acrylic adhesives can fill gaps easily, making them suitable for bonding uneven surfaces. |
Application
Acrylic adhesives can be applied in several ways, including manual or automated dispensing systems. The adhesive can be dispensed as a liquid or paste. When using acrylic adhesives, it is important to follow the manufacturer’s instructions for application, and not exceed the recommended amount of adhesive.
Curing
Acrylic adhesives cure through a chemical reaction which can be accelerated by heat, ultraviolet light or a combination of both. Once fully cured, acrylic adhesives form a strong bond which is resistant to stress and environmental factors.
Post-Treatment
Post-treatment of acrylic adhesives involves cleaning up any excess adhesive and sanding or finishing the joint area. This can be done using a solvent or sandpaper, depending on the preferences of the user.
Acrylic adhesives are a highly effective bonding solution for Acetal. Their high strength, fast curing time and chemical resistance make them an ideal choice for high-stress applications. When using acrylic adhesives, it is important to follow the manufacturer’s instructions for application, curing and post-treatment to ensure optimal performance.
Structural Acrylic Adhesives
When it comes to adhesives for Acetal, Structural Acrylic Adhesives are a popular choice due to their high strength and durability. These adhesives are specially formulated to provide excellent adhesion to a broad range of substrates including Acetal. Here are some key features and benefits of using Structural Acrylic Adhesives for bonding Acetal:
- High strength: Structural Acrylic Adhesives have excellent shear, peel and impact strength, making them ideal for bonding Acetal parts that are subject to high stress and loading.
- Fast curing: These adhesives typically have a fast cure time, which can help reduce assembly time and increase production efficiency. Many Structural Acrylic Adhesives can cure at room temperature, eliminating the need for additional heat or curing equipment.
- Chemical resistance: Acetal is known for its excellent chemical resistance, and Structural Acrylic Adhesives are formulated to provide similar resistance to a broad range of chemicals, including solvents, oils and fuels.
- Flexibility: Some Structural Acrylic Adhesives are designed to have a degree of flexibility, which can help compensate for thermal expansion and contraction of bonded parts. This can be important in applications where temperature changes are expected.
- Good gap-filling: Structural Acrylic Adhesives can typically fill gaps and irregularities between bonded parts, which can help ensure a strong and durable joint. Some Structural Acrylic Adhesives are designed for use in applications where larger gaps or uneven surfaces are present.
When using Structural Acrylic Adhesives to bond Acetal parts, it is important to choose an adhesive that is specifically formulated for use with Acetal. Additionally, proper surface preparation and application techniques should be followed to ensure optimal bonding performance.
Polyurethane Adhesives
Polyurethane adhesives are known for their high strength and flexibility. They are ideal for bonding acetal to various substrates, including metal, plastic, and wood. They have excellent resistance to water and chemicals, making them suitable for use in harsh environments. These adhesives come in two main forms – one-component and two-component polyurethane adhesives.
One-component polyurethane adhesives are pre-mixed and ready to use. They cure when exposed to air moisture, and the curing time depends on humidity and temperature. These adhesives have good gap-filling properties and can be used for bonding dissimilar materials.
Two-component polyurethane adhesives consist of a resin and a hardener, which are mixed before use. These adhesives cure quickly and have high strength and toughness. They are ideal for bonding large surfaces or structural joints.
Below is a table summarizing the properties of polyurethane adhesives:
| Property | One-component polyurethane adhesives | Two-component polyurethane adhesives |
|---|---|---|
| Strength | High | Very high |
| Flexibility | High | Very high |
| Curing time | Depends on humidity and temperature | Fast |
| Gap-filling properties | Good | Poor |
| Resistance to water | Excellent | Excellent |
| Resistance to chemicals | Excellent | Excellent |
When using polyurethane adhesives, it is important to follow the manufacturer’s instructions for application, as the curing time and application temperature can vary between different products. Additionally, proper ventilation should be ensured during application and curing to avoid inhaling harmful fumes.
Polyurethane adhesives are a great choice for bonding acetal due to their high strength, flexibility, and chemical resistance.
Surface Preparation
Achieving a strong bond between two surfaces depends heavily on the surface preparation. This step is critical, as it ensures that there are no impurities, debris, or oils on the acetal surface, which can compromise the adhesive’s effectiveness. Proper surface preparation guarantees an optimum adhesive joint that can withstand the expected loads and stresses. In this section, we will delve into the essential steps to achieve the right surface preparation before applying the adhesive. So, let’s dive in and take a closer look at the process.
Cleaning the Surface
The first step in gluing Acetal is to clean the surface thoroughly. Any dirt, oil, or grease on the surface of the Acetal can weaken the bond of the adhesive, leading to a weak joint. To ensure the best possible bond, it is crucial to clean the surface with the appropriate solvents and tools.
Solvents for Cleaning Acetal
Acetone or isopropyl alcohol is the most effective solvent for cleaning Acetal. Acetone is a fast-drying solvent and is perfect for removing any surface contaminants that can affect the adhesion of the joint. Isopropyl alcohol, on the other hand, is less volatile than acetone and evaporates at a much slower rate, but it is still an effective solvent that is suitable for cleaning the Acetal surface. To determine which solvent is the best choice for cleaning your Acetal surface, refer to the manufacturer’s instructions.
Tools for Cleaning Acetal
When cleaning an Acetal surface, always use a clean, lint-free cloth or a paper towel. Using a contaminated cloth can introduce new contaminants onto the surface that can affect the bond. The cloth should be dampened with the solvent, but not soaked. You can also use a soft-bristled brush to scrub the surface of the Acetal gently.
The Cleaning Process
The cleaning process is straightforward. First, soak a clean cloth in the solvent and wring out any excess liquid. Wipe the Acetal surface with the cloth in a circular motion, using moderate pressure. Be sure to clean the entire surface, paying particular attention to any hard-to-reach areas.
Once the entire surface has been cleaned, use a dry cloth or paper towel to wipe away any remaining solvent. Repeat the cleaning process if necessary until the surface is completely clean and free of any contaminants.
Remember, proper surface preparation is the key to a strong, long-lasting bond. So take your time and clean the surface thoroughly before applying the adhesive.
Roughening the Surface
Roughening the Surface
One of the most important steps in preparing the acetal surface for adhesive application is roughening the surface. This step helps to increase the surface area of the material, allowing better adhesion of the adhesive.
Here are some ways to roughen the surface of acetal:
- Sandpaper: Using fine-grit sandpaper, gently roughen the surface of the acetal in a circular motion. Be sure to remove any dust or debris with a clean cloth before proceeding to the next step.
- Abrasive blasting: Abrasive blasting with materials such as aluminum oxide can also help to roughen the surface of acetal. This method should be used with caution, as over-blasting can damage the surface of the material.
- Chemical etching: A chemical etching process can also be used to roughen the surface of acetal. This involves using a specialized chemical solution to dissolve a small amount of the material, creating a roughened surface. This method should be used with caution, as it can be hazardous if not handled properly.
Regardless of the method used, it is important to follow proper safety procedures when roughening the surface of acetal. Wear appropriate personal protective equipment, and ensure that the work area is well-ventilated.
Application Techniques
Once you have selected the appropriate adhesive for your acetal application and prepared the surface, it’s time to apply the adhesive. Proper application techniques are crucial for achieving a strong and durable bond between the acetal parts. In this section, we’ll discuss the nitty-gritty details of effectively applying adhesive, from dispensing to clamping, ensuring that your acetal parts are bonded successfully. So, roll up your sleeves and let’s dive into the application techniques of gluing acetal!
Dispensing the Adhesive
When it comes to dispensing adhesive for acetal, there are several options available depending on the type of adhesive being used. The following table outlines some common methods for dispensing different adhesive types:
| Adhesive Type | Dispensing Method |
|---|---|
| Epoxy Adhesives | Use a two-part dispenser or a dual-syringe dispenser that mixes the two components together as they are dispensed. |
| Cyanoacrylate Adhesives | Use a squeeze bottle or a needle-tipped applicator to precisely apply small amounts of adhesive. |
| Methacrylate Adhesives | Use a mixing nozzle or a static mixer to ensure that the two components are properly mixed as they are dispensed. |
| Acrylic Adhesives | Use a squeeze bottle or a cartridge dispenser that automatically mixes the two components as they are dispensed. |
| Structural Acrylic Adhesives | Use a cartridge dispenser that automatically mixes the two components as they are dispensed, or a plunger-style dispenser that allows for precise control of the amount dispensed. |
| Polyurethane Adhesives | Use a two-part dispenser or a dual-syringe dispenser that mixes the two components together as they are dispensed. |
It’s important to follow the manufacturer’s instructions for dispensing the adhesive to ensure proper mixing and application. In general, it’s best to dispense the adhesive onto a clean, dry surface and apply it in a continuous bead or with a zigzag motion to ensure full coverage. Be sure to avoid applying too much adhesive, as this can lead to excessive squeeze-out and weak joints. By using the proper dispensing method and technique, you can ensure a strong, lasting bond with your acetal material.
Spreading the Adhesive
Once you have dispensed the adhesive onto the surface, the next step is to spread it evenly. Even distribution of the adhesive ensures that the entire surface is covered and results in a stronger bond. There are several techniques you can use to spread the adhesive, including:
| Technique | Advantages | Disadvantages |
|---|---|---|
| Brushing | Allows for precise application in hard-to-reach areas | May leave brush marks and require additional cleaning |
| Rolling | Quickly covers large surface areas | May result in uneven distribution if not done correctly |
| Spraying | Provides an even coat with minimal effort | Requires specialized equipment and may create a mess if not done carefully |
| Notched Trowel | Creates ridges that help distribute the adhesive evenly | May not be suitable for all adhesive types and requires a certain level of skill to use effectively |
No matter which technique you choose, it’s important to work quickly before the adhesive starts to dry. Make sure to spread the adhesive in a thin, even layer and avoid over-applying to prevent excess adhesive from getting squeezed out when the parts are clamped together. Using a uniform layer of adhesive ensures that the parts will be evenly bonded and can withstand the stresses of their application.
Clamping the Parts
When it comes to gluing acetal, it is crucial to clamp the parts in place for proper bonding. Here are some tips for clamping acetal parts effectively:
1. Choose the Right Clamp: Before beginning the clamping process, you need to make sure you have the right clamp for the job. For most applications, a standard C-clamp or bar clamp will work just fine. However, if you are working with larger or oddly-shaped parts, you may need specialized clamps to hold everything in place.
2. Use Even Pressure: When clamping acetal parts, it is important to apply even pressure across the entire joint. Uneven pressure can lead to weak spots in the bond and cause the joint to fail over time. Use multiple clamps if necessary to distribute pressure evenly.
3. Don’t Over-Tighten: While it is important to apply enough pressure to hold the parts in place, you don’t want to over-tighten the clamps. Over-tightening can cause the parts to warp or buckle, or even damage the joint itself. Use just enough pressure to hold everything in place without distorting the parts.
4. Time the Clamping: The amount of time you need to clamp the parts together will depend on the specific adhesive you are using. Check the product data sheet for specific instructions, but as a general rule, most adhesives require at least an hour of clamping time. Some may require longer periods of time to achieve full strength.
5. Monitor the Bonding: While the parts are clamped together, keep an eye on the joint to make sure everything is going well. Make sure the parts aren’t shifting or coming apart during the clamping process. If you notice any issues with the bond, you may need to re-apply the adhesive and start over.
By following these tips, you can ensure that your acetal parts are clamped effectively to create a strong and durable bond.
Drying and Curing the Adhesive
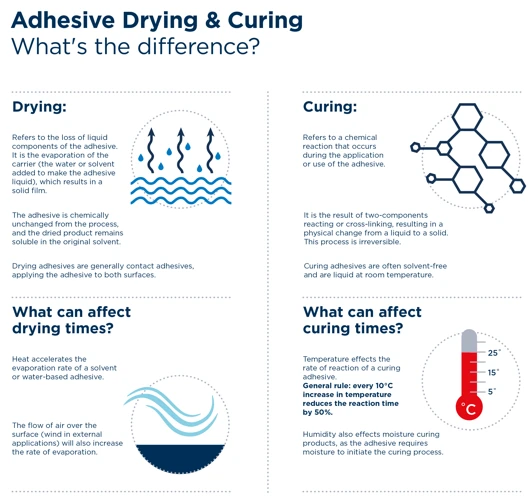
After applying the adhesive to the surfaces of the acetal parts, it is important to allow enough time for the adhesive to dry and cure properly. The drying and curing process is critical for the strength and stability of the bond, and therefore should not be rushed.
Drying Time: The drying time of the adhesive is the time it takes for the solvent or carrier to evaporate, leaving behind a dry adhesive film. This can vary depending on the type of adhesive used, as well as temperature and humidity conditions. Generally, epoxy and methacrylate adhesives have longer drying times than cyanoacrylate and acrylic adhesives. It is important to follow the manufacturer’s recommended drying time to ensure optimal bonding strength.
Curing Time: The curing time of the adhesive is the time it takes for the adhesive to reach its full strength and ability to withstand stresses. This can vary depending on the type of adhesive used, as well as temperature and humidity conditions. Generally, structural acrylic and polyurethane adhesives have longer curing times than cyanoacrylate and epoxy adhesives. It is important to follow the manufacturer’s recommended curing time before subjecting the bonded parts to any stresses or loads.
Heat/Catalyzed Curing: Some adhesives may require a secondary process in order to cure properly. This can include heat cure or catalyzed cure processes. Heat cure involves heating the adhesive to a specific temperature for a specific amount of time, while catalyzed cure involves adding a catalyst to the adhesive that triggers the curing reaction. It is important to follow the manufacturer’s recommended process for heat or catalyzed curing.
Handling Time: The handling time of the adhesive is the time it takes for the adhesive to reach a stage where it can be handled without damaging the bond. This can vary depending on the type of adhesive used, as well as temperature and humidity conditions. It is important to follow the manufacturer’s recommended handling time before moving or manipulating the bonded parts.
Testing the Bond: After the adhesive has fully cured, it is important to test the strength of the bond. This can be done by applying stress or load to the bonded parts and observing any signs of failure or weakening. It is important to follow the manufacturer’s recommended testing procedures to ensure the bond is strong and durable.
Proper drying and curing of the adhesive is essential for a strong and reliable bond between acetal parts. It is important to follow the manufacturer’s recommended drying and curing times and processes to achieve the best results.
Post-Treatment
Once the adhesive has cured, it’s time to move onto the post-treatment phase. This is an important step in the process as it ensures the longevity of the joint. Neglecting post-treatment can lead to weak joints, which can ultimately fail. In this phase, we will focus on removing excess adhesive and achieving a smooth, finished joint by sanding and polishing. By following these post-treatment steps, you can ensure that your acetal joint will stay strong and durable over time. Let’s dive deeper into the key post-treatment techniques.
Cleaning up Excess Adhesive
Cleaning up excess adhesive after gluing acetal is critical to achieving a clean and finished look. It is important to tackle it as soon as possible before the adhesive dries up. Here are some tips for cleaning excess adhesive:
| Tools | Method |
|---|---|
| Razor Blade | Use a sharp razor blade to scrape off the excess adhesive from the surface of acetal. Hold the blade in a flat position and make sure to apply minimal pressure to avoid damaging the surface. You can also use a slightly angled position to avoid scratching the material. |
| Solvent | Use appropriate solvent to remove any remnants of adhesive. Be sure to use the right type of solvent, as different adhesives require different solvents. Methanol, acetone, and isopropanol are some solvents that can be used to clean acrylic adhesives, while methyl ethyl ketone is suitable for epoxy adhesives. Always read the manufacturer’s instructions for recommended cleaning solvents. |
| Sandpaper | For hard-to-remove adhesive, you can use fine-grit sandpaper. Start with 400 grit and gradually increase to 1000 grit until you achieve a smooth surface. Remember to sand gently to avoid damaging the surface. |
| Sponge or Cloth | An absorbent sponge or cloth can be used to wipe off excess adhesive. Dampen the sponge or cloth in the solvent and gently rub the area to remove any excess adhesive. Be careful not to rub too hard as it may damage or scratch the surface of acetal. |
Remember to wear protective gloves and eye goggles when using solvents to avoid any accidents. Always make sure that the surface of acetal is completely clean and dry before proceeding to post-treatment. Proper cleaning ensures the longevity and durability of the adhesive joint and a proper finish on the acetal surface.
Sanding and Finishing the Joint Area
Once the adhesive has fully cured, it’s important to sand and finish the joint area to ensure the best possible appearance and performance of the finished product. Here’s what you need to know:
| Step | Description |
|---|---|
| Step 1: | Remove any excess adhesive using a scraper or razor blade. Be careful not to damage the surrounding material. |
| Step 2: | Use a fine-grit sandpaper to smooth out any rough spots or bumps around the joint area. Work carefully to avoid sanding down too much material. |
| Step 3: | After sanding, wipe down the joint area with a clean cloth to remove any dust or debris. |
| Step 4: | If desired, you can apply a coat of paint or other finishing material to the joint area to further enhance its appearance and protect it from damage. |
Remember, properly sanding and finishing the joint area is an important step in the process of gluing acetal parts together. Taking the time to do it right will help ensure the strength and longevity of the joint.
Conclusion
In conclusion, choosing the right adhesive is crucial when gluing acetal. The properties of acetal and its resistance to most adhesives make the selection process even more important. It is important to consider the strength and durability of the adhesive in order to create a bond that withstands the test of time.
Proper surface preparation and application techniques also play a vital role in the success of the adhesive bond. Cleaning and roughening the surface, as well as dispensing, spreading and clamping the parts correctly can all affect the final result.
After applying the adhesive, it’s essential to allow the proper time for drying and curing. Rushing this step can result in a weak bond that fails to meet expectations.
Finally, post-treatment is also critical to ensuring a successful bond. Removing excess adhesive and sanding and finishing the joint area can all help to strengthen and improve the overall appearance of the final product.
In the end, gluing acetal can be challenging but with the right adhesive, surface preparation, application techniques, and post-treatment, a successful bond can be achieved. It’s all about finding the right combination of factors and taking the time to do things right in order to create a strong, durable, and long-lasting bond.
Frequently Asked Questions
What is the best adhesive for Acetal?
It depends on the application and the specific properties desired, but some popular choices include epoxy and cyanoacrylate adhesives.
Can Acetal be glued with super glue?
Yes, cyanoacrylate adhesives (also known as super glue) can bond Acetal effectively, but may not be ideal for high-stress or long-term applications.
What is the best way to prepare the surface of Acetal for gluing?
Clean the surface thoroughly with a degreasing agent, and roughen it with sandpaper or other abrasive material for best results.
Do I need to clamp Acetal parts while the adhesive is drying?
Yes, using clamps or other pressure-applying devices is recommended to ensure a strong bond and prevent parts from shifting or separating during the curing process.
How long does it take for Acetal adhesive to dry?
This can vary widely depending on factors such as type of adhesive, temperature, and humidity, but many Acetal adhesives require several hours to fully cure.
Can Acetal be glued to other materials?
Yes, depending on the adhesive and properties of the materials in question, Acetal can be bonded to a wide range of surfaces, including metals, plastics, and composites.
What is structural acrylic adhesive?
Structural acrylic adhesives are commonly used in high-stress applications where strength and durability are critical, such as in aerospace and automotive industries.
Should I wear gloves or protective gear when handling Acetal adhesive?
Yes, it is recommended to wear protective gloves and other gear, as some Acetal adhesives can be harmful if they come into contact with skin or eyes.
Is it safe to use Acetal adhesive indoors or in poorly ventilated areas?
No, it is important to use Acetal adhesives in well-ventilated areas, as some adhesives can emit harmful fumes during the curing process.
Can excess Acetal adhesive be removed after it has dried?
Yes, excess adhesive can often be removed with solvents or by sanding and filing the joint area carefully.