Introduction
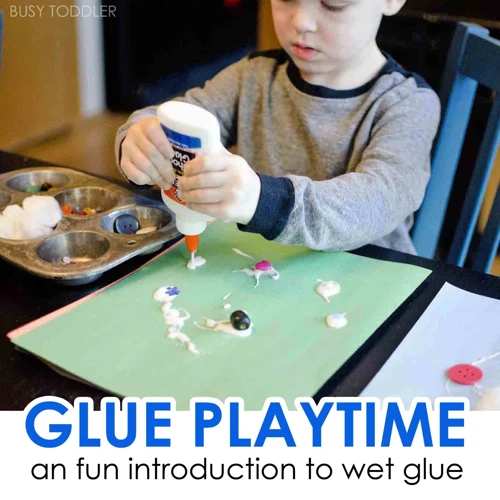
Embarking on the journey of creating your own table top can be both exciting and overwhelming. With so many factors to consider, from choosing the right wood to selecting the appropriate glue and clamps, it is crucial to have a guide to ensure a successful project. In this ultimate guide, we will walk you through the step-by-step process of gluing up a table top, from selecting and preparing your wood to applying the right glue and clamping techniques. By the end of this guide, you’ll have all the knowledge and tools necessary to complete a beautiful and sturdy table top. So let’s dive in!
Overview
An “Overview” of the article “How to Glue Up a Table Top: Ultimate Guide” begins with understanding the basic aspects of a successful table top glue-up. This article provides a step-by-step guide to make sure your table top glue-up is successful. With proper tools, technique, and patience, you can craft a table top that is not only functional but also aesthetically pleasing. This guide will also help you understand the benefits and drawbacks of different types of glues that can be used to make a strong and sturdy table top.
Before we get started, it is important to understand the tools that will be required for this project. The various tools required will include clamps, glue, cauls, saws, and sandpaper to name a few. Each tool has its own importance and specific use that we will go in detail about in the following sections. It is worth noting that the success of your glue-up will heavily depend on the quality of these tools and how they are utilized.
Additionally, it is important to choose the right types of wood and to take the proper steps in preparing the wood before starting the glue-up. In this guide, we will discuss the types of wood available in the market and how to choose the right one for your project. We will also teach you how to properly prepare your wood by smoothing, planing, and cutting the pieces to the correct size.
Moving further, we will explore the various types of glues available in the market and their benefits and drawbacks. PVA glues, polyurethane glues, and epoxy glues will be discussed in detail. We will also provide an anchor for each type of glue, so you can easily find more information on each type, as per your need.
The next section will be about glue application techniques. This section goes into details of how to apply glue to the edges and faces of each wood piece. We will also discuss glue spreading techniques in order to get the perfect amount of glue applied to the wood. The glue-up time will also be discussed to ensure enough time is given for the glue to set properly.
Once all the glue has been applied and the wood pieces are in place, clamping is required to create pressure and help your glue bond stronger. In this section, we will show you the importance of clamp selection, placement, and how to use cauls effectively. We will also provide an internal link to our section on cauls, so you can learn more about how to utilize this tool effectively.
Lastly, finishing the tabletop is a crucial step that should not be overlooked. We will teach you how to properly clean up the glue mess and sand the edges so that each piece fits perfectly together. We will also show you how to trim and square the tabletop so it has a professional finish.
Crafting a strong and beautiful table top involves patience, preparation, and proper technique. By following these step-by-step instructions in the upcoming sections, you will have the knowledge to safely and successfully glue up your table top. Remember to utilize proper tools, take precautions when necessary, and have fun with your project.
Tools You’ll Need
Tools You’ll Need:
To glue up a table top, you will need the following tools:
- Clamps: These will be used to hold the wood together during glue-up.
- Sawhorses: Necessary for holding and clamping the table top.
- Glue: Choose the right glue for your specific project. Popular options include CA glue, epoxy glue, plastic glue, and wood glue.
- Glue spreader: You will need a tool to spread glue evenly over the surface of the wood.
- Cauls: Used to distribute pressure from the clamps more evenly across the table top.
- Sanding materials: From sandpaper to sanders, you’ll need to be able to finish the wood after glue-up.
- Saws or a planer: If you need to prepare the wood yourself, a saw or planer will come in handy.
- Square: Necessary for measuring and ensuring everything is aligned correctly.
- Tape measure: Used to measure the wood or to ensure that everything is symmetrical.
With these tools, you’ll be well-equipped to glue up a table top that will last for years to come. Just remember to choose the right glue for your specific project, and properly prepare the wood before beginning the glue-up process.
Choosing and Preparing the Wood
Choosing and Preparing the Wood: Essential Steps for a Sturdy Table Top
The quality of your table top will depend largely on the type and preparation of the wood you choose. It’s crucial to select wood that’s straight, flat, and dry to ensure a tight joint and a stable, long-lasting table top. In this section, we will discuss the steps you need to take to select and prepare the perfect wood for your project. Whether you are using reclaimed wood or purchasing it new, these steps will help you achieve a high-quality result.
Selecting Your Wood
When it comes to selecting the right wood for your table top, there are a few things to keep in mind. First, consider the project’s budget, as some types of wood can be quite expensive. Additionally, you’ll want to take into account the wood’s hardness, durability, and color.
Hardness: The harder the wood, the more resistant it will be to dents and scratches. Hardwoods are typically the best choice for table tops. Some popular hardwoods for table tops include oak, maple, cherry, and walnut.
Durability: The durability of wood can be affected by its grain pattern. Woods with interlocking or irregular grain patterns, such as oak, are more durable than woods with straight grain patterns, such as pine.
Color: Wood comes in a range of colors, from light blonde to deep reddish-brown. If you want a consistent color throughout your table top, you may want to consider staining or applying a finish to the wood.
| Wood Type | Hardness Rating | Durability | Color |
|---|---|---|---|
| Oak | 1290 | Very durable with interlocking grain | Light to medium brown, with a distinctive grain pattern |
| Maple | 1450 | Hard and durable with fine, uniform grain | Blonde to light brown with minimal grain pattern |
| Cherry | 995 | Moderately durable with distinctive grain | Reddish-brown with a prominent grain pattern |
| Walnut | 1010 | Durable with a dark, rich color | Dark brown with a straight grain pattern |
Remember to take your project’s requirements and personal preferences into consideration when selecting your wood. Consider the amount of use this table will receive, and the kind of finish that will match with your existing decor style. For instance, if you anticipate rough treatment of the table top surface, consider using a harder wood with a rich texture, like oak. Alternatively, if you would like a uniform, clean surface without a lot of grain, you might choose a dark, straight-grained wood like walnut.
By carefully considering your options for wood types, you can craft a beautiful table top that withstands the test of time.
Preparing the Wood
A crucial step in gluing up a tabletop is properly preparing the wood to ensure a strong bond. Clean and flat surfaces are key to a successful glue-up. Begin by examining your boards and sanding out any rough spots or imperfections. Check each board for warping or twisting and make sure they are all straight before proceeding.
Once your boards are ready, label each one to ensure proper placement during the glue-up process. Keep in mind that the best tabletops are made from contrasting wood pieces, so consider the placement of each board and its appearance next to the others.
After labeling, use a jointer or a hand plane to create flat, straight edges for each board that will be joining. Next, use a table saw or a hand saw to create square ends. Remember that all boards should be the same length before gluing them together to make the tabletop even.
Finally, ensure that all surfaces are completely dry before applying glue. Any moisture in the wood can cause the glue to not adhere properly, which can potentially lead to a weak bond. It’s recommended that you acclimate your wood to your workshop for a few days to reduce the amount of moisture in it before using.
Properly preparing your wood is a critical step in ensuring a successful glue-up for a strong tabletop. Taking the time to label, create a flat surface, and check for moisture will make a huge difference in your finished product.
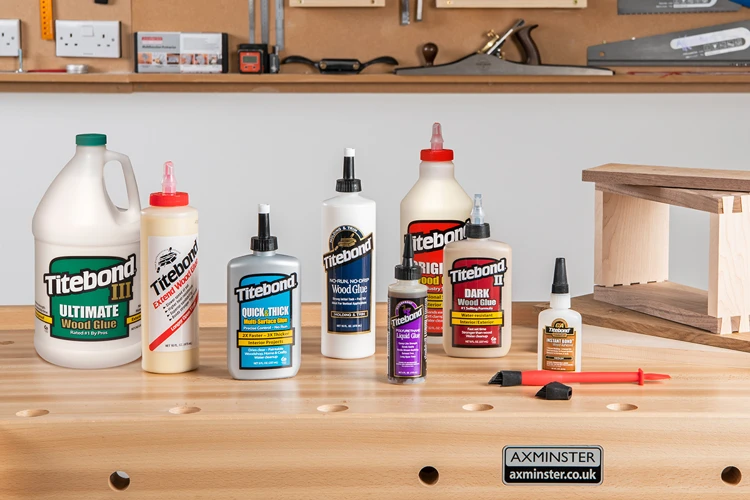
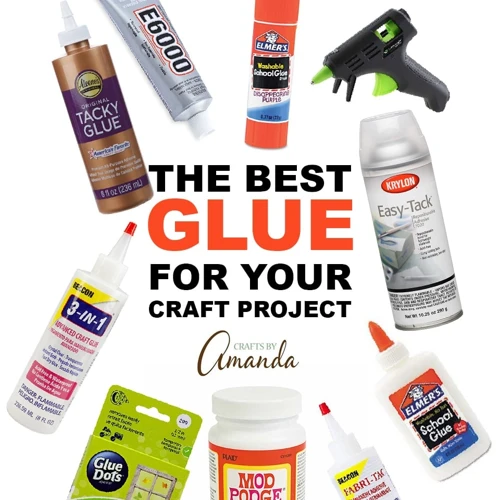
Glue Selection
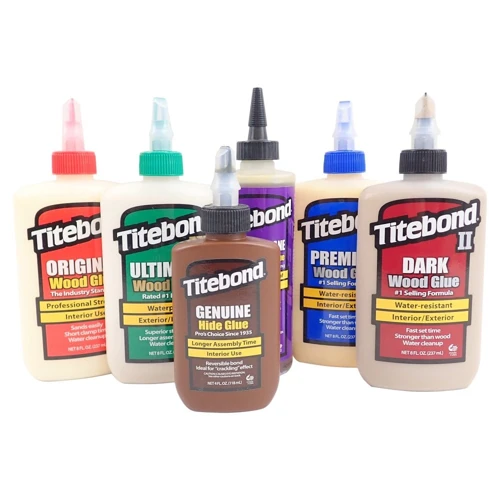
Choosing the right adhesive is critical when gluing up a table top. The type of glue you select for your project can significantly impact its durability and long-term performance. With so many options available on the market, it can be perplexing to know where to start. In this section, we’ll explore several popular glue types for table top construction, including their advantages and disadvantages. Whether you’re working with hardwood or softwood, thin or thick boards, you’ll find the perfect adhesive for your project.
PVA Glues
PVA Glues: PVA (Polyvinyl acetate) glues are the most commonly used type of glue for woodworking and crafting. They are water-based and easy to work with, making them a popular choice for DIYers. PVA glue is also very affordable and dries clear, which is great for projects where the glue lines will be visible.
One important thing to note about PVA glue is that it is not waterproof, so it shouldn’t be used for outdoor projects or anything that will come into contact with moisture. However, it’s great for indoor furniture projects such as tabletops.
| Pros: | Cons: |
|---|---|
| – Easy to use | – Not waterproof |
| – Dries clear | – Not suitable for outdoor projects |
| – Affordable |
When using PVA glue, it’s important to apply a thin, even layer to both surfaces that will be glued together. This helps to ensure that the glue adheres well and there are no gaps. PVA glue has a relatively short drying time, usually around 20-30 minutes for initial tack and 24 hours for full cure. It’s recommended to clamp the project for at least 30 minutes to an hour to help ensure a strong bond.
PVA glue is a great choice for many woodworking projects, especially those that will be used indoors or won’t be exposed to moisture.
Polyurethane Glues
Polyurethane glues, also known as Gorilla glue, are becoming increasingly popular in the woodworking industry due to their exceptional bonding strength. The glue is activated by moisture, which causes it to expand and create a foam-like structure that fills any gaps in the joint. This makes polyurethane glue an excellent choice for gluing uneven or rough surfaces.
Here are some benefits of using polyurethane glues:
- They provide a strong bond that is resistant to water and most chemicals, making them ideal for outdoor tables or tables that will be exposed to liquids and spills.
- They expand while drying and fill gaps that other glues may not bond well with.
- They work on a variety of surfaces, including wood, metal, ceramics, and plastics.
However, there are some things you need to keep in mind when using polyurethane glues:
- The glue dries quickly, and it’s hard to remove once it dries.
- It foams and expands while drying, which may cause excess glue to ooze out of the joint.
- It’s not recommended for use on softwoods like pine as it might cause the wood to warp or crack.
- It’s essential to dampen the surfaces with a moist cloth before applying the glue to activate it.
When using polyurethane glue, follow the same steps as with PVA glue. Apply a thin layer of glue to both surfaces to be joined and clamp them together. Because the glue expands while curing, use it sparingly and wipe away any excess before it dries.
To learn more about specific applications for different glues, check out our article on how to glue plastic.
Epoxy Glues
When it comes to strong and durable adhesive options for table top gluing, epoxy glues are often a top choice. Epoxy glues come in two parts – a resin and a hardener – and must be mixed together before application. Here are the key advantages and disadvantages of using epoxy glues for table top gluing:
Advantages:
- Epoxy creates an incredibly strong and durable bond, making it ideal for table tops that will be subjected to heavy use or wear and tear.
- It dries clear, creating an almost invisible bond.
- Unlike PVA glues, it can be used on a variety of surfaces, including metal and plastic.
- It has a longer working time than other glues, allowing for more time to adjust and position the wood pieces before the glue sets.
Disadvantages:
- It can be more difficult to work with than other glues due to the mixing process and the longer setting time.
- Epoxy can be more expensive than other glues.
- It is not as heat resistant as other glues, so it may not be the best choice for outdoor furniture or table tops that will be subjected to hot dishes or objects.
- The mixing process can be messy, so it’s important to work carefully and protect your work area.
Epoxy glues are a great choice for table top gluing projects that require a strong and durable bond. Whether you are gluing together large slabs for a rustic farmhouse table or smaller pieces for a decorative accent table, epoxy can help ensure a secure bond that will stand the test of time.
If you want to learn more about the use of epoxy glues, read our article on how to glue plastic car parts or how to glue rocks to wood. And if you’re wondering whether epoxy or super glue is stronger, check out our article on which is stronger: epoxy or super glue.
Glue Application
Before diving into the glue application process, it’s important to note that a well-made table top requires more than just high-quality glue and wood. To ensure a sturdy and long-lasting table top, proper preparation and clamping techniques are essential. Now let’s focus on the glue application process itself. Applying glue can be a messy and daunting task, but with the right techniques and tools, you can successfully bond your table top with strength and precision. In this section, we will cover everything you need to know about glue application, including spreading techniques, application to edges and faces, and glue-up time. By following this guide, you’ll be able to confidently apply the perfect amount of glue for a seamless and strong bond.
Glue Spreading Techniques
When it comes to spreading glue onto the surface of the wood, there are several techniques you can use. Each method has its advantages and disadvantages, and the one you choose will depend on your personal preferences and the size of the project.
The Roller Technique: This technique involves spreading glue onto the wood surface with a roller. A paint roller is an excellent tool for applying glue to large surfaces. For smaller areas, you can use a small foam roller. This technique can be particularly helpful when working with thin woods like veneer. However, it can be difficult to apply glue evenly with a roller, and you may need to go over the surface multiple times to ensure full coverage.
The Brush Technique: The brush technique involves applying glue to the wood with a brush. A soft-bristled brush is ideal for spreading glue evenly. This technique allows you to get into tight corners and other small areas easily. However, brush strokes can be visible in the final finish, so you’ll need to work carefully to minimize this. This technique is also excellent for applying glue to the end grain.
The Notched Trowel Technique: This technique requires a notched trowel, which is a specialized tool for spreading glue. When you drag the notched edge of the trowel across the surface of the wood, it creates ridges that help to distribute the glue evenly. The notches also help to prevent the glue from being squeezed out of the joint during clamping. This technique can be useful when working with large pieces of wood because it allows you to apply a significant amount of glue quickly.
The Finger Spreader Technique: This is a simple technique that involves using your fingers to spread the glue across the surface of the wood. This technique is ideal when working with small areas or when trying to spread the glue evenly over a curved surface. It can be messy, and you’ll need to be careful not to leave any fingerprints in the glue.
No matter which technique you choose, it is essential to spread the glue evenly to ensure a strong bond. Once you’ve applied the glue, use a putty knife to scrape away any excess that can cause the glue to ooze out during clamping.
For more information on gluing techniques, check out our article on how to glue steel.
Apply Glue to Edges and Faces
When applying glue to edges and faces, it’s important to ensure full coverage to achieve a strong bond. Here are the steps to follow:
- Step 1: Apply a thin coat of glue to both edges that will be joined. A brush or roller can be used for this step. Avoid applying too much glue as excess glue can cause the wood to warp or create glue bumps on the surface.
- Step 2: Spread the glue evenly with a glue spreader, making sure to fully cover the surface. A spatula or plastic scraper can also be used for this purpose. The spreading technique can vary depending on the glue type, so make sure to check the manufacturer’s instructions.
- Step 3: Apply glue to the faces that will be joined. Use the same spreading technique as before, and ensure that the entire surface is covered with glue. It’s important to make sure that glue doesn’t drip onto the floor or other items in your workspace.
- Step 4: Align the edges and faces together and press firmly. Use a wooden mallet or a hammer and a scrap block of wood to tap the pieces into alignment. It’s crucial to align the pieces correctly before clamping to achieve a tight joint.
- Step 5: Use a glue brush to apply glue to any gaps or voids that may have formed during the assembly. This will ensure that no air pockets are present, creating a stronger bond.
- Step 6: Wipe away any excess glue with a damp cloth before it dries. Remember that excess glue can be sanded away later, but it’s best to clean it up as you go to avoid any unwanted glue spots.
Following these steps will ensure that the table top is glued up properly and can withstand regular use without any issues.
Glue-Up Time
The glue-up time is a crucial stage in the process of gluing up a table top. Choosing the right amount of time for the glue-up process can impact the quality of the final result.
Here are some things to keep in mind when considering glue-up time:
- Read the instructions: The glue manufacturer’s instructions will typically specify the optimal glue-up time for the type of glue you’re using. It’s important to follow these instructions to ensure the best results.
- Check the temperature and humidity: Temperature and humidity can also affect the glue-up time. If it’s too hot or dry, the glue may dry too quickly, while if it’s too cold or humid, the glue may take too long to set.
- Practice: Before gluing up your final table top, it’s a good idea to do a practice run. This will help you get a feel for how much glue to use and how long it takes to set.
- Start the clock: Once you start spreading the glue, begin timing the glue-up process. During this time, be sure to work quickly and efficiently, as you don’t want the glue to start drying before you’ve finished spreading it over the wood surfaces.
- Be patient: After you’ve applied the glue and clamped the pieces together, it’s important to wait patiently for the glue to dry. Don’t be tempted to move or adjust the clamps before the glue has had a chance to fully set.
By following these tips, you can ensure that your glue-up time is just right for a successful table top gluing process.
Clamping
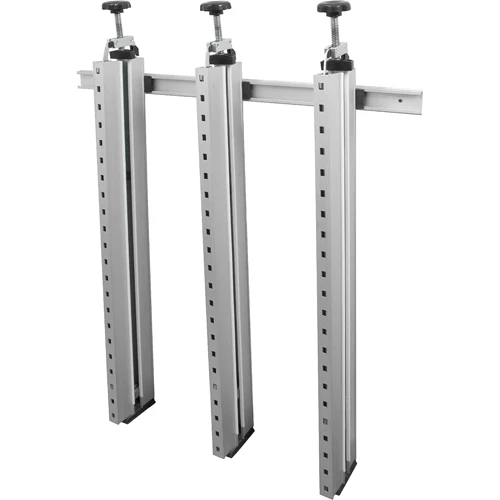
Assembling a table top involves more than just applying glue to the wood. The next crucial step is clamping the pieces together to ensure a strong and even bond between the boards. This step requires some care and attention, as improper clamping can result in a warped or uneven surface. To ensure an excellent result, here are some important factors to consider when clamping your table top.
Clamp Selection and Placement
When it comes to gluing up a table top, selecting the right clamps and placing them appropriately is crucial to achieving a successful result. Here are the steps to follow:
1. Determine the number of clamps needed: As a general rule of thumb, you’ll need one clamp per every foot of the table top. Depending on the size of your table top, you may need more.
2. Select the right clamps: There are many types of clamps on the market, including pipe clamps, bar clamps, and parallel clamps. Choose clamps that are long enough to span the width of your table top and have enough clamping pressure to hold the boards together.
3. Prepare the clamps: Before starting the glue up, make sure your clamps are in good condition. Clean the clamp faces and lubricate the threads if necessary to ensure they don’t get stuck during the glue-up process.
4. Arrange the boards: Arrange the boards in their final position and make sure they are lined up perfectly. Use dowels or biscuits to align the edges if necessary.
5. Apply glue: Apply glue to the edges of the boards and any joints where they will connect. Use a glue roller or brush to spread glue evenly over the surface.
6. Clamp placement: Starting at one end of the table top, place a clamp over the edge of one board and tighten it until the boards are snug together. Repeat the process along the length of the table top, spacing the clamps evenly to prevent any gaps between the boards.
7. Alternate clamp positions: As you tighten the clamps, alternate their positions between the top and bottom of the table top. This will prevent the boards from warping as they dry and ensure a level surface.
8. Check for even pressure: As you tighten the clamps, check to make sure that the pressure is even across the table top. If you notice any gaps or uneven pressure, adjust the clamps accordingly.
Remember, the key to successful clamping is to use enough force to close any gaps between the boards but not so much force that the glue is squeezed out excessively. With the right clamp selection and placement, you’ll be one step closer to a beautiful, sturdy table top.
Using Cauls
One technique that can greatly improve the quality of your table top glue-up is the use of cauls. Cauls are typically made of hardwood and are designed to apply pressure to the center of the glue-up, which can help to prevent the boards from bowing or curving. Here are a few steps to follow when using cauls in your glue-up process:
- Prepare your cauls: Start by preparing your cauls. They should be straight, free of knots, and at least as long as the width of your table top. It’s also a good idea to sand the surfaces of the cauls so that they are smooth.
- Apply glue to the edges: Apply glue to the edges of your boards, making sure to spread it evenly with a brush or roller.
- Assemble your table top: Place your boards glue-side down and assemble your table top. Make sure to alternate the grain direction of your boards for added strength.
- Add your cauls: Place your cauls across the width of your table top at regular intervals, spaced about 12 inches apart. Make sure that the cauls are sitting on top of the boards and are centered over the glue joint.
- Add clamps: Add clamps to your table top, making sure to tighten them evenly. The clamps should be positioned so that they are clamping both the boards and the cauls together.
- Clean up the excess glue: Use a damp cloth to clean up any excess glue that may have squeezed out from the joint.
- Allow the glue to dry: Allow your glue to dry according to the manufacturer’s instructions.
- Remove the clamps and cauls: Once the glue is dry, you can remove your clamps and cauls. Use a chisel or scraper to carefully remove any glue that may have squeezed out from the joint.
By using cauls in your table top glue-up, you can help to ensure that your table top stays flat and level. This technique can be especially helpful when working with wider boards or when using a particularly strong type of glue, such as polyurethane.
Finishing the Table Top
As your glue-up dries and the clamps are removed, it’s time to move on to the final steps in creating your perfect table top. This stage is all about adding the final touches that will make your piece truly shine. From cleaning up any excess glue to perfecting the edges, this is where your hard work and attention to detail will truly pay off. So grab your sandpaper and let’s dive into the finishing process.
Clean Up and Sanding
After the glue has dried and the clamps have been removed, it’s time to clean up any excess glue and prepare the table top for finishing. This step is crucial in the final outcome of the project and may take some time, but it’s well worth the effort. Here is a detailed guide on how to clean up and sand your table top:
Clean Up
The first step is to remove any excess glue that might have squeezed out during the glue-up process. Use a sharp chisel or scraper to carefully remove the dried glue from the surface of the table top. Be careful not to gouge the wood with the tool, as this will leave unsightly marks. Once the bulk of the glue has been removed, use a damp cloth or sponge to wipe away any remaining residue. Make sure to clean areas where you may have missed excess glue, such as in corners and crevices.
Sanding
After cleaning up the excess glue, it’s time to sand the table top. Start with a low grit sandpaper, around #80, to remove any scratches or marks from the glue removal process. Work in the direction of the grain, and be sure to sand evenly across the entire surface of the table top. Gradually work up to higher grit sandpaper, up to #220, to achieve a smooth finish.
Choosing Sandpaper
Choosing the right sandpaper is important to ensure that the job is done correctly. Sandpaper comes in different grits, ranging from coarse to fine. Coarse sandpaper is usually around #40 grit, and is used for removing paint or stains, or for rough sanding. Fine sandpaper, around #220 grit, is used for final sanding before finishing.
It’s important to note that sandpaper can become clogged with sawdust and debris. To prevent this, use a sanding block or pad to hold the sandpaper in place, and regularly clean the sandpaper by tapping it or blowing it with compressed air.
Trimming and Squaring
Before applying the final finish, it’s important to trim and square the table top. Use a straight edge and circular saw or track saw to cut off any excess wood and trim the edges of the table top to make it perfectly rectangular.
After trimming, use a hand plane or sanding block to ensure that the edges are perfectly square and even. Take your time on this step, as accuracy is important for a professional-looking final product.
Final Thoughts
After completing the cleaning and sanding process, your table top should be smooth and ready for finishing. Remember to take your time and be precise with your sanding, and always work in the direction of the grain. With a little patience and effort, you’ll have a beautiful table top that will last for years to come.
Trimming and Squaring the Table Top
Once the glue has dried and the clamps have been removed, it’s time to trim and square the table top. This final step is important for achieving a professional-looking finish on your table top.
Step 1: The first step is to remove any excess glue that has leaked out from the joint. This can be done using a scraper or chisel. Be careful not to damage the wood while doing so.
Step 2: Next, use a hand plane or belt sander to level the surface of the table top. Start with coarse-grit sandpaper and work your way up to a finer grit until the surface is smooth and even.
Step 3: After the surface is level, it’s time to square the edges of the table top. Use a table saw or circular saw to carefully trim the edges to the desired size. Make sure to measure accurately and use a square to ensure that the edges are straight.
Step 4: Once the edges are trimmed, use a router with a flush trim bit to clean up any excess material and ensure that the edges are smooth and even.
Step 5: Finally, sand the edges of the table top with a fine grit sandpaper to give them a smooth finish and remove any rough spots.
By following these steps, you’ll be able to trim and square your table top with ease, ensuring that it looks professional and polished.
Conclusion
As we have seen in this comprehensive guide, gluing up a table top requires careful consideration and attention to detail. By selecting the right wood, choosing the appropriate glue, applying it correctly, and clamping with precision, you can create a beautiful, sturdy table top that will last for years to come. However, the work does not end there. In this section, we will go over the key steps for finishing your table top, ensuring that it is fully ready for use. From cleaning up and sanding to trimming and squaring, these final touches will make all the difference in the final product. Let’s take a closer look at what is involved in finishing your table top.
Final Thoughts
As you complete gluing up your table top, take a moment to appreciate the effort and care you put into the process. Remember that the quality of your table top depends on the choices you make during the preparation and glue-up phases.
Final Thoughts:
| ✅ Do | ❌ Don’t |
|---|---|
| Take the time to properly select and prepare your wood. | Rush the preparation process or skip important steps. |
| Choose the right glue for your project. | Assume any glue will work for any project. |
| Apply enough glue to create a strong bond that will hold up over time. | Apply too much glue, creating a mess and potentially compromising the bond. |
| Take care when clamping your table top to avoid damaging the wood or creating uneven pressure. | Rush through the clamping process, potentially resulting in a warped or uneven table top. |
| Finish your table top with care, paying attention to details like sanding and trimming. | Ignore the finishing process or rush through it, resulting in an unfinished or poorly finished table top. |
| Enjoy the satisfaction of completing a beautiful, handcrafted table top. | Take the process too seriously and forget to have fun or appreciate the joy of creating something with your own two hands. |
Remember, gluing up a table top requires patience, attention to detail, and careful execution. But with the right tools, techniques, and a little bit of creativity, you can create a beautiful and functional piece that will last for years to come. So take your time, follow the steps outlined in this guide, and enjoy the process of bringing your vision to life.
Frequently Asked Questions
Can I glue up a table top without clamps?
Technically, yes. However, it is highly recommended to use clamps for best results and to ensure your table top stays flat during the process.
Should I apply glue to both faces or only one when gluing up a table top?
You should apply glue to both faces when gluing up a table top. This helps ensure a strong bond between the pieces of wood.
What is the minimum number of clamps needed to glue up a table top?
At minimum, you should have one clamp for every foot of table top. However, having extra clamps can help provide more even pressure and result in a better glue-up.
What is the best type of glue to use when gluing up a table top?
The best type of glue to use when gluing up a table top largely depends on your specific needs and preferences. PVA, polyurethane, and epoxy glues are all good options to consider.
What size clamps should I use when gluing up a table top?
The size of the clamps you should use when gluing up a table top depends on the size of the table top and the thickness of the boards being used. Generally, larger clamps will provide more even pressure.
Can I glue up a table top alone?
While it is possible to glue up a table top alone, having an extra set of hands can make the process much easier and ensure better results.
How long should I wait before removing clamps after gluing up a table top?
The amount of time you should wait before removing clamps after gluing up a table top depends on the type of glue being used. Typically, it is recommended to wait at least 24 hours before removing clamps.
Can I use a hair dryer or heat gun to speed up the glue drying process?
While it can be tempting to try to speed up the glue drying process, using a hair dryer or heat gun can cause the glue to dry too quickly and result in a weak bond. It is best to allow the glue to dry naturally.
What is the best way to clean up excess glue?
The best way to clean up excess glue is to use a damp cloth or sponge before the glue has dried. Once the glue has dried, it can be scraped off with a chisel or putty knife.
Should I sand my table top before or after gluing it up?
It is recommended to sand your table top before gluing it up. This helps ensure a clean and smooth surface before the glue is applied.