Introduction
As one of the most durable and versatile materials, stainless steel is a popular choice for a wide range of applications. From kitchen appliances and jewelry to industrial machinery and construction, the uses for stainless steel are virtually endless. However, to make the most of its strength and resilience, you need to know how to glue stainless steel properly. In this comprehensive guide, we’ll explore the different types of glue that can be used for stainless steel, the preparation steps that are crucial for a successful bond, as well as the techniques for applying and fixing the adhesive. Whether you’re a DIY enthusiast or a professional metalworker, this guide will equip you with all the knowledge you need to glue stainless steel like a pro.
Why Glue Stainless Steel?
Gluing stainless steel may seem like an odd task at first, but there are many reasons why someone may want to do so. One of the main reasons is for repairs or modifications to stainless steel products. For example, if a part of a stainless steel appliance or car is broken, gluing it can be a cost-effective and efficient solution. Additionally, glue can be used to bond different pieces of stainless steel together to create new structures or products.
Benefits of gluing stainless steel:
| Benefits | Explanation |
| Cost-effective | Gluing stainless steel can be a cheaper alternative to welding or replacing broken parts. |
| Efficient | Gluing stainless steel is often a quicker process than welding or using other methods to bond the metal. |
| Strong bond | Many types of glue can create a strong bond between stainless steel surfaces. |
| Versatile | Gluing can be used for a wide variety of stainless steel applications and can be used on different shapes and sizes of metal. |
Regardless of the reason for gluing stainless steel, it’s important to choose the right type of glue for the specific application. Using the wrong glue can result in a weak bond that will not hold up to stresses or environmental factors. In the next section, we will discuss the different types of glue that can be used for stainless steel bonding.
Types of Glue for Stainless Steel
When it comes to gluing stainless steel, it’s important to choose the right type of glue for a strong and long-lasting bond. There are several options available on the market, each with its own unique properties and strengths. Some popular choices for bonding stainless steel include epoxy glue, cyanoacrylate glue, acrylic adhesives, and polyurethane adhesives. Each type of glue has its advantages and disadvantages, so it’s essential to understand the differences in order to choose the best one for your project. Let’s explore each option in more detail.
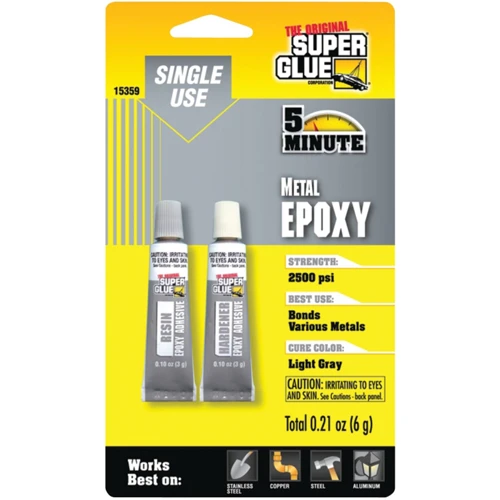
Epoxy Glue
Epoxy glue is a popular choice for bonding stainless steel due to its strong bonding capability and resistance to water, chemicals, and heat. Epoxy consists of two components, a resin and a hardener, and comes in different types such as two-part epoxy, one-part epoxy, and structural epoxy.
Advantages of Epoxy Glue for Stainless Steel:
- Provides a strong bond suitable for heavy-duty applications.
- Can fill gaps and holes due to its thick consistency.
- Resistant to water, chemicals, and heat.
- Dries clear and can be sanded or painted over.
Before using epoxy glue, it is important to prepare the surface of the stainless steel by cleaning, scuffing, and degreasing it to ensure a strong bond. It is also recommended to use a primer to enhance adhesion.
Application Techniques:
When using epoxy glue, it is important to mix both components thoroughly as per the manufacturer’s instructions. Using a mixing ratio that is not recommended can result in an incomplete cure or weak bond. Once mixed, apply the glue evenly and quickly to prevent it from hardening before application. Do not use too much epoxy as it can overflow and create a mess. A thin layer of glue is enough for a strong bond. Clamping or fixing the stainless steel pieces together is recommended to ensure a strong bond while the glue sets.
Drying and Curing Time:
The drying and curing time of epoxy glue can vary depending on the type and brand. In general, it can take anywhere from a few hours to a few days for the glue to fully cure and reach its maximum strength. It is recommended to wait at least 24 hours before using or handling the glued stainless steel.
Other types of glue suitable for stainless steel:
- Glue for Rocks
- Glue for Formica
- CA Glue for Wood
- Glue for Plexiglass
- Glue for Sea Glass
- Glue for Fiberglass to Metal
- Glue for Metal to Rubber
- Glue for Silicon
- Cement Glue
Epoxy glue is a reliable option for bonding stainless steel due to its strength, durability, and resistance to various factors. Proper surface preparation and application techniques are crucial for achieving a strong bond.
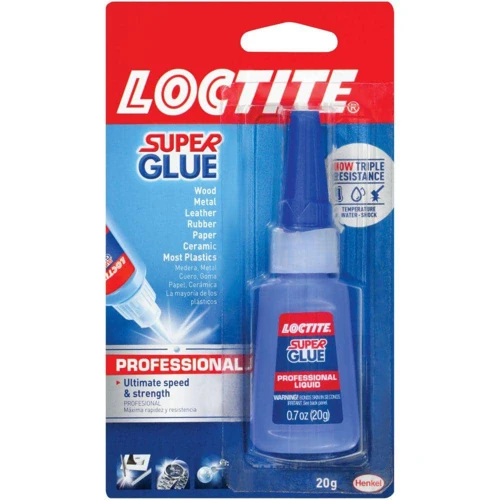
Cyanoacrylate Glue
Cyanoacrylate Glue, also known as super glue, is a popular choice for bonding stainless steel. It is a fast-drying adhesive that is capable of creating a strong and durable bond. This type of glue works best for bonding small pieces of stainless steel that do not require any significant load bearing capabilities.
One of the benefits of cyanoacrylate glue is its ability to dry quickly, often within seconds. This makes it ideal for use in applications where time is of the essence. However, it is essential to note that the bonding strength of the glue may be affected by factors such as temperature and humidity.
When using cyanoacrylate glue to bond stainless steel, it is important to follow the manufacturer’s instructions carefully. The table below provides an overview of the recommended guidelines:
| Step | Description |
|---|---|
| Clean the Surface | Ensure that the stainless steel surface is clean and free of any dirt, oil, or grease. Use a cleaning solution such as acetone or isopropyl alcohol to wipe down the surface before applying the adhesive. |
| Apply the Glue | Apply a small amount of cyanoacrylate glue to one of the surfaces that need to be bonded. |
| Join the Surfaces | Join the two surfaces together and apply pressure for a few seconds to allow the glue to set. |
| Hold in Place | Hold the surfaces in place for at least 30 seconds to allow the bond to set. |
| Drying Time | The bond should set within 10 seconds, but it is recommended to leave it to dry for at least an hour before handling. |
| Aftercare | Once the bond has fully cured, ensure that the stainless steel surfaces are not exposed to moisture or extreme temperatures that could weaken the bond. |
It is important to note that cyanoacrylate glue is not suitable for use on load-bearing applications such as fixing car parts. For such applications, it is recommended to use epoxy or polyurethane adhesives. If you want to read more on how to glue other types of metal, check out our article on how to glue metal.
In the next section, we will discuss how to prepare the stainless steel surface before gluing.
Acrylic Adhesives
Acrylic adhesives are another popular choice for glueing stainless steel. They are known for their excellent bonding capabilities and fast-drying time. Acrylic adhesives perform well in extreme temperature conditions, making them a great option for outdoor applications.
Advantages:
| Advantages |
|---|
| Excellent bonding capabilities |
| Fast drying time |
| Good performance in extreme temperature conditions |
Acrylic adhesives are available in both one-part and two-part formulations. One-part adhesives are easy to use and require no mixing, while two-part adhesives offer a stronger bond and higher temperature resistance.
Disadvantages:
| Disadvantages |
|---|
| Not as strong as epoxy adhesives |
| May not work well with oily or greasy surfaces |
When using acrylic adhesives, it is important to make sure the surface is clean and free of any contaminants. The bonding area should be roughened or scuffed to ensure maximum adhesion. Clamping or fixturing the parts together while the adhesive sets is also recommended to prevent movement and ensure a strong bond.
Acrylic adhesives are a good option for glueing stainless steel in applications where high temperature resistance and outdoor durability are required. However, they may not be as strong as epoxy adhesives and may not work well with oily or greasy surfaces. Proper surface preparation and clamping techniques are important to achieve a strong and lasting bond.
Polyurethane Adhesives
When it comes to polyurethane adhesives, they are a popular choice for bonding stainless steel due to their strong bonding ability and versatility. Here are some key features and things to consider when using polyurethane adhesives for stainless steel:
- Formulated with urethane prepolymer, these adhesives cure by reacting with moisture in the air, making them perfect for bonding stainless steel in humid or damp environments.
- Polyurethane adhesives have excellent chemical and solvent resistance, making them ideal for applications where the adhesive will be exposed to harsh chemicals or industrial solvents.
- They have a high resistance to impact, shock, and vibration, making them suitable for high-stress applications where strong and durable bonding is required.
- Polyurethane adhesives work best on surfaces that have been sanded or roughened to allow for better adhesion.
- It’s important to note that polyurethane adhesives typically have a longer curing time compared to other types of adhesives, and may require clamping or fixing during the curing process.
- When using polyurethane adhesives, it is essential to follow the manufacturer’s instructions carefully and to ensure that all safety precautions are taken, including using gloves and working in a well-ventilated area.
Polyurethane adhesives offer a reliable and high-strength bonding solution for stainless steel, especially in demanding applications where resistance to chemicals, impact, and vibration is critical. The key to successful bonding with polyurethane adhesives lies in proper surface preparation and careful adherence to the manufacturer’s guidelines.
Preparation for Gluing Stainless Steel
Before delving into the process of gluing stainless steel, it’s essential to prepare the surface properly. This step is crucial for getting a strong bond that will last for a long time. Without proper preparation, the adhesive may not stick well, and you might end up with a weak bond that can easily break apart. In this section of the article, we’ll cover the necessary steps to ensure that the surface of your stainless steel is ready for gluing. These include cleaning the surface, scuffing and sanding, and de-greasing. Let’s dive in and explore each of these steps in detail.
Cleaning the Surface
Proper surface preparation is crucial when gluing stainless steel. The first step in preparing the surface is cleaning it thoroughly. Any oil, grease, or dirt on the surface can affect the bond strength and prevent the glue from adhering effectively.
Cleaning Agents
There are various cleaning agents that can be used to clean stainless steel surfaces. Some of the commonly used cleaning agents are:
| Cleaning Agent | Description |
|---|---|
| Isopropyl Alcohol | Effective in removing oil and grease from the surface |
| Methyl Ethyl Ketone (MEK) | Effective in removing organic substances from the surface |
| Acetone | Effective in removing oil, grease and other contaminants from the surface |
| Detergent Solution | Effective in removing dirt, grime and other substances from the surface |
| Vinegar Solution | Effective in removing hard water stains and other mineral deposits from the surface |
Cleaning Process
Once the appropriate cleaning agent has been selected, the next step is to clean the surface thoroughly. Use a soft cloth or sponge to apply the cleaning agent to the surface and wipe it clean using a dry cloth. Make sure to clean the surface in a well-ventilated area to avoid inhaling any fumes.
Drying the Surface
After cleaning, it is important to dry the surface completely before proceeding to the next step. Any moisture on the surface can affect the bond strength of the glue. Use a clean, dry cloth or let the surface air dry completely before proceeding.
By following these cleaning steps, you will ensure a clean and prepared surface for the glue to adhere to, resulting in a stronger bond.
Scuffing and Sanding
Before gluing stainless steel, it’s important to prepare the surface to ensure the best bond possible. One important step in the preparation process is scuffing and sanding the surface. This process helps to create a rough texture on the surface of the stainless steel, allowing the glue to adhere better.
Why Scuffing and Sanding is Important?
Scuffing and sanding are important because stainless steel has a smooth surface, which can make it difficult for glue to adhere to it properly. The rough texture created by scuffing and sanding helps to provide more surface area for the glue to bond to, resulting in a stronger bond overall.
How to Scuff and Sand Stainless Steel?
To scuff and sand stainless steel, follow these steps:
- First, clean the surface of the stainless steel to remove any dirt, grease, or debris that may be on it.
- Next, use a fine-grit sandpaper like 220-grit to sand the surface of the stainless steel. Sand in the direction of the grain to avoid scratching the surface.
- After sanding, use a scuff pad to scuff the surface of the stainless steel. The scuff pad will create a rougher texture, which will help the glue adhere better to the surface.
- Finally, clean the surface of the stainless steel again to remove any debris created by scuffing and sanding.
It’s important to note that scuffing and sanding can create dust and debris, which can affect the adhesion of the glue. It’s important to thoroughly clean the surface after scuffing and sanding to remove any debris.
Conclusion
Scuffing and sanding are important steps in preparing stainless steel surfaces for gluing. By creating a rougher texture on the surface, scuffing and sanding help the glue to adhere better, resulting in a stronger bond overall. However, it’s important to clean the surface thoroughly after scuffing and sanding to remove any debris that may affect the adhesion of the glue.
De-Greasing
De-greasing is an important step in the preparation process of gluing stainless steel. Any type of grease, oil or dirt can significantly reduce the strength of the glue bond and make it difficult for the glue to adhere to the surface. It is important to remove all traces of grease, oil and dirt before attempting to glue stainless steel.
Various options to de-grease stainless steel surface:
| De-greasing Options | Description |
|---|---|
| Isopropyl Alcohol | Isopropyl alcohol, commonly referred to as rubbing alcohol, is an excellent de-greasing agent. It evaporates quickly and leaves no residue on the surface. Simply dampen a clean cloth with isopropyl alcohol and wipe the surface of the stainless steel thoroughly. |
| Acetone | Acetone is another effective de-greaser that leaves no residue on the surface. It evaporates quickly, so it is important to work quickly when using it. Apply a small amount of acetone to a clean cloth and wipe the surface of the stainless steel thoroughly. |
| Detergent Solution | A mild detergent solution can be used to remove grease and oil from the surface of stainless steel. Mix a small amount of detergent with warm water and use a clean cloth to wipe the surface of the stainless steel. Rinse the surface thoroughly with clean water and dry it with a clean towel. |
| Vinegar and Baking Soda | A mixture of vinegar and baking soda can also be used to de-grease stainless steel. Mix equal parts of vinegar and baking soda to create a paste. Apply the paste to the surface of the stainless steel and let it sit for a few minutes. Scrub the surface with a soft-bristled brush and rinse it thoroughly with clean water. Dry the stainless steel with a clean towel. |
It is important to remember that the de-greasing process should be carried out just before gluing the stainless steel. Any delays between de-greasing and gluing can allow new grease and dirt to accumulate on the surface. It is recommended to de-grease just before the application of the adhesive.
Gluing Stainless Steel
Assembling stainless steel may seem like a difficult task, but with the right adhesive and application technique, it can be accomplished with ease. Once you have identified the appropriate adhesive, the next step is to understand how to properly apply it to the stainless steel surface. In this section, we will explore the various techniques for gluing stainless steel, including application, clamping, and fixing. By following these steps, you can successfully join pieces of stainless steel together to create a durable and long-lasting bond.
Application Techniques
Proper application techniques play a crucial role in ensuring a strong and durable bond when gluing stainless steel. Here are some steps to follow:
1. Apply the glue precisely
When applying the glue to the stainless steel surface, make sure to apply it precisely in the intended area. Use a small amount of glue to avoid excess that may cause a mess or push out during clamping.
2. Spread the adhesive evenly
If the glue has a low viscosity, use a brush or a spatula to spread it evenly across the surface. Clean the excess glue that may flow from the joint with a dry cloth.
3. Create uniform thickness
The adhesive layer should be uniform in thickness for adequate bond strength. Uneven adhesive layers can cause too much stress concentration at the thin spots, leading to a weak joint.
4. Mix the ingredients well
If using a two-part epoxy glue, mix the correct quantity of resin and hardener according to the instructions. Mix thoroughly until it becomes a uniform grey color.
5. Avoid air bubbles
While applying the adhesive, avoid trapping air bubbles between the surface and the adhesive. Air bubbles can cause voids in the bond, leading to a weak joint.
Here are some tips to avoid air bubbles:
– Apply adhesive in thin layers using a spatula or a brush
– Use a toothpick or a needle to puncture any air bubbles that may form
– Use a vacuum chamber to remove the air bubbles before applying the glue
6. Check alignment
Before clamping and fixing, check the alignment of the two surfaces to ensure they match correctly. Adjust them if necessary.
By following these steps, the adhesive can form a strong bond between the stainless steel surfaces.
Clamping and Fixing
When it comes to gluing stainless steel, clamping and fixing play a crucial role in the success of your project. It helps to ensure the glue sets and cures in the right place and prevents any movement that could affect the bond.
Here are some important tips to consider when clamping and fixing stainless steel:
- Apply the glue in a generous amount to both surfaces to create a strong bond.
- Make sure the surfaces are in full contact with each other.
- Use a clamp to hold the surfaces together until the glue dries and cures.
- When using a clamp, use a insert (a piece of metal or wood) between the clamp and the stainless steel to avoid damaging the metal surface.
- If a clamp is not available, use a heavy weight or a piece of tape to hold the surfaces together. Regardless of the method you choose to fix the surfaces, it’s crucial to keep them together without any movement until the glue dries completely.
- Leave the glued surfaces alone for at least 24 hours to allow the adhesive to cure fully. Otherwise, the bond might not be as strong as you want it to be.
Remember: If the glue is not applied and fixed correctly, it may not create a good bond between the surfaces, causing the stainless steel to break apart. So, take your time to fix and clamp the surfaces correctly to achieve the best results.
Drying and Curing Time
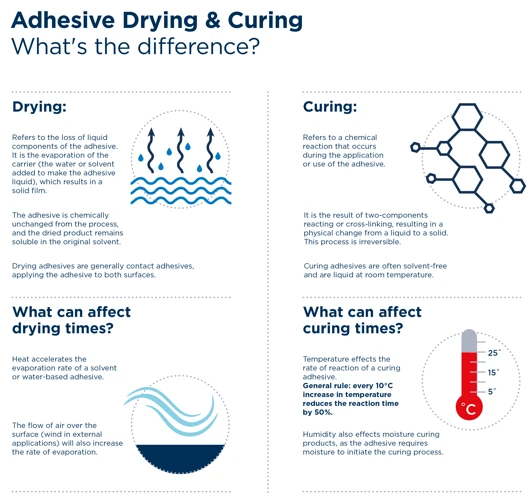
Drying and Curing Time:
After gluing stainless steel, it is important to understand the drying and curing times of different adhesives to ensure that the bond created is strong enough. Each type of adhesive has a unique drying time, and it is important to wait until the adhesive is fully cured before subjecting the steel to any kind of stress.
Epoxy Glue:
Epoxy glue generally has a drying time of 24 hours with full curing taking between 48 to 72 hours. This type of glue has a cure time of 7 days, and for best results, it is advisable to leave the glued stainless steel to dry for the full 7 days before using the item for any heavy-duty work.
Cyanoacrylate Glue:
Cyanoacrylate glue, also known as super glue, has a drying time of 10 to 30 seconds while curing takes up to 24 hours. However, the bond strength increases for up to 48 hours after the glue has dried, making it advisable to wait for the bond to cure thoroughly before using the item.
Acrylic Adhesives:
Acrylic adhesives have a comparatively shorter drying time and can take between 5 to 20 minutes for the initial set. Full curing may take anywhere from 24 hours to a few days, depending on the adhesive’s brand and specific formula.
Polyurethane Adhesives:
Polyurethane adhesives usually have a drying time of between 24 and 48 hours, and full curing can take up to 30 days. For optimal results, it is recommended to wait until the adhesive has fully cured before using the glued item.
It is important to note that drying and curing times can be influenced by the temperature and humidity of the environment the glued item is in. It is best to follow the adhesive manufacturer’s recommendations for the specific product being used. Rushing the process by subjecting the glued item to stress before the adhesive is fully cured can result in a weak bond, which may cause the item to break or fall apart even with a small amount of stress.
Aftercare
Once you have successfully glued your stainless steel, it is important to take care of it properly to ensure its longevity. Here are some essential aftercare tips that you must follow:
Clean the Surface: Any residue or leftover glue should be cleaned off with a solvent. Use a soft cleaning cloth and an appropriate solvent to avoid any scratches or damage to the surface.
Avoid Abrasives: Stainless steel surfaces can be easily scratched by abrasive materials. Do not use harsh abrasives or rough cleaning materials like steel wool, sandpaper, or ceramic scrubbers.
Avoid Heat Exposure: Stainless steel can expand or contract when exposed to high temperatures. Avoid exposing glued steel surfaces to high temperatures, as it can weaken the bond and cause damage.
Avoid Chemical Exposure: Chemicals like acids and alkalis can corrode and damage stainless steel. Avoid using such chemicals on glued steel surfaces.
Regular Maintenance: Maintain regular cleaning of your stainless steel surface to prevent any buildup of dirt or grime. This will not only make the surface look better but also prevent any potential future damage.
Taking proper care of your glued stainless steel surface will ensure its longevity and maintain its aesthetic beauty. Following these aftercare tips will keep your stainless steel looking new for a long time.
Conclusion
After going through this comprehensive guide on how to glue stainless steel, it is evident that gluing stainless steel requires precision and careful attention to detail. From selecting the right adhesive to prepping the surface, applying the glue, clamping and fixing, and allowing for adequate drying and curing time, there are several important steps to follow to ensure a successful outcome.
When choosing a glue for stainless steel, it is essential to consider factors such as the intended use, the strength of the bond needed, the environment the steel will be exposed to, and the conditions during application. Whether you opt for epoxy glue, cyanoacrylate glue, acrylic adhesives, or polyurethane adhesives, it is crucial to ensure that the adhesive you choose is compatible with stainless steel.
Before gluing the stainless steel, it is important to take the time to properly prepare the surface. This involves cleaning the surface to remove any dirt, dust, or grime that could interfere with the bonding process. Scuffing and sanding the surface are also critical as they create a rougher texture that allows the glue to adhere more effectively. Additionally, de-greasing the surface is necessary to remove any oily residue that could cause the glue to fail.
When it comes to gluing stainless steel, applying the adhesive in thin layers and following the manufacturer’s instructions is essential. Clamping and fixing the steel during the drying and curing process is also crucial to ensure a strong bond. It is essential to allow the glue to dry and cure completely before subjecting the steel to any stress or pressure.
Aftercare plays a significant role in ensuring the longevity of the bond. Once the glue has dried and cured, it is essential to take measures to protect the bond from exposure to excessive heat, moisture, and other elements that could compromise its integrity.
In conclusion, gluing stainless steel is not as straightforward as it seems, but by following the steps outlined in this guide, you are sure to achieve a strong and durable bond that will last for years to come. Take your time, select the right adhesive, prepare the surface, apply the glue correctly, clamp and fix, allow for adequate drying and curing time, and take measures to protect the bond after it has formed.
Frequently Asked Questions
What are the benefits of using epoxy for gluing stainless steel?
Epoxy provides a strong and durable hold on the metal, is resistant to heat and chemicals, and can fill in gaps and cracks for a seamless appearance.
Can cyanoacrylate glue be used for food-related items?
No, cyanoacrylate glue should not be used for items that will come into contact with food due to its toxic properties.
What is the ideal surface temperature for gluing stainless steel?
The surface temperature should be around room temperature, between 60-70°F, for best results.
Can acrylic adhesives be used for outdoor applications?
Yes, acrylic adhesives are weather-resistant and can be used for outdoor applications.
Is it necessary to scuff and sand the surface before gluing stainless steel?
Yes, scuffing and sanding the surface helps to create a rough texture for the adhesive to cling onto, leading to a stronger hold.
What is the recommended clamping time for polyurethane adhesives?
The clamping time for polyurethane adhesives is typically between 1-4 hours, but be sure to check the manufacturer’s instructions for specific details.
Is it safe to clean the surface with solvents when preparing for gluing?
Yes, it is safe to use solvents for cleaning the surface before gluing, but be sure to wear protective gloves and work in a well-ventilated area.
Can stainless steel with a high polish finish be glued?
Yes, high-polish finishes should be scuffed or sanded before gluing to create a rough surface for the adhesive to adhere to.
What is the ideal drying time for epoxy glue?
The ideal drying time for epoxy glue is around 24 hours, but it may take longer in humid or colder conditions.
What should be done if excess glue seeps out during clamping?
If excess glue seeps out during clamping, wipe it away with a damp cloth before it dries to avoid a lumpy appearance.