Embracing creativity often means finding new uses for everyday items. Bottle cap art has emerged as a vibrant and eco-friendly craft that repurposes these metal treasures into stunning, functional pieces. One popular project is creating a unique and personalized bottle cap table, which not only serves as a conversation starter but also adds a touch of whimsy to any room. This guide will lead you through the process of how to glue bottle caps to wood, transforming simple materials into a work of art.
Materials Needed for a Bottle Cap Table
Choosing the Right Bottle Caps
Selecting your bottle caps is the first step in this creative endeavor. Aim for a variety of colors and designs to add visual interest to your project. You can collect these caps from different beverages or purchase them from craft stores or online suppliers.
Selecting the Perfect Wood Surface
When considering how to attach bottle caps to wood, the choice of wood surface is critical. Ensure it’s flat and smooth; options like tabletops, wooden planks, or even large cutting boards can work well, depending on the size of your project.
Best Glues for Attaching Bottle Caps to Wood
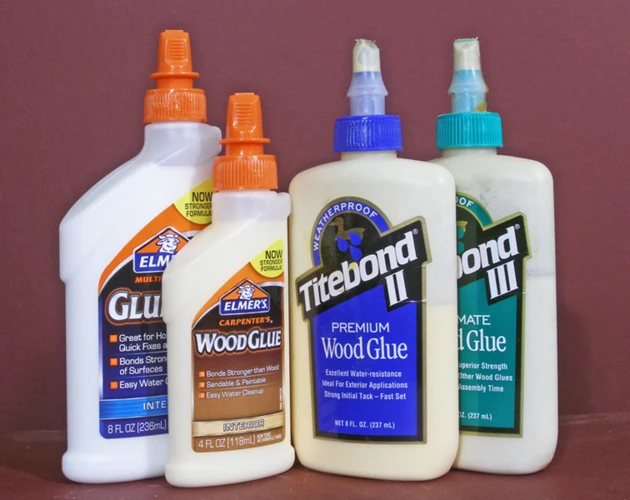
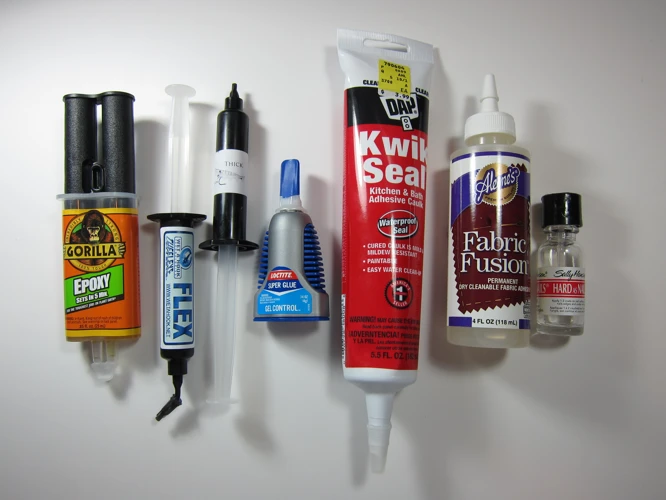
A strong adhesive is essential for securing bottle caps to the wood. Wood glue, super glue, or a clear, strong adhesive like E6000 are all suitable options. Each has its drying time and strength, so choose according to your project’s needs.
Epoxy Resin for a Durable Finish
To solidify your artwork and protect it, an epoxy resin finish is often applied. This clear coating not only enhances the appearance but also creates a durable, glass-like surface that preserves the caps and makes the table functional.
Step-by-Step Guide: How to Glue Bottle Caps to Wood

Preparing the Wood Surface
Start by cleaning the wood surface thoroughly. Remove any debris or dust to ensure the glue adheres properly. If necessary, sand the area lightly and wipe it down with a damp cloth.
Arranging Bottle Caps for Your Design
Lay out your bottle caps on the wood in the desired pattern. Experiment with different arrangements until you find a design that appeals to you. Remember, once glued, you will not be able to easily adjust the placement.
Applying Glue to Bottle Caps
Apply a small amount of glue to the inside of each bottle cap. Be careful not to overdo it, as excess glue may seep out and mar the overall look of your project.
Securing Bottle Caps to the Wood
Press each cap firmly onto the wood surface where you want it to be placed. Allow adequate time for the glue to set according to the manufacturer’s instructions, typically a few hours.
Applying Epoxy Resin Over Bottle Caps
Mix the epoxy resin according to the package directions. Pour it over the secured bottle caps, spreading it evenly with a spatula or brush. Ensure the room is well-ventilated and follow safety precautions. Allow the resin to cure completely, which may take up to 72 hours.
Creating Different Bottle Cap Table Projects
How to Make a Bottle Cap Table Top
To create a bottle cap table top, begin with a pre-existing table or construct a new top. Follow the same steps as before, arranging and gluing the caps in a pleasing pattern before sealing them with resin.
DIY Beer Bottle Cap Coffee Table
A beer bottle cap coffee table is perfect for showcasing your favorite brews. Use a coffee table as your base and create a themed design with the caps from different beers for a personalized touch.
Constructing a Bottle Cap Epoxy Table
A bottle cap epoxy table requires a careful pouring of resin to ensure a level surface. Use a blowtorch to remove any air bubbles and achieve a crystal-clear finish. Patience is key during this step.
Bottle Cap Resin Table Techniques
When working with resin, apply it in a well-ventilated area and wear protective gear. Experiment with different techniques, such as layering the resin, to create depth or embedding objects alongside the caps for added interest.
Bottle Cap Table Ideas and Inspiration
Explore various bottle cap table ideas to find the design that best fits your space. Think about color schemes, patterns, or themes that resonate with your personal style or the intended room’s decor.
Finishing Touches for Your Bottle Cap Table

Caring for Your Bottle Cap Table
Maintain your table’s beauty by cleaning it with a soft, damp cloth and avoiding harsh chemicals. Treat the wood with care to prevent scratches and damage to the resin surface.
Additional Decorative Elements
Consider adding trim, painted details, or even LED lights around the table’s edge for a unique and custom finish. These elements can elevate the overall design and functionality of your piece.
Troubleshooting Common Issues

Preventing Bottle Caps from Peeling Off
Ensure that each cap is securely glued down and that the resin covers the entire surface area. This will help prevent any future peeling or detachment of the caps from the wooden base.
Dealing with Epoxy Resin Complications
Should you encounter issues such as air bubbles or an uneven surface, use a heat gun or blowtorch to gently heat the resin. This can help resolve most problems that arise when working with epoxy.
When it comes to crafting and DIY projects, gluing different materials to wood can be a unique way to add personality and style to your creations. If you’re looking to attach bottle caps to wood for a custom piece of art or a homemade piece of furniture, you might also be interested in our other guides. For fabric enthusiasts, we have a step-by-step tutorial on how to glue cloth to wood, which can help you achieve a seamless bond between textiles and wooden surfaces. If you’re working with paper, check out our instructions on how to glue paper onto wood to ensure your paper crafts are securely fastened without any wrinkles or bubbles. And for those interested in more heavy-duty applications, our guide on how to glue carpet to wood can be incredibly helpful for home improvement projects. Whatever your project may be, we’ve got the tips and techniques you need to ensure a strong and lasting adhesive connection.
Conclusion: Showcasing Your DIY Bottle Cap Table

Now that you’ve mastered how to make a bottle cap table, it’s time to display your handiwork. Whether it’s in your living room, man cave, or outdoor patio, your new piece will surely capture the attention and admiration of your guests. This DIY bottle cap table not only serves as a testament to your creativity and craftsmanship but also as an eco-friendly statement piece that breathes new life into discarded materials.